Currently only Linux and Windows are supported.
Connections to multiplayer servers use TCP, which Wireshark can capture and decode. It does not work in single player mode. Single player mode uses a dummy connection that does not use TCP, such that Wireshark cannot see its traffic.
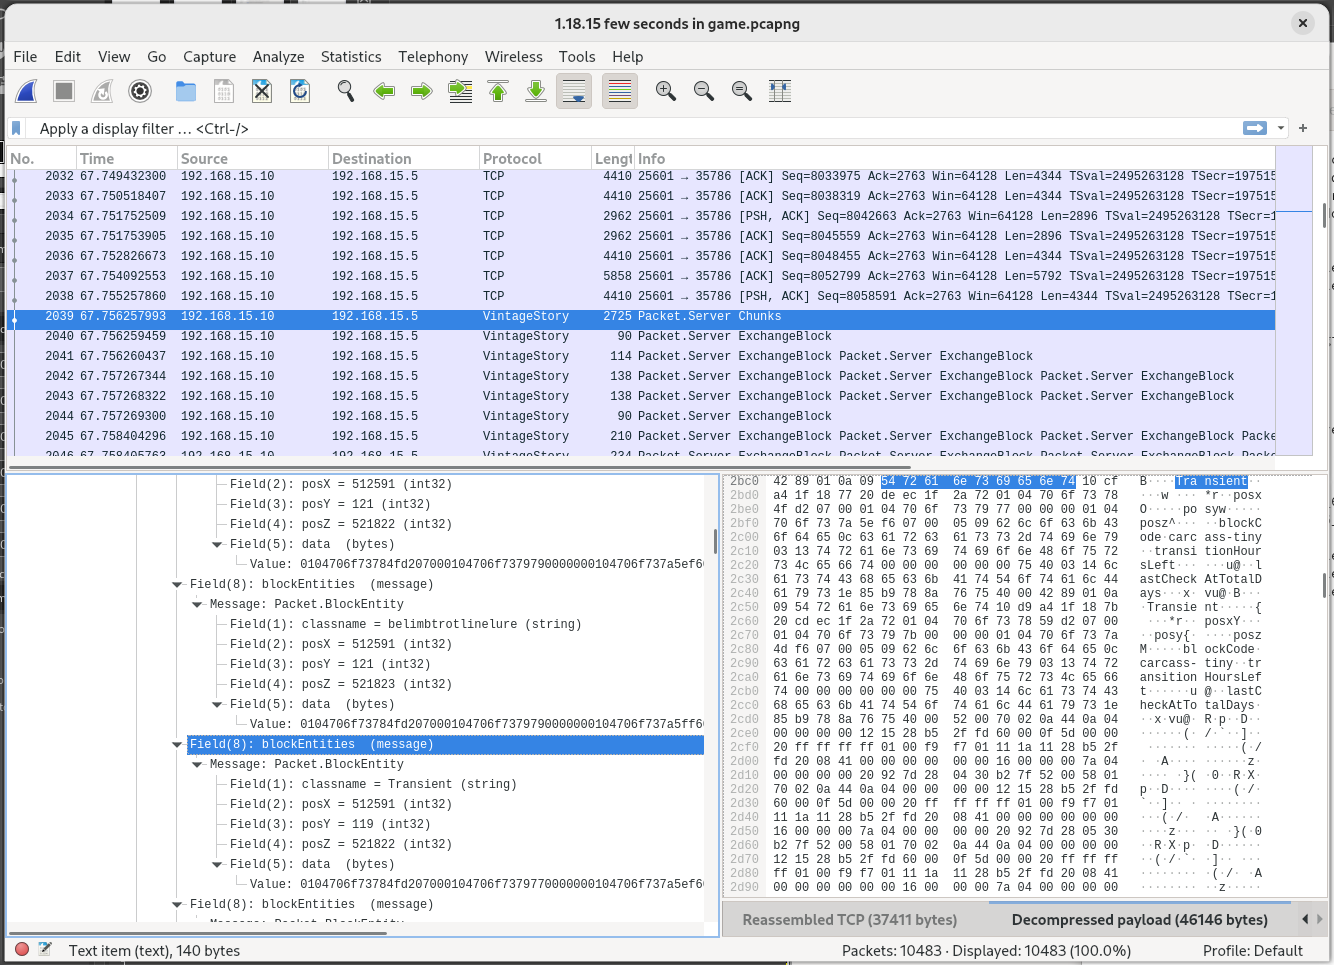
Only the outer protobuf is parsed. Some protobufs have inner fields which are serialized with another format, such as protobuf again, TreeAttribute, or JSON. That second layer of serialization is not dissected. It just shows up as a byte array.
Wireshark has some standard named folders. The actual location of these folders vary in different distros. The exact locations can be found in the folders tab of the About Wireshark dialog in the Help menu. Below is an example from Fedora 38.

The final files consist of a shared library plugin (libvintage_story.so on Linux or vintage_story.dll on Windows) and a Protocol Buffer definition (vintage_story.proto). These files may either be installed in a global location for all users (requires root/admin access), or in a directory for one user (does not require root access).
- Global installation
- Install
libvintage_story.so(Linux) orvintage_story.dll(Windows) in the epan subfolder of the "Global Plugins" folder (typically /usr/lib64/wireshark/plugins/4.0/epan on Linux or "C:\Program Files\Wireshark\plugins\4.0\epan" on Windows). - Install
vintage_story.protoin the protobuf subfolder "Global configuration" folder (typically /usr/share/wireshark/protobuf on Linux or "C:\Program Files\Wireshark\protobuf" on Windows).
- Install
- User installation
- Install
libvintage_story.so(Linux) orvintage_story.dll(Windows) in the "Personal Plugins" folder (typically ~/.local/lib/wireshark/plugins/4.0 on Linux or "C:\Users\username\AppData\Roaming\Wireshark\plugins\4.0" on Windows). Create the folder if it does not exist yet. - Install
vintage_story.protoin the protobuf subfolder of the "Global configuration" folder (typically ~/.config/wireshark/protobuf on Linux or "C:\Users\username\AppData\Roaming\Wireshark\protobuf" on Windows). Create the folder if it does not exist yet.
- Install
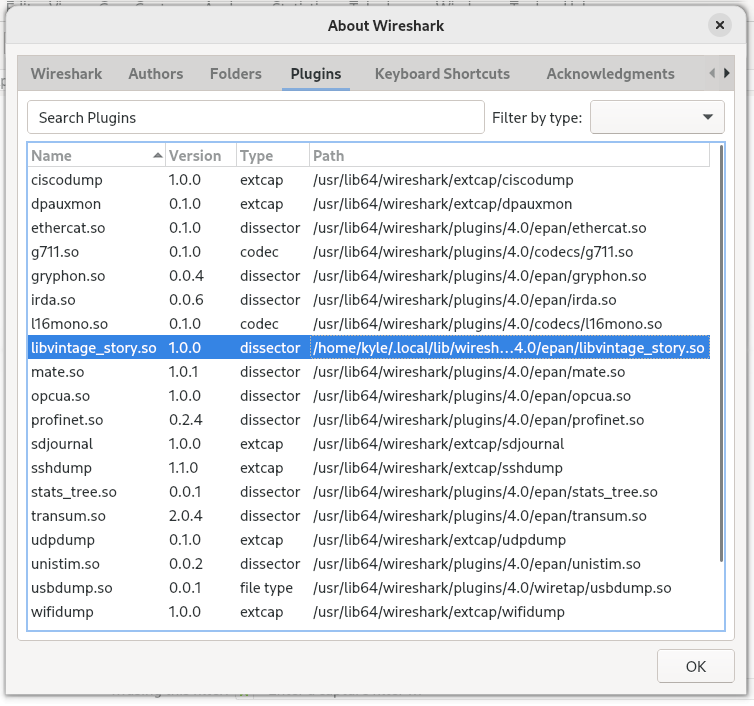
If it worked, the plugin will be listed on the Plugins tab of the About dialog.
The plugin will automatically recognize TCP traffic to VS servers running on the default 42420 port. For servers running on other ports, first capture the data. Then select a packet from the server to the client (do not use a packet from the client to the server), then click 'Decode As...'. Double click the Current column, and select VintageStory in the drop down. Click Save then OK.

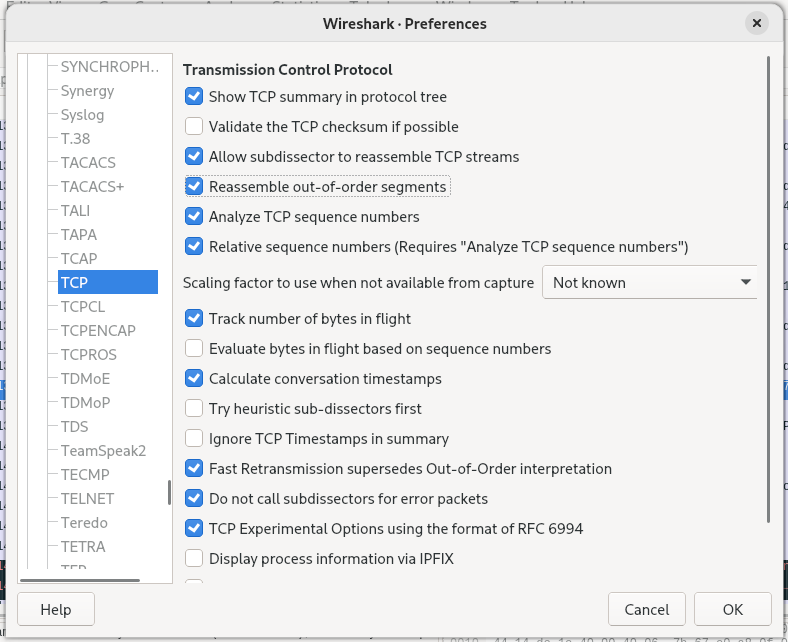
At the network layer, large packets get fragmented into smaller packets. The vs-protocol dissector relies on Wireshark's built-in TCP dissector to reassemble those fragments so that they can be decoded as a full VS packet. For very large packets, such as the ServerAssets packet, those fragments often get reordered on the network. By default the TCP dissector does not handle reordered fragments. It is advised to turn on the 'Reassemble out-of-order segments' so that it does handle that, so that the vs-protocol dissector and decode those very large packets.
The setting can be found in the Wireshark Preferences dialog, under the 'Protocols > TCP' tree.
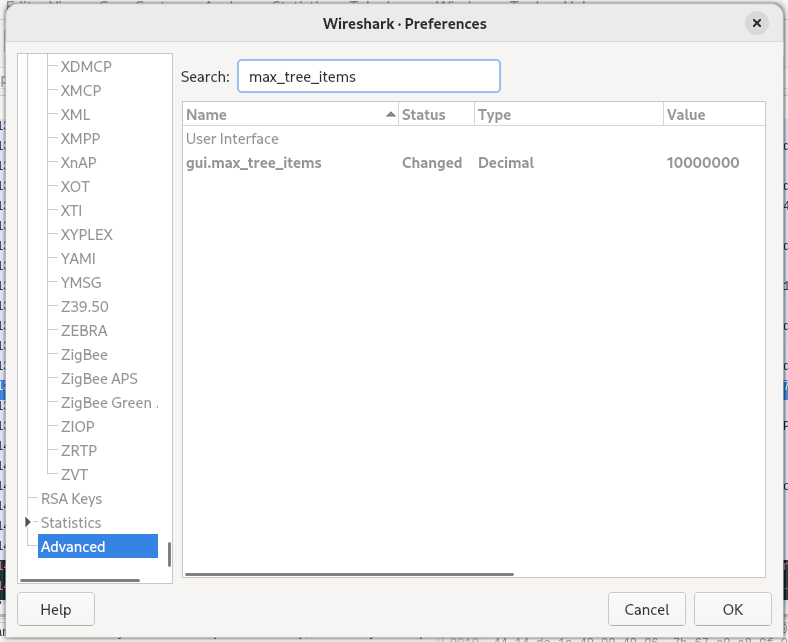
Those very large packets add more Protobuf fields to the tree than Wireshark supports by default. This shows up as a warning 'Adding protobuf.field.number would put more than xxx items in the tree -- possible infinite loop' in the protocol tree. This limit can be increased through the gui.max_tree_items preference, but doing so does seem to make the GUI less responsive on the large packets.
Building requires the following to be installed:
- A C++ compiler
- The Wireshark-dev package
- The libzstd-devel package
- CMake
First create a build directory, typically as a subdirectory inside of the source checkout, and enter it.
mkdir build
cd build
Run CMake to configure the plugin. With the default options, the plugin will be installed in the global location (requires root).
cmake ../
Alternatively, options can be passed to CMake to install in the user directories, which does not require root.
cmake ../ -DPLUGIN_DIR:STRING=~/.local/lib/wireshark/plugins/4.0 -DPROTOBUF_DIR:STRING=~/.config/wireshark/protobuf
Finally build the dissector and install it.
make install
Before the dissector can be built on Windows, Wireshark must be built from source to obtain the lib and header files. Those files are not available through any of the Wireshark precompiled installers. The official Wireshark build directions have all of the details, but the major points are summarized below. Note that it is not necessary to install the Qt dependency called out in the official directions. However, winflexbison3 does need to be installed in order to build Wireshark.
Install Visual Studio. The free community edition is sufficient. Within the Visual Studio installer, make sure the install cmake option is selected.
Download and unpack the Wireshark source code.
Start "x64 Native Tools Command Prompt for VS 2022" from the start menu. Create a temporary directory for Wireshark to download more build dependencies into ("development" is used below). The -DBUILD_wireshark=off option tells Wireshark to skip building the GUI, because the GUI is not necesary for building the plugin. This way Qt does not need to be installed to build the rest of Wireshark.
mkdir %USERPROFILE%\development
set WIRESHARK_BASE_DIR=%USERPROFILE%\development
mkdir build
cd build
cmake -G "Visual Studio 17 2022" -A x64 ..\ -DBUILD_wireshark=off
cmake --build . --prefix %USERPROFILE%\development\wireshark_install --config Release
cmake --install . --prefix %USERPROFILE%\development\wireshark_install --config Release
Download the vs-protocol source code and go to that directory inside the native tools command prompt. The -DCMAKE_PREFIX_PATH option tells CMake how to find dependencies. It needs to point to both the libraries build by Wireshark, and to the zstd dependency that was downloaded during the Wireshark build.
mkdir build
cd build
cmake ..\ -DCMAKE_PREFIX_PATH=%USERPROFILE%\development\wireshark_install;%USERPROFILE%\development\wireshark-win64-libs-4.0\zstd-1.5.2-1-win64ws\installed\x64-windows
cmake --build . --config Release
cmake --install . --config Release --prefix .
The files (vintage_story.dll and vintage_story.proto) are installed in the wrong location. Copy them to the correct locations. As described in the earlier installation directories section.
Vintage Story uses ZStandard to compress large packets. So the dissector must be able to decompress ZStandard. Wireshark 4.2 has builtin support for zstd, but 4.2 is still labelled as a developer release. The stable version, 4.0, does not export a ZStandard function to plugins. So instead vs-protocol links directly against libzstd.
Wireshark supports writing plugins in LUA, which is more portable than C/C++. However, even in the Wireshark development build, the vs-protocol plugin cannot be written in LUA, because Wireshark does not expose all of the compression functions in the LUA API (issue 16451). Furthermore, Wireshark does not include any way for LUA to call arbitrary native APIs. Theoretically one could rewrite zstd in LUA, but that would be very difficult.
This dissector is GPLv2 licensed, because all Wireshark plugins must be GPLv2 licensed, even LUA dissectors. Furthermore, the Vintage Story Protobuf file was contributed by Tyron with the understanding that it would be GPLv2 licensed.