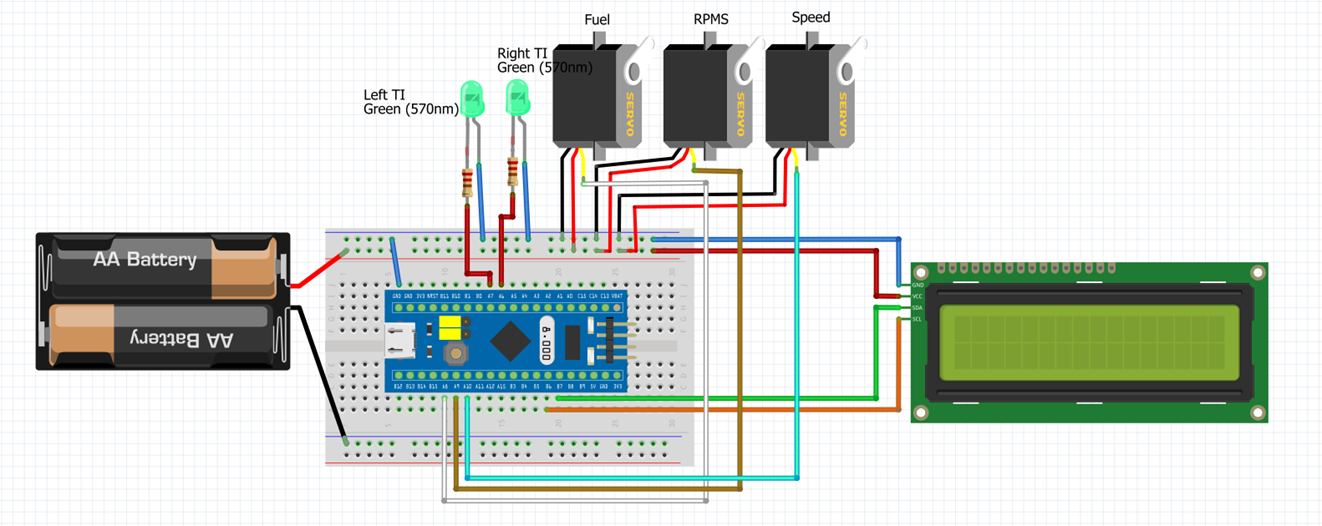
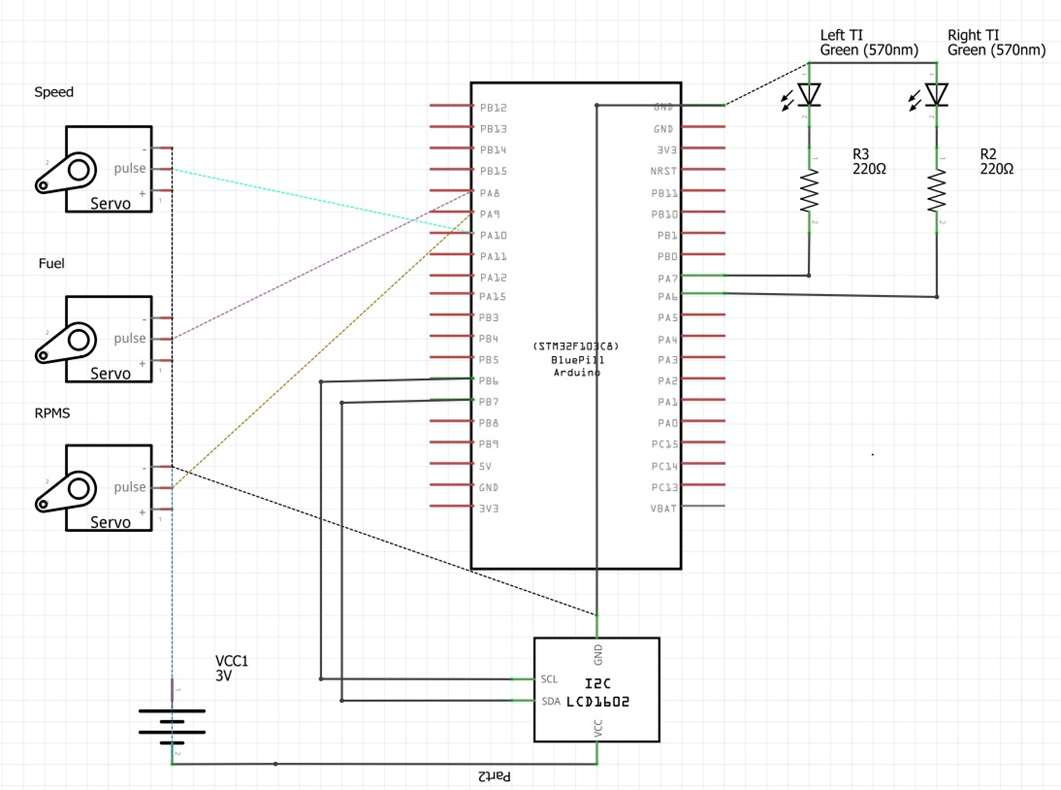
In this text, I'll try to explain how I made my very own dashboard that works with various games. In a nutshell, all of the components are connected to an STM32 Blue Pill microcontroller which communicates with SimHub software. Base of the dashboard is a Fiat Bravo dashboard. Video
All of the code is written in ArduinoIDE (I installed it separately, but you can also use the portable version that comes with SimHub.) In the first chapter, I will explain how to prepare ArduinoIDE to program BluePill via ST-LINK V2 programmer. Then, I will explain how to connect programmed Blue Pill to with SimHub as a Custom Serial Device. And lastly, I will go through the code and explain how it works. Feel free to contact me if you stumble upon a problem.
If you were to use Arduino - please skip to last part where I cover the code because you won't need the first two chapters.
- 1 x STM32 Blue Pill microcontroller
- 1 x ST-LINK V2 programmer (clone)
- 1 x Protoboard
- 1 x LCD screen with I2C adapter
- 3 x TowerPro SG90 servo motor
- 2 x LEDs
- USB Power adapter
- Wires
Since @blekenbleu covered this part very good, for this step, please visit his documentation and complete the steps up to "STM32Duino support"
Open ArduinoIDE and go to following: File>Preferences and in Additional Board Manager URLs add : https://github.com/stm32duino/BoardManagerFiles/raw/main/package_stmicroelectronics_index.json
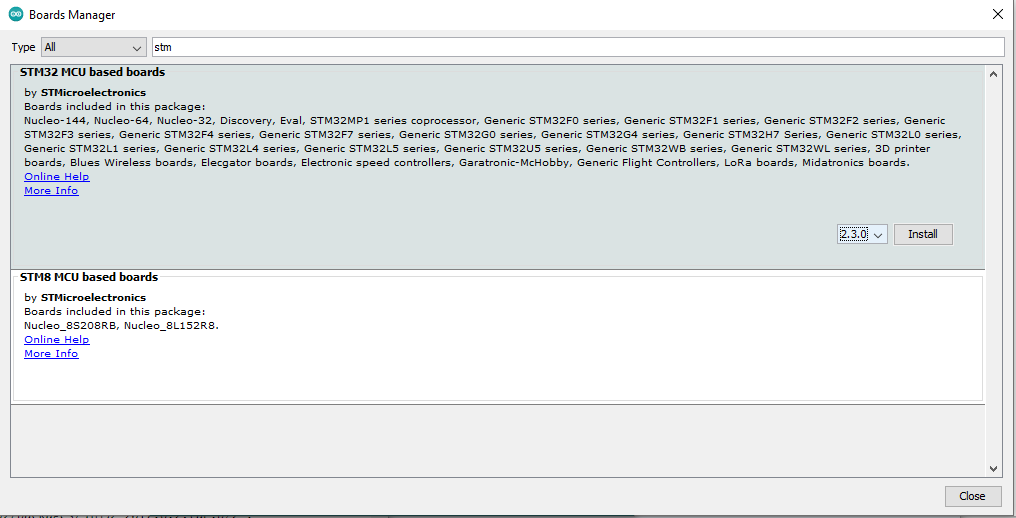
Next, go to Tools>Board>Board Manager, search for STM and install the board package.
Since I2C LCD is used, it's neccesarry to import I2C library for Blue Pill. The standard Arduino one will not work. You can find the download link under Programming STM32 for I2C LCD Display section
- Board - Generic STM32F1 series
- Board part number - BluePill F103C8
In case you don't have Custom Serial Device plugin enabled in SimHub, please enable it.
Here are the settings I used:
 NOTE: You dont have to write Connect/Dissconnect messages.
Also, I enabled incoming data just for the purpose of debugging - I read the data SimHub sent to my BluePill, and then sent them back - just so I know if the data is acutally sent/read correctly.
NOTE: You dont have to write Connect/Dissconnect messages.
Also, I enabled incoming data just for the purpose of debugging - I read the data SimHub sent to my BluePill, and then sent them back - just so I know if the data is acutally sent/read correctly.
In custom formula, you choose the telemetry properties you want to extract from your game. Here is what my custom formula looks like:


Since servos weren't able to actually rotate 180˙, I had to calibrate them. For that purpose I wrote a script which helped me map Dashboard values(speed, rpms, fuel percentage) with to rotating degrees.

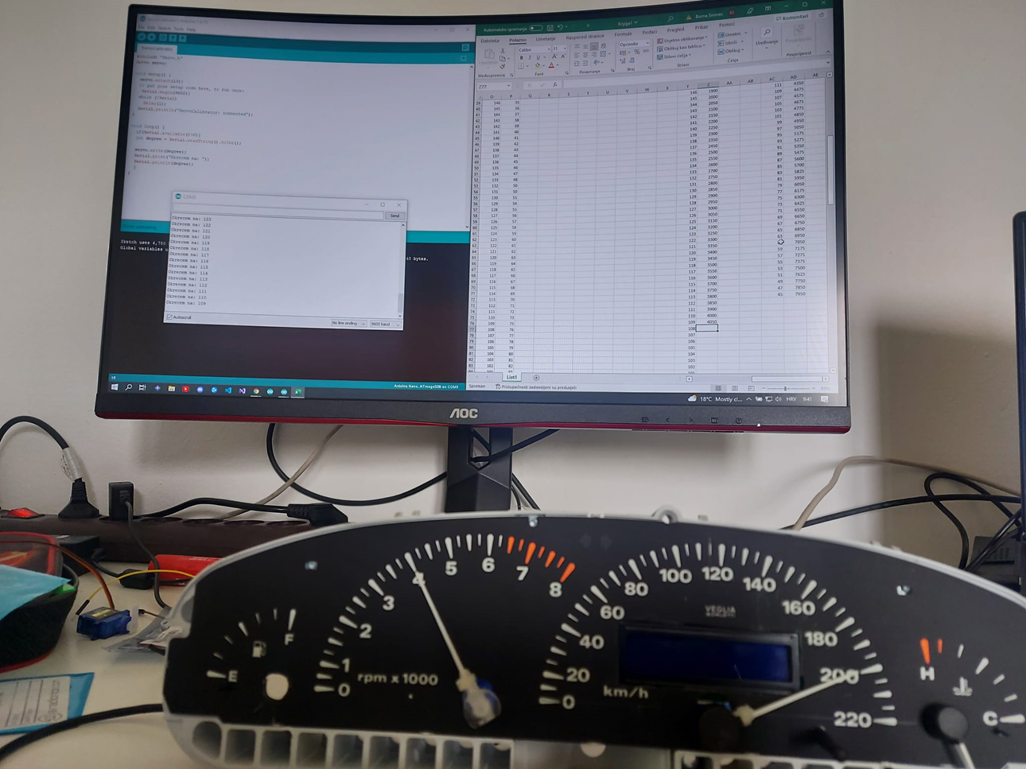
All those mapped values are stored in degArray, speedArray, rpmArray, fuelArray and fuelDegArray.
**The rest of the code is documented and explained in the comments **