This is the repository for the ENPH 253 Project: with Kevin Multani, Conrad Ng, Ben Mattison, and Bryan Luu.
Check out the website for our robot, named Indy on the Rocks (Indy for short).
The software running on Indy is based on a set of states, i.e. the entire challenge can be represented as a State Machine, as seen here:

The stages of the competition, and thus the main states of Indy's logic, are:
- TAPE_FOLLOW
- COLLECT_ITEM
- CLIMB_HILL
- ROCKPIT
- ZIPLINE
Each of these represents a major goal for Indy throughout the competition. First, Indy must navigate the Temple of the Zipline by following tape and collecting artifacts. This includes a strenous hill climb to reach the level of the Idol. Next, Indy must brave the rockpit by aiming towards the Eye of the Idol, a 10kHz IR Beacon. Once Indy crosses the rockpit, he must then carefully retrieve the final Idol. Finally, Indy will pull out his lasso to zipline down and escape out of the Temple, to eternal glory and the continuation of a life of adventure.
Indy is programmed with a Wiring-based board, using a TINAH shield. The programming is done in the Wiring language.
To see the State Machine in action, watch the Software Overview below:
For a large project like Indy, there is a lot of code. This code is organized as shown below:
lab- This folder holds all the code for experimenting and testing.
Indy- This folder contains all the code that is linked to the code on Indy.
Indy- This contains the
.pdefiles that are uploaded directly onto Indy. Separate files represent separate states.
- This contains the
libraries- This folder houses the external libraries used by Indy. See External Libraries for more info.
Tester- This contains the Unit Tests for the external libraries. See the Tests section for more info.
Although most of the code will be written with the Wiring IDE, in the Indy.pde sketch, we have created some external classes and code to handle complex calculations. These external libraries are included in Indy/libraries/Bibliotheque. These include:
IndyPID.cpp- a PID controller implementationTapeFollower.cpp- a PID-like controller with discrete errors for following tape.StandardCalc.cpp- general calculations not included in the Wiring IDE.
To begin programming, follow these instructions:
- Ensure that the Wiring IDE, version 27, is installed. Links: Windows, Mac, Linux.
- Clone this repository if you haven't already!
- PC: Use the GitHub Application to clone the repository.
- Mac/Linux: In Terminal, navigate to desired folder, then run
git clone https://github.com/bryanluu/Fizz-253.git.
- Open Wiring, and change the sketchbook folder location to Fizz-253/Indy/.
- You can now open
Indy.pdein Fizz-253/Indy to start programming!
To upload the code onto Indy, follow these instructions:
- Power the TINAH board with the 16 V LiPo battery
- Open
Indy.pdein Fizz-253/Indy/ with the Wiring IDE. - Change target microcontroller to atmega128.
- Plug in the USB Serial from your computer to TINAH.
- Select the appropriate Serial port.
- Press Upload to Wiring hardware
- Press the RESET button on TINAH.
- Once upload is finished, press RESET again.
Finally, Indy can now be run. To run Indy, simply power on the TINAH board. It will wait for you to press start. Pressing the START button will make it go to the first state: FOLLOW_TAPE.
To switch states manually, simply press the STOP button to activate the menu. Use knob 6 to scroll between the states. Press START to select the state.
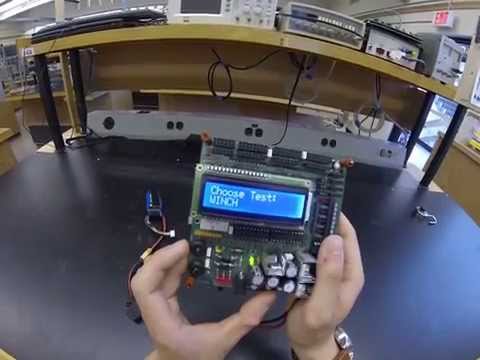
Indy displays information through TINAH via and LCD screen. A SETTINGS state allows the user to adjust various parameters on-the-go. Finally, a TEST state helps pinpoint certain problems with the motors or servos.
The LCD Monitor displays live data from Indy at a frequency controlled by the macro LCD_FREQ. It flashes the current state for a short duration LCD_STATE_DUR after a certain time LCD_STATE_FREQ. Otherwise, it will display the appropriate debug info for the current state.
- To adjust settings, simply press STOP to activate the menu.
- Use knob 6 to scroll to
SETTINGS. Press START to select theSETTINGSstate. - Once in this state, navigate through different adjustable settings with knob 6. Press START to select the current setting.
- Use knob 6 to adjust the value of the selected setting.
- Press START to save the setting at the selected value. It will return to the top of the
SETTINGSstate.
In order to verify the quality of Indy's code, Unit Testing was implemented on the external classes, IndyPID.cpp and TapeFollower.cpp. Unit Testing used CPPUNIT to run modularized tests, ensuring code correctness after every modification. NOTE: they are optional to the functioning of the robot, but it ensures there are no bugs in the external libraries. Below are the setup instructions to get the Tests running. It only needs to be done once.
- The unit-testing framework was written in C++ with Visual Studio 2012. Ensure that Visual Studio 2012 (or later) is installed.
- Check that the cppunit library is installed on your computer. We are using version 1.12.1. If not, install and extract using 7-Zip.
- Navigate into the cppunit folder, to
cppunit-1.12.1\examples, and open theexamples.slnfile with Visual Studio. Allow Visual Studio to convert files if necessary. - Right click the
cppunitandcppunit_dllprojects, select Properties->Configuration Properties->Librarian->Output, then remove the extra d fromcppunitd.libandcppunitd_dll.libtocppunit.libandcppunit_dll.lib. - Select Build->Batch Build, then select all, then unselect all the Template configurations. Build and ignore the errors.
- Next, go into project properties:
- C/C++; General: modify the ‘Additional Include Directories’ field by adding the path to the folder
cppunit-1.12.1\include - Linker; General: modify the ‘Additional Library Directories’ field by adding the path to the folder
cppunit-1.12.1\lib - Linker; Input and modify the ‘Additional Dependencies’ field by adding the name cppunitd.lib for your debug configuration, and cppunit.lib for the release configuration.
- Open the
Tester.slnfound in theIndy\Tester. - Right click the
Testerproject, and Set As Startup Project. - Build, and run the Tests!
- The unit-testing framework was written in C++ with Visual Studio 2012. Ensure that Visual Studio 2012 (or later) is installed.
- Download the cppunit library folder from Dropbox (must have team permissions). This folder already has the compiled binaries required.
- Complete steps 6-end from the above section.