Wrong results #9
Comments
|
Hello,
I see that you are reading data 5x per sec (every 200ms). Is it posssible that the Frame Data-Rate is set faster than that, and that you are overrunning the serial buffer? What is your Frame Data-Rate?
I would like to know more about your use of the library with Node MCU.
Please fill me in on all the details that you can.
Best,
Bud Ryerson
San Francisco
On February 23, 2020 at 11:58 AM TrombiA <notifications@github.com> wrote:
Hello
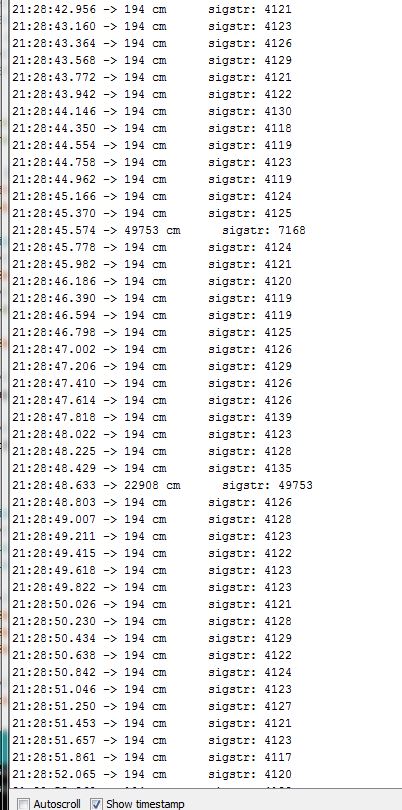
Thank you for this library. I managed to make test program for Node MCU with Basic reading code and library. I can look distance results from serialmonitor and It gives mainly right results. However there are also few wrong results as you can see at picture. Where do you think those comes from and can I avoid somehow those wrong measurements?
—You are receiving this because you are subscribed to this thread.Reply to this email directly, view it on GitHub, or unsubscribe.
|
|
Hello I use default frame data rate 100hz and default serial baud rate 115200 I tried to change delay to 3ms and those wrong measurement values comes more rarely, something like once in a two minutes. So it looks like that buffer was overrunning like you guessed. Maybe my Node MCU board can't handle that speed either. I read TFMPlus library text and noticed that there is commands which can be used for change default frame data rate. So can I just put that "define FRAME_1" to my code beginning when I want to change that frame data rate to 1Hz? Or do I have to put some send command definition to code? Like this (my code which I use for testing): #include <SoftwareSerial.h> // Setup software serial port void setup() { Serial.println ("Initializing..."); // Step 2: Initialize the data rate for the SoftwareSerial port // Step 3: Initialize the TF Mini sensor void loop() { // Display the measurement // Wait some short time before taking the next measurement I use Node MCU board (Lolin 0.1) and here is picture from my setup:
I also tryed this setup to use it with blynk app. Here is code for that: #define BLYNK_PRINT Serial // Comment this out to disable prints and save space // Setup software serial port alla olevat lisatty 22.2.-20 // You should get Auth Token in the Blynk App. // Your WiFi credentials. //DHT dht(DHTPIN, DHTTYPE); // This function sends Arduino's up time every second to Virtual Pin (5). { // Step 1: Initialize hardware serial port (serial debug port)tama lisatty 22.2.-20 // wait for serial port to connect. Needed for native USB port only // Step 2: Initialize the data rate for the SoftwareSerial port // Step 3: Initialize the TF Mini sensor //dht.begin(); Poistettu kenoviioivlla 22.2.-20 // Setup a function to be called every second void loop() It works fine with this code and I get values to blynk app. I were wondering that I can measure volume at storage with this TFmini lidar and blynk app. Thats why there are calculations with measurement results on blynk "D" value. Br. |

|
Tomi, It appears that you are calling the TFMini library header file ('TFMini.h'). You are NOT using the TFMini-Plus library. There is no Can that be part of the problem? Please let me know. Thanks, |
Hello
Thank you for this library. I managed to make test program for Node MCU with Basic reading code and library. I can look distance results from serialmonitor and It gives mainly right results. However there are also few wrong results as you can see at picture. Where do you think those comes from and can I avoid somehow those wrong measurements?
The text was updated successfully, but these errors were encountered: