This project uses the BoltIoT Starter Kit with included temperature sensor to monitor the temperature and send an SMS and email when there is a change in temperature. The email is sent via Mailgun, and the text is sent via Twilio. Mailgun requires a credit card to create an account.
Disclosure: I was not compensated by BolIoT to provide this guide. I am doing so because I think this is an interesting project for makers.
For this project, you will need:
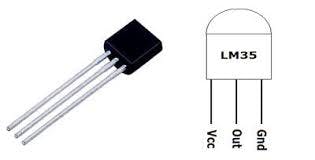
- BoltIoT Starter Kit, if you do not have a starter kit, you may need to purchase an LM35 IC and 3 male to female jumper cables.
- Raspberry Pi 3B+ Kit This project uses a Raspberry Pi 3B+ to continuously run a Python script. You can always use your existing computer instead of a Raspberry Pi, but your computer will need to be on and running this Python script for the project to work.
- HDMI Monitor or Raspberry Pi Touchscreen
- Mouse/Keyboard
Before you begin, you will need:
- Raspberry Pi 3B+ setup with HDMI monitor, mouse/keyboard, and the latest copy of Raspbian OS installed.
- Mailgun account. You will need a Mailgun API Key and Sandbox URL for this project. Mailgun requires a valid credit card to create an account.
- Twilio account. You will need a Twilio SSID, Auth Token, and 'From Number' for this project.
- BoltIoT account and Bolt WiFi Module. You will need your API Key and Device ID for this project.
- Upgrade your BoltIoT module to the latest firmware (if you haven't already done so) by following the instructions here: https://docs.boltiot.com/docs/firmware-update
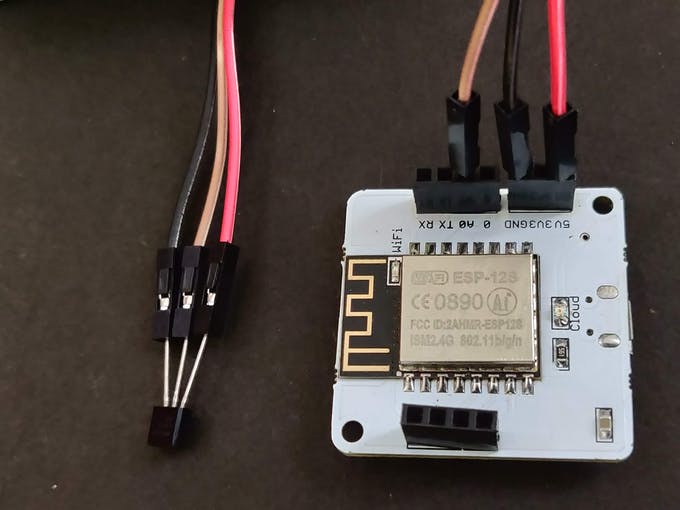
Follow the instructions from the BoltIoT page here: https://docs.boltiot.com/docs/getting-started-with-bolt-temperature-monitoring-system to connect the BoltIoT to the temperature sensor with 3 male to female jumper wires.
Follow Schematic Here:
In the end your hardware setup for your BoltIoT should look like this:
Next, you'll need to setup the BoltIoT to read and report temperature readings from the LC35 IC to the BoltIoT Cloud by following the instructions here: https://docs.boltiot.com/docs/getting-started-with-bolt-temperature-monitoring-system#section-step-3-visualising-the-data-plotting-graph-on-the-bolt-cloud
When you complete this step. you should see a blank output plot:
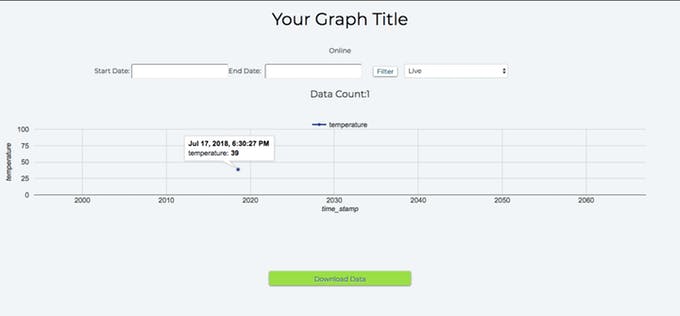
After a few hours, you'll see something like this:

Side Note: I prefer to see everything in Fahrenheit, so I followed the additional instructions on the tutorial for converting Temperature reading to Fahrenheit.
Here's what my product code looked like when I was done:
setChartLibrary('google-chart');
setChartTitle('Your Graph Title');
setChartType('lineGraph');
add(183);
mul(0.0977);
mul(1.8);
setAxisName('time_stamp','temp');
plotChart('time_stamp','temp');

In this section, we will clone the code onto our Raspberry Pi into folder Temperature-Monitoring-with-BoltIot.
Start by opening a command terminal:
git clone https://github.com/carolinedunn/Temperature-Monitoring-with-BoltIoT
Next cd into the folder:
cd Temperature-Monitoring-with-BoltIoT
Your terminal should look something like this:

Next, open a File Manager on your Raspberry Pi desktop and find the folder Temperature-Monitoring-with-BoltIot.

Double-click to open the conf.py file in Geany. Geany should be the default editor.

Now replace all "xxx" values in the conf.py file with the actual values for your accounts. For example, replace SSID = 'ACIxxxx' with the actual SSID from your Twilio account.
You will need credentials from your Twilio, BoltIoT Cloud, your mobile number, and Mailgun account.
When you have completed this task, you will need to save your conf.py file.
Next go back to your terminal. You will need to install dependencies now.
sudo pip install boltiot
sudo pip install statistics
After installing all required dependencies, you will need to make your detection.py file executable and then run the file.
chmod +x detection.py
python ./detection.py
If you've done everything correctly, you should start to see the collection of data in the terminal window. Once 4 temperatures have been captured, if the temperature is outside the range of the upper or lower bounds, this will trigger an email and a SMS message as you have set it up in the conf.py file.
Disclaimer: I am not a data scientist, and the formula I am using to calculate temp variations was pulled from here: https://www.hackster.io/iambishal/temperature-monitoring-alert-system-using-bolt-iot-98e7b9
Here is what the terminal could look like:

Here is an example of a text message generated by the script to Twilio:

Here is an example of an email generated by the script to Mailgun:

And last but not least, leave the BoltIoT module powered up and the Raspberry Pi on and continuing to run your script.
The vast majority of the code in this tutorial was pulled from here: https://www.hackster.io/iambishal/temperature-monitoring-alert-system-using-bolt-iot-98e7b9 Another good resource with a similar tutorial can be found here: https://www.hackster.io/surajsingla333/temperature-monitoring-device-using-bolt-iot-module-862b87