Preview videos : https://www.youtube.com/playlist?list=PLyx101r52fx7jqx3gHLP9T83HwaJSULEn
DockerHub : https://hub.docker.com/r/cdhtlr/mikrotik-speedtest
System requirements:
- Any linux PC or MikroTik RouterOS v7.6 (and above) (Currently support Container for ARM, ARM64, X86 and X86-64 based machine, like the CCR2004-16G-2S+ device with ARM64 architecture)
- 10.5MB of disk space left (3MB for compressed TAR image, 7.5MB for uncompressed running image. You can delete the compressed TAR image once the image is successfully decompressed)
- 6MB RAM space left (Could be more, depending on the workload)
===============================================================
For use with PC (outside MikroTik):
docker run --restart=unless-stopped \
--name speedtest -d \ #set name "speedtest" and Run container in background and print container ID
-p 8080:80 \ #Host-port:Container-port to access the app inside this container via port 8080
-e 'URL=https://jakarta.speedtest.telkom.net.id.prod.hosts.ooklaserver.net:8080/download?size=25000000' \ #url to download (optional)
-e 'MAX_DLSIZE=1.0' \ #maximum size in MB (Megabytes) to download (optional)
-e 'MIN_THRESHOLD=1.0' \ #download threshold in Mbps (Mbits per sec), to check for download speed condition (optional)
-e 'CONCURENT_CONNECTION=4' \ #number of concurrent connections to speed up download tests using parallelism (optional)
-e 'ALLOW_MEMORY_BUFFER=YES' \ #YES to allow memory usage if the URL does not support parallel downloading and MAX_DLSIZE under download file size, enter NO if you do not allow memory usage for streaming downloads (optional)

cdhtlr/mikrotik-speedtest:amd64 #Image for amd64 architecture
You can use the above example on docker-compose.
===============================================================
For use as Container (inside MikroTik):
Example configuration for MikroTik:
/interface veth add name=veth1-speedtest address=192.168.1.2/24 gateway=192.168.1.1
/interface bridge add name=bridge-docker
/interface bridge port add interface=veth1-speedtest bridge=bridge-docker
/ip address add address=192.168.1.1/24 interface=bridge-docker
/ip firewall nat add chain=srcnat action=masquerade src-address=192.168.1.0/24
/ip firewall nat add chain=dstnat action=dst-nat protocol=tcp to-addresses=192.168.1.2 to-ports=80 dst-port=8080
/container envs add name=speedtest key=URL value="https://jakarta.speedtest.telkom.net.id.prod.hosts.ooklaserver.net:8080/download?size=25000000"
/container envs add name=speedtest key=MAX_DLSIZE value="1.0"
/container envs add name=speedtest key=MIN_THRESHOLD value="1.0"
/container envs add name=speedtest key=CONCURENT_CONNECTION value="4"
/container envs add name=speedtest key=ALLOW_MEMORY_BUFFER value="YES"
Get an image from an external library:
/container/config/set registry-url=https://registry-1.docker.io tmpdir=disk1/pull
/container/add interface=veth1-speedtest root-dir=disk1/speedtest envlist=speedtest hostname=speedtest logging=yes remote-image=cdhtlr/mikrotik-speedtest:amd64
or pull this image to your computer (You can use any computer with any cpu architecture).
Example to pull image for ARM64 based MikroTik Router:
docker pull cdhtlr/mikrotik-speedtest:arm64
Save to TAR:
docker save cdhtlr/mikrotik-speedtest:arm64 > speedtest.tar
then upload to your MikroTik Router.
Import image from computer:
/container add interface=veth1-speedtest root-dir=disk1/speedtest envlist=speedtest hostname=speedtest logging=yes file=speedtest.tar
Check your container list in MikroTik Router:
/container/print

/container/start 0
0 is your container ID, please see the list of containers you got from the /container/print command.
===============================================================
How to use:
Now access speedtest from your web browser (IP Router:Port).
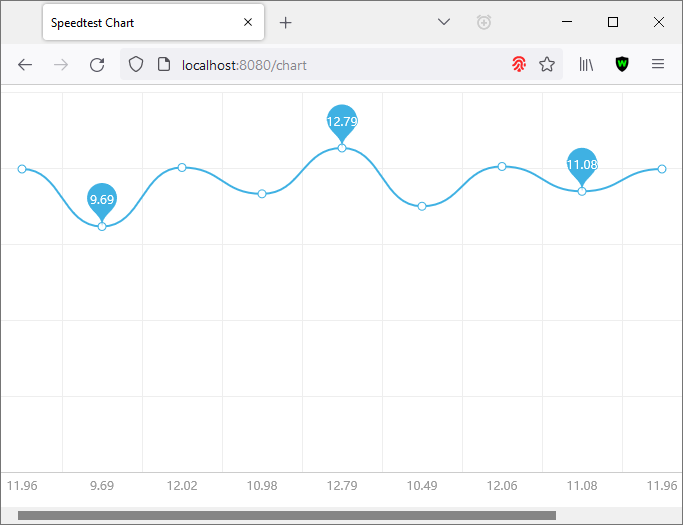
You can go to http://192.168.1.2:8080 to do download test, go to http://192.168.1.2:8080/condition to check for threshold based download speed condition or http://192.168.1.2:8080/chart to check for speedtest history chart.
Finally, you can now get your actual download speedtest (in Megabits per second) using MikroTik Terminal and do some scripting like speedtest based failover.
For example:
:local result [tool fetch mode=http url="http://192.168.1.2:8080" output=user as-value]
:local result [:put ($result->"data")]
:log info "Your actual download bandwidth is $result Mbps"
the example output from the script above is: Your actual download bandwidth is 3.14 Mbps
or
:local result [tool fetch mode=http url="http://192.168.1.2:8080/condition" output=user as-value]
:local result [:put ($result->"data")]
:log info "Your actual download bandwidth currently $result"
the example output from the script above is: Your actual download bandwidth is currently Good
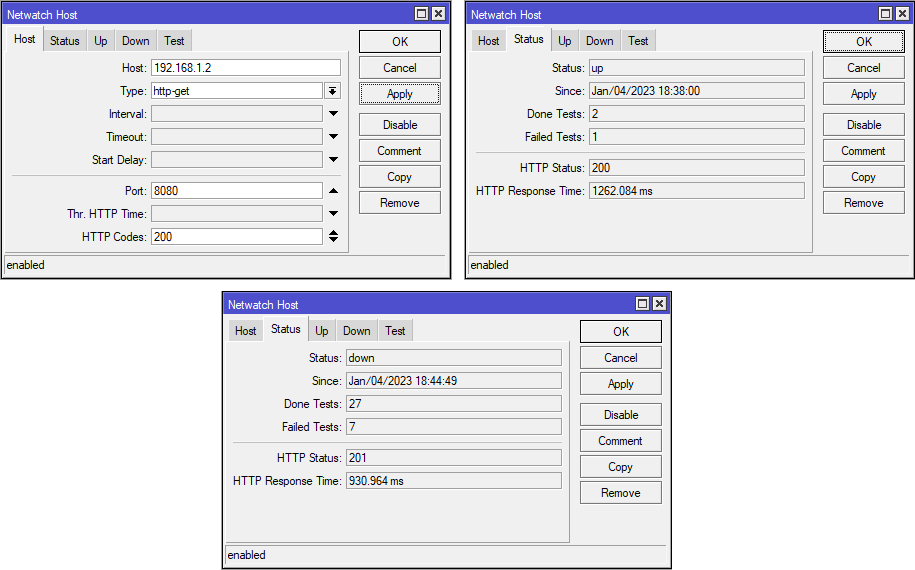
You can also use MikroTik Netwatch for easier scripting like this:
Response code 200 means the current download bandwidth is Good and the network status will be "up"
Response code 201 means the current download bandwidth is Bad and the network status will be "down"
For performance and speedtest accuracy:
Larger MAX_DLSIZE can give better download speedtest results, but MAX_DLSIZE setting that is too large can cause MikroTik to fail to execute scripts due to timeout.
The command line application in this container is made using Golang which is well known for its performance but it is more difficult to do manual memory management.
If the memory usage in the container continues to grow and you are not comfortable with this, you can set the memory limit on the container.
Memory limit that is too small can reduce CPU performance. So please set the memory limit wisely.
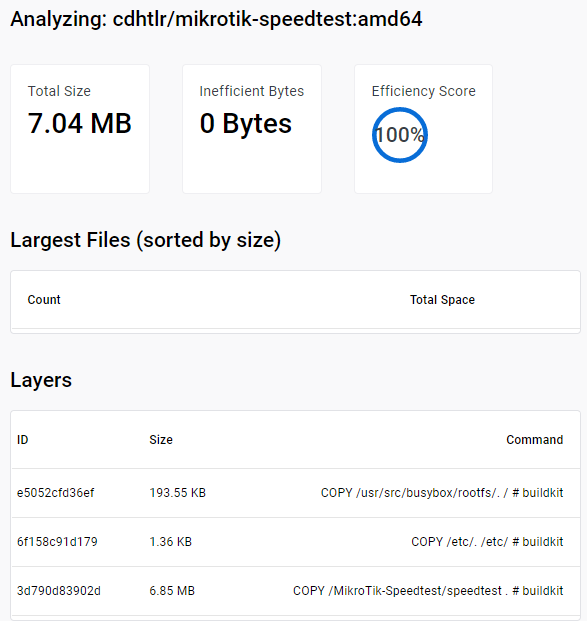
Image size efficiency:
Copyright notice:
The source code of this program is similar to GoParallelDownload and the chart used in this Docker Image is made by go-echarts.


