Graphical Rule Designer
A graphical rule designer is provided within HABmin. It provides a drag and drop interface to produce rule files - it may not support really complex rules (time will tell!), but the idea is that it provides a simple interface to produce the majority of rules that a user may want.
The image above shows the rule designer. On the left is a list of rules that have been developed with the interface, in the middle is the toolbox, and on the right is the rule workspace. To add blocks, drag them from the toolbox to the workspace. To delete blocks, simply drag them into the bin in the bottom left of the workspace.
Information on block types can be found here Rule Designer: Building Blocks.
When the user starts a new rule, a single block is provided in the workspace. It allows you to drop into two areas - the first (top) being the list of definitions (variables, constants) that may be used in the rule. The second part is the rule itself.

The image above shows a simple rule. This rule will simply update an item RainGauge_Change24hr from the value of difference of the item Outside_RainGauge_Counter now, and 24 hours ago. This rule is described in more detail here (Rule Designer: Example 1)
The rule name is configured in the top of the rule block. Note that internally, HABmin uses a numeric identifier to uniquely identify the rule, and when the rule is saved to a .rules file, this identifier is used as part of the filename. This allows the name to be updated without generating multiple versions of the rule. For example, in the rule above, the rule name Rain monitor: 24 hours will be saved into a file _(5)rain_monitor__24_hours.rules.

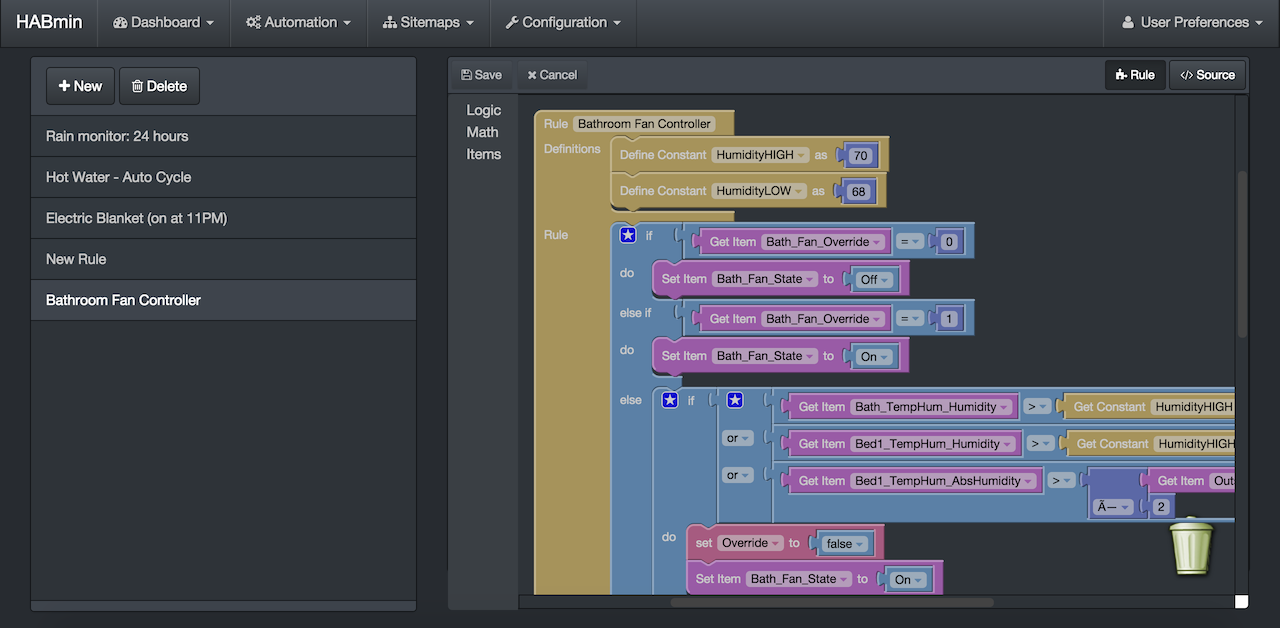
The image above is a more complex rule - described in more detail here (Rule Designer: Example 2). It is used to control a bathroom fan based on the humidity of two rooms (the fan is actually a heat recovery system, so impacts both rooms). If the humidity of either room is above a setpoint, it turns the fan on. If the humidity of both rooms is below a different setpoint, it turns the fan off. A different ON/OFF setpoint provides some hystereses which ensures that the fan doesn't switch too often. Below this is a section with two timers - the first timer will turn the fan on if it's been off for 3 hours, and the second timer will turn the fan off after 10 minutes if it was turned on by the first timer.
The above rule shows the use of items, variables and constants. Constants are initialised at the top of the rule, and can then be used within the rule. The editor allows you to easily use this constant, or to change its value. Variables are used within the rule to control a rule, or retain information between rule triggers. Items are of course openHAB items. Renaming a variable will rename all instances of that variable (or constant, or item) automatically, making using the same rule design multiple times with different items relatively easy.
Comments have also been added to 3 of the blocks. These can be hidden by clicking the ? button.
When the rule is saved, HABmin will generate an openHAB .rules file.