INTERNET =! WEB
- LAN (Local area network)
- WAN (wide area network)
- MAN (metropolitan area network)
Internet = interconnected + Network Red of computers innterconnecteds in the world.
- Computer 1936
- World Wide Web 1990 by Tim Berners-lee (and too found w3c)
- CSS 1994
HyperText Transfer Protocol Secure (encrpted by ssl)
File Transfer Protocol. is a standard network protocol used for the transfer of computer files between a client and server on a computer network.
The same computer works like server and client
is the use of computers to store, retrieve, transmit, and manipulate data or information. IT is typically used within the context of business operations as opposed to personal or entertainment technologies.
Real time communication, like messages app, video-chat, etc
Communication in no real time, like gmail, because you can receive a email but dont read it inmediatly
Uniform Resource Locator (website url)
Text to have contains link to other texts
son serie de instrucciones ordenadas para resolver un problema
Hypertext Markup Language - Is interpreted language focuses on differentiation and synthesis reference
w3c by Tim Berners-lee (http, html, url) sgml > (1,2,3) html xml > xhtml (html4 with more rules) (standar) casesensitivity, close tags, use " html5 (WHATWG)
Is a basic representation from info in html document, used to create, categorize and organize content. An add semantic to website. Can have attributes, and this are value added for extend functionality with specific information
usually are called root elementproperties vs attributes ### Syntax:
- opend tag
- close tag
This is a element:
<name attribute="value">content</name><name/>
it is nothing more than giving meaning and structure to what you are writing. Very important for the browser.
- doctype
- charset (encoding)
- lang, title (globals)
- src alt
- header
- nav
- main (contains section,aside,etc..)
- section (reset h1 hierarchy)
- aside (reset h1 hierarchy) secondary info
- article (reset h1 hierarchy)(can have a header and footer)
- footer
- time (attr datetime="")
- progress (attr value="70" max="100")
- canvas
- audio (attr controls) - source (attr src and type) (multiples types) - p when browser dont have support
- video (attr controls, poster for image when not loaded) - source (attr src and type) (multiples types) (can have multiples source for support in multiple browsers) - p when browser dont have support
-
- on videos from iframe, convert iframe on absolute height and width 100%, create div relative and multiply (height * 100 / width) to get % of height and width 100%, to stay with 16:9
- details (for collapsible menu)
-
- summary
-
- ul
-
-
- li
-
-
relative paths (current folder)
-
absolute paths (https)
-
(# to link ID in current site)
-
for (in label, link id of input)
### Syntax errors Typos, and write errors. w3 validator
Correct syntax, but the code dont respont how to should. The program works wrong
Language of Style Sheets Cascading Style Sheet Called cascade because styles are inherited inward (read from top to bottom) reference
Can be declarated in any component, but is better in root, because they will be transmitted by inheritance
:root {
  --varName: 12px;
  --green-color: #7ACC2D;
}

nav {
  color: var(--green-color);
  color: var(--green-color, red); /* to set default value if var doesnt exist*/
  background-color: var(--my-var, var(--my-background, pink)); /* pink if --my-background and --my-var doesnt exist*/
}All HTML elements have a box model composed by 4 elements: content > padding > border > margin
default size width: 100%; height: auto;
content-box(default)-
- dont include padding or border on element size 'width-height' (only content)
border-box-
- include content, padding and border on size 'width-height'.
margin never be included in width
- css content attr(href), url(xd.png)
- border: width style(solid) color;
-
- border-radius
-
- border-width
-
- border-style
-
- border-color (default inherited by text color) - currentColor
-
-
- border-(top-bottom-right-left)-(color,width,style)
-
-
-
- border-(top-bottom)-(right-left)-radius
-
-
-
- border-(top-bottom-right-left)
-
when margin (top and bottom) overlap the most hight win margin collapsing except in display flex, or with padding+border
when have static size, you can center with value auto
- margin
- margin-(top-bottom-right-left)
can use calc() to calculate values like
- calc(100vh-200px)
- calc(100%3 - 21em - 21px)
<link rel="stylesheet" type="text/css" href="theme.css">
- Inline
- Tag Style (used for write emails)
- External with
This is because the browser read the styles in "CASCADE", from top to bottom. The ones below over-write the ones above.
- inline (the most important)
- Style - External File (depends of order in )
Specificity is a weight that is applied to a given CSS declaration, determined by the number of each selector type in the matching selector. When multiple declarations have equal specificity, the last declaration found in the CSS is applied to the element. Specificity only applies when the same element is targeted by multiple declarations. As per CSS rules, directly targeted elements will always take precedence over rules which an element inherits from its ancestor.
The following list of selector types increases by specificity:
- (1) Type Selectors (h1) and pseudo-elements (::before)
- (10) Class Selectors (.example) Attributes selectors ([type='radio']) and pseudo-classes (:hover)
- (100) ID Selectors (#example)
- (1000) Inline styling
- !important = (1000000)
Universal selector (*), combinators (+, >, ~, ' ', ||) and negation pseudo-class (:not()) have no effect on specificity. (The selectors declared inside :not() do, however.)
h2.special span { /* specificity: 12 - will win*/
  color: red;
}
.special span { /* specificity: 11*/
  color: black;
}!important
Example of rule:
/* rule */
.selector {
  /* declaration { } */

  color: red;
  /*propertie: value */
}- Selectors (reference to html) (h1 .title #title, etc)
- Declarations (properties applied to selector {})
- Properties (attribute to modify)
- Values (value assigned to property) (
swill restore to default value any propertie)
To connect html element with css style
- (tagName) tag
- (tag[type="number"]) attribute
- (.) class
- (#) id
- (space) descendent
- (*) all (universal)
- (>) child
- (+) adyacent
- (,) grouping
- (~) next elements
ID selector is no common used, because not is re-usable, like a class selector, and because have more specificity
change state when user actions more
- :visited
- :hover
- :active
- :link
- :first-child
- :last-child
- :nth-of-type(n) (odd, even)
- :nth-child(2n)
- :nth-child(2n+1)
- :lang(es)
- :focus
- :focus-within (focus en cualquier item adentro de este elemento)
- :enabled
- :disabled
- ::before
- ::need-more
- ::after
- ::first-letter
- ::first-line
- ::backdrop
- ::grammer-error
- ::marker
- ::part()
- ::placeholder
- ::selection
- ::splotted()
- ::spelling-error
Apre provided by User agent stylesheet
- OOCSS (Object orient css)
- BEM (Block element modifier)
- Component CSS
- SMACSS
- ITCSS
- Atomic Design
- Key word (red, blue, transparent)
- Hexadecimals
-
- length 6
-
- 16 characters - 0123456789ABCDEF (0 not color, F fullcolor)
-
- when use the same characters, can short with 3 (#FFF == #FFFFFF)
- rgb()), rgba() - red green blue
-
- red, green, blue each númber 0 to 255 and , alpha 0 to 1
- hls(), hlsa() - Hue, Saturation, and Lightness.
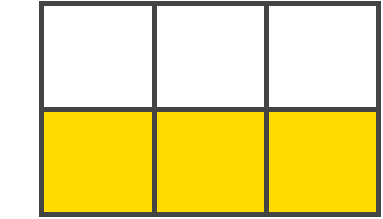
Pixel, is the most small unity of color from digital image.
-
absolut
-
- px
-
- in
-
- mm
-
- cm
-
- pt
-
- pc (font reference the size from others)
-
relative
-
- % (percentaje is relative to width of father) when is 100% can use
auto
- % (percentaje is relative to width of father) when is 100% can use
-
- em (relative to font-size specified closest element can be self, father, etc)
<nav> <!-- font-size: 16px -->
  <ul>  <!-- font-size: 2em; 32px -->
    <li>  <!-- font-size: 1em; 32px -->
      <a href="">hola!</a>  <!-- font-size: .5em; 16px padding: 2em; 32px -->
    </li>
  </ul>
</nav>-
- rem (root em) (relative to font-size specified farthest, usually html or body)
-
- vw - vh (are in percentaje to viewport)
-
- vmax
-
- vmin
-
- ch
-
- ex
can use white-space nowrap for stay fluent in screen and not break down (normal, pre)
Layout model to posicion and organice elements more easy in screen.
- Container
- FlexItems
Have two axis:
-
Main Axis ( default - left to right and up to down - Can be changed with flex-direction)
-
- justify-content (for align items) (flex-start, center, flex-end, space-between, space-around)
-
Cross Axis
-
- align-items (for align items) (stretch(default), flex-start, center, flex-end, baseline)
-
flex-grow flex-shrink flex-basis (growth factor)
-
-flex: flex-grow (absolut positive value) | flex-shrink (absolut positive value) | flex-basis (absolute or relative value)
-
flex-direction
-
- flex-flow: flex-direction | flex-wrap ej: flex-flow: column nowrap
images have object-fit (contain, cover, fill) to change proportion of image
svg = Scalable Vector Graphics
this propertie with (relative, absolute, fixed, sticky) unlock (z-index, top, bottom, left, right).
- (static) html elements by default
- (relative) with relation to normal position (and dont loss initial space in father)
- (absolute) absolute to relative closest ancestor or window (loss space on father)
- (fixed) from window
- (sticky) from window, but ignoring scroll (when you see that element)
- (initial) in predeterminate location
- (inherital) inherit propertie from ancestor
- right
- left
- none (center box)
- right
- left
- both
for scrolls (auto) or add div clear after last ul
- background
- background-image
- background-color
- background-size (cover - contain) (10px 20px) x and y or 100%
- background-position
- background-repeat
in html texts you can escape reserved characters using backslash \
- typography
- font-family
- font-size
- font-style
- font-weight
- color
- letter-spacing
- word-spacing
- line-height
- text-align
- text-indent
- text-decoration
- text-transform
.list ol {
  /* list-style-position: inside; */
  list-style: none;
  counter-reset: features;
}
.list li:before {
  counter-increment: features;
  content: counter(features) ". ";
}.fadeIn {
animation-duration: 4s; /*duration time*/
animation-fill-mode: both; /* to fulfill keyframes round trip (ida y vuelta) */
animation-name: fadeIn; /* name to animation */
-webkit-animation-duration: 4s;
-webkit-animation-fill-mode: both;
-webkit-animation-name: fadeIn;
}
@keyframes fadeIn {
from {
opacity: 0;
-webkit-transform: translate3d(0,-100%,0);
transform: translate3d(0,-100%,0);
}
to {
opacity: 1;
-webkit-transform: translate3d(0,0,0);
transform: translate3d(0,0,0);
}
}all elements in css are squares or rectangles
- layout (first display in css1)
- block (box) - one below the other (from up to down) (div, p,zw h1, section, ul, etc) - it will be as all width as possible
- inline(text) - each side by side (left to right) (span, em, b, etc) - width relative to content
- inline-block - like inline, but respect width and height of each element
- none - hide from DOM, without delete.
- table - Like a element
- flex - to help with center elements and align. by default align left to right. (1D)
-
- display flex delete magin collapsing
-
flex(0 to 1) to indicate size to use (like width 100%)
-
flex-direction(row (default) / column / row-inverse / column-inverse)
-
flex-wrap(nowrap (default) / wrap) wrapp in view-width
-
justify-content(flex-start / center /space-around (the same space at each sides of element - without margin collapsing) / space-between / space-evenly (the same space at each side with margin collapsing - overlaping) / flex-end ) Main axis (X by default - in row)
-
align-items(flex-start / center / stretch / self-end / self-start / flex-end )
-
- Childs items:
-
-
flex-shrink(0 (if canot be shrinked - 1 can be shrinked (encogido))
-
-
-
flex-grow
-
-
-
align-self(flex-end / flex-start)
-
- grid - after flexbox, to make layouts. (2D)
- on <style> tag
- Importing from usual file with other styles
- Importing from file with conditional
- html
-
- head
-
-
- meta
-
-
-
- link
-
-
- body
-
-
- h1
-
-
-
-
- Hola
-
-
-
-
- section
-
-
-
-
- article
-
-
-
-
- footer
-
- body [background: yellow]
-
- h1 [font-size: 2em]
-
-
- Hola
-
-
- img [width: 50px]
- Bytes (36, 26, 67)
- Characters (...)
- Tokens (start tag: html - start tag: head - end tag: head)
- Nodes (html, head, meta, hola)
- DOM
- Process html and build DOM
- Process css and build CSSOM
- DOM + CSSOM = render tree
- make the design in render three
- Print node in screen
- Predictable
- Reusable
- Maintainable
- Scalable
- base (base components in all app)
- layout (elemments with only 1 use)
- module (used more 1 time)
- state (actions, or changes of state, which change style with user interaction)
- theme (themes)
- Settings
- Tools
- Generics
- Elements
- Objects
- Components
- Utils
-
Atoms (like buttons)
-
Molecules (group of buttons)
-
Organisms
-
Templates
-
Pages
- Create
- Read
- Update
- Delete
- Mostly Fluid - (Mayormente fluido)
- Column Drop - (Caida de columnas)
- Layout Shifter (Palanca de cambios de diseño)
- Tiny Tweaks - (Pequeños ajustes)
- Off Canvas - (Fuera del lienzo)
-
ViewPort
-
Portrait: Vertical
-
Landscape: Horizontal
-
Mobile First
-
Desktop First
- more devises
- show mediaqueries breakpoints in bars of color:
-
- Blue (max-width)
-
- Orange (min-width)
-
- Green (merge of max-width and min-width)
- Nulo (null) es un objeto, pero no es una instancia de Object
- Sin definir (undefined)
-
- Null and Undefined usually are called empty values or placeholder values. Because are reserved values, for future value. And too JS can use this values like error. Not is recommended use undefined, because he is reserved by javascript.
- Lógicos (boolean)
- Numérico (number)
- Cadena (string)
- Símbolo (symbol)
- Números enteros, muy grandes (bigint) - proximamente
- suma ( + )
- resta ( - )
- multiplicación ( * )
- división ( / )
- modulo - residuo ( % )
- suma especial ( += )
- sumar uno ( ++ )
- Los meses inician en 0.
- GET: solicitar datos o algun recurso.
- HEAD: traer headers (como una peticion GET pero sin contenidos). Es util cuando vamos a utilizar APIs, para comprobar si lo que vamos a enviar esta correcto y puede ser procesado.
- POST: enviar datos a un recurso para la creación.
- PUT: actualizar por completo un recurso.
- PATCH: actualizar parcialmente un recurso.
- DELETE: eliminar un recurso.
- 1xx: Indican que la peticion fue recibida y el servidor sigue trabajando en el proceso, es decir, no fue exitosa ni fue errónea, sino que esta siendo procesada aun.
- 2xx: Indican que la peticion fue recibida y procesada correctamente.
- 3xx: Indican que hay que tomar acciones adicionales para completar la solicitud. Por lo general estos codigos indican redireccion. Generalmente en los APIs no se usan redirecciones porque no contienen estados, es decir, toda la informacion esta contenida en una solicitud, no se guarda un estado en el servidor con una sesion por ejemplo.
- 4xx: Indican errores del lado del cliente, por ejemplo: se hizo mal la solicitud, faltan datos, headers o cualquier otro error que pueda ocurrir.
- 5xx: Indican errores del servidor. Suelen aparecer cuando existe un fallo en la ejecución en el servidor.
- Recurso: todo dentro de una API RESTful debe ser un recurso. (ej un modelo)
- URI: los recursos en REST siempre se manipulan a partir de la URI, identificadores universales de recursos. Acción: todas las peticiones a tu API RESTful deben estar asociadas a uno de los verbos de HTTP: GET para obtener un recurso, POST para escribir un recurso, PUT para modificar un recurso y DELETE para borrarlo.
- url (a diferencia de la uri, incluye el dominio y protocolo)
- verbo http (get, put, patch, delete, post, head)
- Es poco segura: las credenciales se envían en cada request anteponiendo el usuario y contraseña en la url, por ejemplo: user:password@mail.com.
- Es ineficiente: la autenticación se debe realizar en cada request.
- Función Hash: Difícil de romper, que sea conocida por el cliente y servidor.
- Clave secreta: Solamente la pueden saber el cliente y el servidor, será utilizada para corroborar el hash.
- UID: El id del usuario, será utilizado dentro de la función hash junto con la clave secreta y un timestamp. Es mucho más segura que la autenticación vía HTTP, por ello la información que se envía a través de este método no es muy sensible.
- Uno se va a encargar específicamente de la autenticación.
- El otro se va a encargar de desplegar los recursos de la API.
- Nuestro usuario hace una petición al servidor de autenticación para pedir un token.
- El servidor le devuelve el token.
- El usuario hace una petición al servidor para pedir recursos de la API.
- El servidor con los recursos hace una petición al servidor de autenticación para verificar que el token sea válido.
- Una vez verificado el token, el servidor le devuelve los recursos al cliente.
- Courses API Collection
-
- Courses (with description in markdown)
-
-
- List Courses (request)
-
-
- Authentications (request)
- Eliminar bloqueos de visualizacion
- Comprimir y mimificar hojas de estilo
- Critical CSS o Critical path CSS click
-
- Se basa en dividir la carga del CSS en dos etapas, la parte superior (primera que ve el usuario) y el resto del sitio. Con web scraping podemos generarlo.
- Optimizacion de imágenes (resizeimg, tinypng, jpg -> to png)
-
- En teoría png y gif, son formatos que no pierden calidad en la compresión, jpg se puede comprimir más pero perdiendo calidad.
-
- webp es un formato nuevo de imagen, que pesa muy poco pero sólo es soportado por chrome
- Unit testing
- Integration testing
- Acceptance testing
- Mutant testing
- Black box testing
- Property-based testing
- Stress testing
- Compatibility testing
- Security testing
- Load testing
when have text + images can use vertical-align: middle (middle, top, bottom) to center
can center vertical elements too using line-height: sizeOfHeight of element
CSS interpret any element in browser like a BOX, with that respective properties, forms, sizes, colors. Grid Layout will allow to work with 'Grid' system, wich we allow order elements most efficient.
Is the element that will have the display: grid propertie, for all its child elements
It is a hierarchical system, they would be the elements that inherit the Grid properties of their parent element. All elements direct inside a Container. Can have sub-items but these work differently
Like the Grid display is a grid system, the Grid Line in this case would be that vertical or horizontal dividing line.

Unlike Grid Line, those adjacent spaces between lines (rows and columns) would be somewhat similar to a race track.
They would be the cells of a track, that is, the adjacent spaces between 2 rows and 2 columns, that is, something like an intersection between rows and columns.

It is similar to a Grid Track, but it can be expanded, forming figures of squares or rectangles. It is the sum of n grid cells.
<style>
    .container {
        display: grid;

        /* Explicit grid */
        grid-template-rows: 50%;
        grid-template-columns: 1fr 10% 100px;
        /* rows / columns */ /*This is a explicit grid, because you write sizes*/
        grid-template: 50% / 1fr 10% 100px;
        /*This is a implicit grid, are other items in your grid wich you dont define sizes(template) get size of content*/

        /* can add name for each line */
        grid-template: [firstLine] 50% [lastLine] / [start] 1fr [line2] 10% [line3] 100px [end];

        grid-column-gap: 30px;
        grid-row-gap: 30px;
        grid-gap: 50px 50px;

        /*
          For implicit grid size (rows / columns)

          grid-auto-flow: row; (row(default)/column / dense / row dense / column dense)
          grid-auto-rows: 200px 50px 300px 1fr;
          grid-auto-columns: 1fr

          Will repite for each extra grid (not declarated on template) this sizes.
          If dont specify grid-template (rows or columns) all will be implicits
        */

        /*
        To center Center grid inside container (start end center stretch(default)) stretch will stretch the content size to all avaiable space,
        the others only will use space of content
        */
        justify-items: end; /* Horizontal */
        align-items: end; /* Vertical */

        /*
        To center complete grid area (columns and rows) separating elements (start end center stretch space-around space-between space-evenlty)
        */
        justify-content: center;
        align-content: center;
    }

    .item {
        background: lightgray;
        padding: 10px;
        border: 1px solid red;
    }

    .item:nth-of-type(4) {
        background-color: grey;
        /*
        In the future, will go inherit grid properties from father
        are part for grid specification 2:
        display: subgrid;
        display: inline-grid;
        */
        display: grid;
        /* grid-template: 50% / repeat(4, 1fr); */
        grid-template: 50% / repeat(4, minmax(200px, 1fr));

        grid-template: [firstLine] 50% [lastLine] / [start] 1fr [line2] 1fr [line3] 1fr [line4] 1fr [end];
    }

    .item:nth-of-type(5) {
        background: grey;
        /* line for start and line for end */

        /* 4 forms to make the same */
        grid-column-start: 2;
        grid-column-end: 4;

        grid-column: 2 / 4;

        grid-column: 2 / span 2; /* span is used to specify number of columns to use */

        grid-column: 2 / -1;  /* -1 is trick for the final line */

        grid-column: line2 / end; /* using names to each line */

        /* to align specific element (grid items), the same properties of align father */
        align-self: center;
        justify-self: center;
    }

    .item:nth-of-type(6) {
        grid-row: 3 / span 2;
        /*
        if want use grid-column and grid-row at same time, can replace with grid-area
        */
    }
</style><section class="container">
<!-- .item{content #$}*12 -->
<div class="item">content #1</div>
<div class="item">content #2</div>
<div class="item">content #3</div>
<div class="item">
<div class="item">subitem #1</div>
<div class="item">subitem #2</div>
<div class="item">subitem #3</div>
<div class="item">subitem #4</div>
<div class="item">subitem #5</div>
</div>
<div class="item">content #5</div>
<div class="item">content #6</div>
<div class="item">content #7</div>
<div class="item">content #8</div>
<div class="item">content #9</div>
<div class="item">content #10</div>
<div class="item">content #11</div>
<div class="item">content #12</div>
</section>.container {
display: grid;
grid-template: 100px 1fr 150px / 200px 1fr;
grid-gap: 50px 50px;
height: 100vh;
/* not needed ident, but is for read easily */
grid-template-areas: "header header"
"left content"
"footer footer";
}
.header {
grid-area: header;
}
.left {
grid-area: left;
}
.content {
grid-area: content;
}
.footer {
grid-area: footer;
}
.item {
background: lightgray;
padding: 10px;
border: 1px solid red;
}<section class="container">
<div class="item header">header</div>
<div class="item left">left</div>
<div class="item content">content</div>
<div class="item footer">footer</div>
</section><!-- to indicate the viewport size -->
<!-- content have: width, initial-scale, maximum-scale (all sizes are in pixels or variables like device-width) -->
<meta name="viewport" content="width=320">
<!-- To indicate the width of device -->
<meta name="viewport" content="width=device-width">
<!-- initial zoom (0 to 1) 1 is 100% of device -->
<meta name="viewport" content="width=device-width, initial-scale=1">Module of CSS3 (since 2010), to adapt content (design) to each screen size (devices). Before CSS3 exist mediaqueries but not for responsive. In the past used subdomains with m.domain with other website created
<link rel=“stylesheet” href="./style.css" media=“screen and (max-width:768px)”>/*
media type is type of element to be changed (screen, print)
can have 1 o more conditions
@media media type and (condition) {
}
*/
@media screen and (condition) {
}
@media (max-width: 600px) {
/* will active this section below 600px */
.class {
/* changes */
color: red;
}
}
@media only screen and (max-width: 600px) and (min-width: 480px) {
.class {
/* changes */
color: red;
}
}@media screen and (min-width: 320px) {
}
@media screen and (min-width: 480px) {
}
@media screen and (min-width: 768px) {
}
@media screen and (min-width: 1024px) {
}@media screen and (max-width: 1024px) {
}
@media screen and (min-width: 768px) {
}
@media screen and (min-width: 480px) {
}
@media screen and (min-width: 320px) {
}Tree, with the merge of DOM and CSSOM
Document Object Model, loaded in browser and represented like a nodes tree.
CSS Object Model
## Browser process to read
## Browser process to show
Divide content from style, to be more reusable
.header {
  /* width: 100% */
}
.footer {
  /* width: 100% */
}

/* Create global class to repeated properties  */
.full-width {
  width: 100%
}Divide blocks elements and modifiers of code
.block__element--modifier {
}
.header {
}
.header__button--red {
}
.header__button--yellow {

}Scalable and Modular Arquitecture CSS (base + layout + module + state + theme) = SMACSS
inverted triangle
Based on chemical
To extend css functionalities, to have vars, functions, mixins, reuse code, and be more flexible in the develop. Compile to css. CSS With steroids
// vars
$var: red;

// nesting
.container {
  p {

  }
  &--medium {

  }

  // inheritance

  .flex {
    display: flex;
    align-items: center;
  }
  .header {
    @extend .flex;
  }

  // mixing // these can receive parameters

  @mixin flex {
    display: flex;
    align-items: center;
  }
  .header {
    @include flex;
  }
}
// The 3 we just saw and ...
// Declarations
function add (x, y) {
  return x + y
}
// Expressions
var add = function (x, y) {
  return x + y
}Names: Mocha (from Netscape) -> LiveScript -> Javascript
Principles more info
can add:
iconmoon fontawesome
window.matchMedia('the same at mediaqueries')
window.matchMedia('screen and (min-width: 480px)') // in .media will return boolean about condition true or false
console.log(window.matchMedia('screen and (min-width: 480px)'))
const phone = window.matchMedia('screen and (min-width: 480px)')

// can add listener
phone.addListener(validation) // will stay listen to call validation
function validation(event) {
  console.log(event.matches) // will print if condition is met or no
  if (event.matches) {
    item.addEventListener('click', functionHandled) // add event listener
  } else {
    item.removeEventListener('click', functionHandled)
  }
}
validation(phone) // need add event almost 1 time, because if dont add will make error on else (removeEvent) const item = document.querySelector('.menu')
// add class to element
item.classList.add('is-active')
// or
item.classList.toggle('is-active') item.addEventListener('click', functionHandled)
function functionHandled(){
// function called when item has been clicked
}inspect -> 3 points right -> more tools-> remote devices or go to chrome://inspect/#devices
Javascript tiene seis tipos primitivos:
Todos los demás tipos son objetos (Object): Array, Date, Promise, etc.
Con primitivos, si asignamos una variable a otra, se crea una copia del valor.
var banano = "banano amarillo"
var fruta = banano; // var fruta = "banano amarillo"

banano = "banano verde"
console.log(banano) // banano verde
console.log(fruta) // banano amarilloLos strings son cadenas de texto. se declaran con comillas simples, dobles o invertidas (TemplateString). Ver métodos
var nombre = 'Carlos', apellido = 'Jaramillo'.toLowerCase();
var a, b;

var nConcated = nombre.toUpperCase() + " " + apellido;

// TemplateString o TemplateLiterals.
var nConcat= `${nombre.toUpperCase()} ${apellido}`;Se declara similar a los strings, pero sin comillas. Ver métodos
Los operadores matemáticos más comunes son:
JavaScript no es muy preciso con decimales. Porque destina una cantidad de bytes en la ram, para asignarle un decimal.
var precio = 200.3;
var precioFixed = precio * 100 * 3 / 100; // Solo funciona con 1 decimal.
var priceFixed = Math.round(precio * 100 * 3) / 100; // es un poco más exacta.

var totalStr = priceFixed.toFixed(3); // Convertir a string y cantidad de decimales.
var totalNum = parseFloat(totalStr); // Convertir a número float.Es un objeto (Date) de JavaScript que se usa para almacenar fechas, se pueden realizar operaciones de suma y resta. Pero su resultado se obtiene en milisegundos. Ver métodos
function diasEntreFechas(fecha1, fecha2) {
    // 1000 milisegundos, 60 segundos, 60 minutos, 24 horas
    const UN_DIA = 1000 * 60 * 60 * 24;
    const DIFERENCIA = Math.abs(fecha1 - fecha2);

    return Math.floor(DIFERENCIA / UN_DIA);
}

const HOY = new Date();
// en javascript los meses inician en cero
const NACIMIENTO = new Date(1996, 8, 4);No es igual el objeto al primitivo, Si se omite el valor o es 0, -0, null, false, NaN, undefined, o la cadena vacía (""), el objeto tiene un valor inicial de false
x = new Boolean(false);
if (x) // es verdadero
x = false;
if (x) // es falsoUn protocolo especifica reglas en la comunicacion entre dos entes, en este caso entre dos computudoras.
HTTP son las siglas de Hypertext Transfer Protocol o protocolo de transferencia de hipertexto, es el conjunto de reglas en las que se van a comunicar dos entidades, en este caso dos computadoras.
Así como nosotros nos comunicamos en español gracias a poder mover las cuerdas vocales, producir y escuchar sonidos, las computadoras se pueden comunicar a través de HTTP gracias al modelo de TCP/IP.
Otra de las cosas que especifica el protocolo HTTP son los codigo de estado (status codes). Sirven para describir el estado de la peticion hecha al servidor.
REST es un acrónimo de Representational State Transfer o transferencia de estado representacional, le agrega una capa muy delgada de complejidad y abstracción a HTTP. Mientras que HTTP es transferencia de archivos, REST se basa en la transferencia de recursos.
Una API RESTful es una API diseñada con los conceptos de REST:
Las interacciones son simples. Los recursos de tu hardware son limitados.
La autenticación vía HTTP tiene dos problemas:
Para esta autenticación necesitamos 3 elementos:
Está forma es la más compleja de todas, pero también es la forma más segura utilizada para información muy sensible. El servidor al que le van a hacer las consultas se va a partir en dos:
El flujo de la petición es la siguiente:
request (pre-request script) -> Request -> Response -> request (test script)
// guardamos una variable antes de hacer una petición
pm.environment.set("today", new Date().toISOString());// guardamos una variable despues de hacer una petición (conn el response)
var json = JSON.parse(responseBody);
postman.setEnvironmentVariable("token", `Token ${json.token}`)
// validar sólo esto estallará cuando falle, entonces por eso creamos validaciones:
// validaciones
pm.test("Status code is 200", function() {
pm.response.to.have.status(200);
// pm.expect(pm.response.code).to.be.oneOf([200,201]);
});
pm.test("Response should be JSON", function() {
pm.response.to.be.json;
})
pm.test("Response should contains token", function() {
pm.response.to.have.jsonBody("token");
pm.environment.unset("token"); // clear variable
var json = JSON.parse(responseBody);
postman.setEnvironmentVariable("token", `Token ${json.token}`)
})Un entorno en Postman hace referencia a un contexto o a un grupo de valores que se pueden utilizar a través de endpoint. Como una variable.
También podemos tener variables globales, que funcionen transversales a todos los entornos y colecciones.
Se abren dandole click al ojito. Y se usan de esta manera: {{nombre_variable}}
Una colección es como un folder, donde declaramos los request que pertenecen a este folder.
Si organizamos bien todo esto, postman nos ayuda a crear una documentación.
Luego de hacer una petición podemos darle save response. Para guardar un response como ejemplo.
Es la parte visible de la pagina que se carga inicialmente, es decir, cuando entramos a la webpage.
Un bloqueo de visualización se puede dar cuando ponemos a cargar inicialmente en el Above in the fold (pagina visible cargada inicialmente) un archivo relativamente pesado. Para ello, podemos mover aquellos archivos de carga ( fuentes, javascript, estilos ) hacia la etiqueta footer como sugerencia. También podemos agregar atributos como el async al tag de carga de scripts.
Densidad de píxeles = Es la cantidad de pixeles que hay en un espacio determinado y generalmente es medido en píxeles por pulgada o PPI (Pixels per Inch).
Retina display es una marca comercial de Apple pero hace referencia a la cantidad justa de píxeles que hacen falta en un dispositivo para que a la distancia normal de uso no se noten los píxeles en la pantalla, por que la distancia a la que estemos es lo que nos va a dar esa sensación de HD. Por esta diferencia de distancia es que los televisores pueden tener la misma cantidad de pixeles en un tamaño mayor de pantalla sin perder la sensación de que estamos viendo una imagen nítida y por esto mismo es que los teléfonos necesitan tener una resolución tan alta en dispositivos tan pequeños.
Entonces algunas imagenes cuando las ves en una pantalla con el doble de densidad de pixeles, como un celular se pixelean, solucionaremos esto sencillamente con el atributo srcset y redimensionando las imágenes para que tengan el doble de tamaño. También podemos comprimir esta imagen alternativa. srcset="images/hero.png, images/config.png 2x" Recibe multiples imagenes, o si no encuentra como fallback tomará el src normal.