FT2232H D2XX for OSX and SSD1306 controller via I2C MPSSE FT232H
Description:
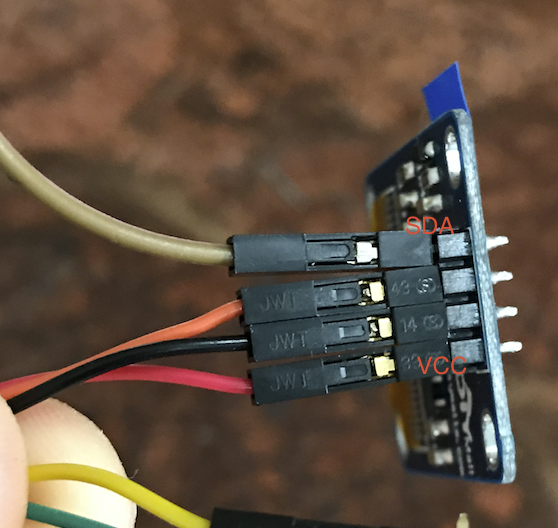
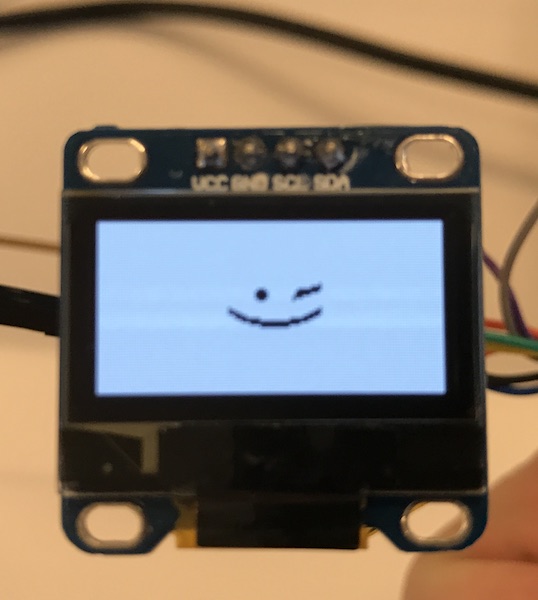
Connect OLED with SSD1306 Controller to my MacBook Pro with MPSSE cable using FTDI D2xx driver
Background:
I couldn't find an example using the D2XX driver on OSX to connect to a Graphic OLED with the SSD1306 controller via I2C. I roughly combined the adafruit graphics library with the code in the USB to I2C example from FTDI to fill the gap.
Defaults to the FT0EARPI Cable
Runs on Mac OSX Sierra
Based on Adafruit graphics library https://github.com/adafruit/Adafruit-GFX-Library
USB to I2C Example using the FT232H and FT201X devices http://www.ftdichip.com/Support/Documents/AppNotes/AN_255_USB%20to%20I2C%20Example%20using%20the%20FT232H%20and%20FT201X%20devices.pdf
Link to USB 3.3v cable https://www.amazon.com/gp/product/B00HKK4SCO/ref=oh_aui_detailpage_o06_s00?ie=UTF8&psc=1
Command line options
./oled -l cycle once through the images in the images folder
./oled 5 -i image.bmp The argument supplied is timeout 5 image image.bmp
./oled defaults are 3 second delay filename image.bmp
./oled -t 100 100ms timeout between frames
./oled -d 1000 1s delay before turning off last image
./oled -D FTYPX46A -l Use the FTYPX46A 5V Cable
./oled -D Use the FT0EARPI 3.3v Cable — This is the default cable
Try not to keep the same image on the screen for too long, you will burn up the OLED.
—————————————————————————————————————————————
Instructions for image conversion of png images output by AfterEffects
for i in *.png; do convert "$i" -depth 1 -colors 2 -rotate 180 -flip output/"$i".bmp; done
or
magick mogrify -format bmp -depth 1 -colors 2 -rotate 180 -flip *.png
—————————————————————————————————————————————
Notes / Addendum
Convert photoshop layers to BMP compatible with device.
convert ‘filename’ -background black -flatten -gravity center -extent 128x64 -depth 1 -colors 2 -rotate 180 -flip ‘filename’.bmp
for i in *.png; do convert "$i" -depth 1 -colors 2 -rotate 180 -flip -background black -flatten -gravity center -extent 128x64 "$i".bmp; done
resize from photoshop mogrify -format bmp -set colorspace gray -depth 1 -colors 2 -rotate 180 -flip -resize 64x64 -background black -flatten -gravity center -extent 128x64 -type palette *.png
mogrify -format bmp -resize 64x64 -background black -flatten -gravity center -extent 128x64 -colorspace Gray +matte -depth 1 -colors 2 -type palette *.png
//sequence to get in the right format mogrify -format bmp -resize 64x64 -background black -flatten -gravity center -extent 128x64 *.png
mogrify -colorspace Gray +matte -depth 1 -colors 2 -type palette *.bmp
mogrify -flip *.bmp
//Clip, Move down, repaint, set color depth mogrify -format bmp -background black -flatten -gravity center -extent 200x150 *.png
mogrify -resize 64x48 -background black -flatten -gravity South -extent 128x64 *.bmp
mogrify -flip -colorspace Gray +matte -depth 1 -colors 2 -type palette *.bmp