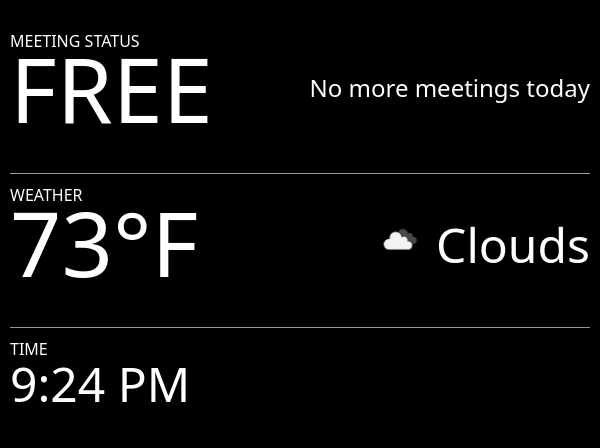
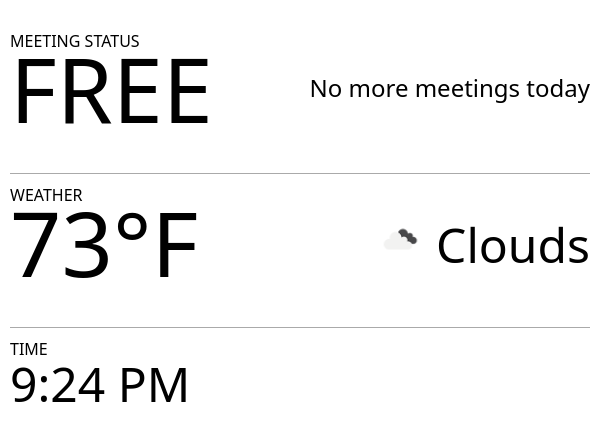
A WFH-oriented eInk dashboard for your Raspberry Pi. I wanted a low-power way for my wife to quickly check if I'm currently in a meeting, so I hacked this together.
InkyDash should start when the Raspberry Pi boots. You can alter the contents of config/inkydash.toml to personalize your dashboard, disable or reorder widgets, etc.
This repository contains the backend API code and everything an end-user needs to set up InkyDash on their Pi. For the Inky HAT frontend's source code, see clairesrc/inkydash-frontend.
- Raspberry Pi: tested on a 4B+ model running Raspbian.
- Inky screen: I used the Impression variant, but any of them should work.
- GPIO enabled
Make sure your Pi is online, has Docker and docker-compose set up, and has SSH enabled.
On your PC, download & run the setup script:
curl https://raw.githubusercontent.com/clairesrc/inkydash/main/setup.sh | sh
Clone and enter this repository:
$ git clone https://github.com/clairesrc/inkydash && cd inkydash
Create an .env file and set the following values:
TZ=America/Chicago
THEME=default
Create a Google Developer project and create desktop application credentials through the Google console.
Save the credentials Oauth JSON file as ./config/inkydash.apps.googleusercontent.com.json.
Complete the Oauth flow from your PC:
$ pip install -r requirements.txt
$ ./setup.py
Click the link in terminal to authenticate the Google account you want to give calendar access to. Once this completes, InkyDash should be ready to get your calendar data without needing to re-complete the flow.
Get an API secret key from Openweathermap.
Paste the API secret in .env:
OPENWEATHERMAP_WEATHER_API_SECRET=secret goes here
Copy the entire repository to your Raspberry Pi over SSH using scp:
$ scp -rv . pi@raspberrypi:~/inkydash
Set up Docker and docker-compose.
cd to the directory you just copied over from your PC, then run:
$ docker-compose up -d
InkyDash supports CSS-based theming. Currently it ships with 2 themes, default and light.
To apply a new theme, set INKYDASH_THEME to the desired value in .env and run docker-compose up -d on your Raspberry Pi.
| default | light |
|---|---|
 |
 |
These are just basic examples -- given full CSS support and flexible markup, you can change the layout, fonts, colors (dithering support is built-in for 7-color displays), or add graphics as desired. To contribute a new theme check out the frontend repo.
Add your module file to modules/ and it will be auto-loaded at startup. Remember to also add it to the modules array in config/inkydash.toml.
All modules should define MODULE_NAME, REFRESH_INTERVAL, LABEL, SIZE and PARAMS at the top level of the file, and the module class should be named module so that it can be properly imported.
| Variable name | Variable description |
|---|---|
| MODULE_NAME | Module filename e.g. freebusy |
| REFRESH_INTERVAL | Module state update frequency in minutes |
| LABEL | Module widget label for display on frontend e.g. MEETING STATUS |
| SIZE | Module font size for display on frontend e.g. large, medium, small |
| PARAMS | List of environment variables to pass down to module e.g. ["GOOGLE_TOKEN_FILENAME"] |
Module "Hello world" boilerplate:
from inkymodule import InkyModule

MODULE_NAME = "hello"
REFRESH_INTERVAL = 1
LABEL = "HELLO WORLD"
SIZE = "large"

class module(InkyModule):
    def _hydrate(self):
        return "Hello, world!"
_hydrate() is run once at startup, then run at the interval set in REFRESH_INTERVAL to set the data that will be passed down to the frontend. When the module is rendered in between intervals, the previous value is loaded from memory. The data type returned must be a number or a string.
You can add module parameters (specified as a list, e.g. PARAMS=["ENV_VARIABLE_NAME"]) for passing down individual environment variables to the module. Use self._get_params()["ENV_VARIABLE_NAME"] to access the value in your module code.
You can specify a _setup() method that will be run once, before the first render, on app initialization. This method has full access to module config and parameters.
Modules can accept config values that are set in inkydash.toml. You can then use self._get_config()["key"] to access the value in your module code. You can set the DEFAULT_CONFIG dictionary to specify default config values in the form {"key": "default_value"}, which makes them optional.
To specify multiple columns for a single widget, remove the SIZE variable, and set the WIDGETS variable. Each item should set a size and name property:
WIDGETS = [
    {"name": "widget1", "size": "large"},
    {"name": "widget2", "size": "medium"},
]
Then adjust your _hydrate() function to map return values to their widgets:
def _hydrate(self):
    return {"widget1": "widget 1 content", "widget2": "widget 2 content"}