
Customer Journey Master is a Web Management Application written by Python's Django web framework, targeting small and medium businesses, assisting them in collecting and managing customer journey data from multiple sources and channels in one place, analyzing and exploiting the journey based on Process Mining and Machine Learning techniques.
- Create data sources (dataset) for analyzing customer journey data
- Import customer journey data into data sources by uploading CSV Files (limit 15 MB for each upload file)
- Import customer journey data into data sources by pre-defined RestfulAPI endpoint
- Visualize the entire customer journey based on Process Mining Algorithms, including: Alpha Miner, Heuristic Miner and Inductive Miner
- Cluster customer journeys into similar groups based on Clustering Algorithms, including: KMeans and KModes
- Find decision points that influence customers' choices through the entire process based on Decision Tree Algorithm
- Store analytical results and review
- View daily metrics reports by charts
-
Python
- Django is a Python web framework, so, we have to download python on the machine, so that we can run the server. We recommend downloading Python version from 3.x.x .

-
Database (MySQL)
- The system needs a database management system to store customer data, so it needs to install a DBMS. The source code of this system, currently supports MySQL, so we recommend you to install MySQL. However, you can still load other DBMS systems (PostgreSQL, SQL Server, ...), and then need to reconfigure the database engine in the project's settings.py file, to enable the connection between backend server and database server.

- Once installed, you need to create a database, name it and save the database account information: hostname, port, username, password and database name.
-
Pip
- A package manager for Python.

-
Virtual environment
- A tool to create isolated Python environments. A Python environment such that the interpreter, packages, libraries, and scripts installed into it are isolated from those installed in the global environment of the system. It also allows installing packages without administrator privileges. Django package, the process mining library will be stored in the directory of the virtual environment.

-
Clone source code
-
Create an empty folder for project

-
Clone source code into created folder, following the link: https://github.com/cnam0203/CJX.git
-
-
Virtual environment
-
Create a virtual environment folder in the root of folder:

-
Activate virtual environment and then installing Python packages for project:


-
-
Configuration
-
First, Go the the cjx_project folder.
-
Create a database for this project.
-
Configure information relating to database server (database name, database user, ...), in 'cjx_project/settings.py' file:


-
Makemigrations pre-defined tables in apps journey, graph_model, company_items into database: python manage.py makemigrations journey, python manage.py makemigrations graph_model, python manage.py makemigrations company_items
-
Migrate pre-defined tables (admin, permission, session, etc.) into database

-
-
Start server
-
Now, we can run starting system

-
By default, the server run on port 8000, we can change the port with the following command

-
Go to the link: http://127.0.0.1:8000/ to check whether server runs. If OK, it will display an Authentication screen

-
In order to run analysis in system, it requires that customer journey we import must have a pre-defined format. Each customer data is an event/an interraction between customer and company that can be tracked. Neccessary fields for an interraction are described in below table:
| Fieldname | Describe |
|---|---|
| Customer ID | unique ID for each customer |
| Action type | customer activity (ask for information, technical support, view product info, view product list, ...) |
| Time | moment when customer executed the touchpoint |
| Channel type | where customer executed the touchpoint (website, mobile app, call center, offline store) |
| Device category | name of device category (smartphone, tablet, laptop,...) |
| Device OS | name of operating system (Windows, MacOS, Ubuntu,...) |
| Device Browser | name of browser (chrome, safari, edge,...) |
| Geo-country | geo-network data about country tracked from device when customer executed the touchpoint |
| Geo-city | geo-network data about city tracked from device when customer executed the touchpoint |
| Traffic source | which source triggers customer touchpoint |
| Store | physical store name where the customer directly interacts with the service of the company |
| Employee | employee name where the customer directly interacts with the service of the company |
| Webpage hostname | hostname of website which customer executed the touchpoint |
| Webpage url | URL of website which customer executed the touchpoint |
| Webpage title | title of page on website which customer executed the touchpoint |
| App name | mobile app name that customer executed the touchpoint |
| App screen title | title of screen on mobile app that customer executed the touchpoint |
| Interract item type | name of interact item (product, transaction, video, ...) |
| Interract item url | URL of item that customer interacted through the touchpoint (video_url, ...) |
| Interract item content | content of item that customer interacted through the touchpoint (email content, ...) |
| Experience emotion | name of experience emotion (happy, angry, satisfied, ...) |
| Experience score | score that customer evaluated for the touchpoint experience |
A customer data does not need to have all the fields listed above. However, required fields include: customer_id, time and action_type. The remaining fields can be used to analyze customer bahavior or customer habits.
Admin is the first account that needs to be created after installing the system. Admin can create staff accounts (analyst, company's marketer). Besides, the admin also has the right to create data sources (datasets) containing customer data. In addition, the admin can authorize staff accounts or other systems to import data into these data sources or run analysis based on these imported data.
-
Create admin account
-
Run the following command and enter information account

-
Check admin account is created, browse the link: http://127.0.0.1:8000/admin

-
Enter account just created. Then we can go to the admin site:

-
-
Add staff account
-
Create staff accounts, enable them to connect to analysis website

-
-
Create data source
-
A data source is the storage that we can import customer data into. Admin can create multiple data sources and set data source private or public. If data source is public, all staff accounts can see data.

-
-
Grant permission for data source
-
If a data source is set public, all staff accounts can see all customer data in it. However, to enable staff accounts perform analysis functions with the data source, admin need to grant permission for staff account.

-
-
Create API Token
-
To enable other systems import tracking customer data into data source, admin can create an API token and send it to other systems. When the others systems post customer data into data source through Restful API endpoint, they need to add API token in request header.

-
-
Create data source
- Just like admin accounts, staff accounts can also create data sources. However, these data sources are private, which means that only staff creates that data source and runs analysis on that data source.
-
Create matching file
-
After creating the data source, the staff account can import customer data into the data source. Create mapping file is a function that allows the user to create a file, this file has the function of matching the data structure of the data in the csv file with the data structure of the table in the database. Staff can reuse this matching file multiple times.


-
-
Upload CSV File
-
Then, the staff can upload data to the system through the customer data contained in the csv file.
-
Staff match data structure and choose data source.

-
-
Remove data
-
All data that staff import into the system is logged. Staff can review log history and delete imported data based on stored information.

-
-
Visualize Process Graph
-
Visualize process graph is an analysis function that helps convert customer journey data into a process graph based on 3 main process discovery algorithms: Alpha miner, Heuristic miner and Inductive miner. The process graph is capable of depicting the entire customer journey. Staff can choose algorithm, time of customer journey data and data source.


-
-
Trace Clustering
- Trace clustering is the function of clustering similar customer journeys into groups. It allows to simplify the process graph generated from the "Visualize process graph" step above. Staff can know which of the most common customer journeys are taking place, thereby recommending appropriate business strategies.
- We allow staff to choose from two clustering algorithms: K-Means and K-Modes and two preprocessing methods: Bag-of-activities and Sequence-vector.
-
Decision Mining
-
Decision mining is a function that helps staff find decision points that influence customer choices in their journey. These decision points can be customer habits like: device, channel, etc. We use this decision tree algorithm to find the decision points.

-
-
Review analytical history
-
All results, algorithms, data sources, and time taken by staff to run the analysis are saved in the database.

-
-
View daily metrics report
-
Staff can view charts of customer volume, daily customer interaction based on attributes like device, action, channel from data sources.

-
-
Read guideline
-
For new staffs, they can read system guideline and follow instructions to step-by-step perform functions.

-
-
Import data by Restful API endpoint
-
To help automatically import customer journey data into data sources, the system allows customer systems to send tracking customer journey data through Restful API endpoints. These requests require an API Token that the admin has created, to enter the request "header", the request "method" is "POST", and the data needs to be in the format of customer data as in the table above, put in in the request "body".


-
Response results include status code and message.
Successful request:

Failed request with no auth:
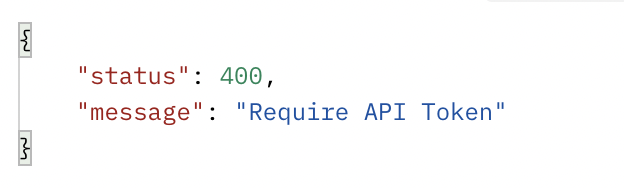
Failed request with invalid API token:

Failed request with invalid API token:

-
-
Amazon Web Service
-
Configuration
- Project
- Gunicorn
- Nginx