2 Mic Development Kit User Guide
This guide provides step-by-step instructions for setting up the AudioSmart® 2-Mic Development Kit for Amazon AVS with a Raspberry Pi 3 (RPi3).
When complete, you'll have a fully functioning Amazon AVS prototype that uses the AudioSmart® 2-Mic Development Kit for Amazon AVS as an audio front end.
Before you get started, let's review what you'll need:
- AudioSmart® 2-Mic Development Kit for Amazon AVS - Buy
- Raspberry Pi 3 - Buy on Amazon - RPi3
- Micro-USB power cable for RPi3.
- Micro SD Card (Minimum 8 GB, Recommended 16 GB) - You will need Raspbian Stretch with Desktop, which you can download and install on your SD card (follow instructions here).
- External Speaker with 3.5mm audio cable
- A USB Keyboard & Mouse, and an external HDMI Monitor to connect to the RPi3.
- Internet connection (LAN or WLAN)
Part A. Hardware Setup
- Step 1: Establishing hardware connections between the EVK and RPi3
Part B. Software Setup
- Step 1: Download and write the Raspbian Stretch OS to an SD card
- Step 2: Install, Configure, and build the SDK
Make the following hardware connections between the CX20921 evaluation board and the RPi3 (not provided with the kit), refer to the images below.
-
Connect the 3.5mm audio jack on the RPi3 (J7) to LINEIN on the CX20921 evaluation board (J25).
-
Connect audio jack, J3, (Line Out labeled as HP) on the CX20921 evaluation board to a powered speaker.
-
Connect the microphone module to the CX20921 evaluation board (J19). a. Spacing between the left MIC and right MIC should be set to 55mm with the preloaded configuration. Refer to Figure 4 on page 7. b. Software tool (FCP Essential) will be provided for mic distance adjustment between 30mm - 120mm
-
Connect the audio path from micro USB (J1) to USB port on RPi3.
-
Using the Cable Assembly, connect GPIO1 at pin 2.14 from CX20921 evaluation board to J8.pin13 on the RPi3, and the other wire from the Cable Assembly to Ground (GND) at pin 2.15 from the CX20921 evaluation board to J8.pin14 on RPi3.
-
Connect the power supplies for both the CX20921 evaluation board, (J10, +5V power supply included) and the RPi3 (J1). a. Switch the power switch (SW3) to turn on the CX20921 evaluation board. b. LED D6 (5VLED) will turn on when there is power on the board.
Proper speaker selection will enhance overall performance. Please refer to the External Loudspeaker Guidelines and Recommendation for Smart Speaker Applications document for additional info.


Using Win32DiskImager
- Format the SD card. This can be done by going to the ‘Computer’ folder and right clicking on the SD card. Click ‘Format…’ to display the format options. When reformatting, make sure the File system is FAT32 or FAT.

-
Download the Raspbian Stretch with Desktop OS. The zip file is located at the following link: http://downloads.raspberrypi.org/raspbian/images/raspbian-2018-11-15/
-
Unzip and write the downloaded image to the SD card using Win32DiskImager. This tool can be found at the following link: https://sourceforge.net/projects/win32diskimager/
-
Run the Win32DiskImager to write the image to the SD card.

a. Select the path to an image by clicking the subdirectory icon in the Image File field.
b. Select the device drive in the Device drop down menu to write the Raspbian OS.
c. Click Write to write the image to the SD card.
- When you get a pop-up message 'Write Successful', the Raspbian OS is ready.
-
Insert the microSD card with the Raspbian Stretch OS installed in the RPi3. Connect the HDMI monitor, keyboard, and mouse to the RPi.
-
Connect the power supplies for both the CX20921 evaluation board and the RPi3. The desktop will display on the RPi3 shortly after powered on.
-
When the desktop loads, establish a WLAN or LAN connection.
-
Open a terminal and send the following command to get the files necessary for installing the SDK.
git clone https://github.com/conexant/avs-device-sdk.git

-
Once the files are downloaded, go into the avs-device-sdk directory and run the install.sh script
cd avs-device-sdkbash install.sh

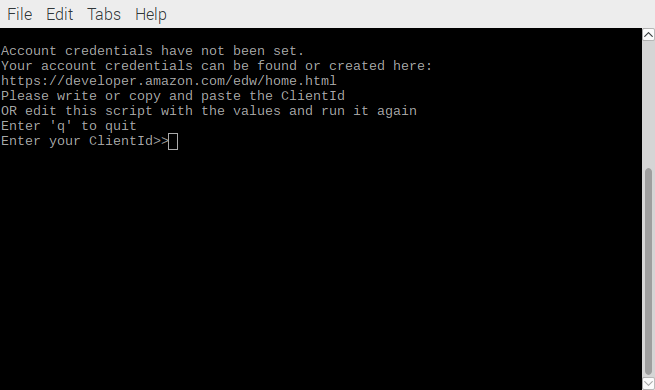
- You will need to provide your account credentials and answer several prompts. Depending on your answers to the prompts, you may need to acknowledge the Sensory license agreement. Once the Sensory license agreement is complete, the installation will take less than an hour to finish.
Note: If you haven’t already registered your device, you can do so at: https://developer.amazon.com/alexa/console/avs/home . To create a security profile, go to: https://github.com/alexa/avs-device-sdk/wiki/Create-Security-Profile for step-by-step instructions.

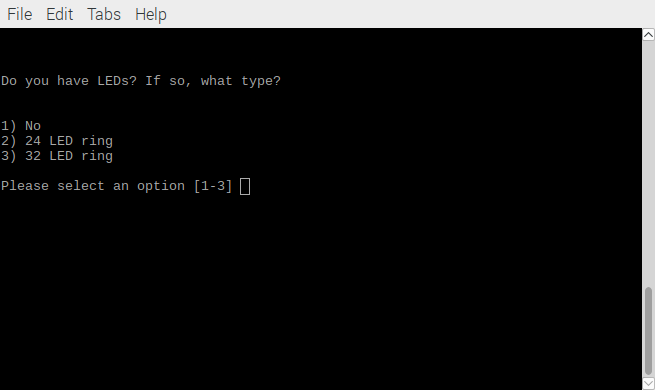
For the 2-Mic setup, ensure these options are selected for the following screens:
Select 1 for no LED ring.
Select 1 for RPi.

Select 1 for USB from DSP.

If using the Embedded Synaptics Smart Trigger (recommended), select 3 for None. Otherwise select 1.

If you will be using the Embedded Synaptics Smart Trigger, select 1 for GPIO. Otherwise Select 2.

Select 1 for On.

Prior to completing the steps in this section, the following tasks should be completed:
- Raspbian Stretch OS loaded onto the microSD card
- HDMI monitor, keyboard, and mouse are connected
- LAN or WLAN connection has been established
- Hardware setup complete
- The install.sh has been run and is finished
Configure volume settings before running the SDK sample app. Open a terminal and send the following command:
alsamixer
Configure the volume setting for the bcm2835 ALSA sound card as well as the I2S RX 16K TX 48K sound card. Refer to screen captures below:


After configuring both cards, exit the alsamixer and send the command:
sudo alsactl store

Open a terminal and send the following command to run the SDK sample app:
bash run.sh
 Find the following message (you may have to scroll up a bit):

Open up a browser and go to https://amazon.com/us/code (can be done on your RPi or PC) and log into the Amazon account you wish to use.

Enter the code found in the AVS app (shown in previous picture) and hit continue.


Once finished, you should see "Authorized!" in the terminal. The sample app is now ready to be used, try asking Alexa a question!