Laravel Entity Builder is a revolutionary way to create objects on the fly with no development skills needed, using the entity builder view you can add different types of fields with many customizable options, once your entity is configured you will have a new menu with Listing and ready CRUD screens to manage these entities.
You can install the package via composer:
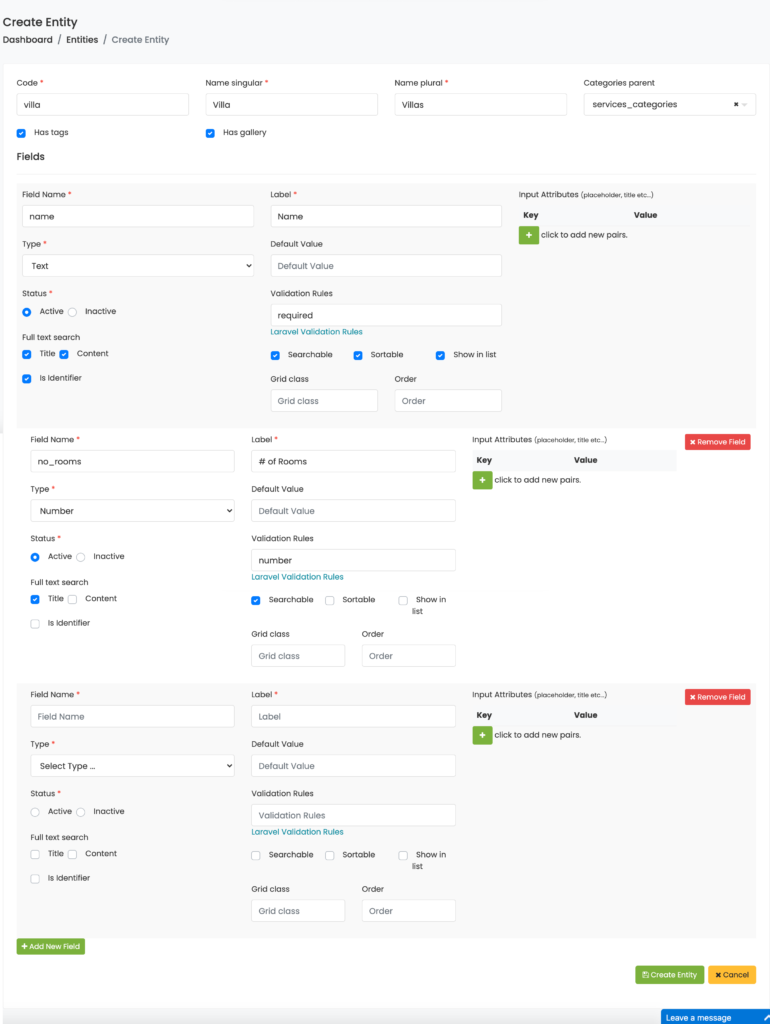
composer require corals/entityvendor/bin/phpunit vendor/corals/entity/tests - To define Entity you’re required to set the following items
1.Code: for internal use, use a lower case with no space
2.Name Singular: the display name of the Entity and referred with a single item
3.Name Plural: the plural reference of the displayed item.
4.Categories Parent: If you want to assign the entity entries to categories, a category dropdown will be available at Entity entry creation, Categories are managed under the Laraship utility module, only parent categories will show.
5.Has Tags: check this if you want to have the “tags” field for the entity where the entry can be assigned to different tags.
6.Has Gallery: Check this if you want to upload media to the Entry

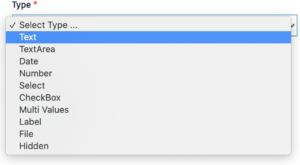
You can define an unlimited number of fields for each Entity, there is over 10 field types can be selected
below shows the options available field definition:
-
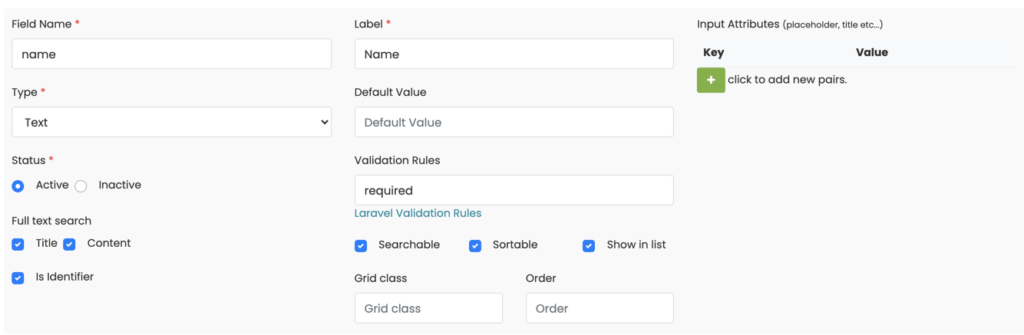
field Name: for internal use, choose a lower case name with no spaces or special characters.
-
Label: this is what shows above the field when you fill this field from the entry creation screen.
-
Type: once selected it cannot be changed after entity creation, some additional options will show depends on what field type is used, for example in the dropdown field, you will be asked for the data source of options which will be described below.
-
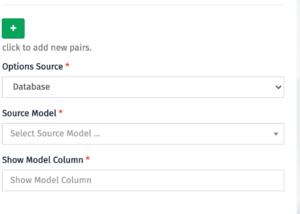
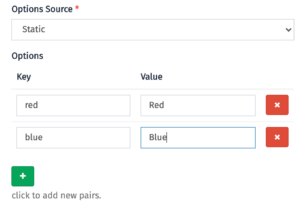
List options source: you can define whether you want the data to be with manually defined options, or you want to pull the data dynamically from other models saved on the database, if you select the database to be the source, you need to select the model for example “User”, and which columns to be shown in the dropdown, for example, “email”
- Default value: initial value to be populated on the field.
- validation rules: you can have unlimited rules for example required|numeric|date| …., available options can be found in laravel documentation https://laravel.com/docs/7.x/validation#available-validation-rules
-
Status : enable / disable field,
-
Full-Text Search: do you want this field to be used for full-text search, this will add the field to the Laraship Search engine and can be used for full-text search, select if you want to have it with high priority then use the checkbox title, or lower priority then use the content checkbox.
-
Is Identifier: if checked this field will be referred to this object in the system, for example, the book title, or the car license plate.
-
Input keys: you can add different attributes to the input for example placeholder, classes, inline styles, or any additional attributes
-
Searchable: if selected this field will be available for filtering in the listing page
-
Sortable: if selected this field can be used for sorting in the listing page
-
Show in List: if selected this field will be shown as a column in the listing page of the entity entries
-
Grid Class: this will help you in defining field size in crud and view you can see available options from bootstrap https://www.w3schools.com/bootstrap4/bootstrap_grid_basic.asp.
-
Order: the display order of the field in the listing table.
If you faced any issue you can check our questions center, and you can post your question from the following link Questions & Answers
follow the Online Docs to see more about this module
Looking for a professional team to build your success and start driving your business forward. Laraship team ready to start with you Hire Us