
Answers to the questions in this statement must be submitted as files named according to the question number in your repository, in the answers folder.
Each answer will be the subject of a new file in your repo.
Questions requiring an answer in the form of a file will be tagged with the following icon:
⚠️ These files are corrected automatically by Github Autograde.
Commits are not optional. Commits are not optional Commit as soon as the statement asks you to.
The TP must be done individually and will be based on the answers in the files in the answers folder, as well as on the code in your personal repositories.
| Command | Description |
|---|---|
git clone |
Clone a repository on your computer |
git add |
Add files to the staging area (which will be taken into account in the next commit) |
git commit |
Create a new commit locally |
git push |
Push your local commit tree to the server (Local --> GitHub) |
git pull |
Synchronise your local tree with the remote tree (Local <-- GitHub) |
git branch |
Create a new local branch |
git merge |
Apply changes from one branch to another locally |

- Classroom
- Issue
- SaaS service - github.com/features/actions
- Pipeline: CI vs CD
- Pipeline: Configuration as code
Go to Github and create an account if you have not already done so.
Follow the link on the board or in the Teams channel to get a personal copy of this repository in the GitHub Classroom organization cours-esilv.
Clone the newly copied repo on your computer
In your repo, edit the identity.md file and fill it with your personal data (first and last name).
Commit and pushe changes made to the file
Commits are not optional. Commit at least as soon as the statement asks you to.
⚠️ ANSWER: Create a file called1.3containing the commands you used to commit and push your changes.
Display the logs of previous commits.
Bear in mind that everything has been logged since the start of the project. You can find messages, dates and also the authors of past commits.
⚠️ ANSWER: Create a file called1.4containing the command you used to view the logs.
Using the command you used in the previous question, find Ginny before it's too late!
Hint**: Look in the documentation for the previous command to find ideas for other commands.
⚠️ ANSWER: Create a file called1.5containing only the command you used to track down Ginny.
List all the branches in the repository.
Do all the branches seem normal to you? Is there a branch that catches your eye? If so, check it out.
⚠️ ANSWER: Create a file called1.6containing the command you used to display the branches in your repo.
Now that you've had a look at the branch that caught your attention, merge the changes made to it into your main branch (snape -> main). Then delete the snape branch locally.
⚠️ ANSWER: Create a file called1.7.1containing the command you used to merge thesnapebranch into themainbranch.
⚠️ ANSWER: Create a file called1.7.2containing the command you used to delete thesnapebranch (after merging the changes tomain).
Now that you only have one main branch in your repo, create a branch from main. The branch you want to create should be called feature/ followed by the first letter of your first name and then your surname in lower case (no spaces or accents in the name).
Ex Albus Dumbledore --> feature/adumbledore
Then go to your newly created feature/{name} branch.
⚠️ ANSWER: Create a file called1.8containing the commands you used to create it, and move to the new branch.
Answer the questions in the questions.md file, then commit the changes to the feature/{name} branch.
Finally, upload all the changes you've made to all the branches to your GitHub repository.
⚠️ ANSWER: Create a file called1.9containing the commands you used to push all the branches to your GitHub repo.
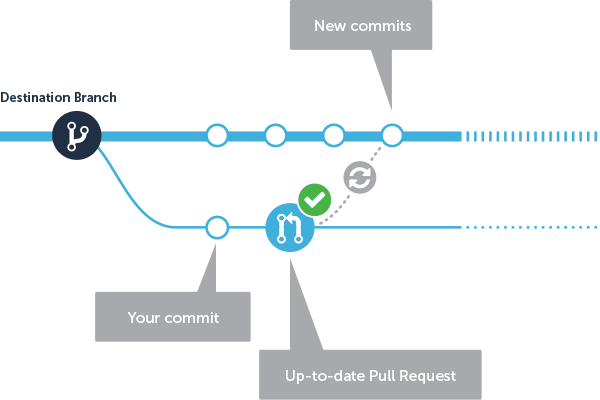
In the GitHub web interface, open a pull request from your feature/{name} branch pointing to the develop branch of your repository.
Warning**: Don't forget to add me (laurentgrangeau) as a reviewer of your pull request so that I can correct you.
For more help on pull requests see the official documentation
#2: CI/CD with GitHub Actions
In this second part, you must use the same repo as that obtained at the end of part 1, by placing yourself on the main branch of your repo.
⚠️ WARNING: Each question requiring a code modification requires at least one commit and one push in your repository. The breakdown of commits is taken into account in the scoring.
To carry out all the steps required in this part, you will place yourself on the
mainbranch.
The aim of this second part of the tutorial is to implement a CI (continuous integration) pipeline to automate:
- downloading dependencies useful for building the application
- build the application
- testing the application and making it available in a UI that can be used by anyone
- packaging the application using Docker - no pressure, I'll give you everything for the Docker part for now 👌
To do this, we're going to use a SaaS solution integrated into GitHub called GitHub Actions.
Thanks to its pipeline system, this solution can be used to implement the automations we want to carry out in this tutorial.
Pipelines are described in YAML (pipeline as code) code files.
For an overview of GitHub Actions features, see the official page For more documentation on the syntax of YAML files, see the official documentation
Important: The above documentation will be essential for the successful completion of this and subsequent tasks.
On the home page of your repository (on GitHub), go to the Actions menu and click on set up a workflow yourself.
This will display the YAML file corresponding to the Continuous Integration (CI) you are creating.
This file describes several essential steps in setting up a pipeline:
triggers (on keyword): Defines the conditions under which the actions described in this pipeline will be carried out.
- steps**: The description of the steps to be automated
You can now click on the Start commit button.
⚠️ WARNING: Don't forget to add a meaningful commit message to each commit. This will help you when you come back to the project in the future.
Observe the execution of the pipeline in the GitHub Actions UI.
For the moment, the build isn't doing much apart from displaying two messages. So we're going to modify the pipeline to build our java application.
To do this, modify the .github/workflows/main.yml file to add the following build steps:
      # Installe java 8 sur l'agent
      - name: Set up JDK 8
        uses: actions/setup-java@v2
        with:
          java-version: '8'
          distribution: 'adopt'

      # Compile notre application
      - name: Build with Maven
        run: mvn --batch-mode --update-snapshots package
Start your changes and observe the build of your application.
If you look closely at the build logs, you will see that unit tests are being run. We are going to retrieve the test report and display it in the pipeline result.
To do this, modify the .github/workflows/main.yml file to add the following build steps:
      # Publie les résultats de test
      - name: Publish Unit Test Results
        uses: EnricoMi/publish-unit-test-result-action@v1
        if: always()
        with:
          files: target/**/*.xml
Start your changes and observe the build and the results of your application's unit tests.
You are now going to publish the artifact you built in the previous steps. This allows you to download the artifact in question and also to deploy it in later stages on different environments.
To do this, modify the .github/workflows/main.yml file to add the following build steps:
      # Publie les fichiers présents dans le dossier target dans un build artifact
      - name: Upload a Build Artifact
        uses: actions/upload-artifact@v2.2.4
        with:
          name: my-app-1.0
          path: target/*
Commit your changes and observe the build and the artifact published on the build page.
So far the pipeline has built and tested the application but no deployable package has been created or persisted. You are going to create a Docker image to make our appliance ready for use.
To do this, create a Dockerfile at the root of your project containing the following code:
FROM maven:3.3.9-jdk-8-alpine

COPY target/my-app-1.0-SNAPSHOT.jar /root/my-app-1.0-SNAPSHOT.jar

CMD ["java", "-jar", "/root/my-app-1.0-SNAPSHOT.jar"]
Then modify the .github/workflows/main.yml file to add the following build steps:
      # Installe la commande docker sur l'agent
      - name: Install Docker
        uses: docker/setup-buildx-action@v1
        id: buildx
        with:
          install: true

      # Build l'image Docker
      - name: Docker build
        run: |
          docker build .
Commit your changes one last time and observe the build of the Docker image via the logs.
For the moment your pipeline is only triggered on the main branch (see trigger).
Change the value of the trigger to launch the pipeline on all branches of type:
- main
- feature (beginning with the word feature/...)
Your pipeline is now ready to execute the steps defined within it, whatever branches are created.
Create a feature/test-build branch from the develop branch and note that the build is automatically applied to this branch.
You can now create several features branches and see that the build, test and package stages are applied to these branches.
All this configuration means that you can have a validation system that is as close as possible without wasting time on the rapid feedback you need to improve product quality.