
The EVE is an open framework for an automated continuous culture system.
- Easy to use for programmers and non-programmers
- Cheap
- Replicate functionality of a morbidostat/chemostat/turbidostat
- Versatile & easily modifiable for different purposes
This device is meant to be used for the study of population dynamics and evolution.
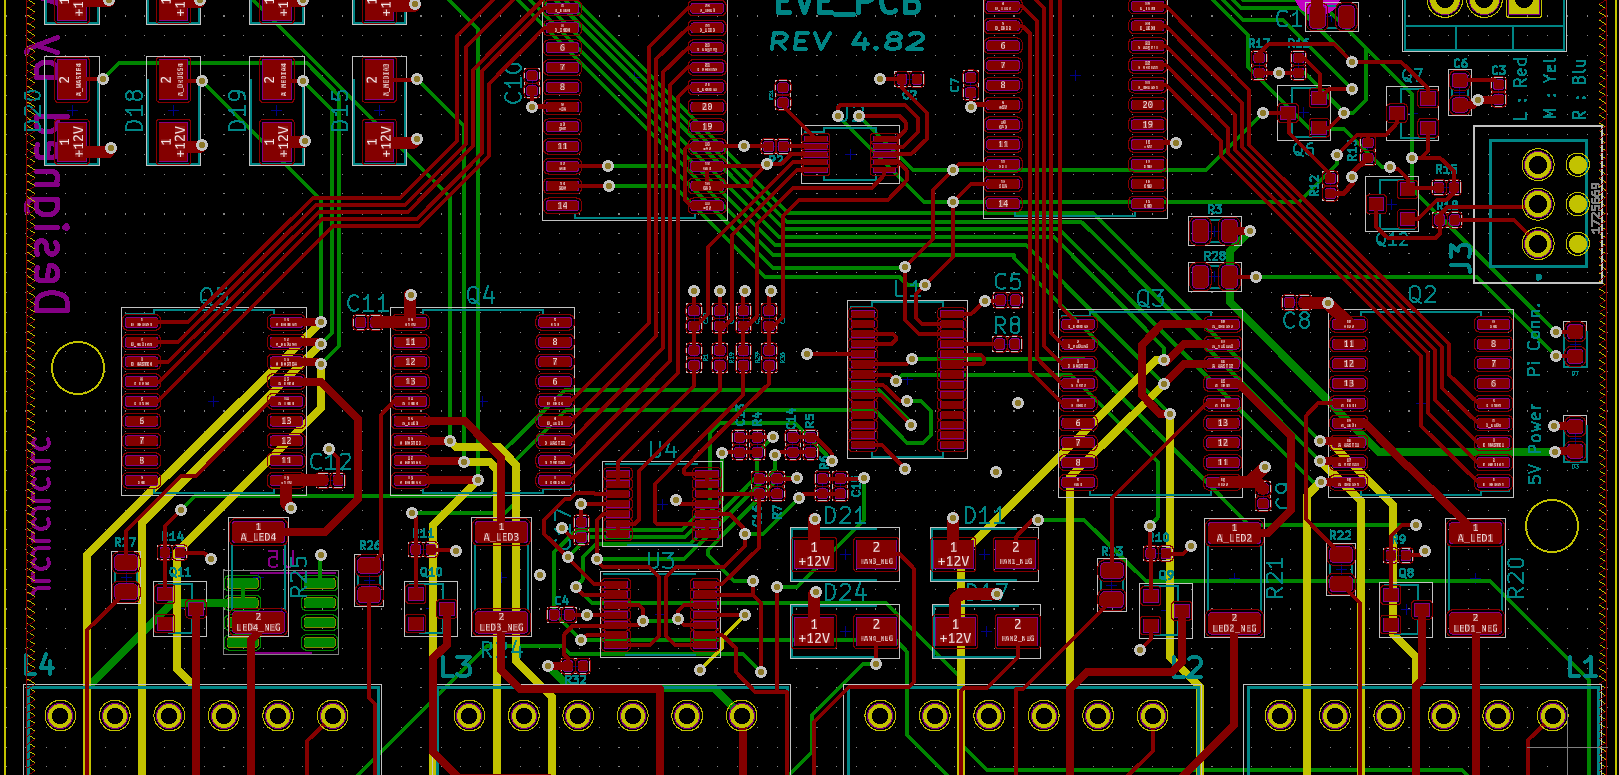
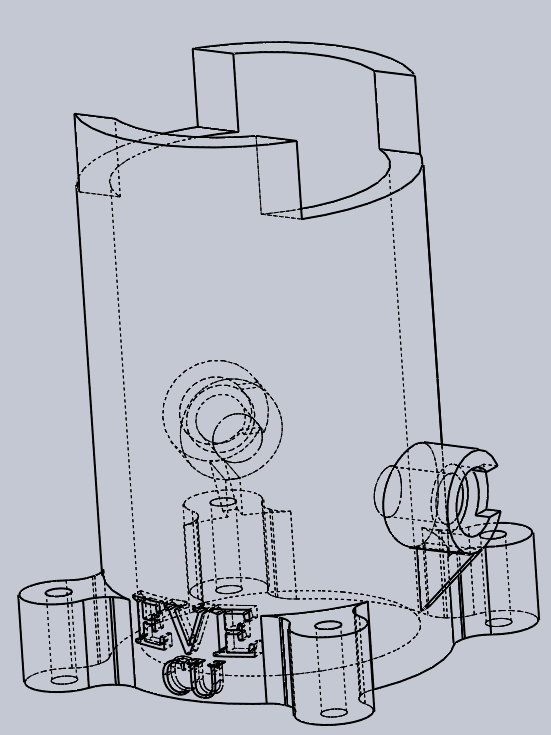
Head over to Start Building folder to find the 3D stls and circuit schematics (along with KiCAD project).
- Download and flash the Raspbian Buster OS on an SD card.
- Insert the SD Card into the Pi and connect the Pi to a display, keyboard, local area network, and power.
- Note the IP address of the device with the command:
$ ifconfig- Enter super user mode with the command:
$ sudo su- Run the setup script by entering the command:
$ bash <(curl -s https://raw.githubusercontent.com/vishhvaan/eve-pi/master/st_eve.sh)- Follow the on-screen instructions to install the software.
- Navigate to the folder
scripts/live/and copy thesample-conf.intoeve-conf.ini. - Edit the
eve-conf.inifile based on the "Configuration File Parameter Definitions" file in the "Start Building" folder.* - If the Pi has a browser, navigate to the web interface by accessing: http://localhost.
- On a browser on the network, navigate to the web interface by accessing the IP address or hostname of the device (e.g. http://eve.local_domain.net).
* If the PCB is used or the breadboard was wired like the schematic, the default values for the hardware address in the sample-conf.ini file will work.
For a headless install:
- Download and flash the Raspbian Buster OS on an SD card.
- Add a file titled
sshto the boot partition. - Insert the SD Card into the Pi and connect the Pi to the local area network and power.
- In a seperate computer's terminal run a command to connect to the pi.
$ ssh pi@raspberrypi- Login to the pi with the password
raspberry - Continue from step 3 in the non-headless install.
Pre-built images coming soon to Docker Hub!
Use the Dockerfiles in the repo to build images yourself. Use the images to spin up containers in the Pi with EVE WebUI and all the programs built-in.
- Install Docker on the Raspberry Pi.
- Install git on the Raspberry Pi.
$ sudo apt install -y git- Clone the repository to the home directory.
$ sudo git clone https://github.com/vishhvaan/eve-pi.git /eve- Move to the correct directory.
$ cd /eve- Run the Docker build command.
$ docker build -t eve:pi .- Create a container.
$ docker create --name = eve1 \
    -p 80:80 \
    -p 8050:8050 \
    -e PUID=1000 \
    -e PGID=1000 \
    -v /eve/data:/data \
eve:pi- Start the container.
$ docker start eve1Emulate the ARM environment with QEMU. Build images with the Dockerfile.arm32v7.
The EVE uses a number of open source projects to work properly:
- script-server - Script server to run programs on the Pi
- slack-api - Uses the Slack API for Python for experiment monitoring
- plotly - Uses Dash for real-time plotting
- KiCAD - For Circuit Schematics and PCB Designs
- Docker - For creating self-contained application platforms
- Configurable save locations (USB or Network)
- Combined graphs of culture units
MIT