ConnectToSerialConsole
To adjust settings of the c6021light or to view log output, it is often handy to be able to connect to the serial console. In this chapter, we will show you how to connect to the serial console of the c6021light.
If you are an advanced user only looking for the serial parameters, these are:
- Baudrate 115200
- 8 Bits
- No Parity
- 1 Stop bit
- A USB-to-Serial adapter capable of operating at 3.3V or a populated on-board USB-to-Serial adapter.
- A serial terminal program installed on your computer.
Note Issue #7: On some versions of the c6021light PCB, the RX and TX lines on J52 are swapped. If your PCB is affected by this bug, use jumper cables to cross over RX and TX.
While any serial terminal program can be used, we will only cover two programs explicitly: PlatformIO IDE and PuTTY.
If you have followed the instructions for Build & Upload, you will already have installed the PlatformIO IDE. In this case, we recommend to stick to using the PlatformIO IDE.
If you have no serial terminal program installed, we recommend to install PuTTY for its ease-of-use and feature-completeness. See the Website of PuTTY for instructions on how to download and install PuTTY on your machine.
Note that this guide focuses on Windows. Connecting to the serial console is possible just as well using Linux or Mac OS using serial terminal programs available on the respective platform.
The major benefit to using the PlatformIO IDE for serial access is its ease of use, provided that you have set up the c6021light firmware project correctly. In this case the PlatformIO IDE is preconfigured with the correct parameters for your serial port and will in addition determine the serial port to connect to the c6021light automatically.
Start by ensuring that the USB-to-Serial adapter is connected to the computer as well as to the c6021light. Ensure that the c6021light is powered. Start the PlatformIO IDE and open the c6021light software project. Once the project is opened, wait a few seconds for PlatformIO to properly parse all of the project settings (around 10s is usually fine). After that, click the plug icon in the bottom left of the PlatformIO IDE, as highlighted in the following image:
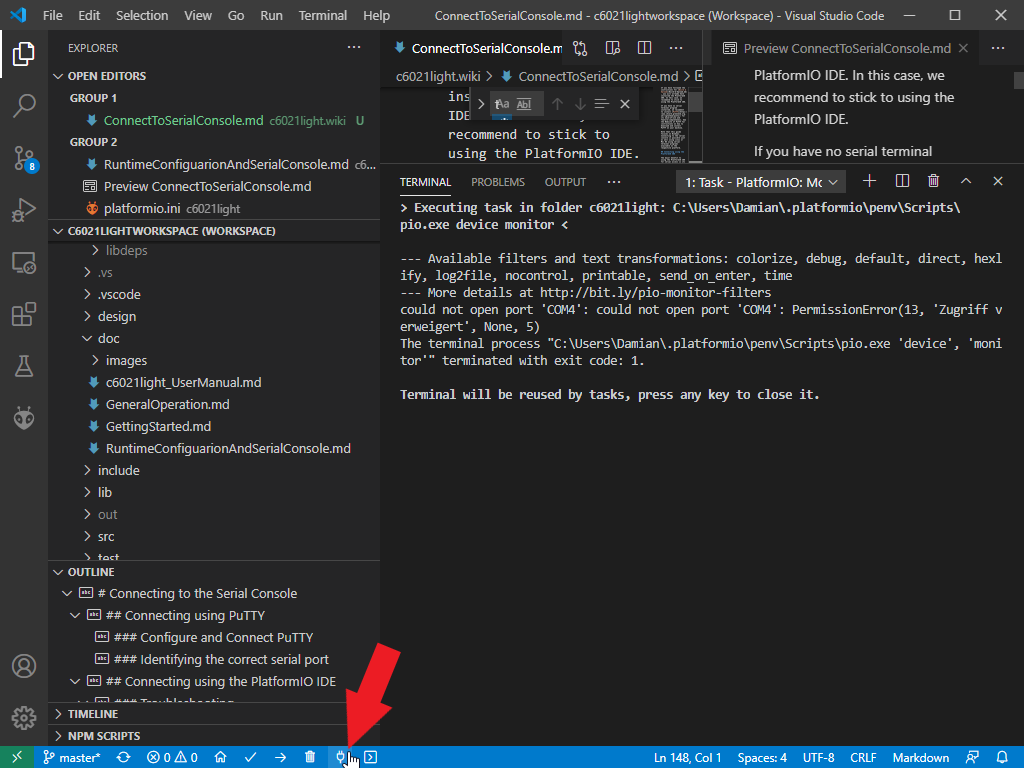
As also shown in the image, a Terminal tab will pop up showing you the output of the serial monitor. If the connection is successful, you will see the following:
> Executing task in folder c6021light: C:\Users\Damian\.platformio\penv\Scripts\pio.exe device monitor <

--- Available filters and text transformations: colorize, debug, default, direct, hexlify, log2file, nocontrol, printable, send_on_enter, time
--- More details at http://bit.ly/pio-monitor-filters
--- Miniterm on COM4  115200,8,N,1 ---
--- Quit: Ctrl+C | Menu: Ctrl+T | Help: Ctrl+T followed by Ctrl+H ---
Note the absence of any output of the c6021light.
To bring up the command prompt, press Enter on your computers' keyboard. You will be greeted as follows (note the change in the last line):
> Executing task in folder c6021light: C:\Users\Damian\.platformio\penv\Scripts\pio.exe device monitor <

--- Available filters and text transformations: colorize, debug, default, direct, hexlify, log2file, nocontrol, printable, send_on_enter, time
--- More details at http://bit.ly/pio-monitor-filters
--- Miniterm on COM4  115200,8,N,1 ---
--- Quit: Ctrl+C | Menu: Ctrl+T | Help: Ctrl+T followed by Ctrl+H ---
c6021light >
c6021light > is the command prompt that indicates that the c6021light now accepts your serial commands.
Congratulations, you are now connected via serial to the c6021light!
The auto-detection of the correct serial port may fail when there are multiple candidate devices connected to the computer, e.g., multiple USB-to-Serial adapters, or additional Arduino-type boards. This occurs when the PlatformIO IDE asks you to pick a serial port when you launch the serial monitor, as seen in this example output:
pio.exe device monitor <

--- Available filters and text transformations: colorize, debug, default, direct, hexlify, log2file, nocontrol, printable, send_on_enter, time
--- More details at http://bit.ly/pio-monitor-filters

--- Available ports:
---  1: COM3                 'Arduino Micro (COM3)'
---  2: COM4                 'USB-SERIAL CH340 (COM4)'
---  3: COM7                 'Standardmäßgige Seriell-über-Bluetooth-Verbindung (COM7)'
---  4: COM8                 'Standardmäßgige Seriell-über-Bluetooth-Verbindung (COM8)'
--- Enter port index or full name:
If the PlatformIO IDE cannot identify the correct serial port automatically or cannot contact the c621light at all, you should explicitly configure the serial port to be used in platformio.ini.
In this case, you should follow the instructions for Identifying the correct serial port to determine the serial port used for the correct USB-to-Serial adpater on your machine. Once you have found the correct port, edit platformio.ini. In the Section [env:bluepill], make sure that the setting monitor_port = <device> is not commented. Next, change <device> to the port you previously identified - in my example, this is COM4. platformio.ini should then roughly look as follows (note the third-to-last line):
...
[env:bluepill]
platform = ststm32@11.0.0
board = bluepill_f103c8
framework = libopencm3

board_build.ldscript = stm32f103c8.ld

monitor_speed = 115200
monitor_port = COM4
monitor_flags = --raw
...
If the PlatformIO IDE cannot connect to the serial console at all, follow the instructions for Identifying the correct serial port to determine the correct serial port for your USB-to-serial adapter. If you cannot find the serial port in device manager, verify that the USB-to-Serial adapter is connected to the computer. It it is connected, try unplugging the USB cable and plugging it back in. If the serial port still does not show up, try disconnecting the serial adapter from the c6021light and unplug/replug the cable again. If this makes the serial adapter show up in Device Manager, it is likely that there is an electrical problem with the c6021light or your USB-to-serial adapter.
If the serial adapter does show up but the PlatformIO IDE claims it cannot connect to the serial port, verify that the setting monitor_port = <device> is set to the correct serial port.
PuTTY has the advantage over the PlatformIO IDE of being a more feature-complete serial terminal than the PlatformIO IDE and of being easier to install, when the full PlaftormIO IDE is not required.
To use PuTTY to connect to the c6021light, there are two major steps, Identifying the correct serial port and actually connecting, which we will detail in the following.
To identify the correct serial port on your computer to contact the c6021light, first make sure that the USB-to-Serial adapter you want to use is connected to your computer and is powered. Most stand-alone USB-to-Serial adapters are host-powered, i.e., they will power up as soon as they are connected to a computer. The on-board serial adapter of the c6021light is device-powered, i.e., you will need to power the c6021light through its regular power supply for this step.
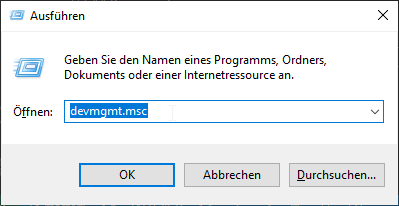
Next, use Device Manager on Windows to look for the port used by the USB-to-Serial adapter. To start device manager, bring up the Windows Run dialog by pressing Win+r. In the Run dialog, enter devmgmt.msc and press Enter.
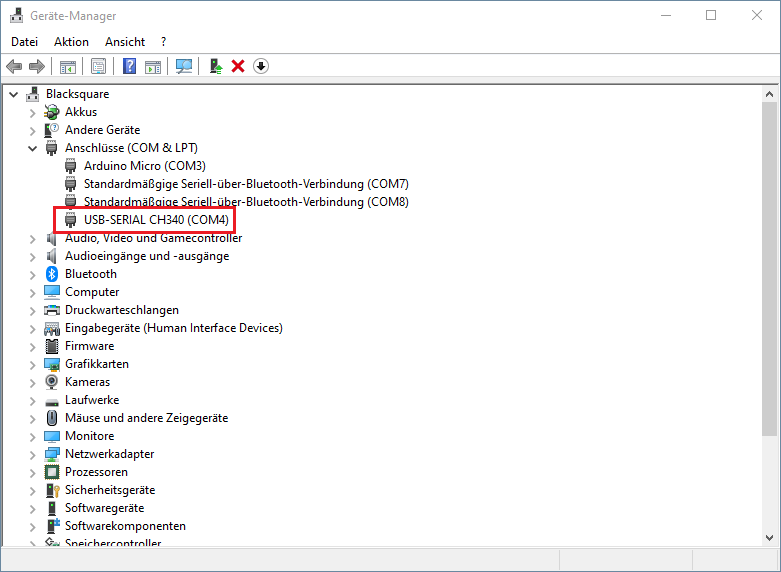
This should open Device Manager. In Device Manager, look for the entry that says Interfaces (COM & LPT) and expand that entry. In the expanded list, look for the USB-to-Serial adapter you are using to connect to the c6021light. In the image below you can see that there are four serial connections, where USB-SERIAL CH340 (COM4) is the on-board serial adapter of the c6021light. The value in braces is the name of the serial port - COM4 in this example. Take a note of the serial port. If you cannot identify which entry is the USB-to-Serial adapter you are using, you may have to disconnect other USB devices until only one entry remains.
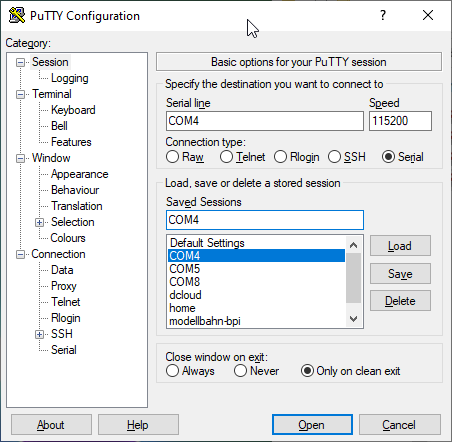
Once you know the serial port used to connect to the c6021light, start PuTTY. On first start, you will be greeted by a screen similar to the following:
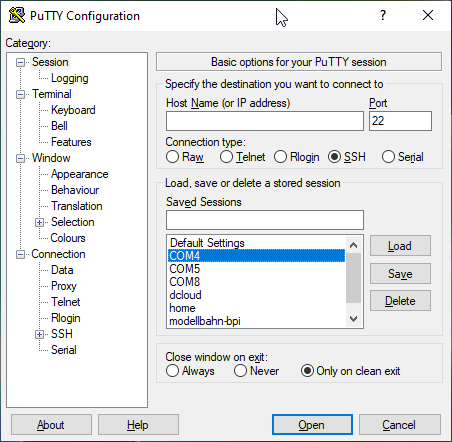
Click on Serial to bring PuTTY in Serial Terminal mode. Under Serial line, enter the name of the serial port you identified in the previous section (e.g., COM4). Under Speed, put 115200. Next, click Open to start the serial session. Example settings are shown in the image below.
Note: Once you have verified that the connection works, you may want to store the connection settings for easier access. To this end, first enter the connection details as stated above. Next put a name in the Saved Sessions field and click Save. The name can be freely chosen, for serial connections it is often a good idea to name them identical to the serial line. When the session is saved, you can later reuse the session configuration by doble-clicking the entry in the Session list.
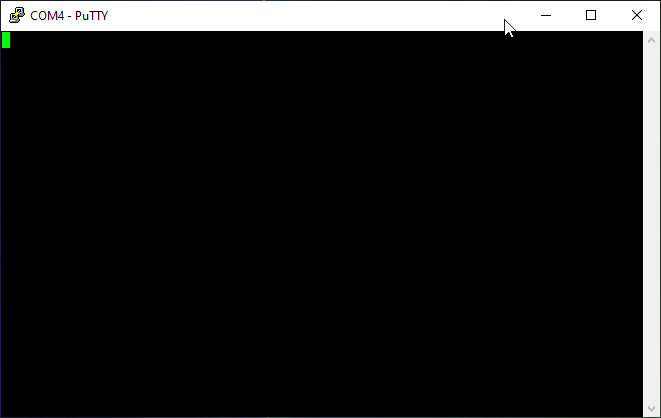
When PuTTY starts and successfully connects to the c6021light, you will be greeted by an empty screen with a green cursor:
To bring up the command prompt, press Enter on your computers' keyboard. You will be greeted as follows (note the change in the last line):
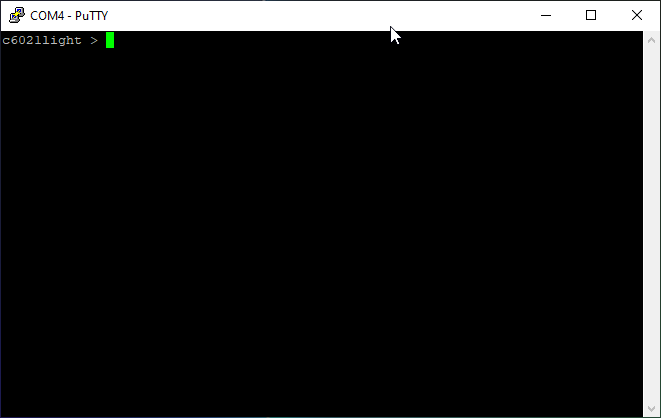
c6021light > is the command prompt that indicates that the c6021light now accepts your serial commands.
Congratulations, you are now connected via serial to the c6021light!