mgmt_ide setup
-
First of all you will have to setup the devonfw IDE. Once the download is complete and you started the installation process via the setup command (or setup.bat), you will be prompted for a settings URL. You can just press enter as no special settings are used. Following that, you will simply have to wait and follow any instructions given.
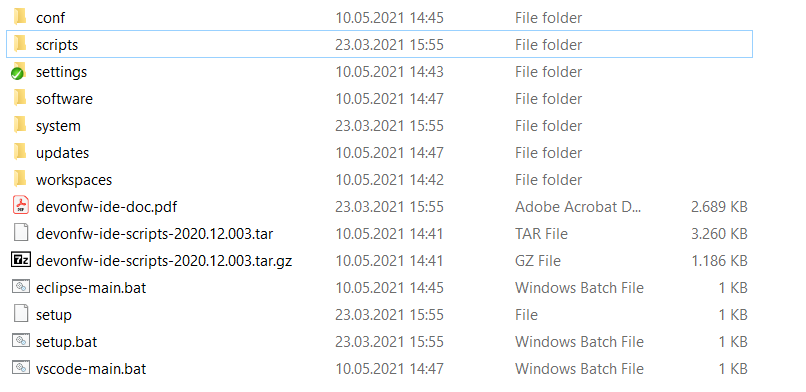
After you have executed the steps mentioned above, your install location should look like the picture below.
-
Now create a fork of
https://github.com/devonfw/cobigenas described here. -
As GIT by default does not set long paths, you need to run the following command as administrator
git config --system core.longpaths trueon your git bash. -
The next step is to open a console inside you devonfw installation and execute the following command:
devon project setup cobigenThis downloads all the necessary files for CobiGen development. -
Build the project by running the build.sh located in the
workspaces/main/cobigenfolder within git bashbash build.sh parallel. -
Change the default setup git remote origin URL to your fork URL and add the upstream (devonfw CobiGen repository) URL to your remotes:
-
For SSH with private key authentication:
-
Execute:
git remote set-url origin git@github.com:<your user>/cobigen.git. -
Execute:
git remote add upstream git@github.com:devonfw/cobigen.git.
-
-
For HTTPS:
-
Execute:
git remote set-url origin https://github.com/<your user>/cobigen.git. -
Execute:
git remote add upstream https://github.com/devonfw/cobigen.git.
-
-
-
Now open eclipse using the eclipse-main.bat file or by executing
devon eclipseon the console and import the CobiGen projects.-
Switch to the "Project Explorer" view (Window→Show View→Project Explorer). This extra step is required because an import from the default view "Package Explorer" doesn’t work properly.
-
Now we need to re-import the CobiGen project. This extra step is required because the automatic project import from devonfw doesn’t work properly.
-
Right click on your CobiGen root project and choose
Delete. -
Tick
Delete xx nested Projectsand make sure to deselectDelete project content on disc
-
-
Click on File→import…→Maven→Existing Maven Project and entering
<Install directory>/workspaces/main/cobigen(Should be the default location when clicking on "Browse…")
-
-
After you have have finished your installation run a maven update. To do so right click on a project, select maven and afterwards update project. Select all projects and the checkbox Force Update of Snapshot/Releases. You might be asked to install some Tycho-plugins. You need those, if you want to debug eclipse-plugins.
For some parts of CobiGen, you will have to have additional plugins installed.
If you want to develop CobiGen plugins (OpenAPI plugin, Java plugin etc.) you need to have the Eclipse PDE plugin available. It is not strictly necessary to install this manually as Eclipse should prompt you for installation once you try to build a relevant project.
To install the plugin manually, open a console in your IDE Install location and execute the command devon eclipse add-plugin eclipsepde
When using the default devonfw IDE, you should get an error here that stems from parts of the plugin being installed with the devonfw IDE by default.
-
You can also manually install the PDE:
-
Open Help/Eclipse Marketplace
-
Search for Eclipse PDE
-
Click on install (if it is marked as installed already, choose uninstall from the next dialog, restart eclipse and install it again)
-
To properly test CobiGen in an Eclipse environment we use the Eclipse SWTBot which can automate eclipse interactions in a new Eclipse instance. It is not strictly necessary to install this manually as Eclipse should prompt you for installation once you try to build a relevant project.
To install the plugin manually, open a console in your IDE Install location and execute the command devon eclipse add-plugin swtbot in a console
When using the default devonfw IDE, you should get an error here that stems from parts of the plugin being installed with the devonfw IDE by default.
-
You can also manually install the SWTBot:
-
Open Help/Eclipse Marketplace
-
Search for SWTBot
-
Click on install (if it is marked as installed already, choose uninstall from the next dialog, restart eclipse and install it again)
-
Since CobiGen is a template-based code generator, we have to develop templates. We do this using the template language FreeMarker. It is not necessary to install any plugin though for easier usage we recommend you install an IDE into Eclipse if you do not want to use another platform.
To install an IDE for FreeMarker, open a console in your IDE Install location and execute the command devon eclipse add-plugin freemarker in a console
There are some scripts used in CobiGen development that are written in Python. You may use any platform to write in python you want, but if you want to work in Eclipse, we recommend to install pydev.
You can do this by opening a console in your IDE Install location and executing the command devon eclipse add-plugin pydev in a console
If you want to contribute to CobiGen you should fork CobiGen and change the origin of the local repository to your fork.
You can check your remote settings by entering workspaces/main/cobigen and run the command: git remote -v.
Now let us change the URL to your Fork: git remote set-url origin <Fork URL>
You can use the CobiGen repository as another remote, to get the latest changes. check out the following tutorial to do so.
https://devonfw.com/website/pages/docs/CONTRIBUTING.asciidoc.html#contributing.asciidoc_forking
Disclaimer
If you discover any documentation bugs or would like to request new content, please raise them as an issue or create a pull request. Contributions to this wiki are done through the main repo under the folder documentation.
License

This documentation is licensed under the Creative Commons License (Attribution-NoDerivatives 4.0 International)