twofactor
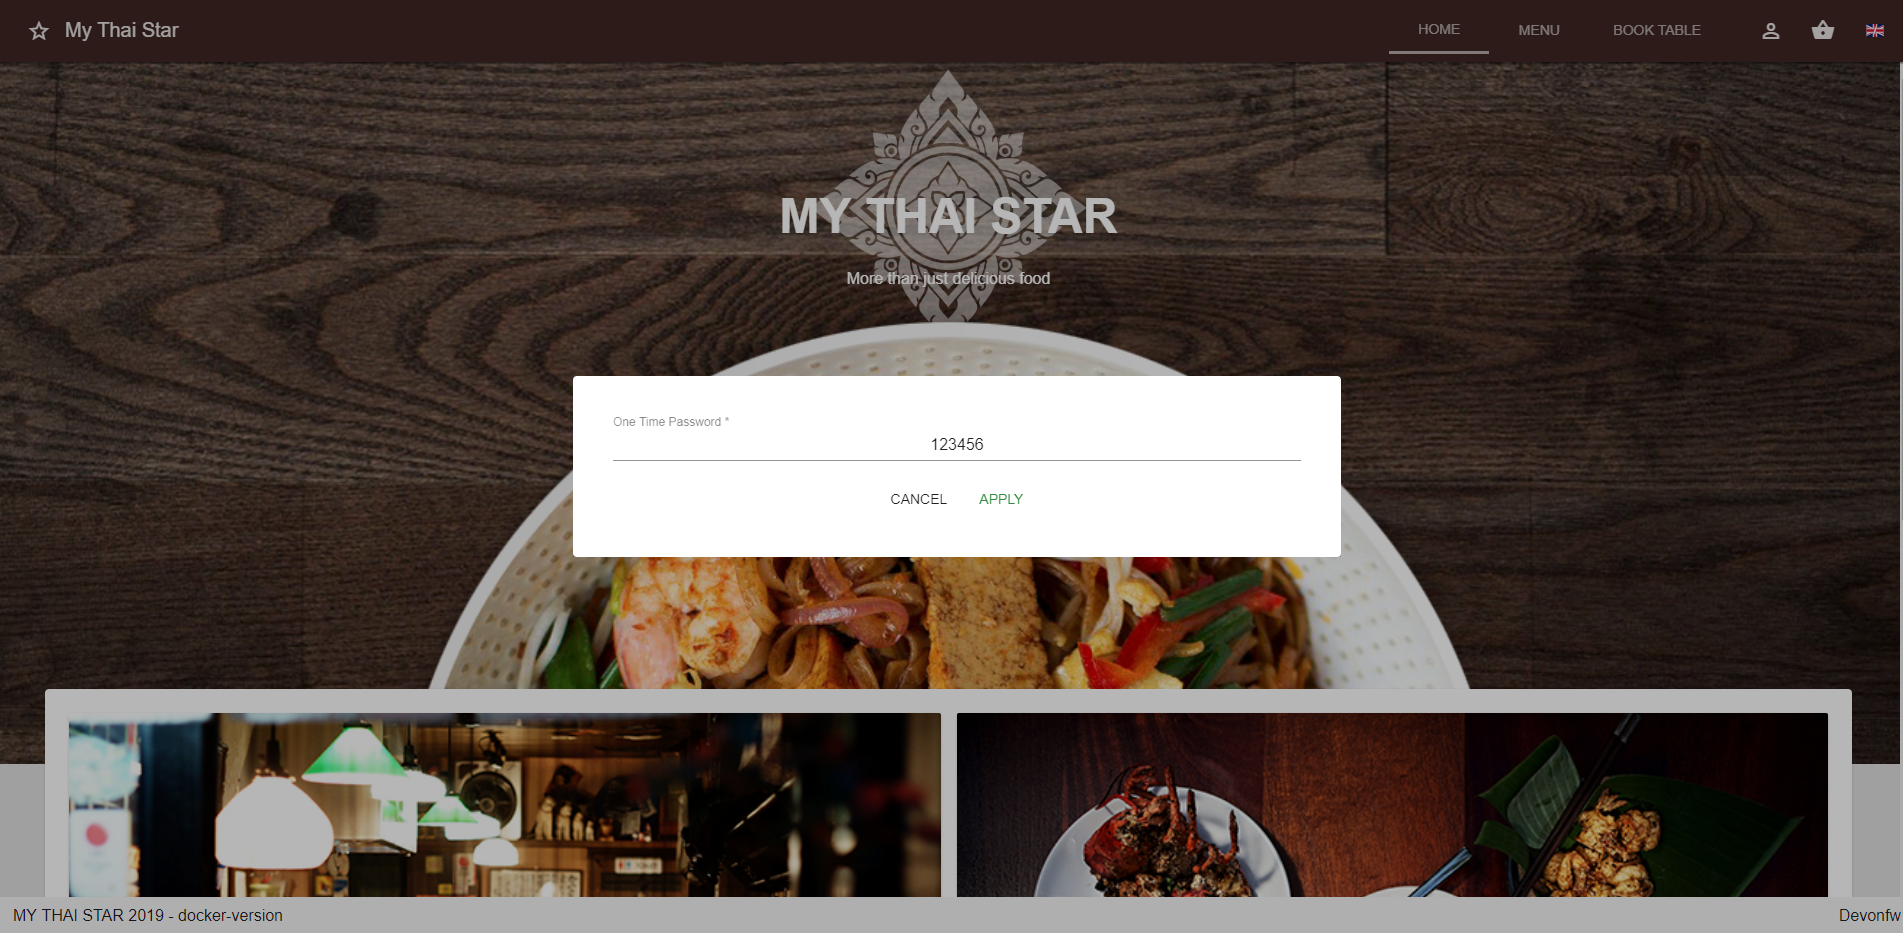
Two-factor Authentication (2FA) provides an additional level of security to your account. Once enabled, in addition to supplying your username and password to login, you’ll be prompted for a code generated by your Google Authenticator. For example, a password manager on one of your devices.
By enabling 2FA, to log into your account an additional one-time password is required what requires access to your paired device. This massively increases the barrier for an attacker to break into your account.
In the back-end, we utilize Spring Security for any authentication.
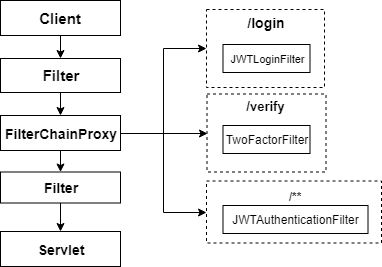
Following the arrows, one can see all processes regarding authentication. The main idea is to check all credentials depending on their 2FA status and then either grand access to the specific user or deny access. This picture illustrates a normal authentication with username and password.

When dealing with 2FA, another provider and filter is handling the request from /verify
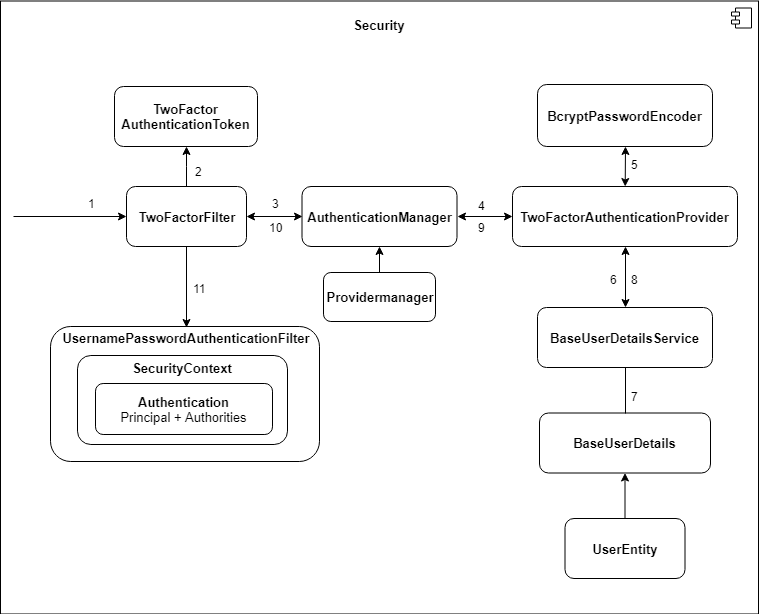
Here you can observe which filter will be used. JWT-Authentication-Filter does intercept any request, which enforces being authenticated via JWT
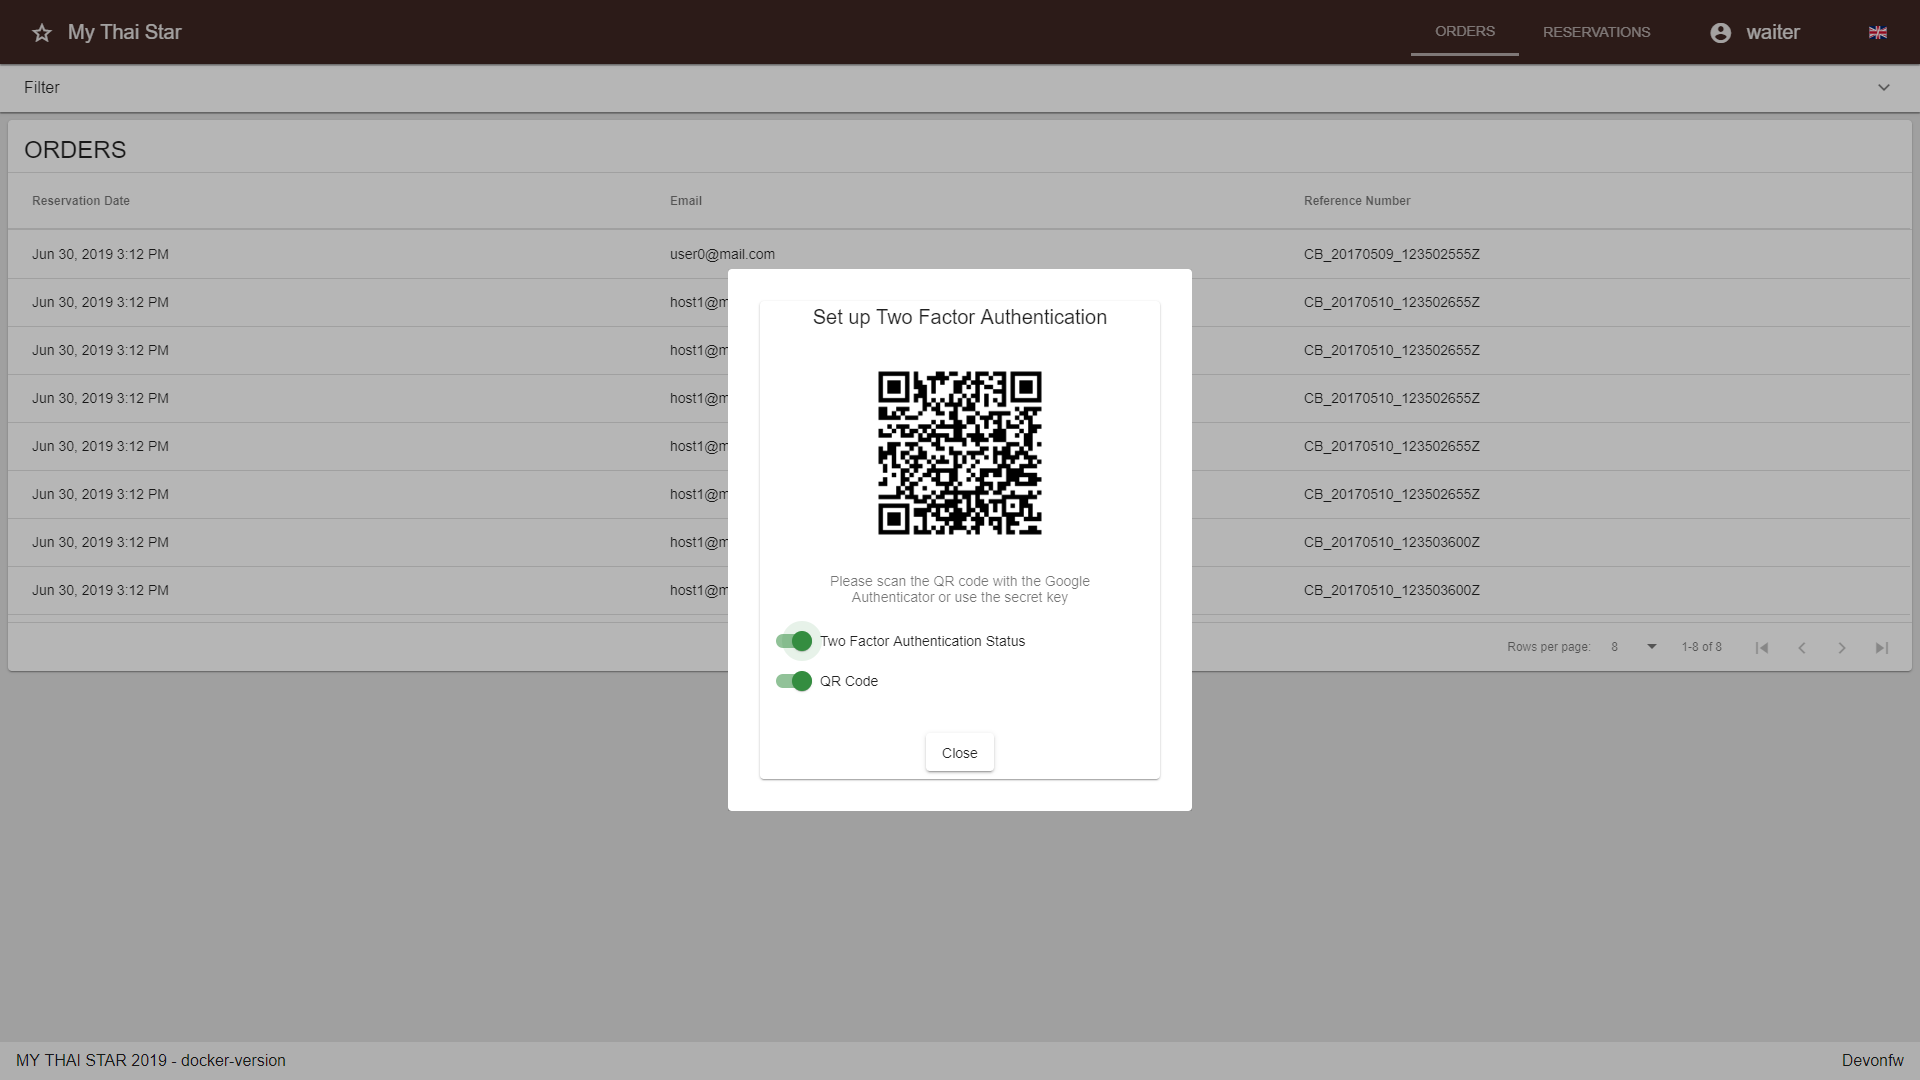
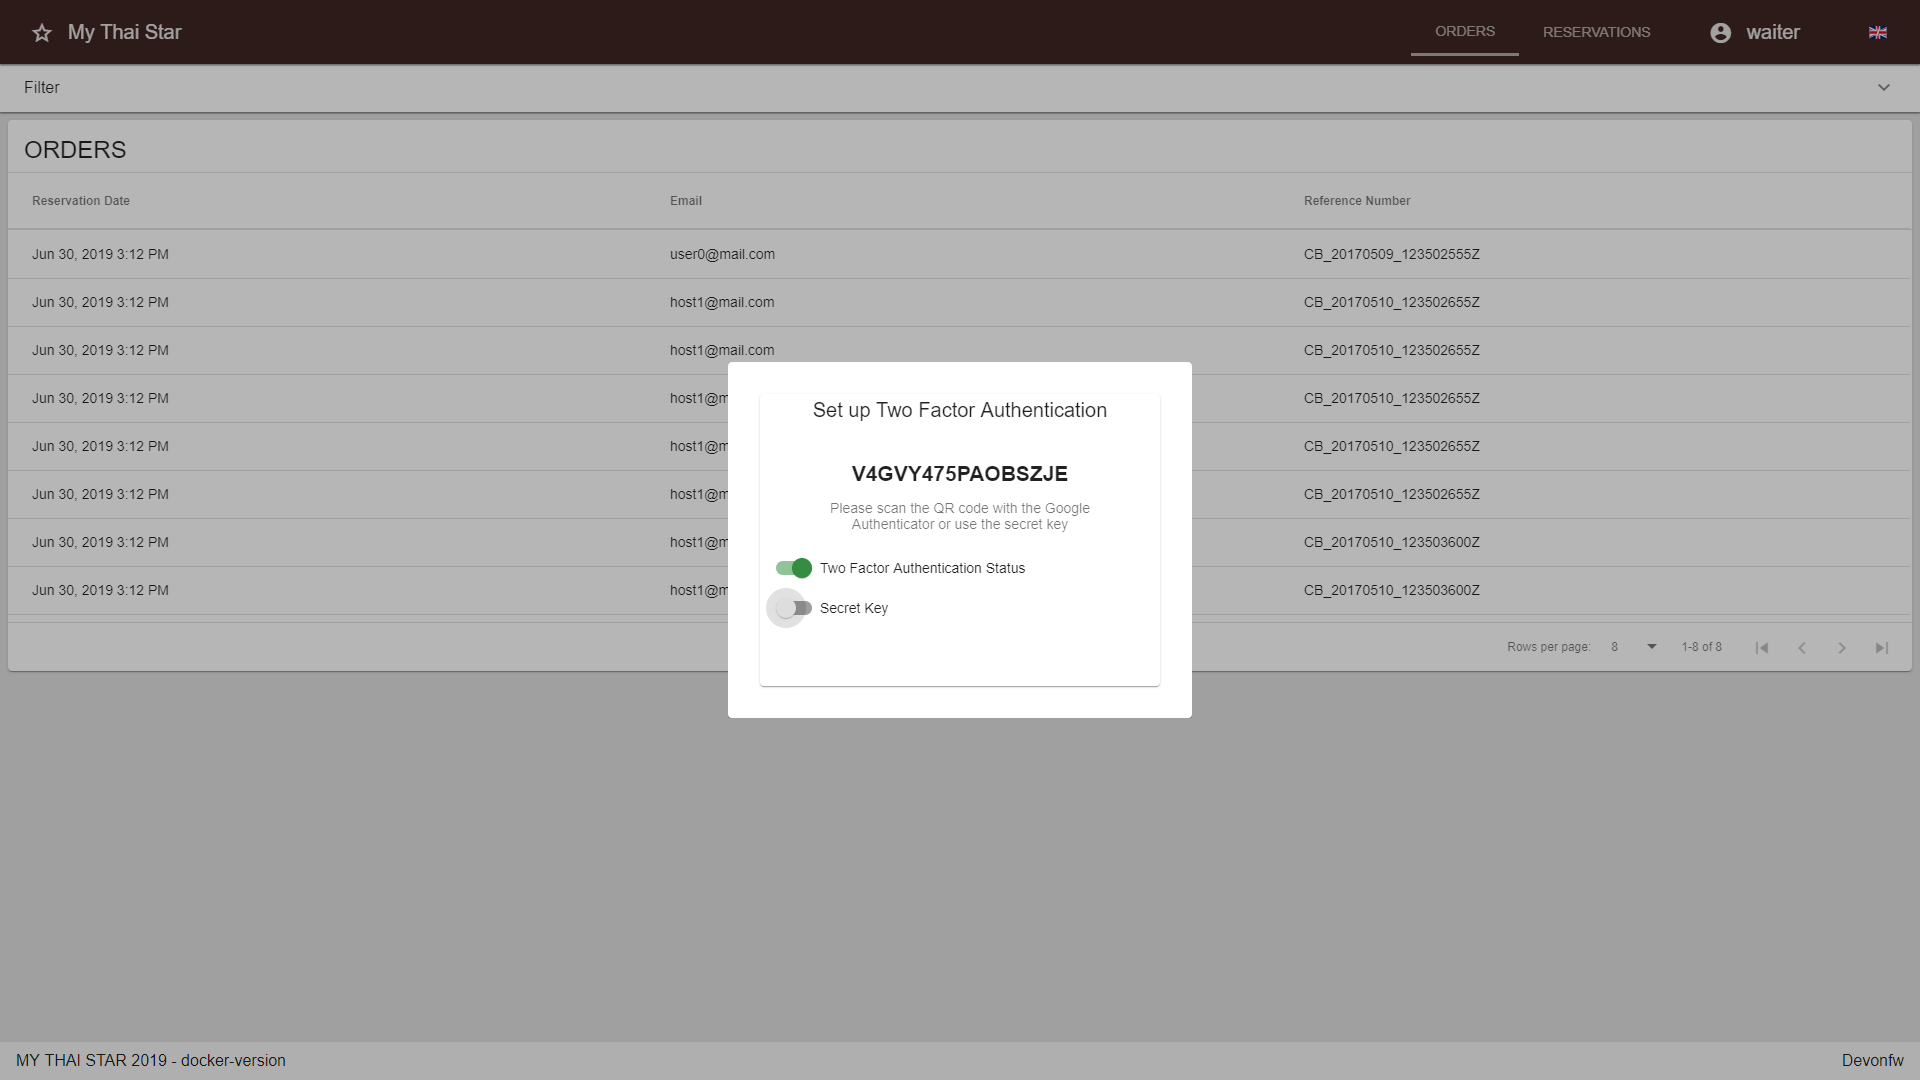
In the current state, TOTP will be used for OTP generation. For this purpose we recommend the Google Authenticator or any TOTP generator out there.
-
Login with your account
-
Open the 2FA settings
-
Activate the 2FA Status
-
Initialize your device with either a QR-Code or a secret