Let me ask you two questions:
1- Are you a pentester or bug bounty hunter?
2- Do you hate reporting?
If you answered yes to both (and I assume that if you answered "yes" to the first one, you necessarily answered "yes" to the second one), check out this extension. It removes the hassle of reporting missing security headers in your pentest reports. Here is what the extension does (the last part is the best, so read until the end!):
- It gets all your Burp Proxy History, element by element.
- It identifies all headers, both for the requests and the responses.
- From all these URLs and Hosts you have visited, it retains only the unique ones, discarding duplicates.
- It gives you a list of all the headers available, and if you click on them it will tell you at which Hosts and URLs you can find them.
- It also identifies the meta headers and shows you their contents in an unified way, so you don't need to scrape websites or do other dirty and annoying tricks.
- You can select headers you are interested in, or define new ones, from different categories (missing security headers, dangerous or potentially dangerous headers). A large preset of headers is included, but you can add your own if you miss any (feel free to send pull requests with headers you would like to include)
- It gives you some nice formatting of headers information for every request, as well as color effects to let you know which requests contain more of the headers you are looking for.
- You can output to text files the headers detected in CSV or JSON format. More options will be included in the future, if they make sense.
- But, best of all, you can export to MS Word custom templates the results, so that you can autofill your own reports with a couple of mouse clicks, or generate a Word file from which you can just copy and paste to your own report individual tables, graphs, and use the included vulnerable headers or cookie flags definitions, or replace them with your own.
No more hours wasted reporting missing security headers, server headers, etc etc etc :) A couple of clicks will do that for you!!!
As far as I have used and tested this extension, both while developing it and for my personal and professional use, it works as it should, but there may be unexpected cases where it doesn't find some header, doesn't properly find unique endpoints or some other minor issues. In any case I don't think you will find many of these outliers, but complicated URLs could cause some problems. If you detect any, feel free to let me know (check the How to contribute section further down below). Also, I advise that you check manually the results provided by this extension, at least a couple of times to get used to how this extension works, and to make sure that you don't report to your client anything that is not actually there. By now I don't check it anymore for my own pentests because I know it works, but use it at your own risk!
This extension is written in Python, therefore you will need the Jython .jar file set on your Burp Suite configuration. If you don't know how to do that, check my course on Burp Extensions creation (https://medium.com/system-weakness/burp-extensions-creation-1-7ddeb61efb33) or google it, it shouldn't be difficult :)
Also, one of the main components of this extension requires that you install Python 3 on your system (on most linux distros should be included by default, on Windows use the installer from https://www.python.org/downloads/). If everything happens with no problems, this extension should detect your installation of Python and install the docxtpl library, to be able to create the .docx reports. In any case, you can install the library yourself with pip install docxtpl. If the extension cannot find your Python binary path you can set it manually, read item 5 on the Instructions or, create an Issue if it doesn't work for you.
In any case, the extension generates an auxiliary file that you can copy to another machine, and generate it there.
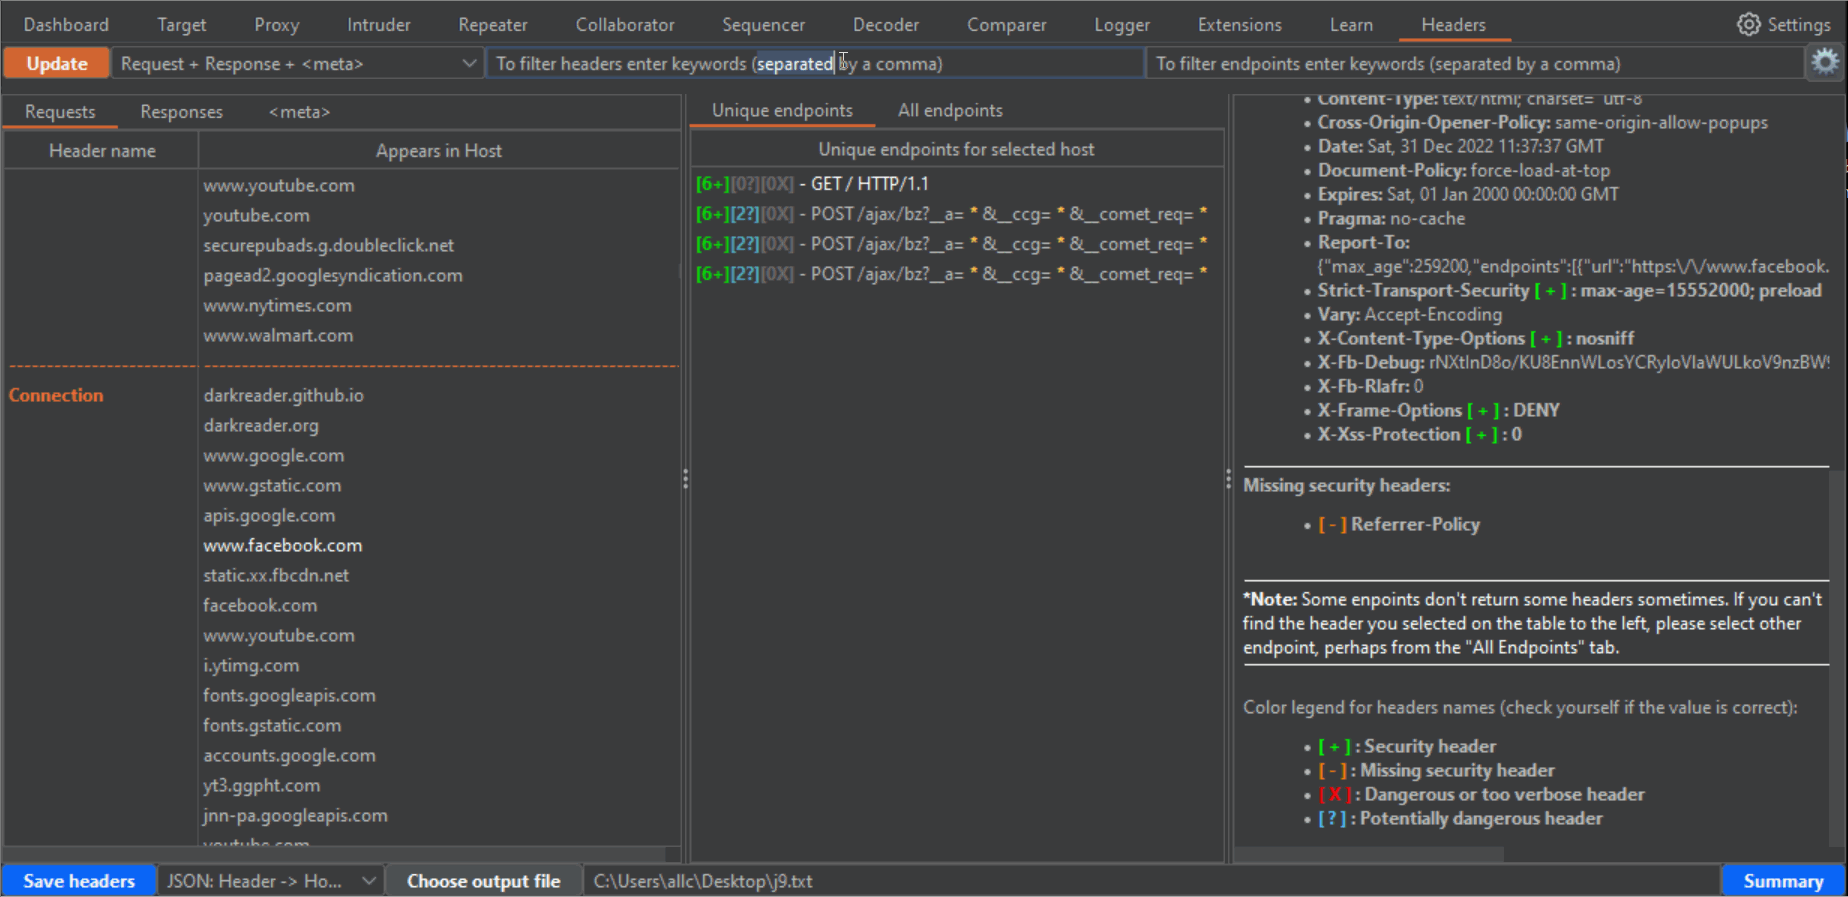
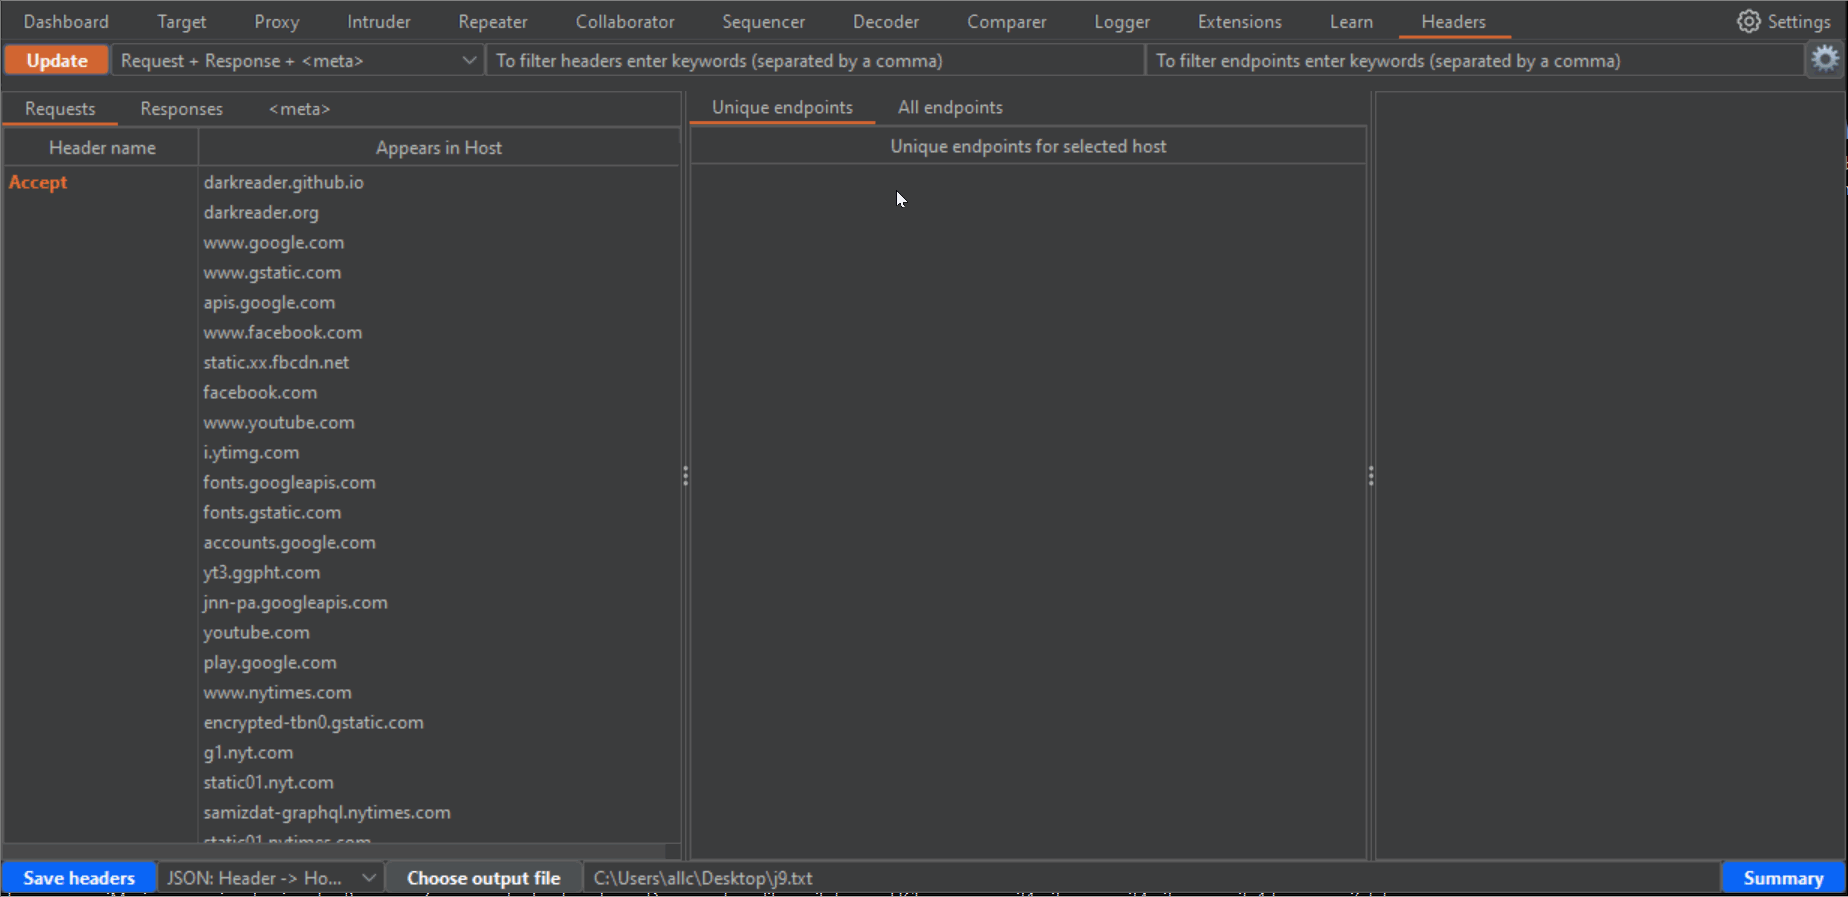
1- After you have captured some proxy traffic, switch to the Headers tab and click the Update button. That will fill the left panel with the headers that appear in the requests from your captured traffic, sorted by alphabetical order. If you change to the Response tab, in that same panel, you will see the sorted headers from the captured responses. In both cases, under each header you can see the hosts where that header is present.

2- If there are many results, you can use the two filters at the top to filter hosts and endpoints. In the case of endpoints filter, you can use different words separated by a comma. The filter will show all results matching any of these words. Press enter after writing filters, or click again the Update button to filter results.
3- On the left panel as well, you can click on the Meta tab, to get the <meta> HTML tags for each host that has any.
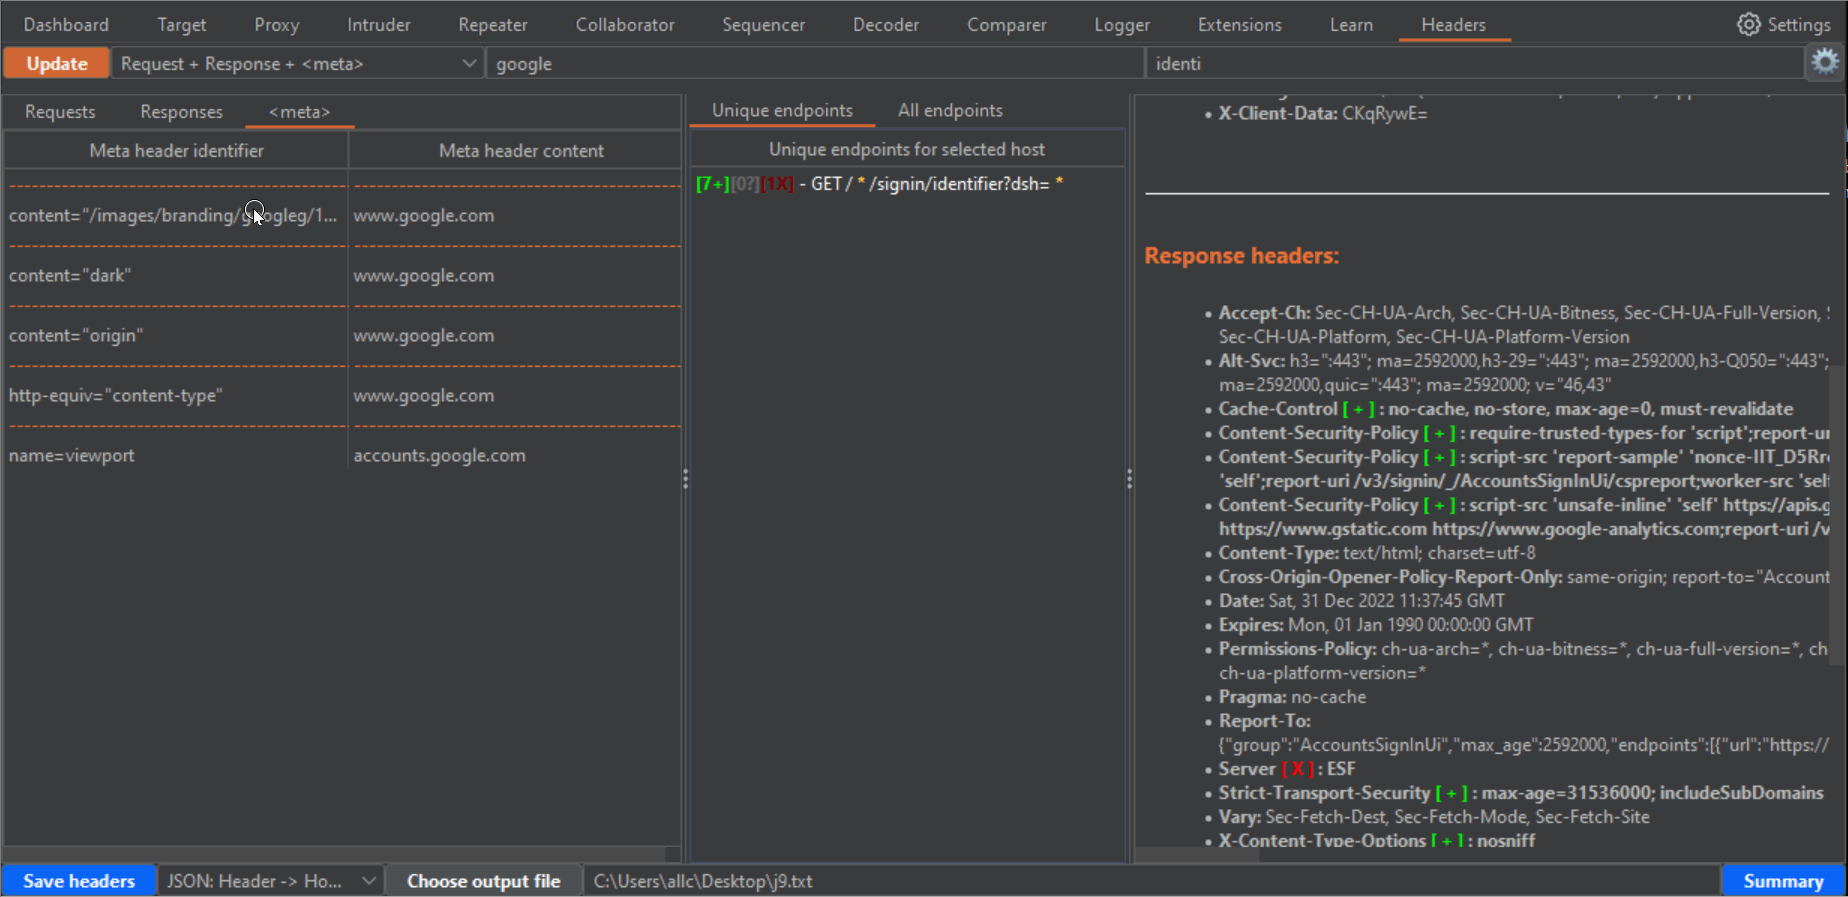
4- If you click in any row of the left panel, either for Requests, Responses or Meta, the central panel will fill with the URLs (endpoint) where those headers or meta tags can be found. The central panel has two tabs, "Unique endpoints" and "All endpoints". If you have browsed the same endpoints during your tests, you will have different requests to and responses from the same endpoint. Or you may have requests to an endpoint, with slight variations in parameters or routes in the URLs. That can be confusing, and seem bulkier than it really is. In the "All endpoints" tab you will see all requests where a certain header, in a certain Host, appears. In the "Unique endpoints" tab, some preprocessing is done, to show you only unique endpoints. Also, query string parameters and things like numbers in the URL have been grepped and replaced by a star symbol. This will remove duplicated URLs, and only show you unique endpoints, which is specially useful when your history has grown pretty big. Addittionaly, the Unique endpoints tab shows you the number of detected headers belonging to three categories: "Security headers", "Dangerous or verbose headers" and "Potentially dangerous headers". Along with the number, you will see a color which becomes brighter, the more headers you want to be taken into account in these categories. You can select these headers from the configuration window (click on the gear icon to open it, and don't forget to click on the "Apply changes" button when you are done!!!). The brightest color will be when all headers for that category are present.
5- Both for "Unique endpoints" and "All endpoints", when you click them (in the case of unique endpoints it will show the first occurrence), the panel on the right will show you a summary of the request and response headers for that endpoint, highlighting in orange and bold font the currently selected header on the left panel, in bold the Host header, for easier visibility, and color symbols for any detected Security header (green [+]), Dangerous or verbose header (red [-]), or potentially dangerous header (blue [?]). This summary also includes a list of missing security headers, compared to all the security headers you have chosen in the configuration window.
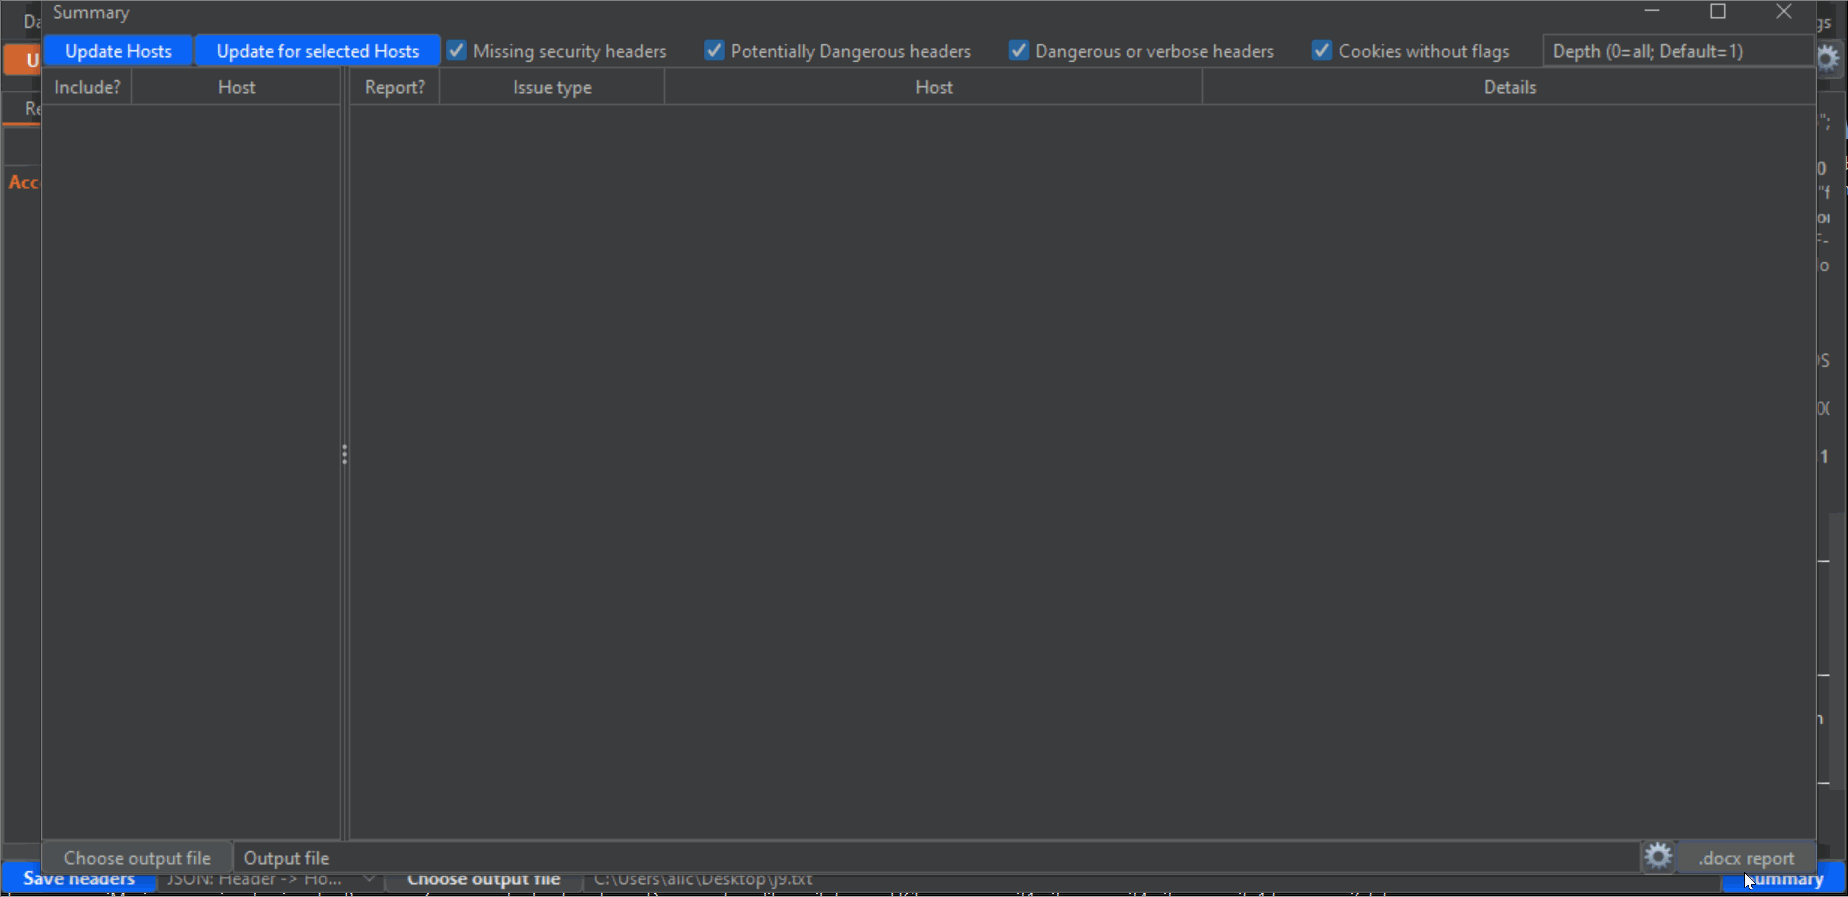
6- Click on the blue Summary button on the lower right corner to open an additional window. This is where the magic happens, and you can export a Word report based on a custom template all the headers findings. First, click on the "Update Hosts" button on the upper left corner to populate the left panel with all hosts detected from the Proxy History. Then, check the checkboxes next to every host that you want to include in the report. Take into account that there will probably be a lot of undesired hosts in this list, from analytic sites and other third parties. Also, make sure that you select all subdomains or desired hosts. Next, make sure that the categories of vulnerability types that you desire to report are checked (by default, all): "Missing security headers", "Potentially dangerous headers", "dangerous or verbose headers" and "Cookies without flags". Lastly, click the "Update for selected hosts" button to populate the main panel with all the headers that will be reported. Again, uncheck all the checkboxes of the entries that you don't want to include in the report.
I have noticed during my tests that on many occasions a host uses different headers for different endpoints. This makes it very easy to miss problematic headers when you test manually, but not anymore thanks to this extension. Change the value of "Depth" on the upper right corner in the Summary window to an integer value, to scan for different depths on the URL structure (for example, depth=1 means the endpoint "/x", depth=2 means "/.../x", depth=3 means "/.../.../x" and so on (where "x" would be the last portion of the endpoint), and depth=0 will give you the full URL). Of course, the lower the depth (which, by default is 1, the lowest possible) the less "granular" the results will be, and the fewer entries you will have. So if you want to report more headers, or "dig" deeper, increase the depth and click again on the "Update for selected hosts" button.
Finally, click on the "Choose output file" on the lower left corner to choose the output .docx file to export the results, or write the full path directly on the textbox next to the button. And click on the ".docx report" button on the lower right corner to generate the report. To the left of this button there is a gear icon that you can click to open the configuration for generating Word reports. As mentioned earlier, you need to have Python3 installed on your computer (Jython is not enough, since the module to generate word reports doesn't work in Jython). If you install it using standard methods (the Python installer for Windows, or apt install python on linux) everything should work. However, you can provide the path to the Python executable on the upper textbox in this window. Then, click the button to make sure you are running the "docxtpl" Python library, which is used to create the reports. You can install it yourself, but this extension will install it for you (at least I didn't have problems installing it, but you never know...).

WARNING!I have noticed that some strange urls, with a lot of symbols can cause problems. If the report is not appearing in the target path, uncheck the longest and weirdest looking URLs, to see if the report appears now. Then, decide if you can skip that URL in your report, or add it manually. It's hard to predict every type of URLs out there, so some cannot be easily parsed, sorry! As an example, this URL caused me problems when generating the report, so if you see something similar, please uncheck it from the Summary window and try again: /rum.js;rAraT1IazsN9CNL_S+tTtSCsOVg=. In this case the problem was the semicolon between "js" and what comes next, that messed up some string splitting that the code does
6- If you use the example template, or modify it, don't forget to update the figure numbers for the evidences that you can paste later into the report. For that, you can select all text on Word (Ctrl-A, or some other key combination depending on your keyboard language) and then right click on the selection and click on "Update field" (for some keyboard languages, the F9 key also works).
NOTE: You don't need to create the report on the same machine where you have Burp installed. The extension generates the file called output/selected_output.txt file when you click the generate report button. You can copy this file over to another machine that has Python and Docxtpl, and call the script in /template/template.py. To do that, copy the selected_output.txt file to another machine where you have downloaded the repo, and place it in the output/ directory. Then go to the template directory and run: python template.py <output path>, where <output path> is the absolute or relative path where the report will be saved. If, for example, you do python template.py out.docx, a report called out.docx will be saved in the very same template folder, next to the template.py script.
7- Enjoy the many hours of manual work that you just saved yourself. Preferably, use these hours to go for a walk or do some exercise instead of gaming, so that the electricity that you save won't pollute the planet, I guess that typing in Word requires less electricity than games to run :)
1- This extension recalls the configurations that you use, but make sure to "save changes" or "apply changes" in the different config windows, whenever you see such buttons. Doing so, next time you load the extension it will have the same settings you last used. There are also buttons to revert to factory settings.
2- You will probably want to use a custom template for the word reports. First, look for the provided template. It is in the /template/template.docx file. If you installed this extension via the Portswigger BApp store, you will find the directory of this extension under C:\Users\<youruser>\AppData\Roaming\BurpSuite\bapps. Then to find it (folders are given weird names, look for some file belonging to this extension, for example, "headers_window.py". Then look for the template).
The template contains Jinja2 instructions to replace in each generated table the appropriate values. Notice that the provided template contains a for loop instruction surrounding the table. This means that a different table will be generated for every issue that will be reported. You can skip some of this information if you don't need it. or you can place it in other arrangements. Next is a description of the different fields you can use (include the "{ " before and " }}" after, they are Jinja2 syntax and are necessary.):
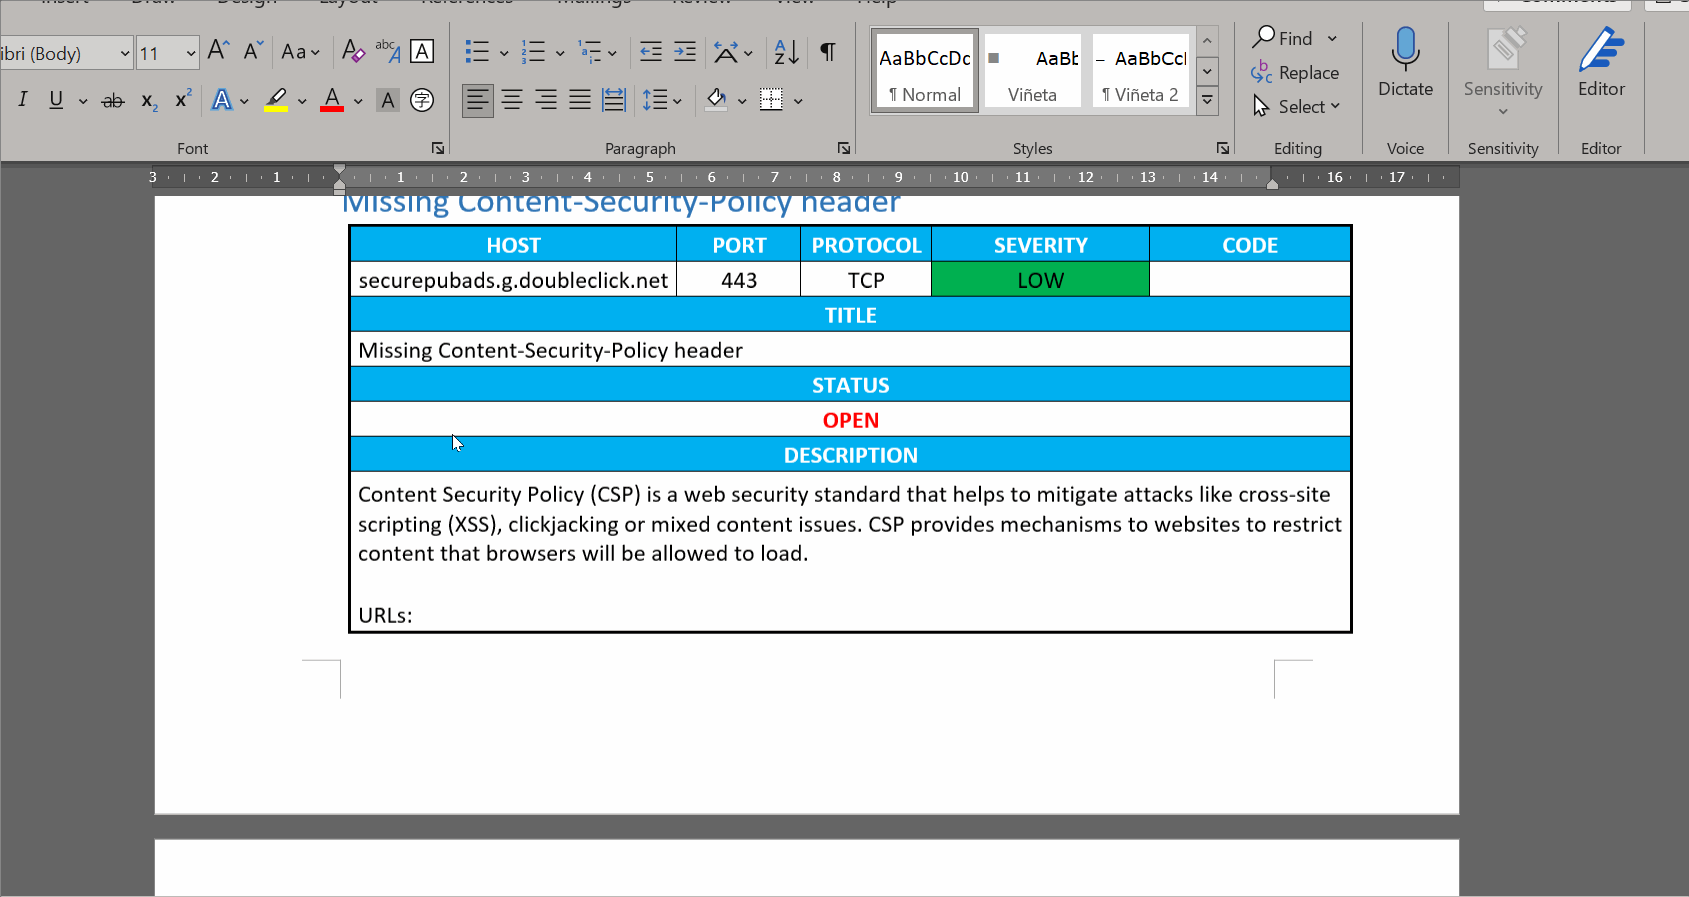
{{ host[‘headers’]["Name"] }}: Vulnerability name{{ host[‘headers’]["Host"] }}: Host name{{ host[‘headers’]["IP"] }}: Host IP, in case it's available{{ host[‘headers’]["Port"] }}: Port where the endpoint is{{ host[‘headers’]["Protocol"] }}: Protocol{{ host[‘headers’]["Severity"] }}: Severity (Critical, High, Medium or Low){{ host[‘headers’]["Code"] }}: In case you use some code to identify vulnerabilities. Not implemented right now.{{ host[‘headers’][“CVSS”] }}: CVSS value (from 0 to 10){{ host[‘headers’][“CVSS_image”] }}: Any image that you want to include to graphically represent the CVSS score{{ host[‘headers’][“Description”] }}: Vulnerability description{{ host[‘headers’][“Solution”] }}: Remediation instructions for the vulnerability- in case you want to include a list of endpoints where the vulnerability is found
{% for url in host[‘headers’][“URLs”] %}
-	{{ url }}
{%- endfor %}```
Feel free to modify the template.py file to include any new functionality that is currently not implemented. This script already contains CVSS scores and vectors for the different vulnerabilities, but keep in mind that they could vary for specific conditions. However I think they are a valid approximation in most cases.
Also, the info.txt file, also in the template directory, contains the description and remediation for every vulnerability. Feel free to modify them, to adapt them to your needs or style of reporting. Every line is in the following format:
<Vulnerability name> ::: <Vulnerability description> --- <Vulnerability remediation>
So if you add new, or modify the current ones, make sure they are in this format. Also, avoid empty lines, just in case.
If you enjoy this extension, please give a star to the repo: https://github.com/dh0ck/Headers I have dedicated many hours to create it, not just to save myself time in the long run, but especially to free pentesters around the world from something that I know we all hate, so that we can dedicate more time to actually doing what we like, and finding more vulns.
If you want to contribute, feel free to add pull requests, or if you have ideas that you would like this extension to include, feel free to create an Issue on this repo, write to me on Telegram (@dh0ck) or via LinkedIn (https://www.linkedin.com/in/dh0ck). If I find your idea is feasible I will add it to my to-do list! Let's make this tool save us even more hours of stupid reporting!
Thanks again for taking the time to try this extension, hope you find it useful ;)