This aims to simplify and guide beginners to run the tests and/or make their first contribution.
If you don't have git on your machine, install it.
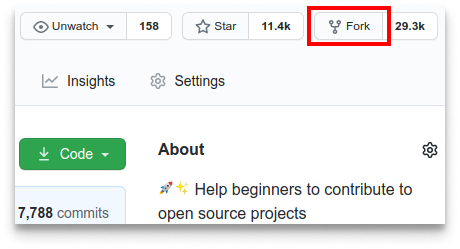
Fork this repository by clicking on the fork button on the top of this page. This will create a copy of this repository in your account.
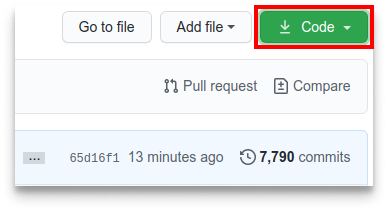
Now clone the forked repository to your machine. Go to your GitHub account, open the forked repository, click on the code button and then click the copy to clipboard icon.
Open a terminal and run the following git command:
git clone "url you just copied"
where "url you just copied" (without the quotation marks) is the url to this repository (your fork of this project). See the previous steps to obtain the url.

For example:
git clone https://github.com/this-is-you/first-contributions.git
where this-is-you is your GitHub username. Here you're copying the contents of the first-contributions repository on GitHub to your computer.
To setup enviroments and run the tests on your local please follow resepctive READMEs of the test directories.
For example, if you want to run HQ Smoke Tests, please follow steps here
Change to the repository directory on your computer (if you are not already there):
cd first-contributions
Now create a branch using the git checkout command:
git checkout -b your-new-branch-name
For example:
git checkout -b kt/alonzo-church
(The name of the branch does not need to have the word your name's initials (kt) in it, but it is a good practice to.)
Make the necessary changes.
If you go to the project directory and execute the command git status, you'll see there are changes.
Add those changes to the branch you just created using the git add command:
git add <changed-file-name>
Now commit those changes using the git commit command:
git commit -m "Add a short message to summarize the changes"
Push your changes using the command git push:
git push origin <add-your-branch-name>
replacing <add-your-branch-name> with the name of the branch you created earlier.
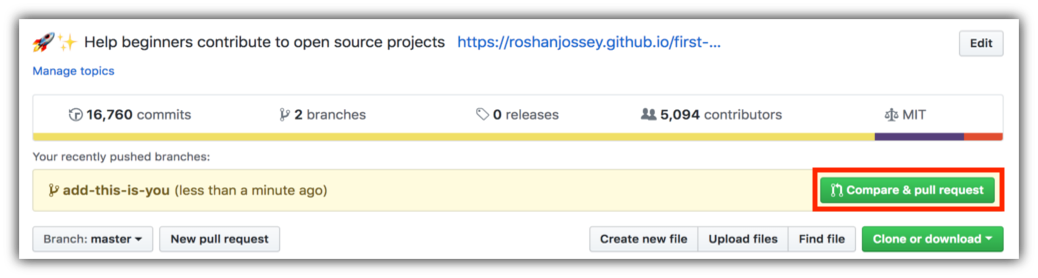
If you go to your repository on GitHub, you'll see a Compare & pull request button. Click on that button.
Now submit the pull request.

Add a reviewer and get the PR reviewed. Once the changes are approved and merged, you will get a notification email.