NOTE: This project is on hold. Advancements with Large Language Models, transformers, and robotics have effectively leap-frogged some of the goals of this project. See my repository "DeepMind_RT_X_with_WidowX_Arm" for current investigations.
Welcome to ALSET. Do you want an inexpensive, open-source autonomous vehicle with full-self driving capabilities? Currently ALSET has 2 models, with more on the way:
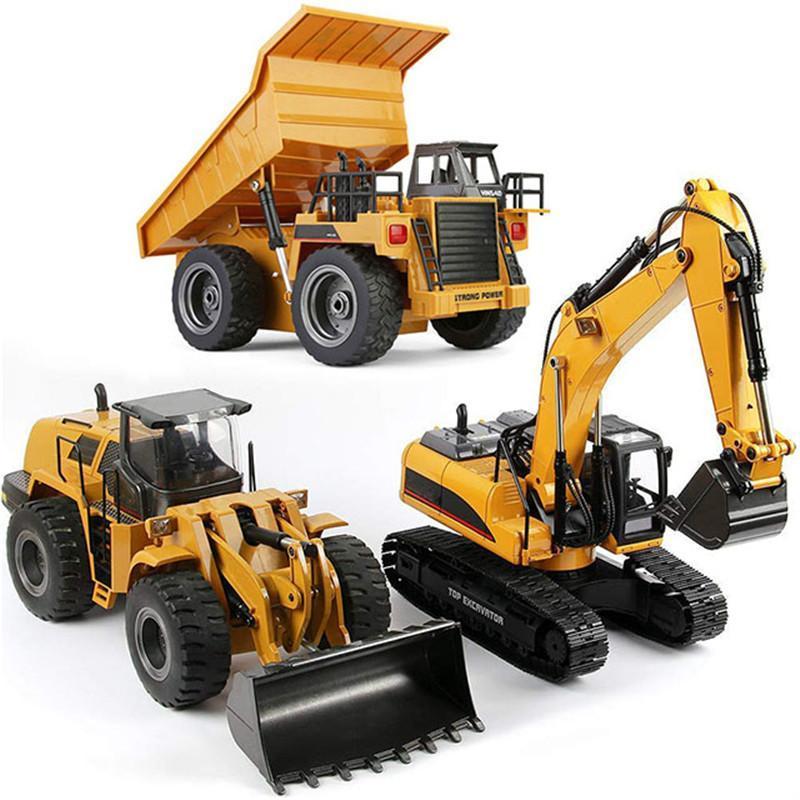
- Model S: an autonomous robotic arm on tracks.
- Model X: an autonomous Excavator.


What does your ALSET S or ALSET X do? Whatever you train it to do! Both run the same software and mostly the same hardware to support the most advanced Deep Learning capabilities.
ALSET S: The ALSET S is based upon the Sharper Image Robot, which was purchased on clearance for less than $20. Note that robots on clearance should be checked in advance of purchase to ensure they are 100% functional, as we found that the majority were not.

ALSET X: The ALSET X is based upon the Top Race 15 Channel RC Excavator. This is an amazing RC vehicle for the price. This tractor vehicle works just like a real excavator with the ability and power to really dig with its heavy steel shovel. It has 680° Degree Cab Rotation and 3 separate motors on digging arm to lift up and down to its full extent.
Future platforms include: the Top Race Bulldozer and Dump Truck. You will be able train these future ALSET vehicles via Remote Control to do Bulldozer-like behavior or Dump-truck-like behavior without explicitly programming anything. With minimal changes, you can train individual "functionality" like put down the bulldozer blade and drive forward and then lift the blade and drive in reverse. You can link functionality together to do a higher-level task. Then, finally you can define some "policy" so that the linked functionalities can be optimized via end-to-end reinforcement learning. Other possible RC toys: firetrucks with RC ladder/firehose, RC Forklifts, RC Utility Bucket Trucks, RC tanks.

Both the ALSET Models X and S can be trained to do simple Jetbot-like functionality like "stay on a table." The Jetbot is an educational robot with just 2 motored wheels from NVIDIA. The NVIDIA Jetbot has a set of nice tutorials of running neural nets (NNs) on the Jetson Nano AI computer including facial recognition, obstacle avoidance, object tracking, and line following. The ALSET vehicles can run all the jetbot tutorials with minor mods. In addition, the software for ALSET vehicles can be trained to do a sequence of individual tasks like "search for cube", "drive to cube",and "pick up cube". The ALSET S has a robot arm for mobile manipulation. Finally, ALSET software can do end-to-end optimizations of the sequence of individual tasks via reinforcement learning.
ALSET vehicles are inexpensive platforms to run NNs and DDQN reinforcement learning on a mobile manipulator. The ALSET hardware and software is generalized to handle many inexpensive RC toys with tracked or differential-drive wheels that have an arm or crane or dozer blade or shovel. Just add a Jetson Nano, battery, and camera mounted near the end of the arm/excavator/bulldozer/crane/shovel as described below. Contact me if interested.
NOTE: A major revision to this project is underway. See the next section for details.
The original Sharper Image robot and Top Race Excavator were hacked as followed:
- Jetson Nano Developer Board with wifi
- raspberry pi camera v2 with 2 ft cable mounted on a cookie wheel case near the end of the arm (model S) or front of the operator compartment.
- A hacked RC:
- the circuit board from inside of the low-end RC control that came with the robot.
- You can see/use the buttons from the RC circuit board to control the robot.
- the other side of the board was soldered to wire it up with the IO expansion board (Model S) or the Multiplexer board (Model X)
- Logitech gamepad joystick communicates with the jetson to provide more sophisticated and specialized RC control.
- It is powered by a mongo BONAI 5.6A battery pack, but smaller 5.6A battery packs also. Unfotunately, if the battery packs degrade just slightly, the Jetson will crash when the amps drop.
The Models S and X differed in how the circuit board inside of their RC transmitters interfaced with the Jetson Nano. For the Model S, an IO expansion board was required because the RC control uses Tri-state logic on 6 pins. The expansion board uses I2C to communicate with the Jetson Development board. The expansion board is connected to the RC control via wires.
The Model X used four MC74HC4066A Quad Analog Switch/Multiplexer/Demultiplexer chips to interface between the RC transmitter board and the Jetson GPIOs. No IO expansision board was needed because the Excavator doesn't use tri-state logic, but the four MC74HC4066A chips allow complex mapping between the RC buttons and the GPIO pins.
The code started with the Jetson Notebook tutorial on Obstacle avoidance, but was changed significantly. The Notebook tutorials barely ran on my Jetson with the wifi connectivity from my working area. The tutorials were replaced with:
- The logitech joystick controls the robot directly
- The camera is streamed using much lower overhead video webserver for teleoperation.
- The images are saved directly to the Robot SD card.
- a poor-man's pwm changes the commands to start/stop up to every tenth of a second or so
- takes the picture when stopped.
- records the command sent by the joystick (lower or upper arm up/down, open/close gripper, etc.) along with the picture in the directory associated with the NN's command.
This data is then gathered and used to train the robot. Note: a tenth of a second of start/stop proved too much for one of the boards and the robot will stop moving after a few minutes of continuous use. Eventually changed the pwm rate to two-moves-per-second.
The robot runs in 4 modes: RC teleoperation, data-capture, and using trained neural net(s) including a single CNN, a multi-part sequence of CNNs, and DDQN reinforcement learning. The CNNs are pre-trained using over 14 million classified images using the Alexnet model. The data capture and neural net can be for a single alexnet NN, or a sequence of alexnet NNs with function-specific knowledge. For example, the 8-parts are for an HBRC phase-3 tabletop bot is:
- get the arm to a known position
- scans for object on the floor (or table)
- goes to object, keeping object in center of vision
- pick up the object
- get the arm to a known position, while gripping object
- scans for the box
- goes to the box (keeping box in center of vision)
- drops object in box
The default app is the HBRC tabletop challenge phase 3:
Basically, the robot is on a table, searches for a cube, drives to the cube, picks the cube up, searches for a box, drives to the box and drops the cube in the box. As dropping off a table is dangerous for a robot's health, I have a setup so that the tabletop is only inches from the floor during training.
A single NN is sufficient for phase-1 of the tabletop challenge. Phase 1 is just go end-to-end and back on a table without falling off the table. The vanilla Jetbot can do that. However, using an arm to pick up a cube and having multi-phase objectives is much harder resulting in using DQN. While individual NN (or a sequence of NN) determine the action based upon a single current image. DQN uses a long sequence of events to determine which action will produce the best long-term reward for an action.
DQN is used instead of PPO reinforcement learning as the robot isn't continuously running in realtime (like an RLdonkeycar race car). The robot stops and figures out the next move, executes the next move, and repeat. The advantage of doing discrete moves is that the robot will have sufficient processing time on low-end processors like the Jetson Nono to determine the next move.
Unfortunately DQN isn't perfect for a tabletop robot because DQN has difficulty handling some situations. For example, picking up a cube is a sparse-reward (taking hundreds of unrewarding moves), as is dropping the cube in a box. Also, there's no continuous scoreboard accumulating tons of rewards/penalties as you might have on a video game.
DQN can be trained after the final reward for each run. For a game like
chess, there's only one reward based upon who won the game.
Then, the DQN algorithm retroactively goes over the history of
preceding moves to give a "quality" score or Q-value.
The Q-value for the move before the checkmate is 99% of the final reward.
The Q-value for the 3rd to last move is .99 * .99 * final_reward, etc.
A neural net is then trained over many moves (i.e. the chess
board state and the associated Q-value) over many games. Eventually,
the NN is able to predict the Q-value of each possible next move.
DQN also uses an experience replay buffer that intermix the acting and learning phases of RL. DDQN is an evolution of the DQN algorithm that addresses various technical deficiencies of DQN.
The ALSET software allows intermediate rewards to be assigned by the user. ALSET uses a jpg image to represent the state after each move. For DQN, minor penalties are assigned for each move to encourage learning more efficient actions.
Here's the ALSET S running the phase1 tabletop (2x speed): https://youtu.be/QVFHAMyEyaI
The same training can be used for both a sequence of functional NNs (i.e. TT_APP ) and for DDQN RL. A potential goal is to train NNs to different functions (like above) and then combine the functions together in different ways to perform different tasks. Then use DDQN to get optimized end-to-end functionality.
It's relatively easy to add other apps because the training is done via teleop. It's a matter of defining and hooking together the different functions to train the NNs on and defining the DQN compute_reward() policies. You can also add "automatic mode" NNs to assist in training, as is done for the "Park Arm Retracted", "scan for cube" and "scan for box" NNs.
The DQN tabletop reward policies are defined in compute_reward(). Basically, the rewards are for picking up the cube, dropping the cube into the box, or a smaller reward for dropping/pushing the cube off the table. The penalties are a small per-move penalty, the robot going off the table (or other bad state), or taking too many moves.
ALSET is essentially an applied research project that tries to take state-of-the-art research and applies it to simple real low-end robots. This ALSET repository tries to take human-demoed functionality and automatically create a dataset to train NNs and DQN RL. Unfortunately, the number of demonstrations required to produce even basic pick-and-place functionality is insurmountable for a mere mortal.
This led to the ALSET_ANALYSIS repository, which tries to apply Open-CV to help automatically gather and label the datasets.
I am currently incorporating the lessons learned from these two repositories into a revised version of ALSET, which is currently work-in-progress. It also tries to integrate GPT-x as a method for model-free offline RL as per the paper: "Decision Transformer: Reinforcement Learning via Sequence Modeling" ( https://arxiv.org/pdf/2106.01345.pdf ). GPT-3 is the basis for huge language models, and the image-from-text DALL-E.
Under the new client-server architecture, ALSET dumbs down the on-board processing of the RC vehicle so that a Raspberry Pi can be used instead of a Jetson. A laptop with GPUs can be used to run the heavy-duty processing of the AI and openCV models.
Full list of parts with Amazon-searchable names for the Model S:
- SanDisk Extreme Pro SDXC UHS-I U3 A2 V30 128GB + Adapter, SDSQXCY-128G-GN6MA
- Cookie Wheel Camera Case for The Raspberry Pi Camera v1 and v2 (not Included) mounted on wrist after taking off half of the black plastic
- Adafruit Flex Cable for Raspberry Pi Camera - 24" / 610mm
- Raspberry Pi Camera Module V2-8 Megapixel,1080p (RPI-CAM-V2)
- Waveshare Power Supply Applicable for Jetson Nano 5V/4A OD 5.5mm ID 2.1mm (US Adapter only)
- seeed studio NVIDIA Jetson Nano Developer Kit Single Board Computer for AI Development - B01 Version. Note the B01 version (for potential future camera)
- Portable Charger 30000mAh, (Ultra High Capacity)(Flashlight)(Outdoor) BONAI 5.6A 4-Port Output External Battery Pack, Polymer Fast 4A Input Power Bank for iPhone iPad Samsung Galaxy and More - Mint
- Onite 20AWG USB to DC 5.5x2.1mm Barrel Jack Center Pin Positive Power Cable Charger Cord for LED Strip, 3.3ft, 2-Pack
- Logitech Gamepad F710
- female-female connector wires
- Geekworm DC 5V 4007 40MM 4CM 40x40x7MM Cooling Fan for NVIDIA Jetson Nano Developer Kit and Jetson Nano Metal Case/T100 Case/T300 Case
- Geekworm DC 5V 4007 40MM 4CM 40x40x7MM Cooling Fan for NVIDIA Jetson Nano Developer Kit and Jetson Nano Metal Case/T100 Case/T300 Case
- Waveshare AC8265 Wireless NIC Module for Jetson Nano Supports 2.4GHz / 5GHz Dual Band WiFi and Bluetooth 4.2
- Waveshare MCP23017 IO Expansion Board I2C Interface Expands 16 I/O Pins Stack to 8 pcs Used at The Same Time Allow Multi I2C Modules to be Stacked
- plastic zip ties, 9 volt battery connector
I made a simple cheap press-board harness glued to wooden right-angle brackets so that the boards go on either side of the arm just on the inside of the tank-tracks and supported by the robot body. You could get a lot fancier if you like. The press-boards are slightly bigger than the battery. The battery is attached via plastic zip ties through holes in the board on one side. On the other side goes the Nano, the MCP23017, the circuit board from inside of the RC joystick.
Put the fan and wifi on the nano.
Take apart the joystick RC controller for the robot. Take out the board. Solder wires to the other side of the buttons up/down on the board. Also, solder the positive voltage. Also solder the 9 volt battery connector to the 9volt wires that are integrated into the plastic controller. The RC controller is the key to the integration with the toy and the Nano to provide simple autonomy. As long as you can do similar soldering to a different toy's joystick, you can use much of the same code and board layout for a toy crane, excavator, bulldozer, etc. The fact that the joystick was a simple up/down set of switches (with no speed control) makes the joystick easier to integrate. We purchased an excavator and verified that the joystick was also a set of simple up/down switches.
The other side of the joystick wires go to the MCP23017.
The MCP23017 are also connected to the Nano via female-female connector wires.
TODO: add lots of pictures. add Amazon links. Contact me using my downingbots gmail, if you have questions in the meantime. This section is mostly a place-holder to give you an idea of the scope of the project. I was able to put this all together in an afternoon.
The robot has separate batteries for the joystick and the base. The Nano has its own battery. The Nano battery was selected because it is one of the few able to provide enough amps to run multiple NNs concurrently.
First, follow the NVIDIA instructions to install the jetbot onto the Jetson Nano. Use a huge SD card as images for the datasets will be stored there and training will (by default) be done on the Nano. It is possible to follow the Jetson instructions so that training could be done on a laptop instead.
cd to the jetson source directory (or a new directory) and put the
contents of this github repository there. Add an apps subdirectory.
Further subdirectories should be automatically created during execution
such as:
- apps/TT_DQN/dataset
- apps/TT_FUNC/dataset
- apps/FUNC/dataset
If you are doing active development, I have a script hack that copies the python files to their system directories:
- ./copy_to_python
The robot's camera is streamed while the robot is running. Goto your web browser and look at the 8080 port on the robot's ip address like:
The jetson doesn't seem to always properly cleanup the webcam upon killing the robot executable. If so, run the following script:
- ./restart_camera
To execute the teleop app, run:
- alset_{teleop,train}.py [--func=nn_name] [--app=app_name] [--dqn=app_name] [--init]
- For example:
- python3 ./alset_teleop.py --app="TT"
- python3 ./alset_teleop.py --func="STAY_ON_TABLE"
- python3 ./alset_teleop.py --dqn="TT"
When you start executing, the default mode is teleoperation. To gather data, use the TT_FUNC app on the command line and toggle the "gather_data" button. To run the imitation-learning NN for the TT_FUNC or TT_NN apps, toggle the "NN" button. The DQN app uses reinforcement learning, which combines imitation learning from the TT_FUNC app for initialization and then then does realtime gathering data and training. To run the DQN RL NN, toggle the "gather_data" button.
To gather data in teleop, hit the top left button to go into "gather data" mode. You can toggle off gather_data mode to teleop reposition the robot.
For DQN, gather_data mode executes the NN and gathers data for training. Training should automatically be done at the end of every run. New data gathered from the DQN app will be automatically processed at the beginning of every run. So, there's no reason to explicitly train the DQN app as it does automated incremental training.
The replay buffer in DQN allows random samples from the buffer to be used for training multiple times. The following command constructs a random set of the app functions to form an artificial application run for DQN:
python3 ./mk_rand_func_idx.py --app TT
The FUNC, TT APP, TT RAND are trained incrementally and require training by executing alset_train.py as discussed below. All three app types (FUNC, APP, and DQN) use the FUNC app to gather data and will be trained from the FUNC data.
DQN only uses FUNC dataset for the initial training. DQN can be initially trained by randomly combining FUNC dataset runs in the correct order and/or by training on APP composite dataset runs that run the functions end-to-end. After the initial training, DQN will collect its own dataset and train using reinforcement learning from there. The huge advantage of the DQN initially training from the FUNC or APP datasets is that thousands of random initial runs can be avoided.
To train, run:
- python3 ./alset_train.py --app="TT"
- python3 ./alset_train.py --func="QUICK_SCAN_FOR_CUBE"
The joystick commands for the ALSET S on the logitech controller are:
- TELEOP LEFT_TRACK => "y" axis
- TELEOP RIGHT_TRACK => "ry" axis
- TELEOP/DQN REWARD => "z" axis
- TELEOP/DQN PENALTY => "rz" axisNN/TELEOP
- TELEOP/DQN GATHER_DATA TOGGLE => "tl" button
- NN/TELEOP TOGGLE => "tr" button
- TELEOP LOWER_ARM_DOWN => "a" button
- TELEOP LOWER_ARM_UP => "y" button
- DQN ROBOT_OFF_TABLE_PENALTY => "y" button
- TELEOP UPPER_ARM_DOWN => "hat0y" axis
- TELEOP UPPER_ARM_UP => "hat0y" axis
- DQN CUBE_OFF_TABLE_REWARD => "y" button
- TELEOP GRIPPER OPEN => "x" buttons
- TELEOP GRIPPER ClOSE => "b" button
- TELEOP WRIST ROTATE LEFT/RIGHT => "hat0x" axis
- (note: WRIST is not used by any of the NNs)
The human uses the joystick to define the REWARD and PENALTY. For TT_func, these will result in moving on to the next NN to train. For DQN, these will end the run. Different DQN terminal penalties and rewards can be awarded by ROBOT_OFF_TABLE_PENALTY and CUBE_OFF_TABLE_PENALTY.
The steps for training the robot for the option --app=="TT":
- For the safety of the robot, have a tabletop-like surface elevated inches from the ground.
- Put a box at the end of the table or just off the table, typically in the middle of the long-end of the table.
- Put a cube on the table.
- Put the robot on the table. Initially the cube and robot placement/orientation can be random, but eventually you'll want to place them deliberately so that more scenarios can be covered, so for example, the robot will learn not to drive off the table.
- Run TT_FUNC in teleop.
- Point your browser at the webcam. There will be some lag.
- You can reposition by teleop while not in gather_data mode.
- Put in gather_data mode.
Once in gather-data mode, we are gathering images and their associated actions so that we can later train the robot. We can train one simple function at a time or we can train an end-to-end a series of functions that form an Application. In the TableTop (TT) app, we train each function of the following functions in sequence:
- The robot will first try to park the arm. To automatically park the run, the camera should not see lots of movement happening beyond the table (e.g., spectators) When done parking the arm, press reward. This automatic function will gather image/action data for the training a NN. Then you can train the second NN, which is searching for the cube.
- Next, the robot will automatically rotate around. When the cube can be completely seen within the webcam, press reward to start training the next NN.
- Keeping the cube in sight, drive to the cube. When within reach of the cube, press reward to finish this NN's training. This phase is gathering data purely the teleoperation.
- For cube pickup, reach out to the cube via the joystick. When ready to grab, press reward to train NN5.
- Next, grab the cube and lift it up. When the cube is successfully off the ground, press reward.
- Like the second NN, the robot scans for the box in automatic mode. Press penalty at the top/bottom of arm scans until you can clearly see the box in webcam, at which time press reward.
- Drive towards the box until within dropping distance. Then press reward..
- Drop the cube in the box and press reward to end training run.
When we've completed enough runs, we train each FUNC NN. The TT_APP will use combine the appropriate FUNCtion in order to accomplish the task of finding, picking up a cube, and dropping the cube into the box. Gather more data if necessary via the TT_APP app in gather_data mode. TT_DQN, FUNC and TT_APP will all train incrementally so that you don't have to train from scratch each time, which is very time consuming.
The key infrastructure is working. There's many directions that we can go from here. Each of the following aren't very hard for me to implement on top of the existing infrastructure. If you are interested in any of these (or other suggestions), contact me via my downingbots gmail:
- Define single-level NN that provide specific named functionality (line following, stay-on-table). Currently possible with some file-copying of NN or training data in the current code. The idea is to expose this functionality.
- Provide a graphical interface to do simple linking together of the functional NN to define an app. Currently, this functionality is available via declarative definition in config.py.
- Associate Fiducials with the NN functionalities. When the fiducial is seen, launch a new functional NN or assign a reward/penalty for reinforcement learning. Maybe do line-following to go from fiducial to fiducial.
- Generalize to other analogous "platforms" like a bulldozer, an excavator, a dump truck, etc.
- Generalize to more dissimilar platforms like a hexipod that I've previously competed at the April 2018 Robogames tabletop and obstacle challenges.
- Experiment with multiple robots working together on tasks.
- Example: excavator fills up a dump truck from gravel in a pit. The dump truck drives around and fills up the same pit on the other side then drives back again for the next refill. A bull-dozer spreads out the gravel in the pit.
- Example: one armed robot picks up cubes and dumps them in a box. Another armed robot picks cubes from a box and dumps them someplace on the ground.
- Write an iPhone / Android app to display the webcam and control the robot via bluetooth. No need to understanding Linux. No Joystick required. No wifi required on the jetson nano. Needs a pre-configured SD card.
- If you are price-sensitive and performance-insensitive, you could try the Raspberry Pi 4 with TensorFlow Lite instead of the Jetson nano.
- Support PPO RL for continuous action in addition to the stop/go DQN. You need to make sure that the Jetson can keep up with the RC response time. PPO was used on the RL donkeycar but required the car to be running slow. However, the Sharper Image Robot on the tabletop would run right off the table. The response time to process an image might be a half-second, and a half-second isn't fast enough for many continuous actions.
I want to do Reinforcement Learning (RL) on real robots (specifically mobile manipulators with high-end hobbyist-grade hardware such as dynamixel MX-64 servos.) These robots cost less than a few thousand dollars. Such robots would be considered very low-end by university research robotics labs.
ROS is a good place to start with real robots, but you'll eventually hit the limits of what custom software can achieve. Robot perception is still not solved and the best human-designed algorithms leave a lot to be desired. My hope is that RL can adapt to handle low-end hardware and fill some of the intelligence void in robotics. Unfortunately, RL presents its own set of challenges. I want to learn these challenges and try to solve subsets of these open-end research problems.
ALSET addresses several lessons learned the hard way.
- Over time, I've become convinced that inexpensive Robot Arms should have camera attached directly to the arm and use RL for digital servoing. The Alset S does this with its only sensor - the RPi camera on its gripper (just below the "wrist"). The Alset X doesn't have a gripper, so the camera is attached to where a human is designed to sit.
- ALSET does discrete moves to avoid realtime processing and also to handle low-end hardware limitions (mcp23017 communication rate).
- The on-board Jetson is the most expensive component. Total price of the whole robot is a few hundred dollars.
- Use imitation-learning to reduce amount of RL episodes that you have to run.
There are many obstacles of doing RL on real robots:
- number of episodes to tune RL (1000-100,000 on model-free). Solving problems like Open AI's DOTA, Deep Mind's Alpha-GO, Open AI's GTP3, etc. requires hundreds of thousands of dollars of computing power. We want to do realtime tuning of RL on a small scale. We want to be order of 10 training sessions or You-Only-Demo-Once.
- Getting access to state information. Simulations provide the internal state of objects such as block locations so you can compute distance to block.
- low-end hardware adds more complexity for repeatability
To solve the problem of getting the state of the environment that simulations can provide for free, you need other external mechanisms to evaluate real-world state:
- OpenCV implementations to identify state (e.g., distance from line, location of block)
- Separate cameras
- add fiducials to objects (e.g., block) in environment
- add sensors to objects in environment
- Tons of human-interactions to reset the environment
Some of my previous robots: PR2Lite (with Maxwell, which ROSwell cloned), REPLab, RLDonkeycar


Lessons from PR2-Lite:
- PR2-Lite isn't light. ROSwell is a much better size. PR2-Lite was an excellent platform for the team of advanced high-school kids who largely designed, coded and built it (with mentoring.)
- ROS has a huge learning curve, but I've been using it since C-turtle days.
Lessons from ROSwell:
- ROS is good. SLAM and complex arm planning (through MoveIt) are now doable by hobbyists. However, doing complex things are really hard to do. Human perception algorithms just aren't good enough. This has led to my interest in RL.
- Human-sized robots are good. But so is transportability. ROSwell / Maxwell is just the right size and pricepoint for a serious robot hobbyist. The current robot's most complex application (chess by Mike Ferguson) is literally out-of-reach for ROSwell's arm. The robot would need to physically move locations to reach the other side of a standard-sized board.
- Honestly, the picking up of a chess piece or similarly light object just isn't inspiring. I'd suggest going to a SCARA arm with real lift capabilities.
- I'd love a robot that can go up stairs. Houses often have too many stairs. I'd love a quadruped like Boston Dynamic's Spot. Lower-end clones of Spot are on their way, but it's doubtful that they can go up stairs and have a weight-bearing arm.
- In an attempt to use ROSwell for RL, I tried to get ROSwell working within a physics-simulator so that I didn't risk wearing out or damaging the robot in humongous numbers of random trials. Unfortunately, the simulations don't match reality at all! Spent a ton of time trying to get Gazebo physics engine to realistically model a light, top-heavy robot with low-end servos (e.g., dynamixel MX-64).
- Problems encountered include incompatible upgrades of components
- Difficulty tuning of weights, inertia, friction, pids, transmissions
- Physics of torsional friction in gazebo is missing or unrealistic (depending on physics engine release)
- Top-heavy robot might flip 10 feet into the air!
- Lots of papers on needing different lighting, coloring, etc.
- Might as well use no physics engine and assume perfect performance.
Lessons from Donkey-car:
- Continuous realtime RL is hard. On-board processing needs better performance for continuous realtime RL. On the other hand, Off-loaded processing to a laptop needs better communication performance for continuous realtime RL.
- Due to the Raspberry Pi limitations, the donkeycar had to drive disappointingly slowly. Then unexpected real-world factors became an issue. For example, the Donkey car performance quickly changed as it used up batteries and the donkeycar didn't easily adapt for this without enhancements.
- You do a lot of training but still overfits to environment, (fails at big DIY robocar events due to the addition of spectators or change in location.) You need to train on many tracks, in many lighting conditions, with and without spectators, etc.
- I'm a big fan of the Donkeycar open source project and its meet-ups. I can only hope that ALSET achieves a fraction of its success.
- I also use the open source project as a guideline in some decision making, and the donkeycar code may be used as an starting point for some future features (e.g., the web controller.)
Lessons from REPLab:
- Intel 3D Realsense camera gave poor results for any single 3D snapshot. Needed to accumulate and integrate results. Worked around this by using OctoMaps, but this greatly reduces performance. Most RL implementations just use 2D camera, ignoring 3D camera capabilities.
- Used ROS moveit to assume away much of the RL problem, only using RL for planning the final stage of grasping (e.g., lower straight down from above so only choosing final x/y and theta). The numerous RL papers on grasping often try to show that they are slightly faster than the previous state of the art. Really, who cares if one algorithm is slightly faster in computing x/y/theta when other real-world concerns like the time of moving the arm dominates? Provide more complex functionality instead.
- Frequent calibration between robot camera and arm. Simple calibration didn't do very well across robots or across runs on same robot due to overheating or stressing of motors (e.g., pushing down too hard on tray).
- Pretrained imagenet models provide some transfer learning for regular cameras, but this doesn't help for 3D cameras.
- Using OpenCV to evaluate state needed for RL is almost as difficult as solving the problem itself. For example,identifying the blocks and stacking them can be made easier by adding fiducials or sensors to blocks (blah... feels like cheating.)
- Need to park arm so that it was away from tray so that state of objects on tray could be accurately assessed.
Lesson from using the Jetson nano / Jetbot:
- The Jetson "notebook" is a cool idea for tutorials, but in practice needs very fast wifi - better than my house has and very fast SSD - faster than I bought. But putting the gamepad/logitech on the robot and using lower overhead video webstreaming worked fine.
- I immediately outgrew the functionality provided by the Jetbot. I was able to start with the jetbot code and tutorials to incremental build an armed jetbot (ALSET S).
Reinforcement learning in general:
- Let's look at some more recent major impressive results in deep learning:
- OpenAI published a paper on GPT-3. A decent summary of it is:
- OpenAI's blog describes the same model applied to images:
- Deep Mind's latest breakthrough:
- These all confirm the ongoing trend in deep learning that shows deep learning scales to incredible degrees. Basically, if you have a problem that you need to solve, recursively add more data and then add more levels to the NN (now attention-based), until you achieve good results (near-human or better).
- To get anything that seems to be impressive, you need huge datasets and tons of training to such a scale that only big companies with hundreds of thousands of dollars to spend can afford. Individual developers / researchers can make contributions to the area (podcast: Can We Scale Up to AGI with Current Tech? https://www.youtube.com/watch?v=oj5kozyUYeM ), but to get to the point of gaining common-sense intelligence is out of the reach of all but the biggest, richest companies with the biggest datasets (think Google and Facebook.)