
Before starting this lab, create a new folder for your files:
$ mkdir -p lab5 \
   && cd lab5
We're going to use OpenFaaS functions to create a GitHub bot named issue-bot.
The job of issue-bot is to triage new issues by analysing the sentiment of the "description" field, it will then apply a label of positive or review. This will help the maintainers with their busy schedule so they can prioritize which issues to look at first.

-
Sign up for a GitHub account if you do not already have one.
-
Create a new repository and call it bot-tester
Note: we will only use this repository as a testing ground for creating Issues. You don't need to commit any code there.
You will need to receive incoming webhooks from GitHub. In production you will have a clear route for incoming traffic but within the constraints of a workshop we have to be creative.
Open a new Terminal and type in:
$ docker run -p 4040:4040 -d --name=ngrok --net=func_functions \
  alexellis2/ngrok-admin http gateway:8080
Use the built-in UI of ngrok at http://127.0.0.1:4040 to find your HTTP URL. You will be given a URL that you can access over the Internet, it will connect directly to your OpenFaaS API Gateway.
Note:
ngrokalso provides a JSON API athttp://127.0.0.1:4040/api/tunnels
Test the URL such as http://fuh83fhfj.ngrok.io
$ faas-cli list --gateway http://fuh83fhfj.ngrok.io/
$ faas-cli new --lang python3 issue-bot --prefix="<your-docker-username-here>"
$ faas-cli build -f ./issue-bot.yml
$ faas-cli push -f ./issue-bot.yml
Now edit the function's YAML file issue-bot.yml and add an environmental variable of write_debug: true:
provider:
  name: faas
  gateway: http://127.0.0.1:8080

functions:
  issue-bot:
    lang: python3
    handler: ./issue-bot
    image: <user-name>/issue-bot
    environment:
      write_debug: true
- Deploy the function
$ faas-cli deploy -f ./issue-bot.yml
Log back into GitHub and navigate to your repository bot-tester
Click Settings -> Webhooks -> Add Webhook

Now enter the URL you were given from ngrok adding /function/issue-bot to the end, for example:
http://fuh83fhfj.ngrok.io/function/issue-bot
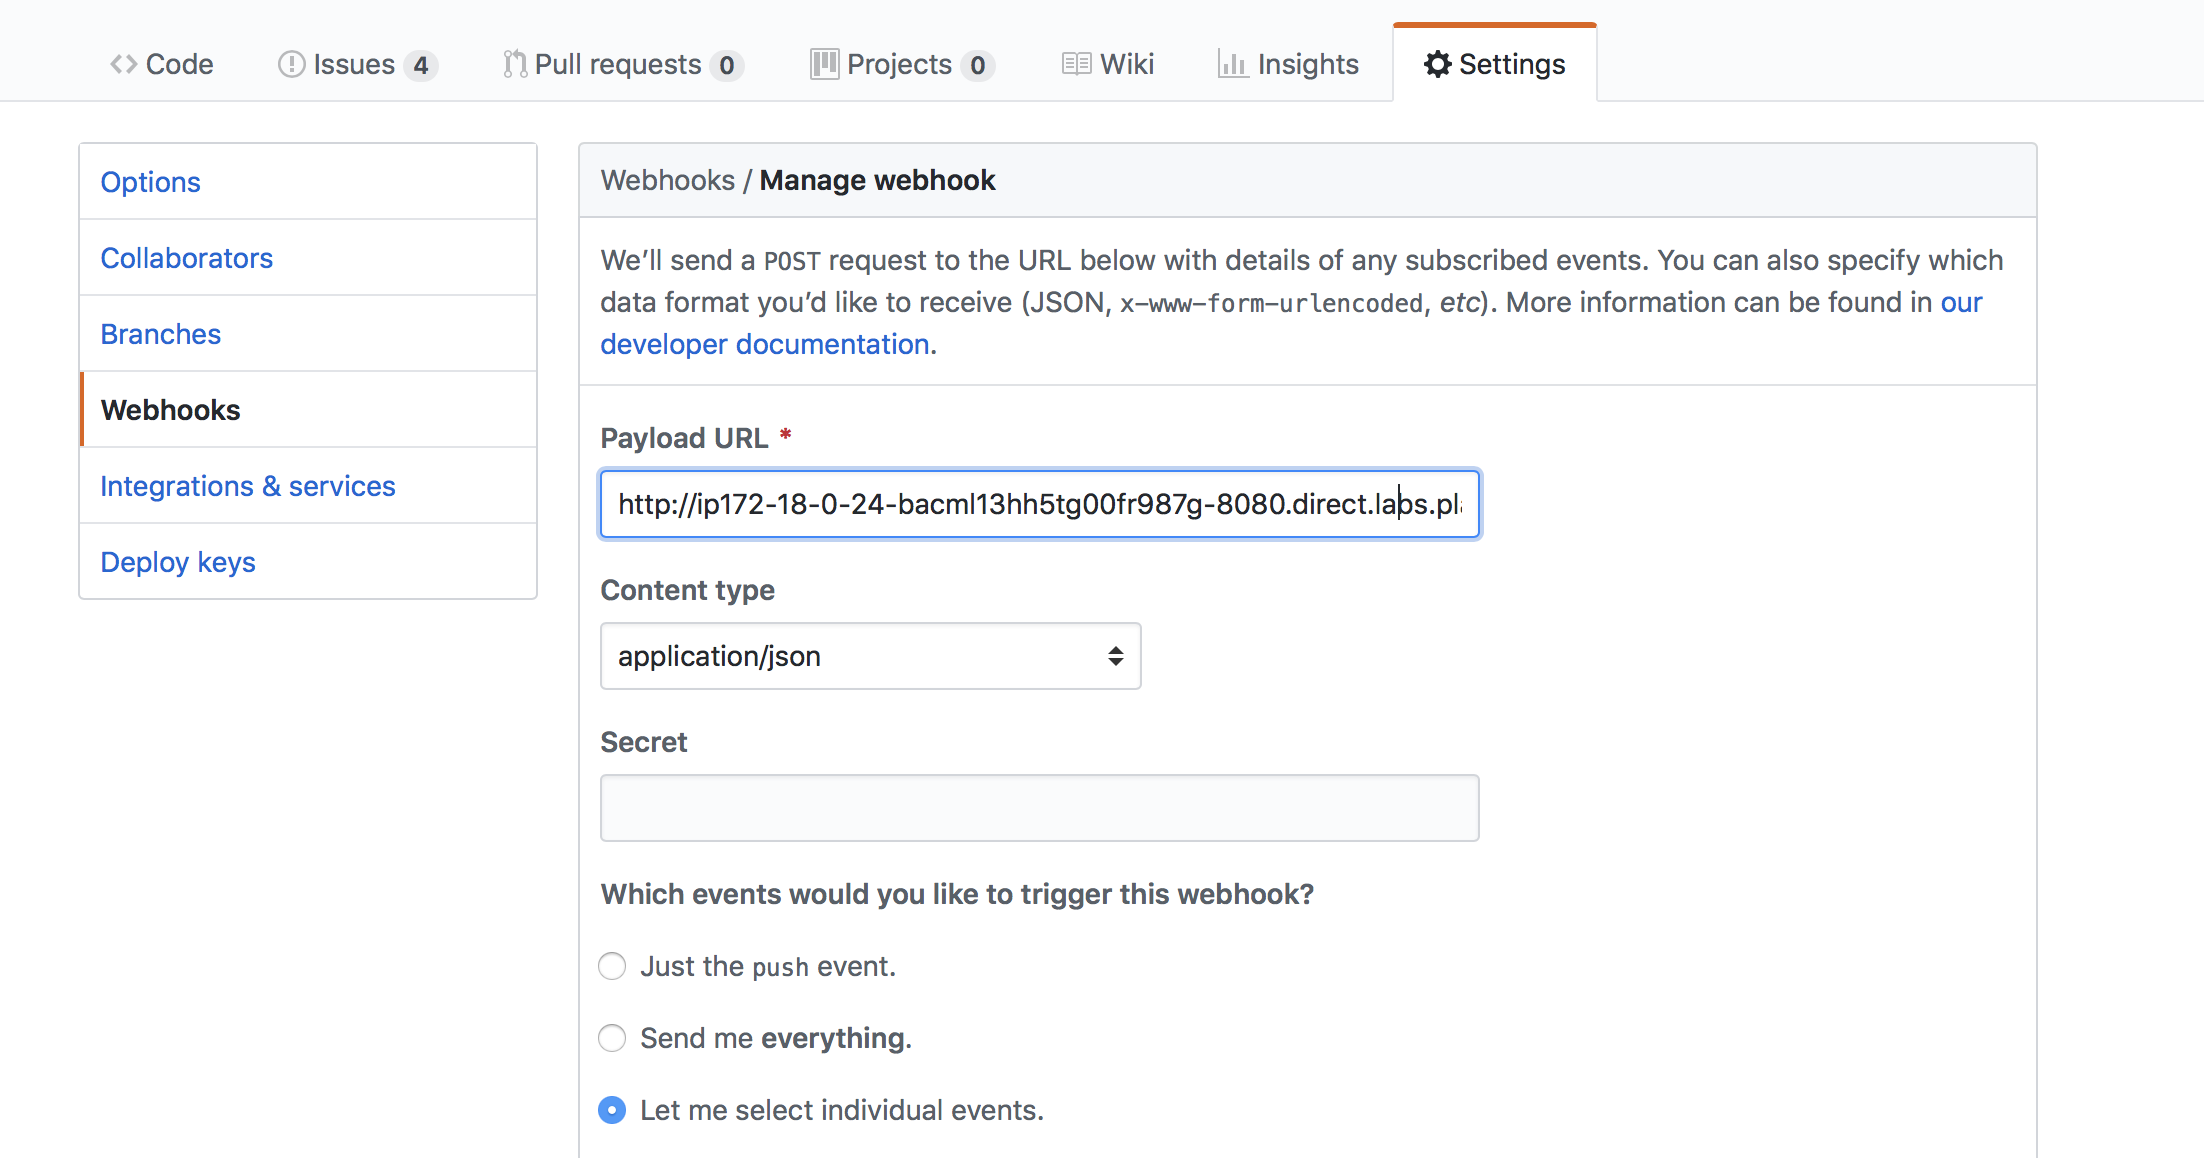
For Content-type select: application/json
Leave Secret blank for now.
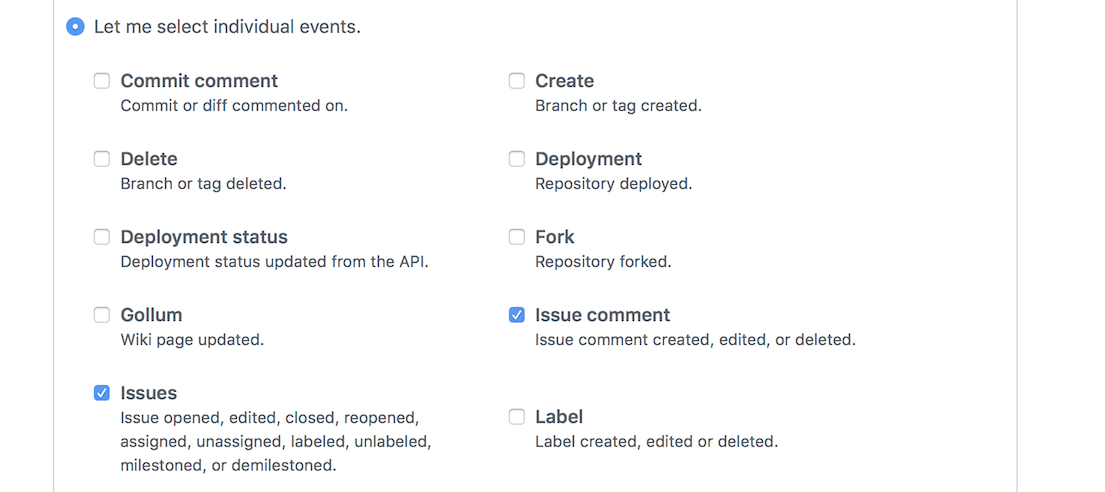
And select "Let me select individual events"
For events select Issues and Issue comment
Now go to GitHub and create a new issue. Type "test" for the title and description.
Check how many times the function has been called - this number should be at least 1.
$ faas-cli list
Function    Invocations
issue-bot   2
Each time you create an issue the count will increase due to GitHub's API invoking the function.
You can see the payload sent via GitHub by typing in docker service logs -f issue-bot.
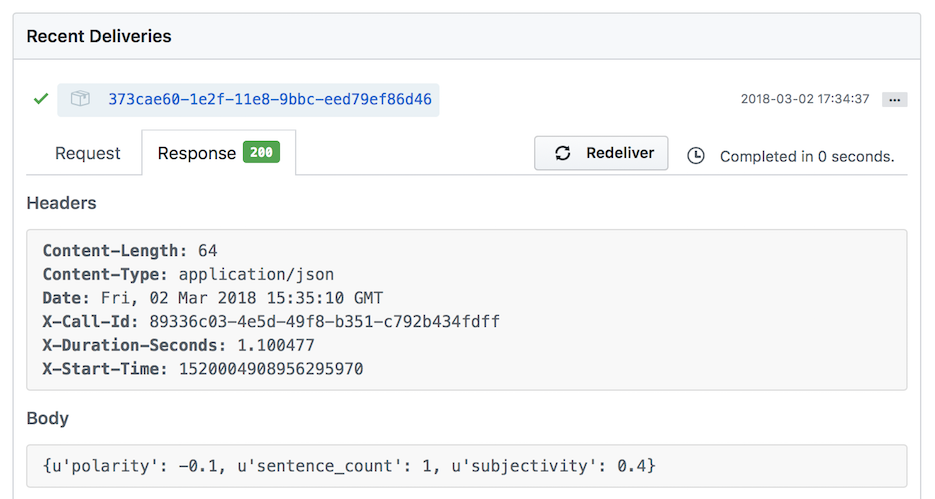
The GitHub Webhooks page will also show every message sent under "Recent Deliveries", you can replay a message here and see the response returned by your function.

In order to use this issue-bot function, you will need to deploy the SentimentAnalysis function first. This is a python function that provides a rating on sentiment positive/negative (polarity -1.0-1.0) and subjectivity provided to each of the sentences sent in via the TextBlob project.
If you didnt do so in Lab 4 you can deploy "SentimentAnalysis" from the Function Store
$ echo -n "I am really excited to participate in the OpenFaaS workshop." | faas-cli invoke sentimentanalysis
Polarity: 0.375 Subjectivity: 0.75

$ echo -n "The hotel was clean, but the area was terrible" | faas-cli invoke sentimentanalysis
Polarity: -0.316666666667 Subjectivity: 0.85
Open issue-bot/handler.py and replace the template with this code:
import requests, json, os, sys

def handle(req):

    event_header = os.getenv("Http_X_Github_Event")

    if not event_header == "issues":
        sys.exit("Unable to handle X-GitHub-Event: " + event_header)
        return

    gateway_hostname = os.getenv("gateway_hostname", "gateway")

    payload = json.loads(req)

    if not payload["action"] == "opened":
        return

    #sentimentanalysis
    res = requests.post('http://' + gateway_hostname + ':8080/function/sentimentanalysis', data=payload["issue"]["title"]+" "+payload["issue"]["body"])

    if res.status_code != 200:
        sys.exit("Error with sentimentanalysis, expected: %d, got: %d\n" % (200, res.status_code))

    return res.json()
Update your requirements.txt file with the requests module for HTTP/HTTPs:
requests
The following line from the code above posts the GitHub Issue's title and body to the sentimentanalysis function as text. The response will be in JSON format.
res = requests.post('http://' + gateway_hostname + ':8080/function/sentimentanalysis', data=payload["issue"]["title"]+" "+payload["issue"]["body"])- Build and deploy
Use the CLI to build and deploy the function:
$ faas-cli build -f issue-bot.yml \
  && faas-cli push -f issue-bot.yml \
  && faas-cli deploy -f issue-bot.yml
Now create a new issue in the bot-tester repository. GitHub will respond by sending a JSON payload to your function via the Ngrok tunnel we set up at the start.
You can view the request/response directly on GitHub - navigate to Settings -> Webhook as below:
The next step will be for us to apply a label of positive or review, but because this action involves writing to the repository we need to get a Personal Access Token from GitHub.
Go to your GitHub profile -> Settings/Developer settings -> Personal access tokens and then click Generate new token.
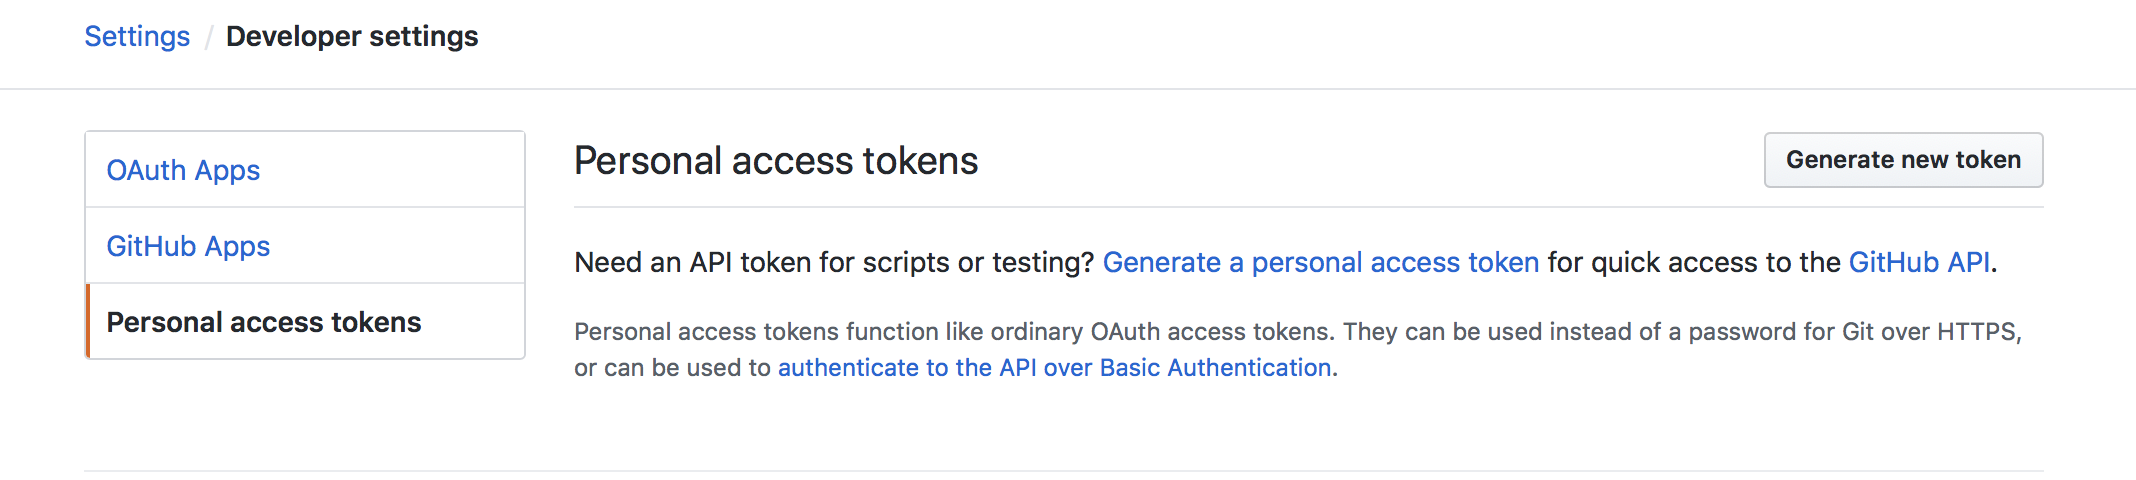
Tick the box for "repo" to allow access to your repositories
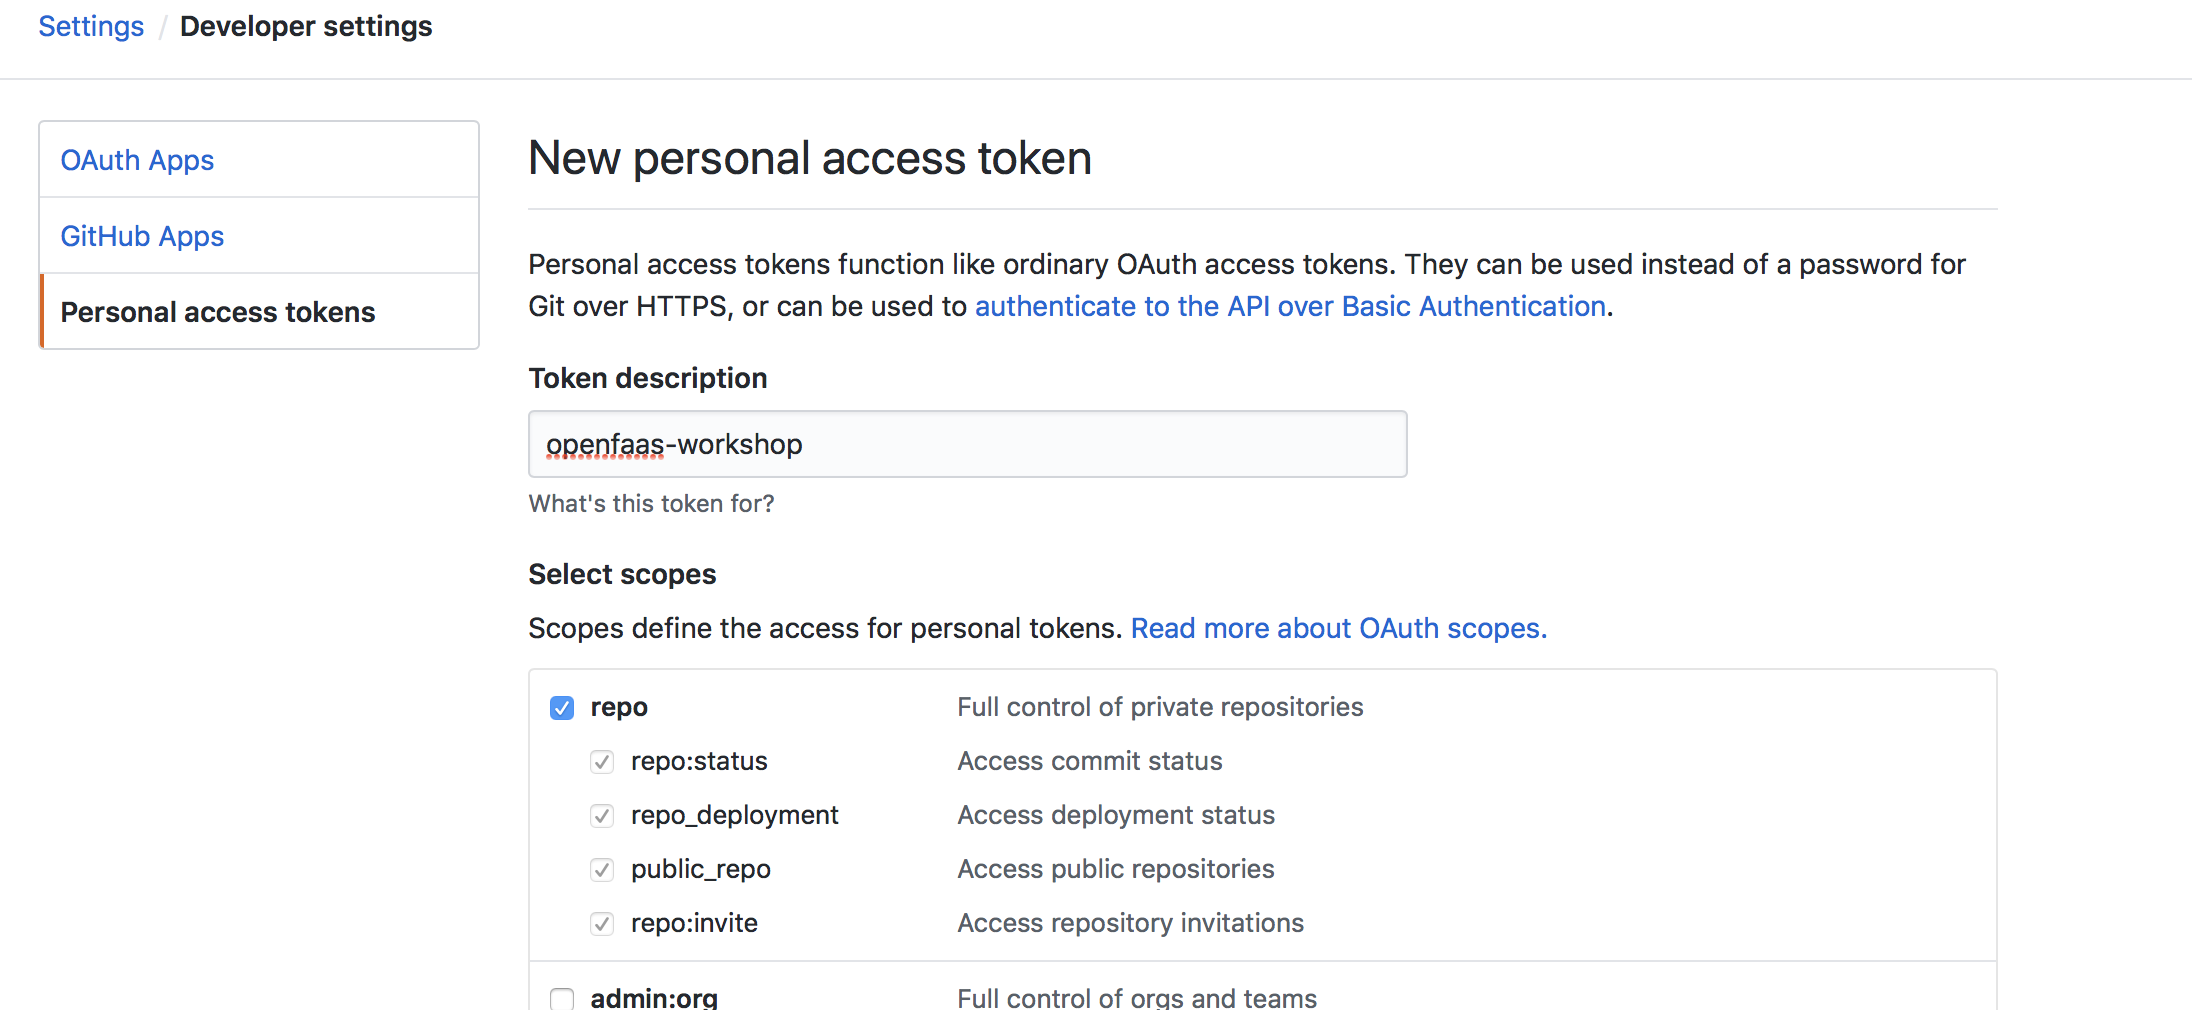
Click the "Generate Token" button at the bottom of the page
Create a file called env.yml in the directory where your issue-bot.yml file is located with the following content:
environment:
  auth_token: <auth_token_value>
Update the auth_token variable with your token from GitHub.
Now update your issue-bot.yml file and tell it to use the env.yml file:
provider:
  name: faas
  gateway: http://127.0.0.1:8080

functions:
  issue-bot:
    lang: python3
    handler: ./issue-bot
    image: <your-username>/issue-bot
    environment:
      write_debug: true
      gateway_hostname: "gateway"
      positive_threshold: 0.25
    environment_file:
    - env.yml
The
positive_thresholdenvironmental variable is used to fine-tune whether an Issue gets thepositiveorreviewlabel.
Any sensitive information is placed in an external file (i.e. env.yml) so that it can be included in a .gitignore file which will help prevent that information getting stored in a public Git repository.
OpenFaaS also supports the use of native Docker and Kubernetes secrets, details can be found in Lab 10
You can use the API to perform many different tasks, the documentation is available here.
Here's a sample of Python code that we could use to apply a label, but you do not add it to your function yet.
issue_number = 1
repo_name = "alexellis/issue_bot"
auth_token = "xyz"

g = Github("auth_token")
repo = g.get_repo(repo_name)
issue = repo.get_issue(issue_number)
This library for GitHub is provided by the community and is not official, but appears to be popular. It can be pulled in from pip through our requirements.txt file.
- Update your
issue-bot/requirements.txtfile and add a line forPyGithub
requests
PyGithub
- Open
issue-bot/handler.pyand replace the code with this:
import requests, json, os, sys
from github import Github

def handle(req):
    event_header = os.getenv("Http_X_Github_Event")

    if not event_header == "issues":
        sys.exit("Unable to handle X-GitHub-Event: " + event_header)
        return

    gateway_hostname = os.getenv("gateway_hostname", "gateway")

    payload = json.loads(req)

    if not payload["action"] == "opened":
        sys.exit("Action not supported: " + payload["action"])
        return

    # Call sentimentanalysis
    res = requests.post('http://' + gateway_hostname + ':8080/function/sentimentanalysis',
                        data= payload["issue"]["title"]+" "+payload["issue"]["body"])

    if res.status_code != 200:
        sys.exit("Error with sentimentanalysis, expected: %d, got: %d\n" % (200, res.status_code))

    # Read the positive_threshold from configuration
    positive_threshold = float(os.getenv("positive_threshold", "0.2"))

    polarity = res.json()['polarity']

    # Call back to GitHub to apply a label
    apply_label(polarity,
        payload["issue"]["number"],
        payload["repository"]["full_name"],
        positive_threshold)

    return "Repo: %s, issue: %s, polarity: %f" % (payload["repository"]["full_name"], payload["issue"]["number"], polarity)

def apply_label(polarity, issue_number, repo, positive_threshold):
    g = Github(os.getenv("auth_token"))
    repo = g.get_repo(repo)
    issue = repo.get_issue(issue_number)

    has_label_positive = False
    has_label_review = False
    for label in issue.labels:
        if label == "positive":
            has_label_positive = True
        if label == "review":
            has_label_review = True

    if polarity > positive_threshold and not has_label_positive:
        issue.set_labels("positive")
    elif not has_label_review:
        issue.set_labels("review")
The source code is also available at issue-bot/bot-handler/handler.py
- Build and deploy
Use the CLI to build and deploy the function:
$ faas-cli build -f issue-bot.yml \
  && faas-cli push -f issue-bot.yml \
  && faas-cli deploy -f issue-bot.yml
Now try it out by creating some new issues in the bot-tester repository. Check whether positive and review labels were properly applied and consult the GitHub Webhooks page if you are not sure that the messages are getting through or if you suspect an error is being thrown.

Note: If the labels don't appear immediately, first try refreshing the page
Now move on to Lab 6.