Different operating systems provide different features on integrating desktop applications into their desktop environments, for example, on Windows applications can put shortcuts in the JumpList of task bar, and on Mac applications can put a custom menu in the dock menu.
This guide introduces how to integrate your application into those desktop environments with atom-shell APIs.
Windows and OS X have provided easy access to recent documents opened by the application via JumpList and dock menu.
JumpList:

Application dock menu:

To add a file to recent documents, you can use app.addRecentDocument API:
var app = require('app');
app.addRecentDocument('/Users/aryastark/github/atom-shell/README.md');
And you can use app.clearRecentDocuments API to empty the recent documents list:
app.clearRecentDocuments();In order to be able to use this feature on Windows, your application has to be registered as handler of the file type of the document, otherwise the file won't appear in JumpList even after you have added it. You can find everything on registering your application in Application Registration.
When a user clicks a file from JumpList, a new instance of your application will be started with the path of file appended in command line.
When a file is requested from the recent documents menu, the open-file event
of app module would be emitted for it.
OS X enables developers to specify a custom menu for dock, which usually contains some shortcuts for commonly used features of your application:
Dock menu of Terminal.app:

To set your custom dock menu, you can use the app.dock.setMenu API, which is
only available on OS X:
var app = require('app');
var Menu = require('menu');
var dockMenu = Menu.buildFromTemplate([
  { label: 'New Window', click: function() { console.log('New Window'); } },
  { label: 'New Window with Settings', submenu: [
    { label: 'Basic' },
    { label: 'Pro'},
  ]},
  { label: 'New Command...'},
]);
app.dock.setMenu(dockMenu);On Windows you can specify custom actions in the Tasks category of JumpList,
as quoted from MSDN:
Applications define tasks based on both the program's features and the key things a user is expected to do with them. Tasks should be context-free, in that the application does not need to be running for them to work. They should also be the statistically most common actions that a normal user would perform in an application, such as compose an email message or open the calendar in a mail program, create a new document in a word processor, launch an application in a certain mode, or launch one of its subcommands. An application should not clutter the menu with advanced features that standard users won't need or one-time actions such as registration. Do not use tasks for promotional items such as upgrades or special offers.
It is strongly recommended that the task list be static. It should remain the same regardless of the state or status of the application. While it is possible to vary the list dynamically, you should consider that this could confuse the user who does not expect that portion of the destination list to change.
Tasks of Internet Explorer:

Unlike the dock menu in OS X which is a real menu, user tasks in Windows work like application shortcuts that when user clicks a task a program would be executed with specified arguments.
To set user tasks for your application, you can use app.setUserTasks API:
var app = require('app');
app.setUserTasks([
  {
    program: process.execPath,
    arguments: '--new-window',
    iconPath: process.execPath,
    iconIndex: 0,
    title: 'New Window'
    description: 'Create a new winodw',
  }
]);
To clean your tasks list, just call app.setUserTasks with empty array:
app.setUserTasks([]);The user tasks will still show even after your application closes, so the icon and program path specified for a task should exist until your application is uninstalled.
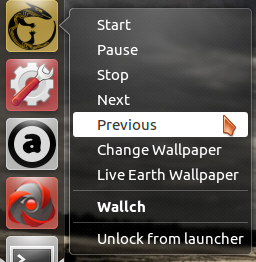
In Unity, you can add custom entries to its launcher via modifying .desktop
file, see Adding shortcuts to a launcher.
Launcher shortcuts of Audacious:
On Windows, a taskbar button can be used to display a progress bar. This enables a window to provide progress information to the user without that user having to switch to the window itself.
The Unity DE also has a simililar feature that allows you to specify progress bar in the lancher.
Progress bar in taskbar button:

Progress bar in Unity launcher:

To set the progress bar for a Window, you can use the BrowserWindow.setProgressBar API:
var window = new BrowserWindow({...});
window.setProgresssBar(0.5);On OS X a window can set its represented file, so the file's icon can show in title bar, and when users Command-Click or Control-Click on the tile a path popup will show.
You can also set edited state of a window so the file icon can indicate whether the document in this window has been modified.
Represented file popup menu:

To set the represented file of window, you can use the BrowserWindow.setRepresentedFilename and BrowserWindow.setDocumentEdited APIs:
var window = new BrowserWindow({...});
window.setRepresentedFilename('/etc/passwd');
window.setDocumentEdited(true);