Program to control Lights, doors, etc. using Open Hardware and control them using a phone line connected to Asterisk PBX.
The main purpose of this project is:
-
Bring a light schema to control Relays with Arduino ONE board https://www.arduino.cc/en/Main/ArduinoBoardUno
-
Make a control vector using a Perl script to interface Asterisk PBX and the open hardware boards. http://www.asterisk.org
-
Using the phone Dialpad to control on/off events
-
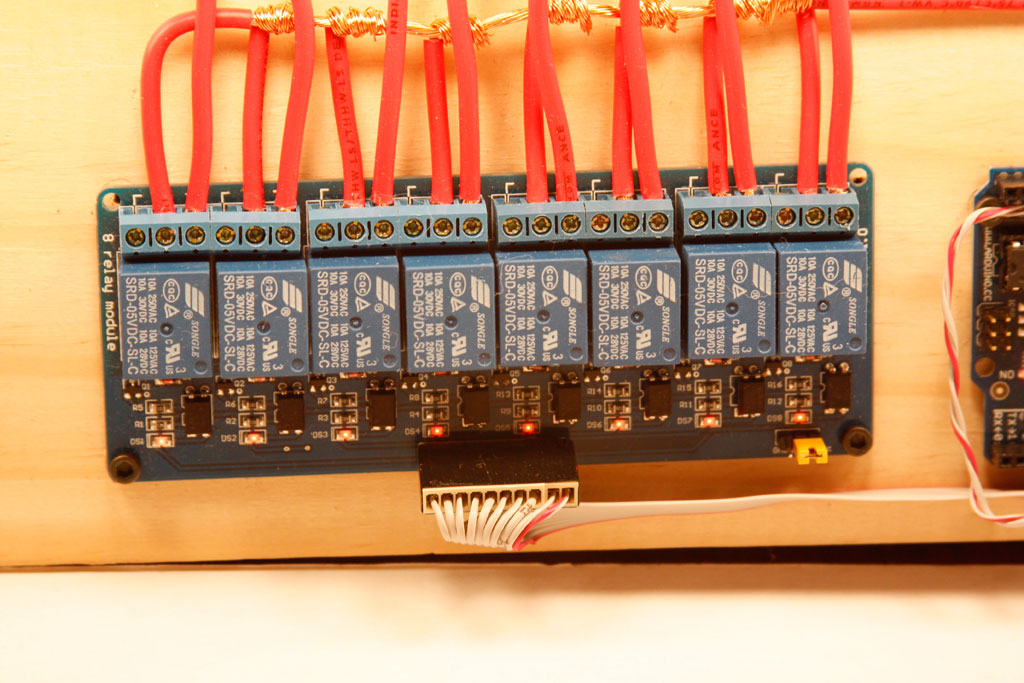
I buy a relay board in www.buyincoins.com for about $8.00 USD
-
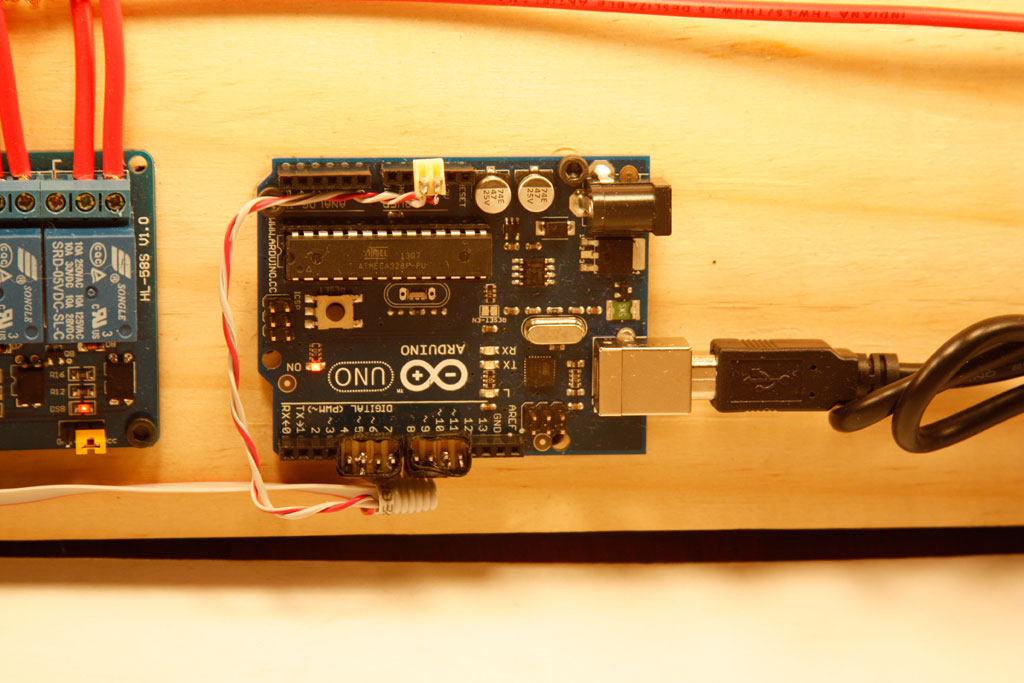
I use one Arduino UNO with a cost of $30.00 USD
-
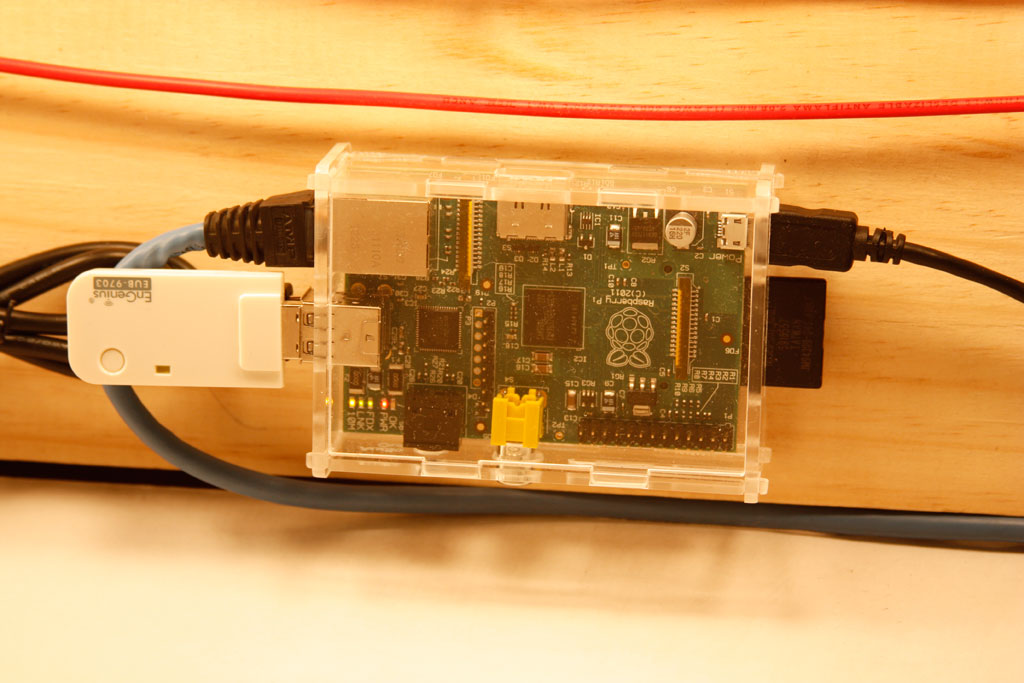
To make Asterisk PBX to work, i purchase a Raspberry Pi in newark.com for about $55.00 USD and use RasPBX (a Debian variant for Raspberry Pi with Asterisk include).
-
Plus a wood board, wires, screws, sockets and electrical contacts for $35.00 USD. One EnGenius WiFi USB adapter for $30.00 USD and a power supply for $18.00 USD.
The gran total was $176.00 USD plus a weekend of mount and programing.
-
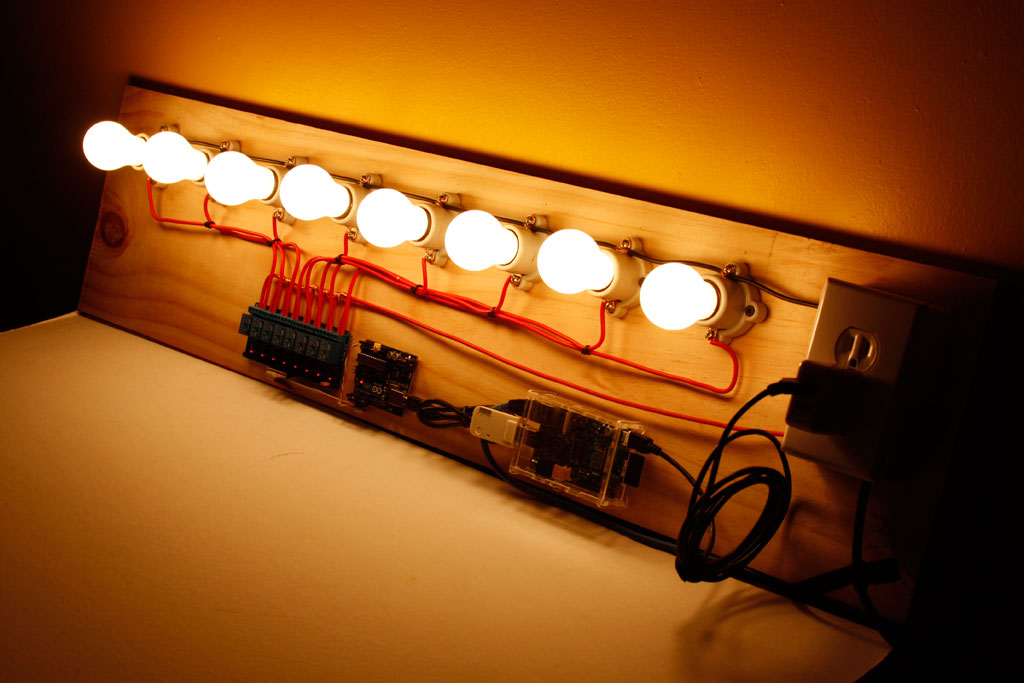
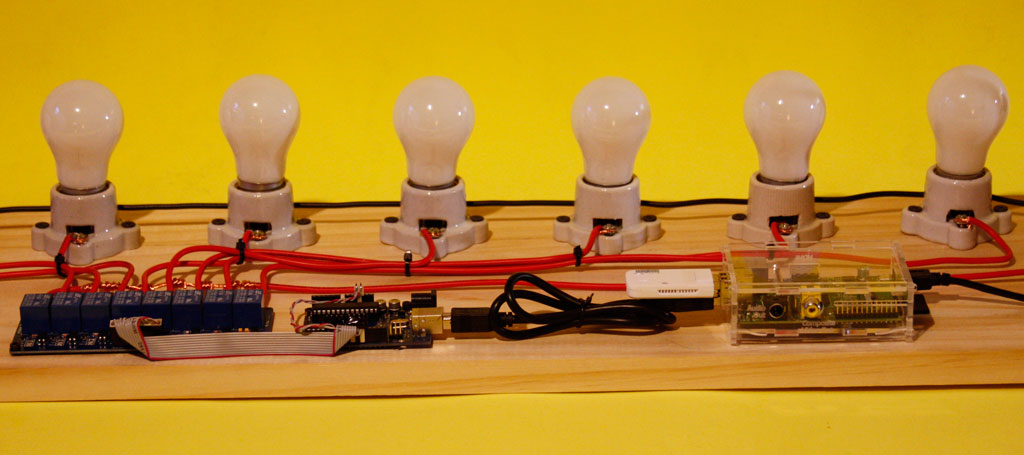
I connect the relay board to the Arduino UNO, this to the Raspberry PI via USB.
The final assembly is show in this picture:
You can see a demo on Youtube here: https://www.youtube.com/watch?v=rcFMJC4n4dQ
I wrote one Arduino Sketch for the Relay board control (arduino/relay.ino) and the control program to bond Asterisk with (bin/arduino_control.pl).
For the Arduino programing i use the Arduino IDE.
The i wrote a Perl script to handle the serial comunication with the Arduino USB and connects to Asterisk trough the AMI (Asterisk Manager Interface) and implement an aditional socket connection to console handle.
-
Edit and append on the file /etc/asterisk/manager.conf the AMI configuration for the perl program:
[arduino]
secret=openhardware
writetimeout = 10000
;read = system,call,log,verbose,agent,user,config,dtmf,reporting,cdr,dialplan
eventfilter=!Event: RTCPSent
eventfilter=!Event: RTCPReceived
read = system,call,log,agent,user,config,dtmf,reporting,cdr,dialplan
write = system,call,agent,user,config,command,reporting,originate
Reload the configuration with the user owner of the asterisk process with:
asterisk -rx'manager reload' -
In the file /etc/asterisk/extensions.ael i wrote this test configuration:
context from-internal {
    888 => {
        goto ivr,s,1;
    };

    777 => {
        Answer;
        MusicOnHold();
        Hangup;
    };

    8378 => {
        Answer;
        Playback(beep);
        UserEvent(RELAY_8378,);
        Hangup;
    };
    666 => {
        Answer;
        Playback(beep);
        UserEvent(RELAY_1,);
        wait(1);
        UserEvent(RELAY_1,);
        UserEvent(RELAY_2,);
        wait(1);
        UserEvent(RELAY_2,);
        UserEvent(RELAY_3,);
        wait(1);
        UserEvent(RELAY_3,);
        UserEvent(RELAY_4,);
        wait(1);
        UserEvent(RELAY_4,);
        UserEvent(RELAY_5,);
        wait(1);
        UserEvent(RELAY_5,);
        UserEvent(RELAY_6,);
        wait(1);
        UserEvent(RELAY_6,);
        UserEvent(RELAY_7,);
        wait(1);
        UserEvent(RELAY_7,);
        UserEvent(RELAY_8,);
        wait(1);
        UserEvent(RELAY_8,);
        Playback(beep);
        Hangup;
    };
}

context ivr {
    s => {
        Answer;
        Background(silence/9);
    question:
        Set(TIMEOUT(response)=5);
        Set(TIMEOUT(digit)=1);
        WaitExten();
        goto question;
    };
    _X => {
       UserEvent(RELAY_${EXTEN},);
       goto s,question;
    };

    t => {
        goto ivr,s,question;
    };

    i => {
        goto ivr,s,question;
    };

}
Reload the configuration:
asterisk -rx'ael reload'I you see, i use the UserEvent fuction from the AMI interface to send custom commands to the arduino_control.pl program.
UserEvent(RELAY_X,);where "X" is the number of the electrical Relay. I use “8378” (TEST) to check the lights and 7828 (STAT) for query the relay's status.
You can interact directly via the 4446 TCP Port. The sample is using telnet:
$ telnet 192.168.1.89 4446
Trying 192.168.1.89...
Connected to raspbx.lan.
Escape character is '^]'.

arduino_control.pl v1.0 (? for help)

relay 8
8|on

relay 8
8|off

status
Status|off|off|off|off|off|off|off|off
you can see more options with the command "help"
Don't forget to subscribe a SIP extension to test.
Enjoy :)
Fernando Romo (pop@cofradia.org)
GNU GENERAL PUBLIC LICENSE Version 3
https://www.gnu.org/licenses/gpl-3.0.en.html
See LICENSE.txt
Please sponsor this project to pay my high debt on credit cards :)