CreatingShips
Because one of the first things I imagine people will want to try out when customizing or expanding Endless Sky is to create a new kind of ship, I've tried to make that as easy as possible. All you need is a single image (which can be hand-drawn or generated by a 3D modeling program) and an entry in a data file. The recommended process for creating new ships is:
-
Using the cheater plugin, create a pilot who has access to all human technology on the same planet. (If necessary, edit the pilot file to add access to other technologies as well.)
-
Create a new plugin for your ship, rather than modifying the base game data.
-
Create a new sprite, using your tool of choice. (I recommend making 3D models in Blender, then adding "grunge" to the ship by post-processing in GIMP.) Save that sprite in the
images/ship/folder of your plugin. -
Create a shipyard "thumbnail" for your ship, rendered from the same model.
-
Copy an existing ship definition from
ships.txtinto your pilot file use as a starting point. To start out with, give your ship large capacities so you won't be limited by them while testing. -
Use the ship builder to set the gun, turret, and engine hardpoints for your ship. Copy those into the pilot file, as well. (You can also use the ship builder tool to check that your sprite's collision mask will be reasonable, e.g. that there are no stray pixels that might mess it up.)
-
In the game, load that pilot and experiment with different sets of outfits until you find one you like. At this stage you can also edit your pilot file to change the ship's attributes.
-
Once your ship seems well-balanced, reduce the capacities to reasonable numbers, and copy the ship definition from your pilot file into a text file in the
data/folder of your plugin.
Most space games back in the 90s (after which this one is patterned) used a sprite sheet for each ship with pre-rendered images of it at a variety of rotations. This allowed for some cool effects (like realistic shadows that move across the ship as you turn). But, it also meant that turning had a choppy effect: if, for example, your sprite sheet had 36 images in it, your ship could only turn in 10-degree increments.
Endless Sky takes a simpler approach. Each ship is a single sprite, which is then drawn by OpenGL at different rotations. This means that the shadows don't move as you turn. But it also means that the ship's position and rotation can change by fractions of a pixel at a time, which makes all movement look much less choppy.
To keep the sprite sharp at any rotation, all ship sprites are twice as big as they are drawn on the screen:

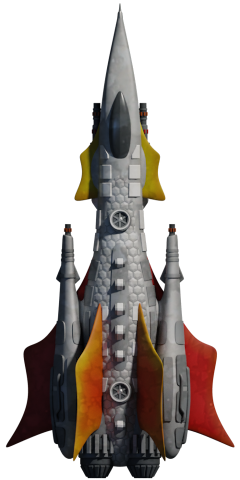
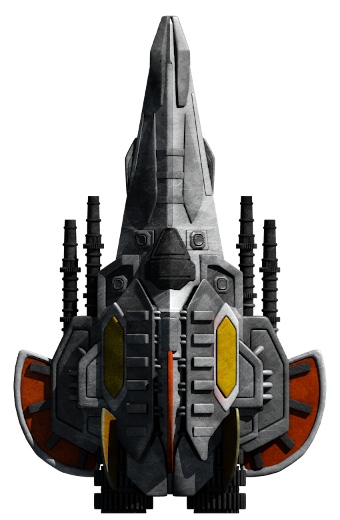
If you are creating a human ship, it should be mostly shades of grey with some highlights in red, orange, and yellow. Depending on the government, the colors will be "swizzled" to green and yellow for the Free Worlds, blue and cyan for civilians, etc.
To create a new ship sprite, just add a PNG file to the images/ship/ directory. Everything in the images directory is automatically loaded when the game launches; no need to add it to a list anywhere.
For collision detection, for all images in images/ship/ and images/asteroid/, or one of their sub-folders, a polygonal outline is generated when the sprite is loaded. This means that it's important for your ship image to be in that folder, so the game knows that it needs to calculate its outline. The folder must be named "ship", singular; "ships" will not work.
If you want your ship to be animated, just create multiple files with the same name, with -#.png appended:
- images/ship/newship-0.png
- images/ship/newship-1.png
(If there are more than 10 frames, the extensions should be -00.png, -01.png, etc. You can also create sprites with additive or "half-additive" blending modes by using the extension +#.png or ~#.png respectively, but these blending modes look much better for projectiles or explosions than for ships.)
The sprite should have at least a one-pixel border of "empty" pixels on every side. Otherwise, the ship outlines (shown in the targeting display and the escort icons, among other places) will not have sharp lines near those edges.
Scaling Sprites: Ship sprites can be scaled by adding a "scale" X where X represents the multiplier. Thus 1 gives a sprite that is normal size, 0.5 would give a sprite that is 50% of its normal, and 2.5 would give a sprite that is 250% of its normal size. Note that a scale attribute is not required, and if it is not specified/present the game will default to a value of 1.
ship "Star Barge"
	sprite "ship/star barge"
		"scale" 0.5
	...
Swizzle Mask (v. 0.10.3): Sometimes you don't want to have your whole ship be swizzled, but only a part of the sprite. This is where swizzle masks come in. Create an image the size of the ship sprite consisting of only two colors, white and black. Any pixel that is black on the mask will get its corresponding pixel swizzled, while a white pixel denotes pixels that will not get swizzled. Example:


In this example, the right and top fin as well as the small fin in the middle will not get swizzled, because the corresponding pixels on the mask are white. All other pixels are black and thus will get swizzled.
The name has to contain @sw at the end: @sw.png. If this is for a @2x sprite, @sw comes before it as follows: @sw@2x.png
If you have multiple frames and wish to give the ship a swizzle mask, then each individual frame must have a mask image defined for it. So ship-0@sw.png would be the mask for the first frame and ship-01@sw.png would be the mask for the second frame. Beginning in v. 0.10.5, if you have multiple frames but only a single swizzle mask is defined as ship@sw.png (i.e. without any frame specifier), that swizzle mask will be applied to all frames of the ship.
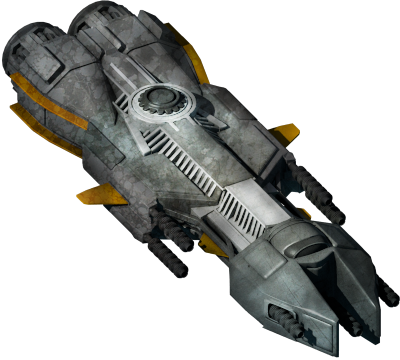
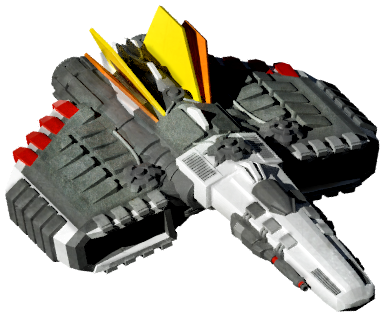
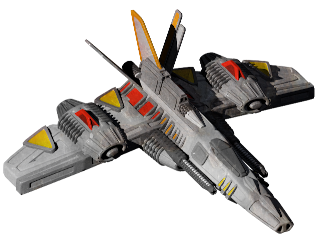
Making a full texture-mapped 3D model can be a lot of work, and since all the ships in this game are only shown from directly overhead and at relatively low resolution, it can be overkill. I've found that the fastest way to create good-looking ship images is to use a 3D design program (such as Blender) for rendering the shape of the ship and the basic colors of the different parts of it, but then using an image manipulation program (such as GIMP) for some post-processing.
Editing images in GIMP, some easy ways to make the models look more detailed and less "artificial" include:
- Find a public domain metal texture. Paste it into a separate layer, setting the layer's blending mode to "overlay" and adding an alpha channel to the layer if necessary. Erase portions of the texture so that it is only applied to certain parts of the ship. Repeat with other textures until each part of the ship is covered by at least one.
- In a layer set to "multiply" mode, spray-paint with black to add extra shadows to the left side of the image and to other areas as you see fit. It often also looks good to add dark patches near the engine outlets, to make that part of the ship look a bit "burnt."
- Spray-painting dark patches at a few corners or edges can also help make the metal look reflective.
- In the "multiply" layer, spray paint with red over the yellow or orange paint sections to make the color less uniform.
At a bare minimum, you should edit ship images at a large enough resolution to provide an "@2x" version for high-dpi monitors. Be sure to save the final version of your 3D model, too!
Each ship can optionally specify a "thumbnail" image to be used for it in the shipyard instead of the overhead view. For consistency, thumbnail images should be rendered with the following setup:
- Camera position: (12, 22, 18)
- Camera angle: (55, 0, 150)
- Sun angle: (0, 55, 10)
The size of the thumbnail should depend on the size of the ship. Drones may be 100×100 pixels or even smaller; capital ships can be up to 250×250 pixels or possibly slightly larger for unusually big ships. To figure out the appropriate size, find some other ships that are about the same size as your ship in the overhead view, and then make the thumbnail the same size (i.e. about the same number of non-transparent pixels) as their thumbnails.
For some examples, you can look at data/ships.txt. The easiest thing to do is to take an existing ship and modify it. If you don't want to change the ships.txt file, you can create a file with any name you like, define your ship there, and save it in the data directory. Each ship attribute is defined as a key name (such as "sprite") followed by (usually) one value. If a key or value has spaces in it, you must enclose it in quotation marks or it will be interpreted as two separate keys.
The data files use indentation, like in the Python language, to define sub-entries within an entry. For example, each ship is defined by a line reading ship "Model Name" with no indentation, followed by several keys indented once:
-
"display name": the name that appears in game as this ship's model name. If not specified, defaults to the model name. (v. 0.10.3) -
"plural": plural version of this ship's model name. If not specified, defaults to the display name with the character "s" added to the end. (v. 0.9.5) -
"noun": noun to use when referring to this ship, instead of "ship." For example, this can make the game refer to a ship as a "creature" or an "entity." (v. 0.9.7) -
"sprite": specifies which sprite the ship uses, relative to the "images/" folder, minus the frame number and any extension (e.g. "ship/newship" refers to "images/ship/newship-#.png"). Additional sprite properties can be provided as children of this node. See the sprite data page for more details. -
"thumbnail": the shipyard sprite. -
"attributes": a list of characteristics of the ship, defined as key-value pairs. -
"outfits": a list of names of outfits that are installed in this ship by default. To add multiple copies of one outfit, add a number after the name:"Energy Blaster" 2 -
"(engine | reverse engine | steering engine)" <x#> <y#> <zoom#>: the (x, y) coordinates, relative to the center of the sprite, where engine flares should appear. Positive y is up; negative y is down (e.g.engine -12 -105). There should be a separateengineline for each engine (usually two).-
As of v. 0.9.4 you can optionally specify a third value, a zoom factor, in order to have some of a ship's engines produce bigger flares than others. It is suggested that the sum of the squares of the zoom factors be roughly equal to 2 so that the total area of the engine flares is the same across ships. (Example: A ship with three engines could have an engine with a zoom factor of 1 and two with zoom factors of 0.7, as 1^2 + 0.7^2 + 0.7^2 is roughly 2.)
-
As of v. 0.9.13, the syntax for the zoom factor of an engine has changed (although the old way of specifying a zoom factor is still supported for compatibility). Two new engine flare types have also been added:
"reverse engine"and"steering engine", the former of which only creates flares when using a reverse thruster, and the latter of which only creates flares when steering."engine"and its variants can now have the following (optional) children:-
"zoom" <zoom#>: the zoom factor of this engine. -
"angle" <degrees#>: the angle at which this flare will be pointed relative to the ship. The default angle for reverse engine flares is 180 degrees that of normal engine flares. -
"gimble" <degrees#>: an additional angle added to the base angle when the ship is both thrusting (forward or backward) and turning at the same time. (v. 0.10.5) -
"over": a single keyword with no value that specifies that the flare should be drawn on top of the ship sprite instead of under it. -
"[left | right]": keywords with no value used only for steering engines. Specifies in what direction the ship must be turning in order for these flares to show. If neither of these keywords are listed, the steering flare will always show when the ship is steering.
-
-
-
"gun" <x#> <y#>: the (x, y) coordinates of any gun ports. The number of gun outfits cannot exceed the number of gun port locations¹ listed here. The following lines can be added as a "child" of the gun line:-
"angle" <degrees#>: the angle at which this gun fires. The default angle for guns is 0 degrees, i.e. facing forward. (v. 0.9.13) -
"parallel": a single keyword with no value that specifies that the gun should fire in parallel with other guns of the same angle. That is, the gun fires straight out from its facing angle. The default behavior of guns is to angle their fire slightly in order to converge on a single point in the distance. (v. 0.9.13) -
"over": a single keyword with no value that specifies that the gun's hardpoint sprite, should it have one, should be drawn on top of the ship. By default, gun hardpoint sprites are drawn under the ship. (v. 0.9.15)
-
-
"turret" <x#> <y#>: the (x, y) coordinates of any turrets. The number of turret outfits cannot exceed the number of turret locations¹ listed here. The following lines can be added as a "child" of the turret line:-
"under": a single keyword with no value that specifies that the turret's hardpoint sprite, should it have one, should be drawn under the ship. By default, turret hardpoint sprites are drawn over the ship. (v. 0.9.15) -
"angle" <angle#>: the base-angle the turret is pointing at when it is idle. -
"arc" <minAngle#> <maxAngle#>: limits to the rotation of installed turrets (minimum and maximum), relative to the base-angle.
-
-
bay <category> <x#> <y#>: specify a bay of the given ship category at the given (x, y) coordinates, e.g.bay "Drone" -14 64. The bay given must be a valid carried category, as specified by acategory "bay type"node. See categories.txt for an example. The only valid vanilla bay types are"Drone"and"Fighter".-
The following lines can be added as a "child" of the bay line:
-
"[over | under]": a keyword with no value that changes the Z position of the bay, displaying the carried ship either over or under the sprite of the carrying ship. Omitting this keyword means that carried ship is not displayed externally on the carrier. -
"[left | right | back]": a keyword with no value that changes the facing direction of the carried ship, the default direction being facing forward. This also controls the direction in which the carried ship is first facing when deployed. -
"angle" <degrees#>: a value of degrees that allows for facing the carried ship in any direction, as an alternative to the set left, right, back directions. -
"launch effect" <effect> [<count#>]: an effect that is drawn at this bay's coordinates when its carried ship deploys.
-
-
Prior to v. 0.9.13 the syntax for adding bays to a ship was different, although it is still supported for compatibility purposes. The old method for defining a bay was as follows:
-
(fighter | drone) <x#> <y#> [over | under] [left | right | back]: specify a fighter or drone bay at the given (x, y) coordinates, e.g.drone -14 64 -
As of v. 0.9.3 the coordinates can be followed by a Z position of "over" or "under" to make the carried fighter visible over or under the ship that is carrying it. You can also specify which way the bay faces, "left" or "right" or "back" rather than the default of straight ahead, e.g.
fighter 20 50 over right.
-
-
-
"explode" <effect> [<count#>]: an effect to create when the ship is dying, and the number of them to create (e.g.explode "small explosion" 10). These effects are created randomly at an increasing rate until the ship finally explodes in one big explosion where 50% of the explosion effects are generated a second time. -
"final explode": the same as"explode", but defines an effect that is only included in the final ship explosion, not in the small explosions leading up to that. (v. 0.9.0) -
"leak" <effect> [<openPeriod#>] [<closePeriod#>]: an effect to create when the ship is dying. The open period of the leak is the random chance each frame (1 / openPeriod) that a new leak will start, while the close period is the random chance each frame (1 / closePeriod) that an active leak will end. Differs from"explode"in that leak effects are emitted from the edge of the ship's sprite, as if the ship's atmosphere is leaking as it dies. -
"never disabled": If this tag is included (no value need be specified for it), this ship never becomes disabled due to its hull dropping too low. This means that it cannot be plundered. This tag is not "inherited" by variants of a ship. -
"uncapturable": If this tag is included (no value need be specified for it), this ship can be boarded but cannot be captured. This can be used to mark things that are not really "ships," e.g. a derelict hulk that you can plunder but that cannot be repaired to fly on its own. This tag is not "inherited" by variants of a ship. (v. 0.9.0) -
"swizzle": the swizzle value that this ship uses, overriding the ship's government swizzle. (v. 0.9.7) -
"name": the name of the particular ship, as seen and/or editable by the player. In general, this field will only be used by content creators for ships gifted to the player by a specific starting scenario. (It is extensively used by the game engine, to save the player's ships' names.)
¹The player info panel will not display properly if the total number of gun and turret hardpoints on either side of the ship is more than 12. In addition, prior to v. 0.9.15, if the total number of gun and turret hardpoints is greater than 32, the extras will not fire.
The attributes key should be followed by a list of ship attributes, ideally listed in the following order:
-
"category": the type of ship: "Transport", "Light Freighter", "Heavy Freighter", "Interceptor", "Light Warship", "Medium Warship", "Heavy Warship", "Fighter", or "Drone".Since v. 0.9.15: also "Space Liner", or "Utility". Since v. 0.10.0: also "Superheavy".
-
"licenses": a list of names of licenses you need to buy this ship. For each<name>specified, thelicense: <name>condition must be set for the player to buy this ship. (If you make an outfit named"<name> License", that condition variable will automatically be set when you buy that outfit.) -
"cost": the cost of the ship, in credits. -
"shields": maximum shield capacity. When a ship is hit, if it has any shields left they absorb the damage; otherwise the hull is damaged. Shields can recharge, whereas hulls generally can only be repaired when landing on a planet. -
"hull": maximum hull strength. A ship is disabled when it reaches its disabled threshold. This threshold can be altered by other attributes, but by default follows the equationhull * (0.1 * (1 - T) + 0.5 * (T))whereT = 1 / (1 + 0.0005 * hull). This results in a continuous curve where the smallest ships are disabled at 50% and the largest at 10% (although in practice the smallest ships are only disabled at about 46%, and the largest ships only approach 10%). -
"required crew": the number of crew members needed to operate the ship without anything failing. -
"automaton": if set to 1, this ship is allowed to have a"required crew"of 0. Ships with the "Drone" category are automatically automata unless"automaton"is defined and set to 0. (v. 0.9.0) -
"bunks": the maximum number of people on the ship, including crew and passengers. -
"mass": the mass of the ship's chassis, without any outfits or cargo. The higher the mass, the more thrust is needed in order to turn or accelerate at a certain rate. -
"drag": the maximum speed of the ship will be equal to "thrust" / "drag". -
"heat dissipation": how well this ship gets rid of excess heat. This should vary from .9 for tiny ships to .5 or less for large ships. For ships of a given size, it should be higher for ships with more exposed hull area or that might be expected to have higher quality construction, and lower for ships that ought to be plagued by overheating issues. -
"fuel capacity": the amount of fuel that this ship can carry. The cost of a hyperspace jump is normally 100 fuel, but depends on the type of hyperdrive used. -
"cargo space": the mass of cargo that can be carried. -
"outfit space": the number of outfits (weapons, generators, engines, etc.) that can be installed. -
"weapon capacity": the amount of outfit space that can be occupied by weapons. -
"engine capacity": the amount of that outfit space which is suitable for installing engines. Some ships have lots of engine capacity but not much weapon capacity, or vice versa.
There is also one special attribute called weapon that defines how much damage your ship does when it explodes. Suggested values for "tier 1" ships are shown in parentheses below; you can make the damage amount less or more depending on whether you want this ship to have a massive explosion (perhaps because it is carrying lots of ordnance) or a tiny one. Higher-tier ships should do less damage relative to their shield and hull values to avoid creating absurdly damaging explosions.
-
"blast radius"(Typical value: (shields + hull) * .01) -
"shield damage"(Typical value: (shields + hull) * .10) -
"hull damage"(Typical value: (shields + hull) * .05) -
"hit force"(Typical value: (shields + hull) * .15)
Outfits work by adding or subtracting to these same attributes. The outfits list can be in any order, but for the sake of consistency its preferred order is roughly from "front to back" of the ship:
- guns
- turrets
- generators
- batteries
- shields
- cooling
- outfits that don't fit any other category (expansions, scanners, hand-to-hand weapons, etc.)
- thruster
- steering
- hyperdrive
It is possible to add custom attributes to outfits/ships by specifying a key:value pair. As an example, when we wanted to add large scale spinal weapons, we added "spinal mount" 1 as a custom attribute. The total value of attributes for a vessel cannot be below 0. Then on the spinal weapon we added "spinal mount" -1, which means it is taking up that slot.
These attributes can be created directly on ships, outfits, and missions; and can be tested in outfits, missions, and planets. For example, we could make an outfit called "Protective Sheathing" that includes the noncorrosive 1 attribute, and then specify a planet that can only be landed on by ships that have this protective sheathing by adding "requires: noncorrosive" to the planet's attributes.
Note that care must be taken to ensure that these custom attributes do not inadvertently duplicate an already-existing attribute.
In addition to nearly 60 different human ship types, each model has several "variants" that represent the different ways that an individual captain might outfit a ship. For example, one pilot might prefer being fast enough to run from a fight, and another might want to be strong enough to survive one, and fighting styles include bombarding a target with missiles or other longer-range weapons, or being able to deal maximum damage at close range.
The syntax for a variant is:
ship <base name> <variant name>
	...
Instead of specifying all the ship's attributes, the variant should only define a list of outfits. The order of the guns and turrets should also be specified if there are two different kinds of gun outfits or turret outfits, so that it is clear which ones go in which slots. For example:
ship "Bastion" "Bastion (Laser)"
	outfits
		"Heavy Laser" 4
		"Heavy Anti-Missile Turret"
		"Heavy Laser Turret" 2
		"Fusion Reactor"
		"Supercapacitor" 4
		"D94-YV Shield Generator"
		"Water Coolant System"
		"Mass Expansion"
		"A370 Atomic Thruster"
		"A525 Atomic Steering"
		"Hyperdrive"
	turret "Heavy Anti-Missile Turret"
	turret "Heavy Laser Turret"
	turret "Heavy Laser Turret"
In this case, all four guns are the same type (heavy lasers), so there is no need to specify their order, but the order of the turrets must be specified. The turret (x, y) positions need not be specified, because they are given in the original ship descriptor. By only providing the bare minimum information in the variant, we can avoid needing to update all the variants if, say, the ship sprite changes and the turret positions move.
A variant can define new weapon hardpoints, but if so the new set of points completely replaces the old ones. That is, if you want your new variant to have two extra guns, you'll need to copy the base ship's list of guns and turrets, and then add two more gun lines. Similarly, if you define any new engine points the old engine points are discarded. And, if you define a new bay location (drone or fighter), all previous "drone" and "fighter" locations are discarded.
Beginning with v. 0.9.9, creating a variant with slightly different attributes than the base model (e.g. more engine space and less hull) can be done with the add attributes node:
ship "Berserker" "Berserker Drone"
	add attributes
		"automaton" 1
		"self destruct" 1
The above creates a variant of the "Berserker" ship model named "Berserker Drone", and gives it the "automaton" attribute (0 crew) and makes it so that boarding this drone ship will cause it to self-destruct.
Any attributes specified in the add attributes node will be added to the base attribute value, so to decrease a value, you must specify a negative increment:
ship "Arrow" "Arrow (Faster)"
	add attributes
		"drag" -.01
		"engine capacity" 20
		"hull" -150
The above creates a variant of the base "Arrow" ship, and the variant has lower drag, lower hull, and more engine capacity.
Note: While it is possible to "chain" the usage of add attributes, by referring to a variant instead of a base model ship, e.g. ship "Arrow (Faster)" "Arrow (Too Fast)", doing so will result in incorrect "model name" display when targeting ships, and may result in improperly configured ships due to the order in which the game creates ships. Thus, you should always refer to a "base model" ship, one that was defined as ship <name> and not ship <base name> <variant name>.
Beginning with v. 0.10.0, variants are also capable of having no bays even if the base model does. Previously, one could define new bays on the variant to override those on the base model, but a variant couldn't be made to have no bays at all if the base model had any.
ship "Carrier" "Carrier (No Bays)"
	remove bays