Based on the experience of HoloMagnet3, this application specializes in sharing the experience for HoloLens with multiple users.
Using the sharing function of the old HoloToolkit, you can easily share the experience with multiple users by preparing a PC for the server.


* HoloLens2 is not supported.
* Using Unity version 2017.4.x.
In addition to the HoloLens for running the app, you need a Windows 10 PC as a server and connect it to the same network.
* Depending on your LAN's firewall settings, you may not be able to communicate normally.
After launching UnityEditor, in the top menu, select [Mixed Reality Toolkit], and then [Sharing Service] -> [Launch Sharing Service] to launch the program for the Sharing server.

Launch a command prompt in HoloMagnet4/External/HoloToolkit/Sharing/Server.
Execute the following command after launching.
SharingService.exe -local
When you start the Sharing server, the IP address will be displayed below the description below.
Local IP addresses are:

Currently, we package a specific IP address in UnityEditor, install it in HoloLens, and make it work.
Open the project in the Unity editor and open Scene2D of the following path on the Project tab.
HoloMagnet4/Assets/HoloMagnet36/Scenes
* Using Unity version 2017.4.x.

From the Hierarchy tab, select "Sharing" under "Managers",
after that from the Inspector tab, set the IP address that you confirmed in checking the IP address procedure to "Server Address" in the SharingStage component.

In the top menu, click the [File] menu and select [Build Settings ...] to display the Build Settings window.
In the Platform item, make sure that the Universal Windows Platform is selected and the Unity icon is displayed.
If you don't see the Unity icon in the Universal Windows Platform item, select the Universal Windows Platform and press the Switch Platform button to switch platforms.

Once you see the Unity icon in the Universal Windows Platform item, press the Build button at the bottom of the window and specify the output destination to build on Unity.
For the output destination, create a new folder in the folder that you specified when you opened the project and specify that folder.
(It is recommended to specify a new, dedicated folder in the project folder as the output destination, as it may not be possible to build properly due to the influence of the destination folder or existing files in the folder.)

Once the build is complete on Unity, Explorer will be launched with the folder you specified as the output destination folder open.
As a .sln file will be generated in the output folder, which you can open in Visual Studio 2017.
(It currently generates a .sln file by default with the name "181026-HoloMagnet41rt".)
Connect the HoloLens to your PC with a data transferable USB cable.
Change the Visual Studio deployment target to x86, Device.


Click the button with play mark as "Device" written and install it to the device and debug.
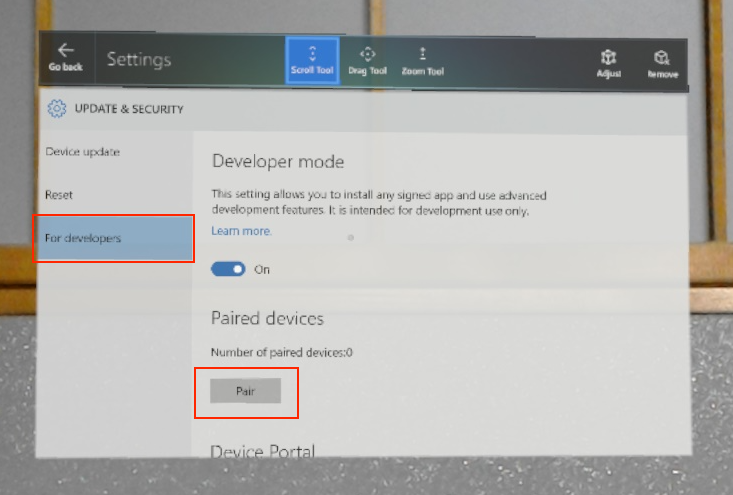
If this is your transfer it with a first time PC and HoloLens combination, you will need to enter a PIN.

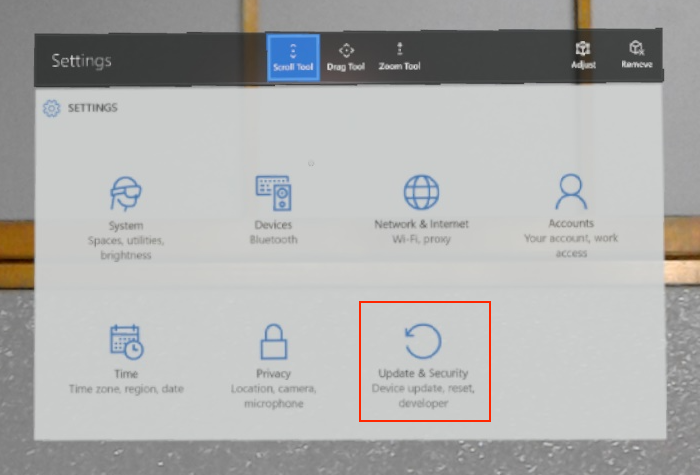
On HoloLens, launch the Settings app and select the "Updates & Security" item.
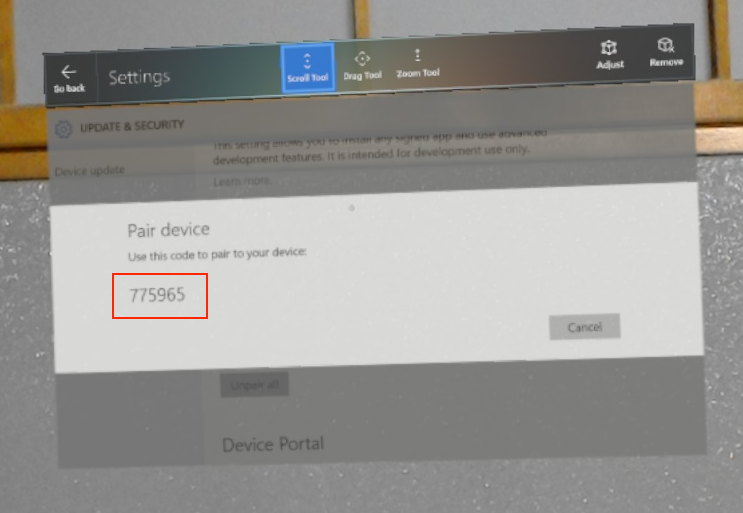
When you see "Pair device" and a 6-digit number appears at the bottom, input the same number in the PIN entry window on the Visual Studio side, then click OK.
In the top menu of Visual Studio, select "Project", "Store" -> "Create App Packages...".

In the Create App Package window, select "I want to create packages for sideloading" and click the Next button.

In the "Select the packages to create and the solution configuration mappings" item, check only the item with the architecture of "x86" and click the Create button.

When the package creation is complete, the output destination for the package will be displayed.
".appxbundle" file, etc will be created in the output destination.
Once the package has been created, install it to HoloLens via the Device Portal.
Connect the HoloLens to your PC with a USB cable by wire and type "localhost:10080" into your browser's URL.
See the official documentation for an overview of the Device Portal and setup instructions.
Once you've accessed the Device Portal in HoloLens from your browser, select "Apps" from the menu on the left.

In the Deploy Apps item, click the "Select File" button and select the ".appxbundle" file that was generated earlier.
Check the "Allow me to select framework packages" checkbox and click the "Next" button, if necessary, for example, when installing for the first time.
If you have checked "Allow me to select framework packages", click the ”Select” button in "Choose any necessary dependencies:" and open "Dependencies" -> "x86" folder and select all the ".appx" files in the folder containing the ".appxbundle" file.

Finally, click the "Install" button and install it to HoloLens.
* The screen layout of the Device Portal will vary slightly depending on the HoloLens OS version.
Reference URL for deployment (official documentation)
After launching the app in HoloLens, keep facing front and raise gradually your point of view to the top, you will see buttons.
By aligning the round cursor in front of the eye direction with this button and performing AirTap operation, you can transition scenes in order and then switch the contents you can experience.
By moving the bar magnet up and down and left and right against the compasses spread out vertically and horizontally, you can see the magnetic force working at what position and in what direction on a flat space with no depth.
By holding your hand in the front direction with your index finger upright, pinch with your thumb and index finger and move your hand, you can pinch the bar magnet to move it in a parallel direction.
The only bar magnet that can be moved is the one with a pink line connecting it to your position.
In addition to the vertical and horizontal movements, the bar magnets move in the compasses spread in the depth direction, making it possible to see how the magnetic force observed in the 2D Scene works in 3D.
In this Scene, the bar magnets cannot be moved, but you can watch from various directions that the bar magnets moving from side to side.
You can display lines of magnetic force against a bar magnet and see the lines of the magnetic force.
Since the one bar magnet is displayed for one person who experiences it, Multiple magnets are displayed through multiple users' experiences, therefore you can watch how each bar magnet affects the lines of magnetic force.