Getting Started with embARC Using GNU on Linux 2017
The ARC EM Starter Kit is an FPGA-based solution for rapid software development, code porting, software debugging, and profiling, preloaded with images for the ARC EM Family of processors: EM4 and EM6 on EMSK v1.1, EM5D and EM7D on EMSK v2.0 and v2.1, EM9D and EM11D on EMSK v2.2. It can be extended using Digilent® Peripheral Modules (Pmods™).
For Windows® instructions, see Getting Started with embARC Using GNU on Windows.
- Visit our User Forums section and create an account to access the download location.
- Unzip the software to
~/ARC(best) or another location. This step creates a subfolder calledembARC. Using the above example,~/ARC/embARCas<embARC ROOT>.
Note: There should be no whitespace in the path to the embARC location. Whitespace causes problems when you build the examples using the provided makefiles.
Synopsys's Eclipse IDE with GNU toolchain for ARC Processors can be used for embARC development.
The following steps describe the installation of the Eclipse IDE with GNU Toolchain for ARC 2015.12 (ARC GNU Toolkit) for Linux.
- Download the latest release ARC GNU Toolkit from https://github.com/foss-for-synopsys-dwc-arc-processors/toolchain/releases.
- The installer archive file name is
arc_gnu_2015.12_ide_linux_install.tar.gz. Extract the contents of the archive to the~/folder. - Rename the
arc_gnu_2015.12_ide_linux_installfolder toarc_gnu.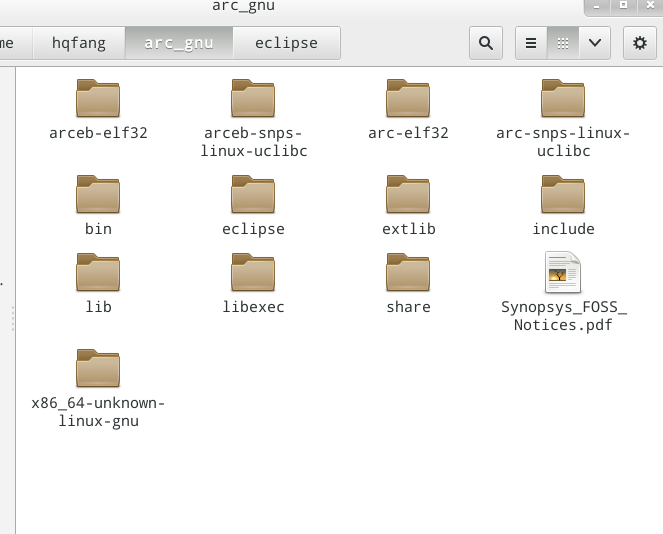
- Add the ARC GNU toolkit path into your Linux bash configure file (such as
.bashrc):
- Make sure your
PATHis set correctly by runningarc-elf32-gcc -vto see the version of the ARC GNU Toolkit: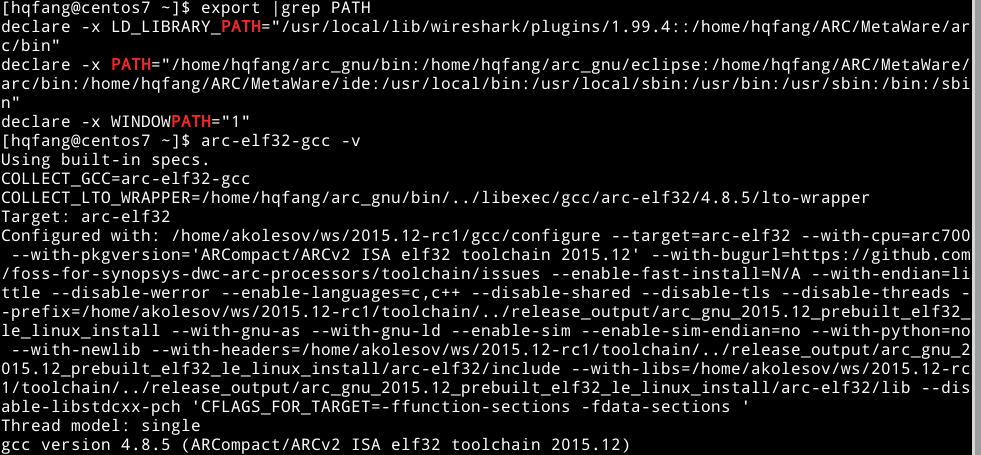
This section describes how to build a simple example using the ARC GNU Toolkit using the ARC EM11D configuration in the EMSK v2.2, in the ARC GNU IDE and in command-line mode.
The supplied examples use the same source code and makefile in both ARC GNU IDE and command-line mode.
This section uses the Contiki Sensor example project as a tutorial. Other examples follow the same build and run steps. For additional documentation, see <embARC_ROOT>/doc/embARC_Document.html in the source-code archive.
This example uses the following components:
- Contiki OS running on EMSK
- Pmod temperature sensor and associated device driver
- GPIO drivers on EMSK
It is also a good simple test to confirm that the temperature sensor module is working and that your debugger connection is working correctly.
- This example uses the ARC EM11D configuration in EMSK 2.2. If your EMSK board is not already running version 2.2 firmware you need to upgrade the firmware to v2.2 (see the ARC EM Starter Kit UserUser's Guide in the PDF manuals provided the EMSK for detailed instructions).
- Connect the EMSK board to your PC using the provided USB cable and select the hardware core configuration to be ARC EM11D using the DIP switches setting on the EMSK.
- Press the button above the 'C' character on the board to load the selected ARC EM11D core configuration.
The embARC Software includes a folder called ide_projects containing a subfolder for your EMSK board version (emsk_<xx>). Each version subfolder contains subfolders for the desired toolchain (GNU or MetaWare). Each toolchain subfolder contains a wide range of examples, each in its own folder, with embARC project files and pre-generated build and debug configurations for the example, pre-packaged as an eclipse project.
All IDE projects for EMSK 1.1 are configured to target the ARC EM6 configuration by default. The default configuration for EMSK 2.0 and 2.1 is ARC EM7D. The default configuration for EMSK 2.2 is ARC EM11D.
- Open the ARC GNU IDE and use the Workspace Launcher to choose
<embARC ROOT>/ide_projects/<emsk_xx>/gnu, where<emsk_xx>stands for the EMSK board version. This example uses EMSK 2.2 with ARC GNU IDE, and the workspace is found under<embARC ROOT>/ide_projects/emsk_22/gnu.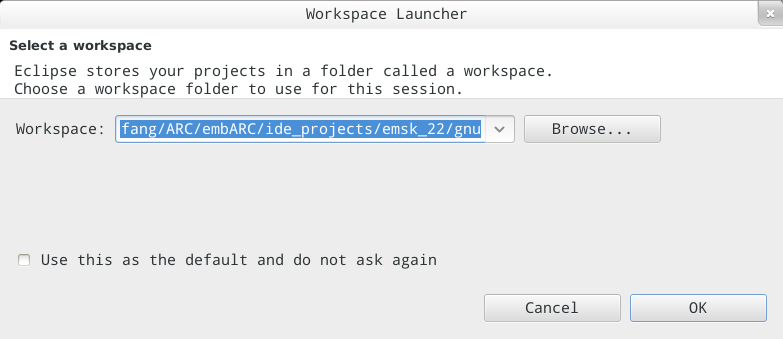
- Close the Welcome perspective if it appears.
- Select File > Import....
- Expand General and select Existing Projects into Workspace, then click Next.
- Use the Browse button to navigate to the location where you unzipped the embARC distribution and look for the
ide_projects/emsk_22/gnusubdirectory (for example,/home/user/ARC/embARC/ide_projects/emsk_22/gnu). The list of embARC example projects appear in the Projects section of the dialog. - Select the example that named
emsk_contiki_sensorand click Finish. Importing may take several minutes, so it fastest to only import the desired projects.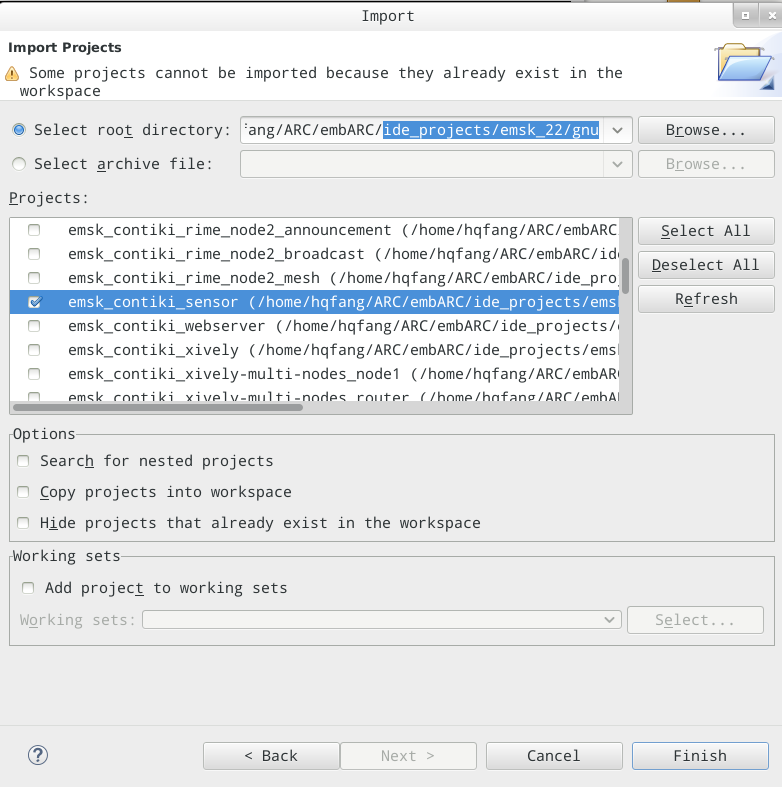
- Confirm that the
emsk_contiki_sensorexample project appears in the Project Explorer on the left.
- In the Project Explorer, find the
emsk_contiki_sensorproject in the list. - If the project is closed (small icon showing a closed folder), double-click on the project name to open it.
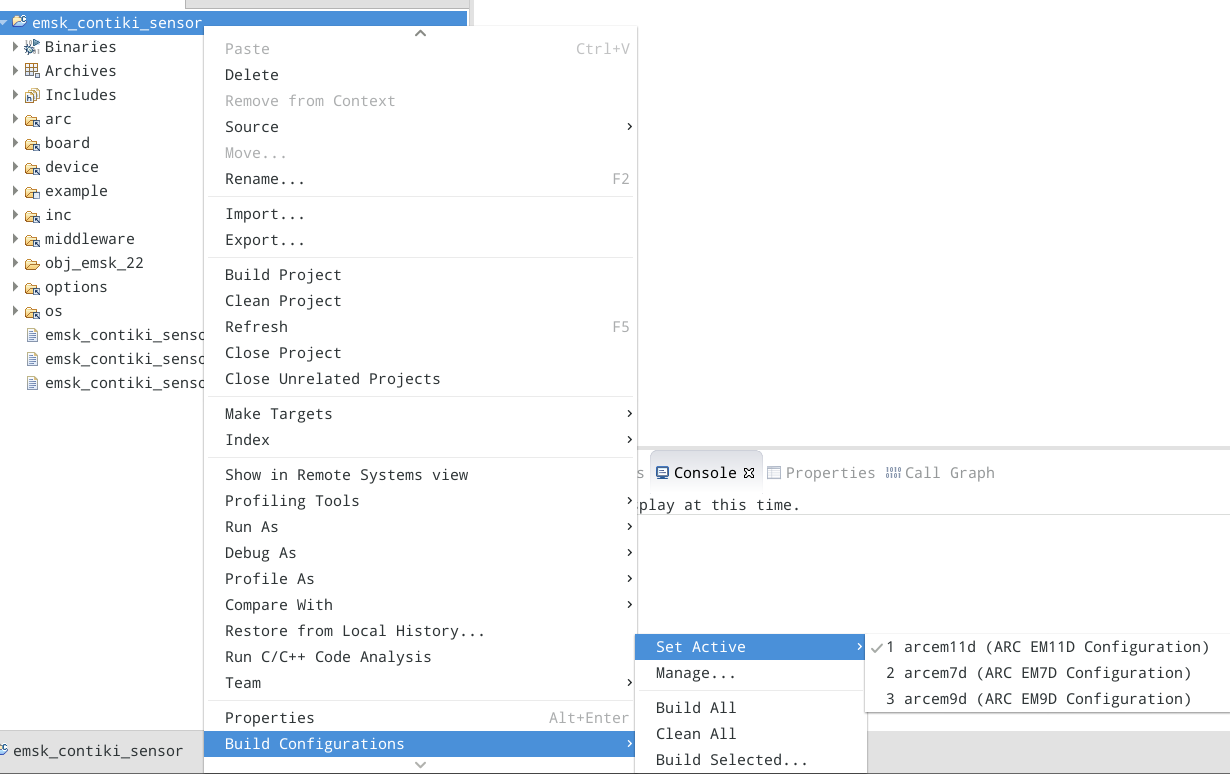
- Right-click on the project name, and select Build Configurations > Set Active> arcem11d.
- Right-click emsk_contiki_sensor in the Project Explorer and choose Clean Project.
- Click the Console tab at the bottom of the screen to see the build progress.
- Right-click emsk_contiki_sensor in the Project Explorer and choose Build Project.
- Right-click on the project name, and select Debug Configurations.... The Debug Configurations dialog appears.
- Select emsk_contiki_sensor-arcem11d from the list under ARC C/C++ Applications and check the OpenOCD binary path and configuration file path by selecting Debugger > Gdbserver Settings.
For example, if you installed ARC GNU toolkit(2015.06 or later) in
/home/yourname/arc_gnu/, the selected OpenOCD configuration file is/home/yourname/arc_gnu/share/openocd/scripts/board/snps_em_sk_v1.cfgif you are using EMSK 1.1, or/home/yourname/arc_gnu/share/openocd/scripts/board/snps_em_sk.cfgif you are using EMSK 2.0 or later.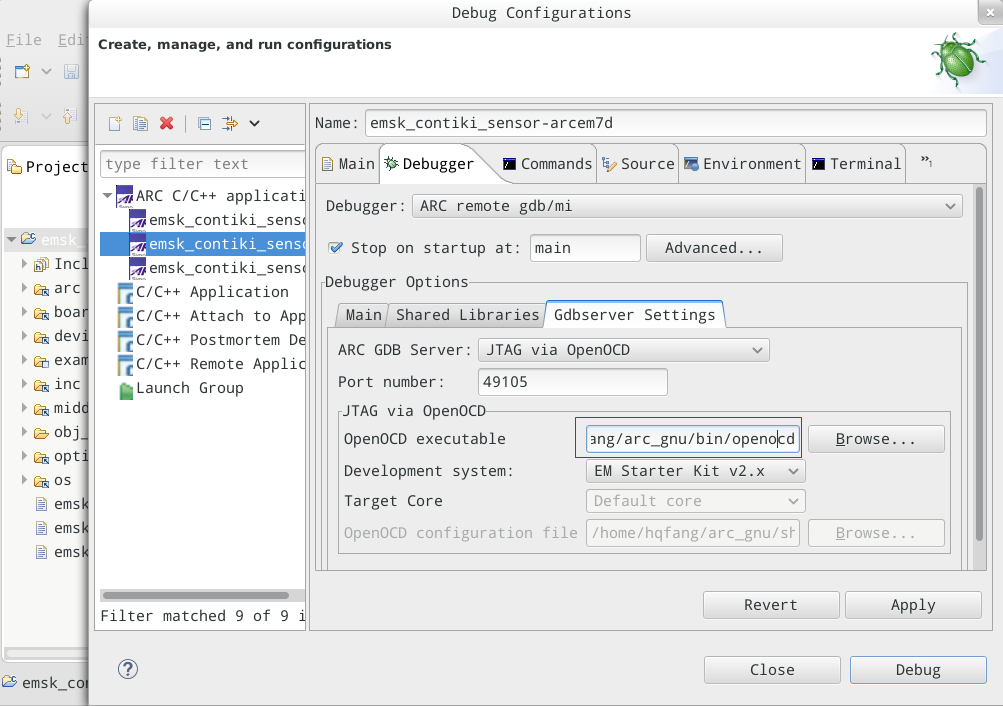
- If you made OpenOCD configuration changes, click Apply.
- Click Debug.
- Confirm that the Debug perspective opens and that execution has stopped at main().
- Click the Resume button (green arrow with yellow bar) on the toolbar to start program execution. You should see messages in the IDE Console view indicating a successful target connection.
- Go to your terminal window and confirm that you see the "Powered By embARC" banner and example print messages.
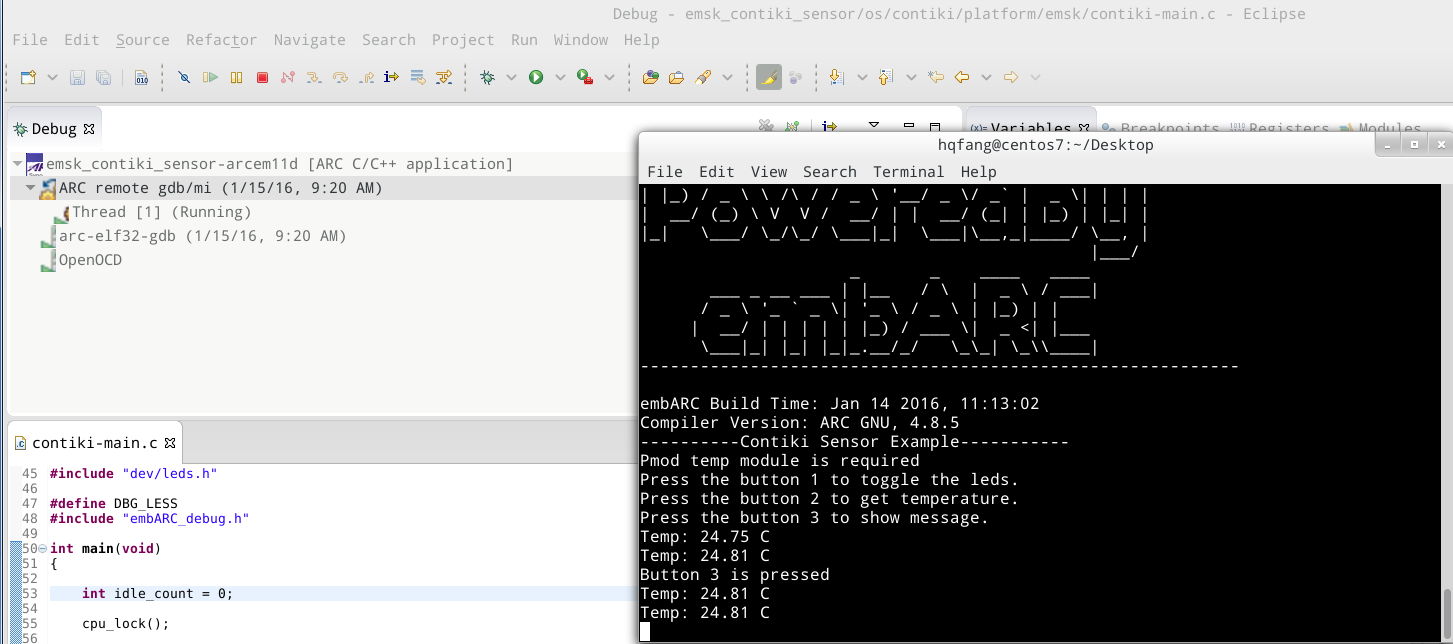
- Experiment with the buttons, LEDs, and temperature sensor (touch the sensor with your finger to change the temperature) to confirm that GPIO and the temperature sensor are working. Button 1 is the button labeled 'L,' button 2 is the button labeled 'R,' and button 3 is the button above the 'A' in the ARC logo.
- When you are finished, click the red Terminate button on the toolbar and return to the C/C++ perspective.
The embARC Software includes a folder called example containing all the source code and makefiles for the embARC example. The EMSK subfolder contains all the available examples for the EMSK board. For the Contiki sensor example, the example folder path is <embARC ROOT>/example/emsk/contiki/sensor. You can build and run the example in command-line mode from inside the subfolder.
Note: For each example, you can use defined make options BOARD, BD_VER, CUR_CORE and TOOLCHAIN to select different board versions, core configurations and development toolchains. For detailed documentation on each make options, refer to the example section of embARC documentation.
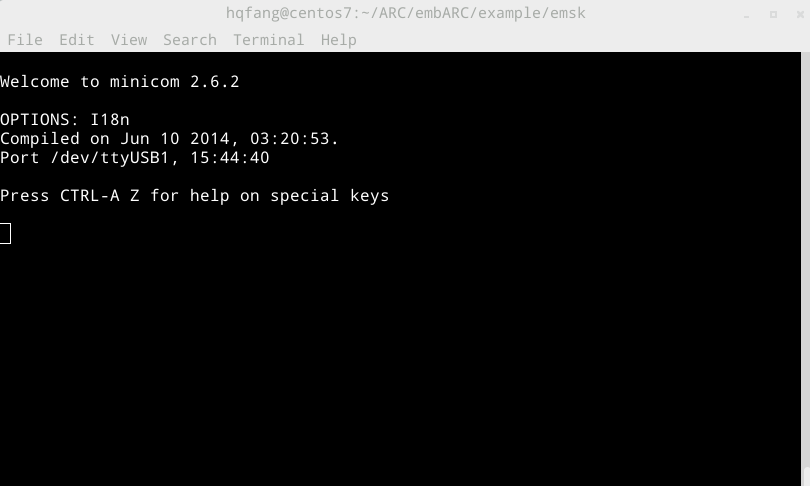
- Open a Linux terminal, and install the minicom tool if it is not already installed, you can also use other UART terminal tools such as putty or ckermit. For information on how to use the minicom tool, see How to use Minicom.
- Open minicom with UART/COM port where you connected the USB JTAG cable.
- Open another Linux terminal, and
cdto the Contiki sensor example folder:<embARC ROOT>/example/emsk/contiki/sensor.
- Type the following command to build the Contiki sensor example for ARC EM11D on the EMSK v2.2:
make BD_VER=22 CUR_CORE=arcem11d TOOLCHAIN=gnu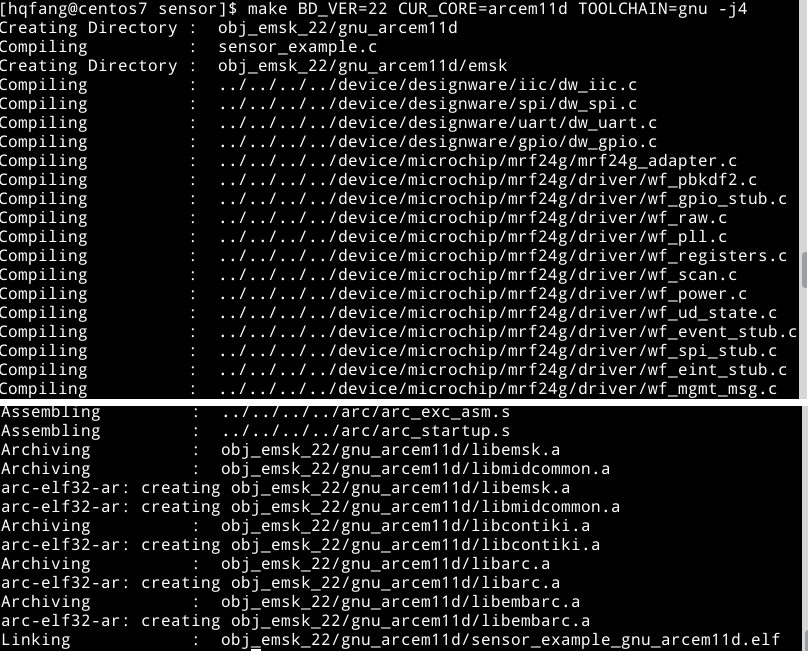 The build progress is displayed.
- Type the following command to run the Contiki sensor example in command line:
make BD_VER=22 CUR_CORE=arcem11d TOOLCHAIN=gnu -j4 runThe application launches in the terminal, and you see the "Powered By embARC" banner and example print messages.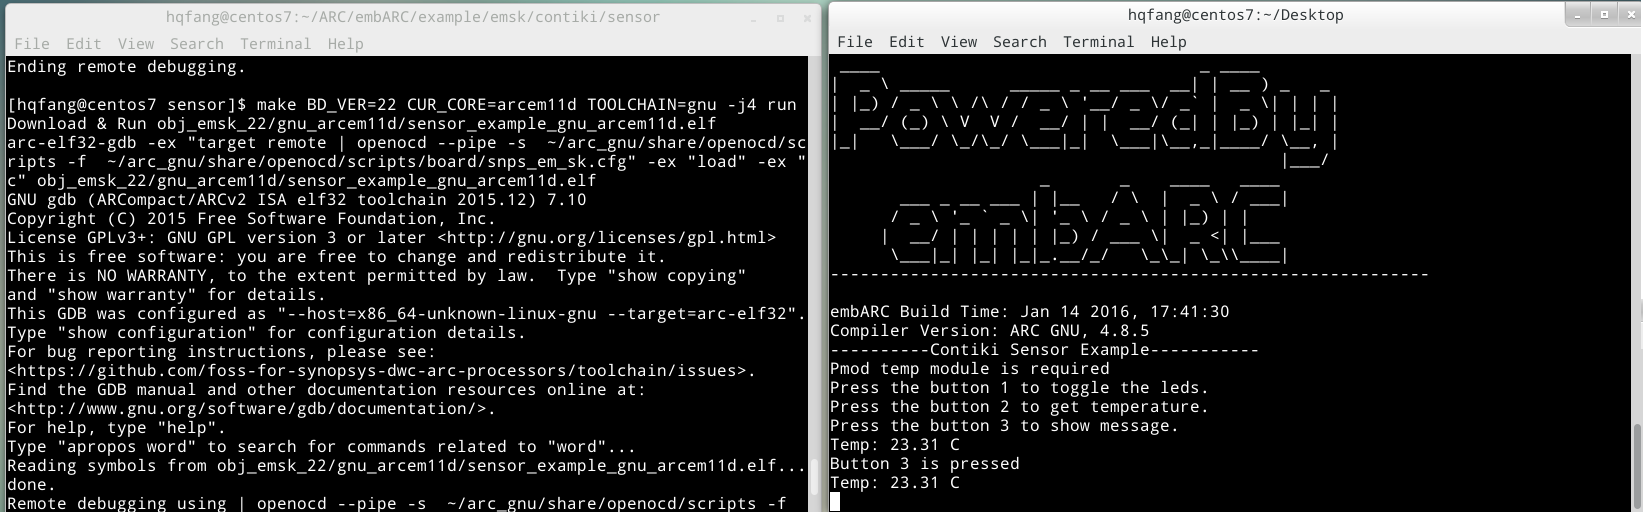
- Experiment with the buttons, LEDs, and temperature sensor (touch the sensor with your finger to change the temperature) to confirm that GPIO and the temperature sensor are working. Button 1 is the button labeled 'L,' button 2 is the button labeled 'R,' and button 3 is the button above the 'A' in the ARC logo.
- When you are finished, press CTRL + c in the terminal where the command is being executed. Enter 'q' and press enter to exit the debugger.
- Enter 'q' and press enter to exit the debugger.