Starting from the simple live canvas demo, this repository is customized as an advanced Teams App POC of using
LiveCanvas,Fluid UI/Web Component,BabyLon JsInkingManager- Customized Fluid Relay Service
Note: LiveCanvs is in preview.
to implement a collaborative inking 2D/3D objects (3D rendering works in Teams Web App with WebGL2, in Teams Desktop App with WebGL) teams meeting extension. It also supports switching different backend Fluid Relay Services.
liveshare3D_2.mp4
-
Add features to support different Azure Fluid Relay Service instances choosen (Teams, Secure, InSecure)
-
Integrated Fluid UI
-
Integrated Babylon 3D library
-
Support to pick up different layers (2D, 3D, Inking)
-
Different view operations
- Live Share View
- Personal View
-
3D models specifically live share operations
- Switch different models in shared view
- Camera moving in shared view
- Object rotating in shared view
- Object moving in personal view
- Object & Inking scaling in personal view
- Switch Object Animations in personal view
In the project directory, you can run:
Installs the latest node packages
Runs the app in the development mode.
Open http://localhost:8080 to view it in your browser.
NOTE: You may need to set PORT environment before run npm run start
$env:PORT=7070
The page will reload when you make changes.
Upon loading, if there is no /#{id} in the URL, it will create one and insert it into the URL.
You can copy this URL and paste it into new browser tabs to test Live Share using a local server.\
Builds the app for production to the build folder.\
The build is minified and the filenames include the hashes.\
In this projec,the output folder is .\dist
Add one web.config as below:
<configuration>

   <system.webServer>

      <staticContent>

         <remove fileExtension=".json"/>

         <remove fileExtension=".txt"/>

         <mimeMap fileExtension=".json" mimeType="application/json" />

         <mimeMap fileExtension=".txt" mimeType="application/txt" />

         <mimeMap fileExtension=".glb" mimeType="application/stream" />

      </staticContent>

   </system.webServer>

</configuration>
Your app is ready to be deployed to Azure App Service!
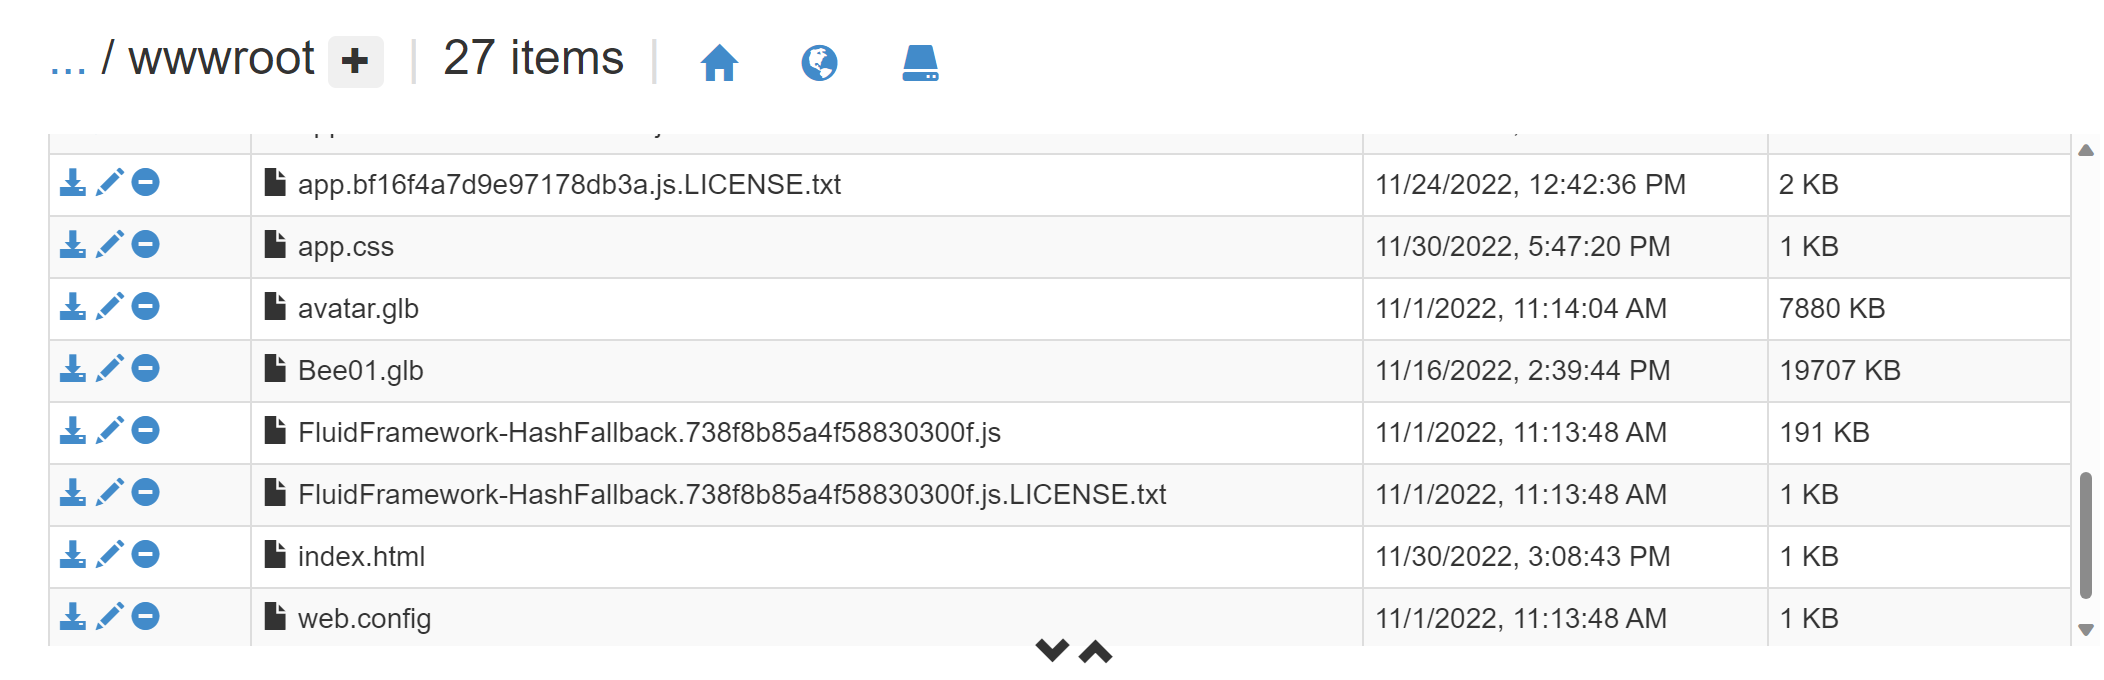
The POC has good performance when loading 3D models below 30MB. You can put your own *.glb directly in the Azure App Service web site folder you deployed in the above step.For example, I put my avatar.glb and bee01.glb here:
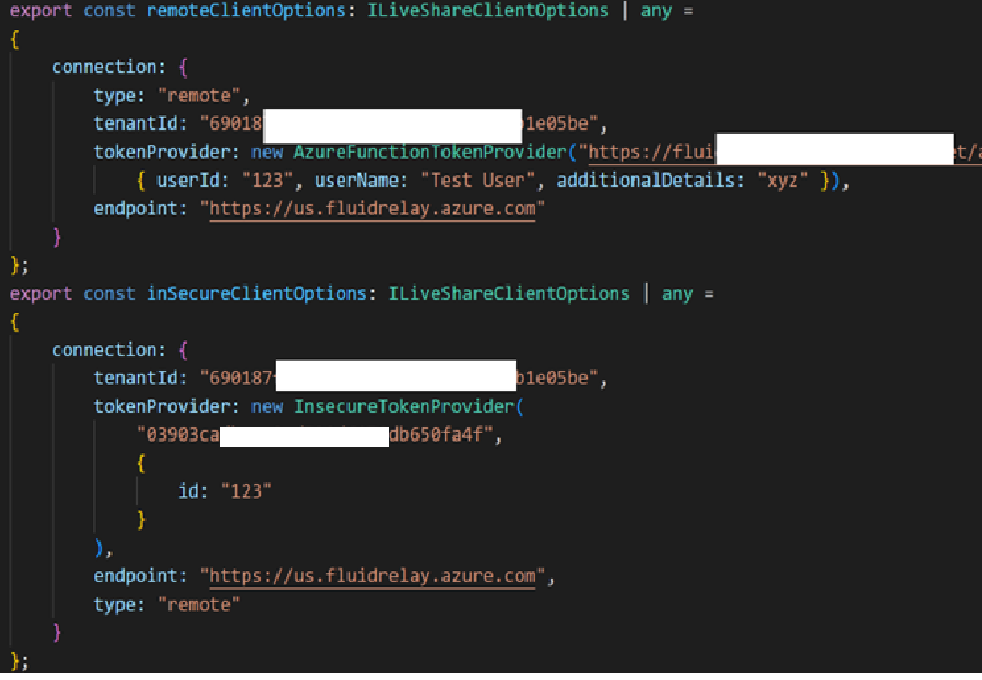
- Create your own Fluid Relay Service on Azure, note its tenant id and key
- Create your Azure Function to provide token generation, check this guideline
- Add necessary information the Remote Secure option and Remote InSecure option in code
Refer to:
- Download ngrok.
- Launch ngrok with port 8080.
ngrok http 8080 --host-header=localhost
- Open
.\manifest\manifest.jsonand update values in it, including your [Application ID](https://learn.microsoft.com/microsoftteams/platform/resources/schema/manifest-schema#id. - You must replace
https://<<BASE_URI_DOMAIN>>with the https path to your ngrok tunnel. - It is recommended that you also update the following fields.
- Set
developer.nameto your name. - Update
developer.websiteUrlwith your website. - Update
developer.privacyUrlwith your privacy policy. - Update
developer.termsOfUseUrlwith your terms of use.
- Set
- Create a zip file with the contents of
.\manifestdirectory so that manifest.json, color.png, and outline.png are in the root directory of the zip file.- On Windows, select all files in
.\manifestdirectory and compress them to zip. - Give your zip file a descriptive name, e.g.
ContosoLiveCanvas.
- On Windows, select all files in
- Schedule a meeting for testing from calendar in Teams.
- Join the meeting.
- In the meeting window, tap on + Apps and tap on Manage apps in the flyout that opens.
- In the Manage apps pane, tap on Upload a custom app.
- Don't see the option to Upload a custom app?! Follow instructions here to enable custom-apps in your tenant.
- Select the zip file you created earlier and upload it.
- In the dialog that shows up, tap Add to add your sample app into the meeting.
- Now, back in the meeting window, tap + Apps again and type the name of your app in the Find an app textbox.
- Select the app to activate it in the meeting.
- In the configuration dialog, just tap Save to add your app into the meeting.
- In the side panel, tap the share icon to put your app on the main stage in the meeting.
- That's it! You should now see react-media-template on the meeting stage.
- Your friends/colleagues invited to the meeting should be able to see your app on stage when they join the meeting.
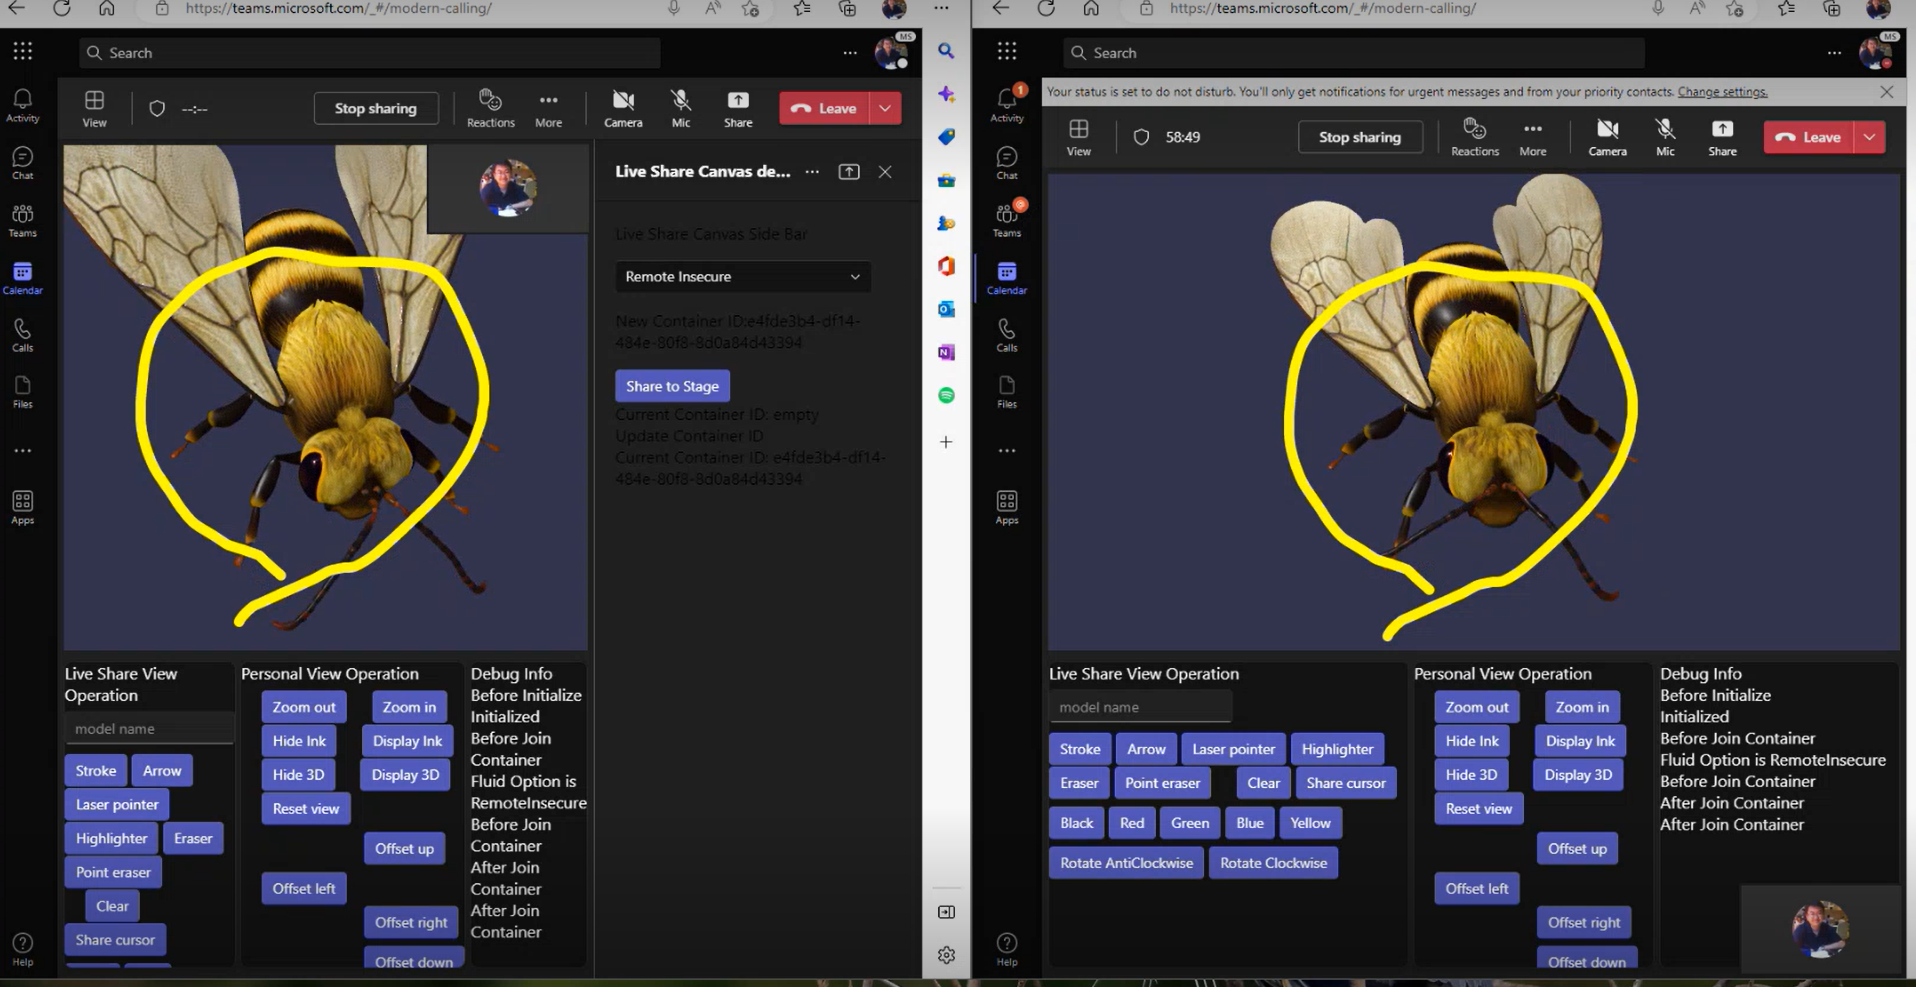
- If you configured your own Fluid Relay Service, can choose different Fluid Service Intances in the right pane:

NOTE: If you test "Remote Secure" or "Remote InSecure", make sure click the "Share to Stage" after seeing the new Container ID occurs:

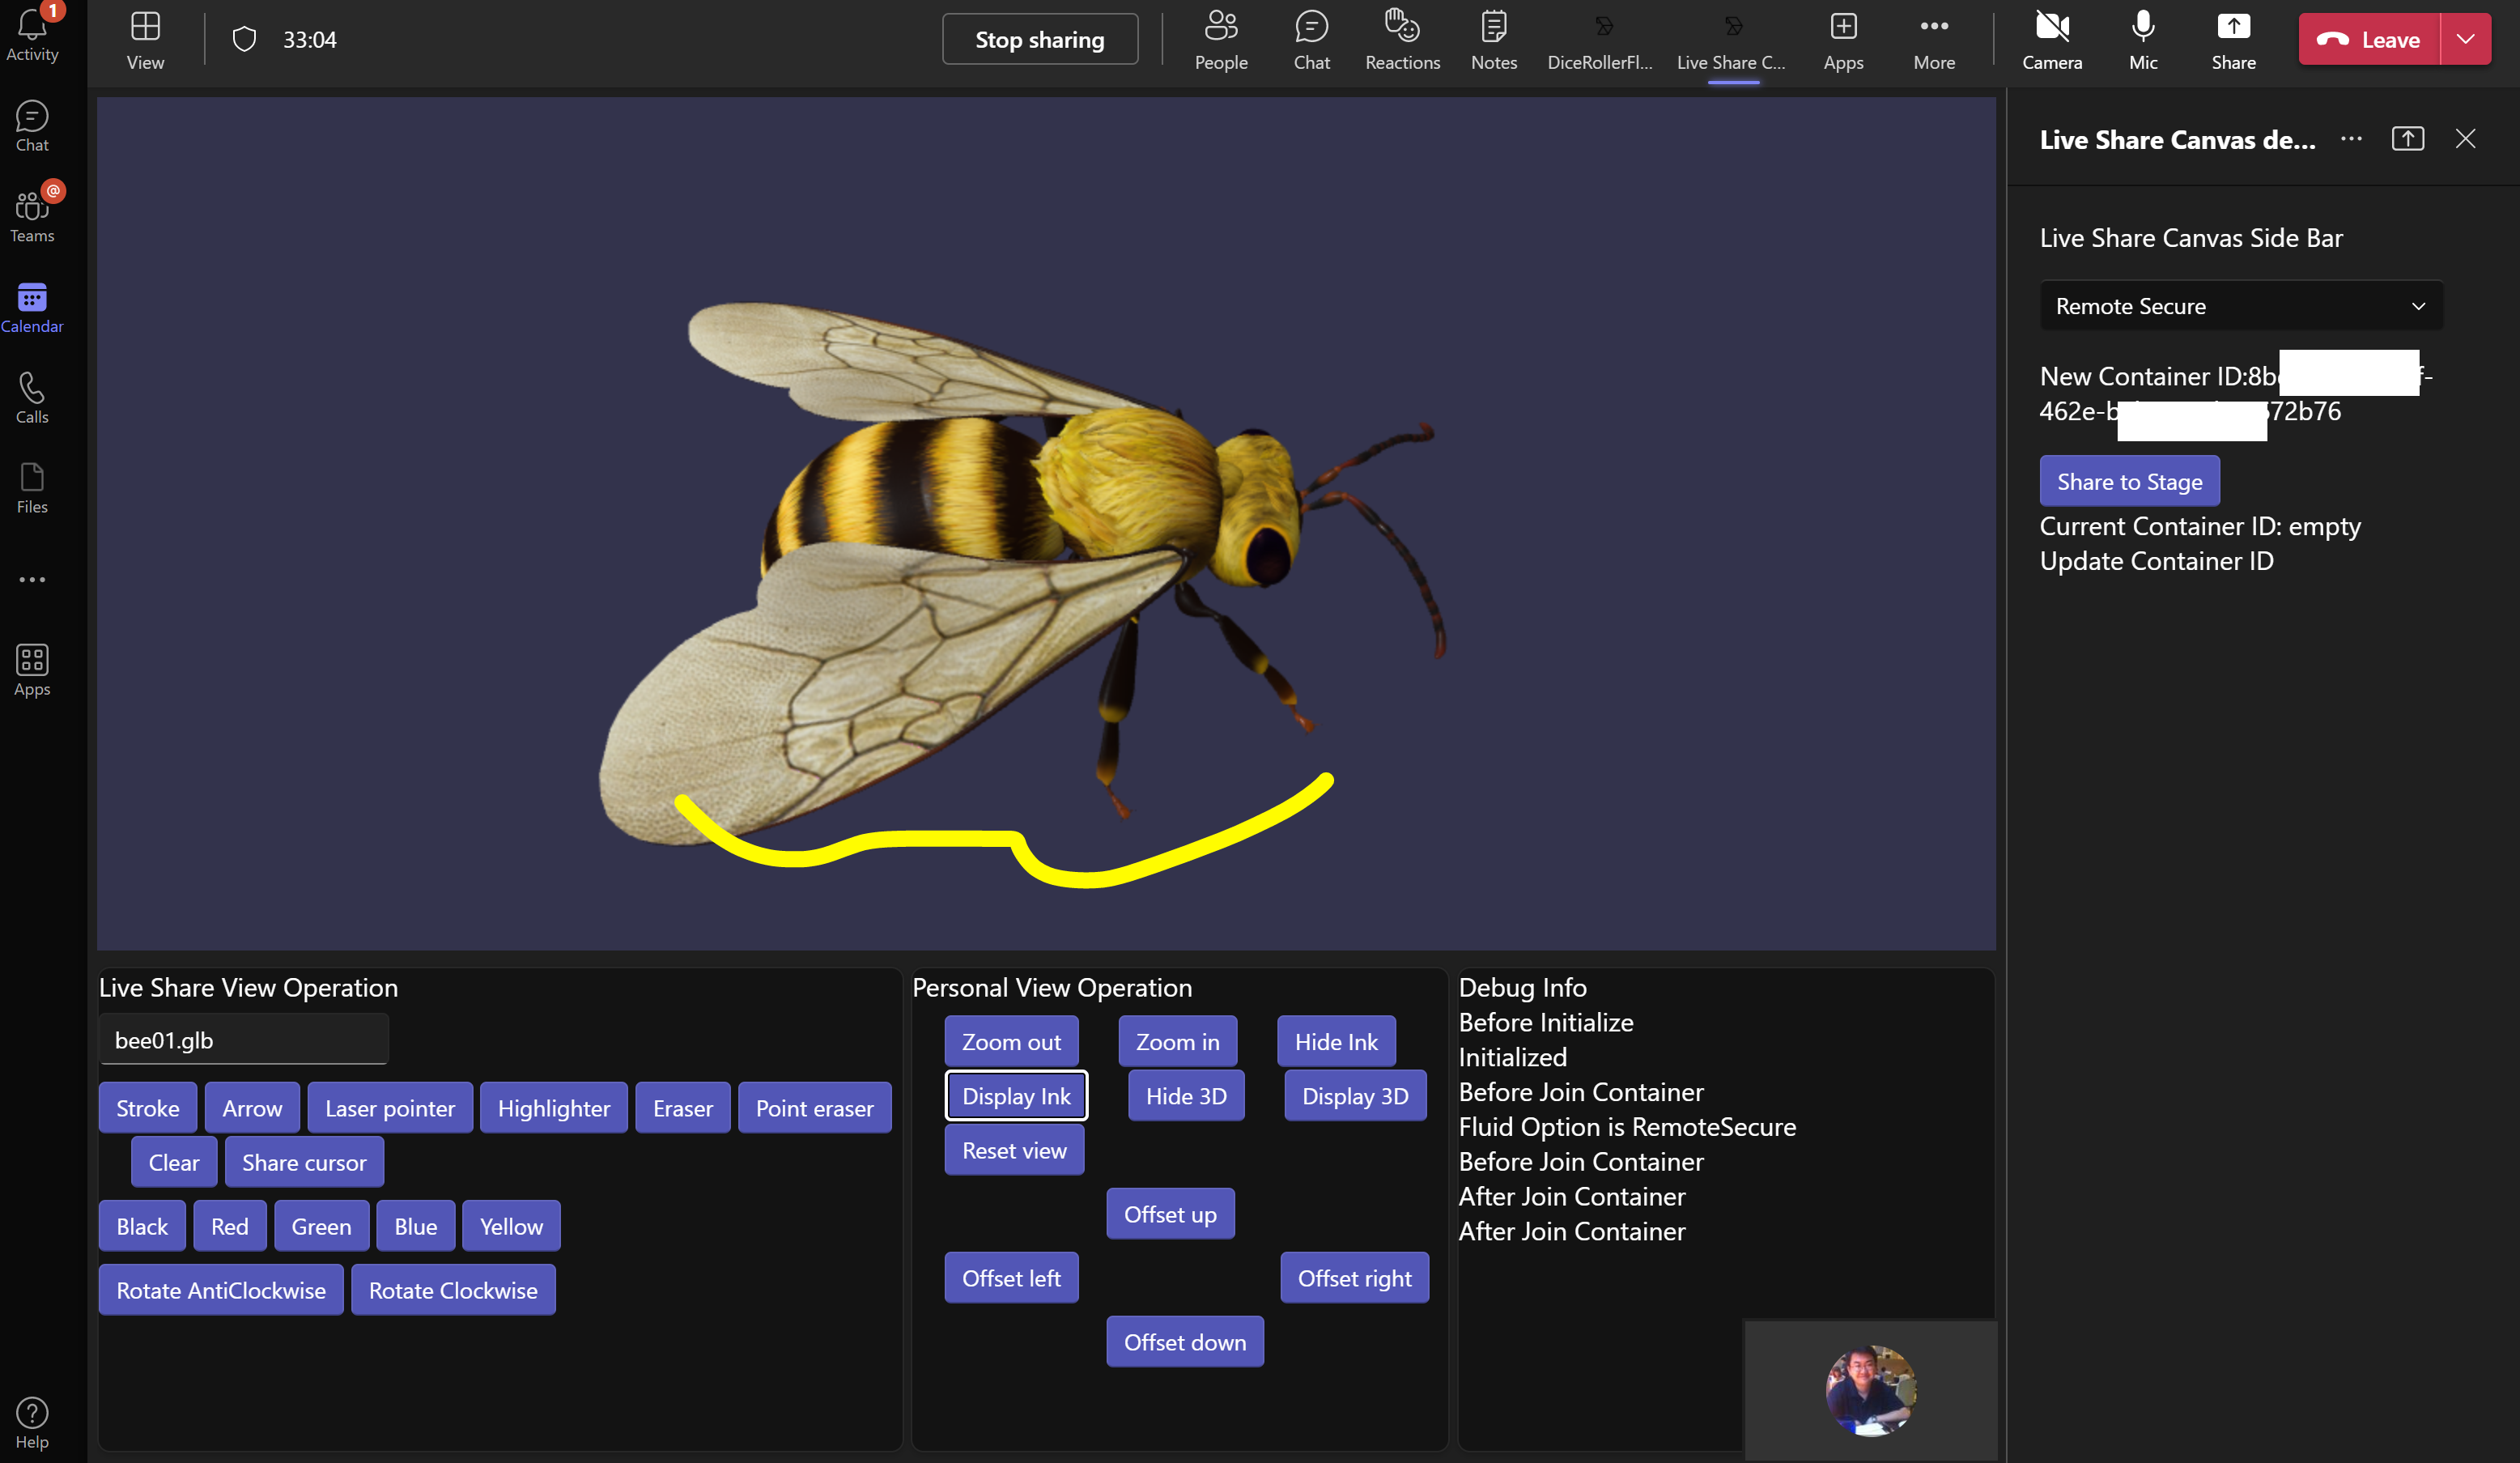
- To load your 3D model (you should test this in Teams Web App), type the model name directly in the "Live Share View Operation"
To make a new app manifest, you can visit the Teams Developer Portal.