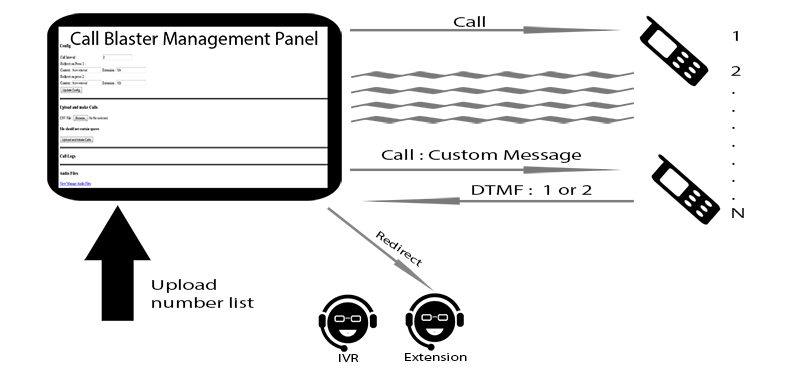
-Supports multiple simultaneous calls to a list of numbers.
-Possibility of separate audio messages for each number.
-Receives DTMF inputs.
-Configurable redirect destinations to any asterisk context and extension (external or internal number,ring groups,queue,ivr etc).
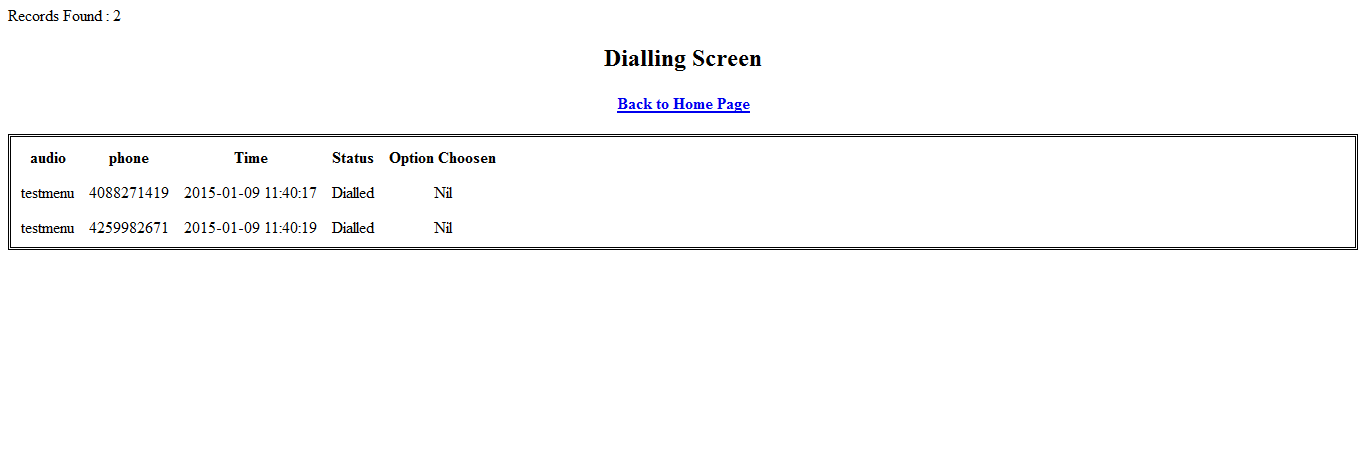
-Dialing Screen displays call status and DTMF response.
-Detailed call log with call deposition and DTMF received.
-Uses regular outbound routing for broadcast,use any trunk or dialpattern.
-Easy to use Management Panel.
Asterisk server
-With trunk and outbound route for making outgoing calls
FreePbx -optional
MySql database
Webserver
...............................................
1-On your Asterisk server,copy all files and directories to a web directory (eg; /var/www/html/Callblaster).
2-Open config.php in a text editor and change database configurations and base path to the installed directory.
Provide your MySql host,database name, database user and database password. Give all privileges on the database to the user. You may use same database for Asterisk and Callblaster, credentials can be found at /etc/asterisk/freepbx.conf
//Database configuration
//...........................................
$db_host="localhost";
$db_name="callblaster";
$db_user="root";
$db_pass="passw0rd";
//..........................................
Provide path to your directory and Asterisk agi path. You can change welcome sound file path here.
//paths
//...........................................
$basepath="/var/www/html/callblastergpl/";
$agipath="/var/lib/asterisk/agi-bin/";
//Set default audio file, it will be used if no audio file specified in number list.
//...........................................
$welcomeSound = $basepath."audio/welcome";
//...........................................
3- Make sure directories audio ,files , logs and tmp are writable. ( change file permission to 777)
4- Give write permissions to directory /var/spool/asterisk.
5- Create a dial plan context for callblaster.
If FreePbx is installed in your server , you can create callblaster context in file extensions_custom.conf . Open extensions_custom.conf located in /etc/asterisk in a text editor and add following lines at the end of file.
;callblaster context
[callblaster]
exten => 333,1,AGI(/var/www/.....path to..../callblaster.php)
change path to callblaster.php script which is in your base directory of callblaster installation. Please don't forget to reload asterisk, run core reload in asterisk console.
6- Callblaster needs to run php functions shell_exec and exec , please ensure your installation is able to run these functions.
Now your Callblaster is ready to use.
Open you browser and point to your callblaster directory, you will be directed to Call Blaster Management Panel.
Call Blaster Management Panel has four sections such as Config, Upload and make Calls,Call Logs and Audio Files.
Config section:
This section helps you to set call interval and two destination contexts and extensions.
During callblasting your listener will have options 1 and 2 for outbound IVR. Here you are setting these two destinations.
Example:
Consider following destinations and outbound route are ready in your server.
-IVR with feature code 10
-Queue setup with 700
-Ring group with 600
-Extensions 102,102 and 103
-Custom destination of [nethram] 500 for custom IVR
Example 1:
We are setting destination 1 for Extension 102 and 2 for Queue 700
Change input fields in Config section, put Context [from-internal] for both and Extension 102 for first and 700 for second.
Example 2:
We are setting destination 1 for Extension 103 and 2 for IVR 10
Change input fields in Config section, put Context [from-internal] for both and Extension 103 for first and 10 for second.
Example 3:
We are setting destination 1 for Ring group 600 and 2 for Custom destination [nethram] 500
Change input fields in Config section, put Context [from-internal] for first and [nethram] for second. Extension 600 for first and 500 for second.
Upload and make Calls:
This section allow you to upload .csv file contained numbers and preferred audio file names and initiate calls. Please check sample file numbers-sample.csv and keep the file format for your uploads.
Call Logs:
From this section you can see what happened with your call blasting and what your listeners chose.
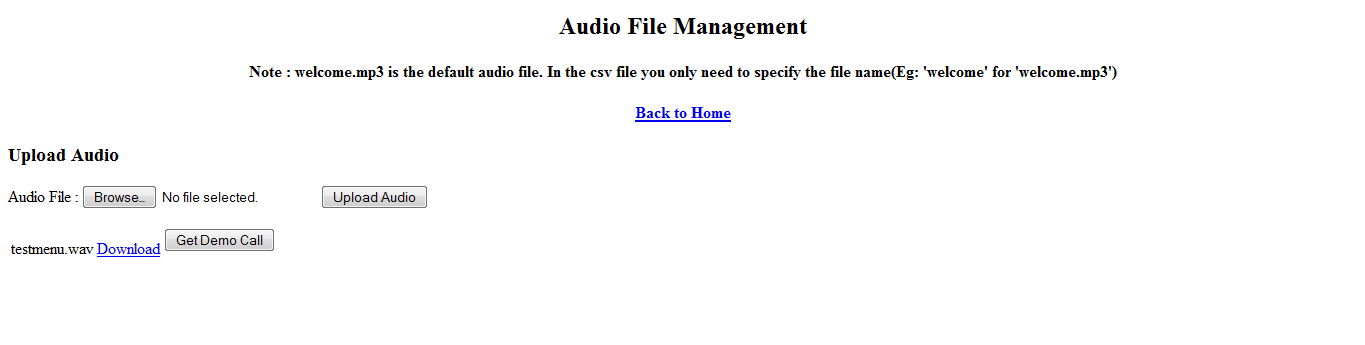
Audio Files:
Here you can upload your custom audio files and make test calls to ensure everything working good.
Callblaster is developed at Nethram.Nethram is a Silicon Valley based telecommunications and cloud innovator. Our mission is to provide the cloud telephony solutions that the big boys use at an affordable price by listening to your needs and providing you with what you actually want.
Thank you for using Callblaster, please don't hesitate to write to us at support@nethram.com. Find more about us at our website www.nethram.com