07. Usage
This section offers practical examples and scenarios to help users understand how to use PROXNUT effectively. It covers both basic and advanced usage scenarios, ensuring a comprehensive understanding of the system's capabilities.
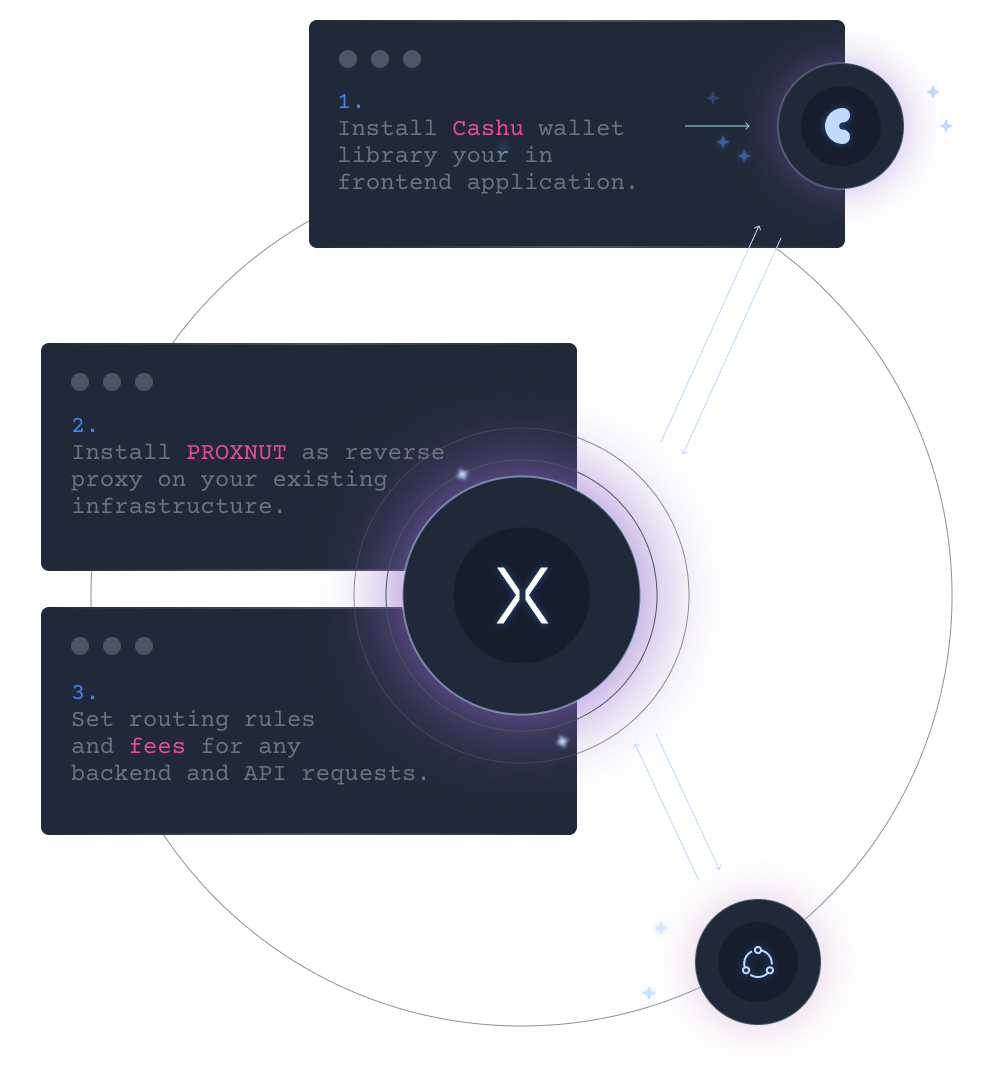
- Install the proxnut scripts into your website
  <script type="module" src="https://cdn.jsdelivr.net/npm/@proxnut/wallet-comp@0.2.0/dist/lib/@proxnut/wallet-comp.js"></script>
  <script src="https://cdn.jsdelivr.net/npm/@proxnut/cashu-request@0.1.6/cashuRequest.js"></script>
<script src="https://cdn.jsdelivr.net/npm/@proxnut/cashu-request@0.1.6/cashuGoto.js"></script>-
wallet-comp.jsis a wallet component where users can store and manage their cashu tokens. -
cashuRequest.jsis a is a request handler that adds cashu tokens to the X-cashu header -
cashuGoto.jsis redirect handler that adds cashutokens as acashuquery
- Mount the
proxnut-walletcomponent and set your preffered mint
<proxnut-wallet minturl="https://8333.space:3338"></proxnut-wallet>- add listeners to the components that should trigger a request to proxnut
<button onclick="goto()" style="color: black; cursor: pointer;">
        follow link
    </button>
    <button onclick="request()" style="color: black; cursor: pointer;">
        make an async request
</button>- Define required callback logic or redirects
<script>
// 3. Add required logic

 const successUnlock = async (response, e) => {
    const contents = await response.text();
    const data = await response.json();
    alert(data)
 }

const goto = () =>{
    // cashuGoto will redirect to a new page, with cashu tokens attached as a query param
    cashuGoto(1, 'localhost:3003/protected',()=>{alert('no nuts!')})

}
const request = () => {
    // cashuRequest send an async request with the cashu token in the X-cashu header.
    cashuRequest(1, 'localhost:3003/api/protected', successUnlock, ()=>{alert('no nuts!')});
}
</script>
here is an example in full:
<!DOCTYPE html>
<html>
<head>
    <meta charset='utf-8'>
    <meta http-equiv='X-UA-Compatible' content='IE=edge'>
    <title>PROXNUT dummy</title>
    <meta name='viewport' content='width=device-width, initial-scale=1'>
  <script type="module" src="https://cdn.jsdelivr.net/npm/@proxnut/wallet-comp@0.2.0/dist/lib/@proxnut/wallet-comp.js"></script>
  <script src="https://cdn.jsdelivr.net/npm/@proxnut/cashu-request@0.1.6/cashuRequest.js"></script>
  <script src="https://cdn.jsdelivr.net/npm/@proxnut/cashu-request@0.1.6/cashuGoto.js"></script>

</head>
<body>
    <div style="position: absolute; right: 10px;">
        <proxnut-wallet minturl="https://8333.space:3338"></proxnut-wallet>
    </div>
    <!-- 2. Add call the functions from your html interactive -->
    <button onclick="goto()" style="color: black; cursor: pointer;">
        follow link
    </button>
    <button onclick="request()" style="color: black; cursor: pointer;">
        make an async request
    </button>
<script>
// 3. Add required logic

 const successUnlock = async (response, e) => {
    const contents = await response.text();
    const data = await response.json();
    alert(data)
 }

const goto = () =>{
    // cashuGoto will redirect to a new page, with cashu tokens attached as a query param
    cashuGoto(1, 'localhost:3003/protected',()=>{alert('no nuts!')})

}
const request = () => {
    // cashuRequest will redirect to a new page with the cashu token in the X-cashu header.
    cashuRequest(1, 'localhost:3003/api/protected', successUnlock, ()=>{alert('no nuts!')});
}
</script>
</body>
</html>The easiest way to run proxnut is with docker compose:
version: '3'
services:
  proxnut:
    build:
      context: ./proxnut-proxy
      dockerfile: Dockerfile
    ports:
        - "3003:3003"
    environment:
      - PROXY_HOST=proxnut
      - BACKEND_HOST=backend
      - REDIS_HOST=redis
      - REDIS_PORT=6379
  backend:
    build:
      context: ./demo-backend
      dockerfile: Dockerfile
    ports:
        - "4444:4444"
  redis:
    command: redis-server --appendonly yes
    image: redis
    ports:
        - "6379:6379"
    volumes:
        - ./redis-volume:/data
  dashboard:
    build:
      context: ./dashboard
      dockerfile: Dockerfile
    ports:
        - "5515:5515"
    environment:
      REDIS_HOST: redis
      REDIS_PORT: 6379
There is a demo backend hosted on port 4444 you can replace that backend with any other backend you want to make requests to.
Once proxnut is running, you can access the dashboard on http://localhost:5515 to set up your configuration.
First, you need to set up a mint. make sure you use the same one you configured in the frontend.
Second, you can configure routes that you wish to map. it should look like this:
from: /some/route ---> to: http://localhost:4444/backend/route | fee: 1
Make sure to hit save after you configured your proxnut
Try topping up your embedded cashu wallet and start making requests to proxnut to see if everything works. If you have token storage enabled, you should be able to see them in your proxnut dashboard after they have been claimed by the proxy.