Versão em português disponível em https://github.com/gpm22/cadastroDeUsuarios/blob/main/LEIAME.md.
Web System for registering and retrieving user data, where registration is only performed by users with administrator permission, moreover every user who is registered by the platform will be a ordinary user, that is, without administrator permission. Ordinary users can only view their own data, while administrators can view their own data and register, update and delete users.
The systems was divided into front-end (or client) and back-end (or service), where communication between these parts is done trough HTTP requests. The client was made using React and bootstrap, while the service was created using Java 8, Spring, Spring Boot, Spring Security, Hibernate, Lombok , Maven, and H2.
Due to the technologies used here, it is necessary to have installed both Maven and NPM to run this system, in addition to making a clone or downloading the files from the current repository. You may also need to install the Lombok plugin if you want to open the service in an IDE or text editor.
Each technology is started separately, in the case of the client, using the terminal, enter the front-end folder and execute the commands npm install, to install the necessary dependencies, and npm start, to start the React application. To start the service, also using the terminal, you must go to the \back-end\ServicoCadastroDeUsuarios directory and run the commands mvn clean and mvn install, to clean the project and install the necessary dependencies, and mvn spring -boot:run, to start the application.
The client will be available at the url http://localhost:3000/, while the service endpoints will be available at the url http://localhost:8080/, as well as the H2 database client, which will be available at the url http://localhost:8080/cadastro-de-usuarios/v1/h2-console.
There are two pre-defined users in the system that can be used:
- Username: admin
- Password: 123456
- Permission: Administrator User
- Username: comum
- Password: 123456
- Permission: Ordinary User
By entering the url http://localhost:3000/, or any other valid system url, the user will be redirected to the login page (Figure 1 ):

Figure 1 - Login Page
When accessing an invalid system url, the user will be redirected to the not found page (Figure 2):

Figure 2 - Not Found Page
After being properly authenticated, the user is redirected from login to the data view page (Figure 3):

Figure 3 - Data Visualization Page
This page contains all the registered user information and a password change section.
In the case of ordinary users, this is the only page available, so the header only shows the option to log out (Figure 4):

Figure 4 - Ordinary Users Header
In the case of administrators users, they will have access to two more pages: registration and alteration pages. So the administrators header shows more options, as can be seen seen in Figure 3.
The registration page (Figure 5) is a form where it is necessary to inform the data presented in the data visualization page (Figure 3) and the username. All fields, but the address complement, are mandatory.
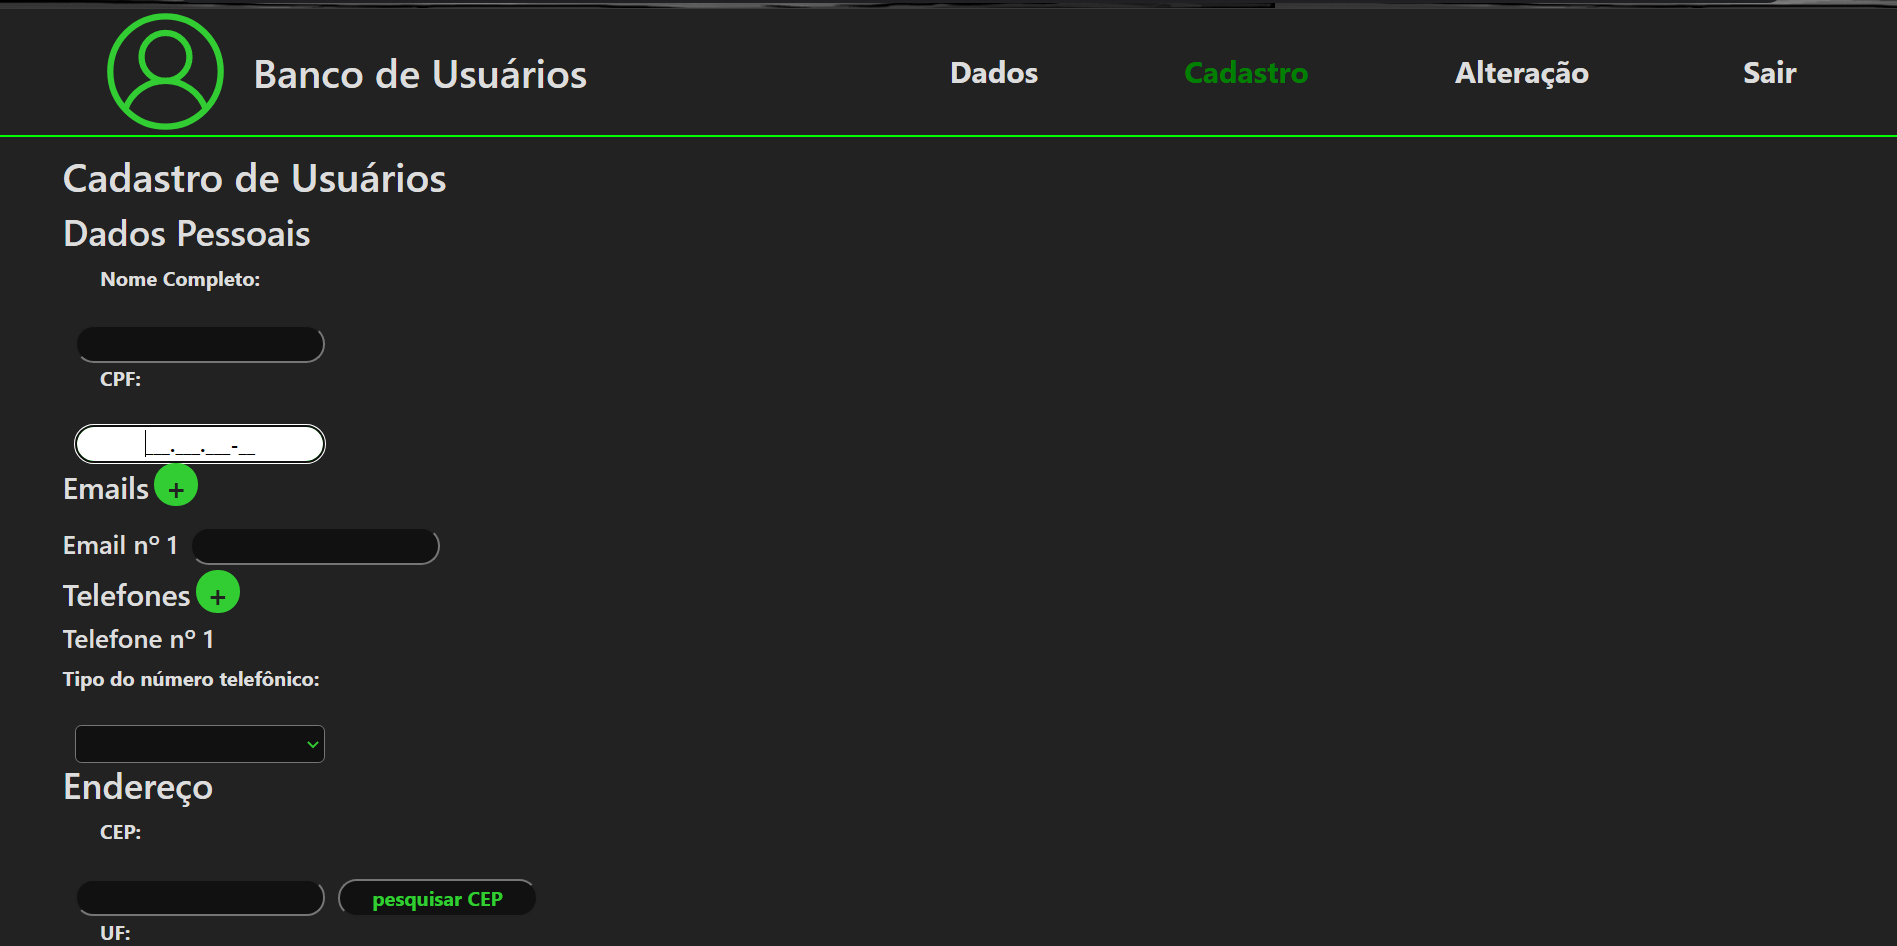
Figure 5 - Registration Page
The CPF, telephones, and CEP fields have masks, and in the case of telephones, the mask will vary depending on the type of telephone, which can be mobile, residential or commercial, as mobile phone numbers have an additional digit in Brazil. All these masked data are persisted in the system without a mask, and the CPF is validated before insertion.
The full name field must receive a string that is between 3-100 alphanumeric characters and/or spaces.
In the case of the email field, input validation is simple, accepting any input in the format: xxxx@xxxx.xxx.
It is possible to add countless emails and telephones, but at least one of each is required. To add one more entry in these fields, just click on the + button (Figure 6).

Figure 6 - Adding New Email Entries
To delete an entry from these fields, it is only necessary to click on the x button (Figure 6). However, as it is necessary that at least one email and one phone number be filled in, the x button does not appear when there is only one entry.
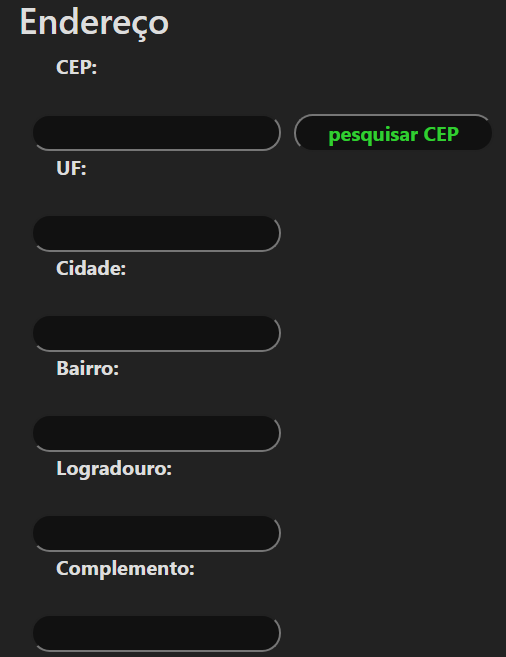
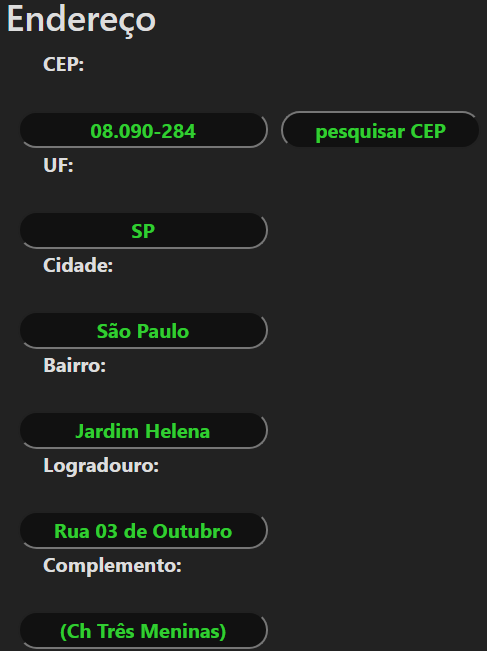
The system is configured to search for the CEP informed by the user through the ViaCEP API to fill in the form with the information returned (Figure 7), whereas the user can modify it.
 |
 |
|---|
Figure 7 - Address Autofill by CEP
Finally, if there is an attempt to register an account with a CPF or a username already registered, the system will show an error message.
The user modification page contains a table (Figure 8) with all the users data:
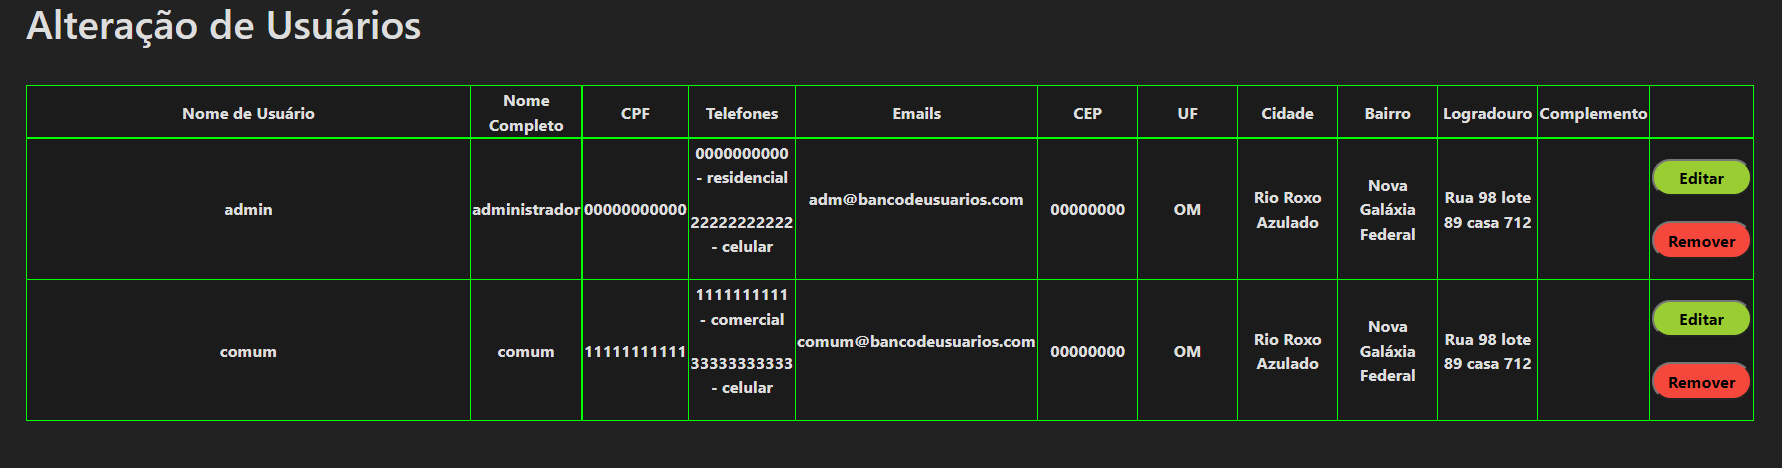
Figure 8 - Users Table
In the last column on the left of the users table are the buttons with the options to edit or remove, whereas when clicking on the remove button a modal is triggered (Figure 9):

Figure 9 - User Removal Modal
And when clicking on the yes button, the user is removed and the table is updated (Figure 10):

Figure 10 - Users Table after the Ordinary User Removal
For its part, when clicking on the edit button, the user is redirected to the user editing page (Figure 11), which is similar to the registration form (Figure 5), but with the information already filled in and without the CPF and password sections:

Figure 11 - User Editing Page
After finishing the editing, the user is redirected back to the users table (Figure 8).
Finally, when clicking on the log out option, the user is redirected to the login page (Figure 1).