Automation scripts for converting .blend models into avatar assets compatible with Animation Prep Studio (Lite). This builder tool is designed to import .blend files directly, and which were created using blender version 2.79b.
| Compatible Skeletons | Expressions | Face Capture |
|---|---|---|
| Makehuman | Yes | Yes |
| CC3 | Yes | Yes |
| Daz3D (Gen2) | No | No |
| Daz3D (Gen3) | No | No |
| Mixamo | Partial | Yes |
| Fuse CC | Yes | Yes |
Upon pressing "Import Avatar Model" button and choosing a .blend file the CustomAvatarBuilder will begin processing the model contained in the selected .blend file. Once the CustomAvatarBuilder finishes building the new Avatar Asset a folder will be displayed that you can copy and paste into the VR_MocapAssets folder located at:
%USERPROFILE%\appdata\LocalLow\Animation Prep Studios\AnimationPrepStudio_Lite\VR_MocapAssets
The avatar would then be available for motion capture by selecting it from the Avatar Browser list in Animation Prep Studio (Lite).
Youtube tutorials showing how to create custom avatars:


Below is documentation describing some of the steps required to create and add custom avatars.
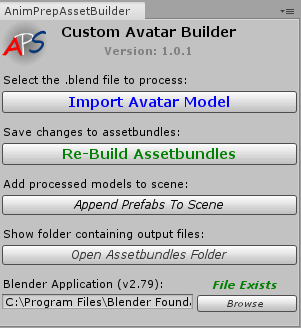
- First be sure that the
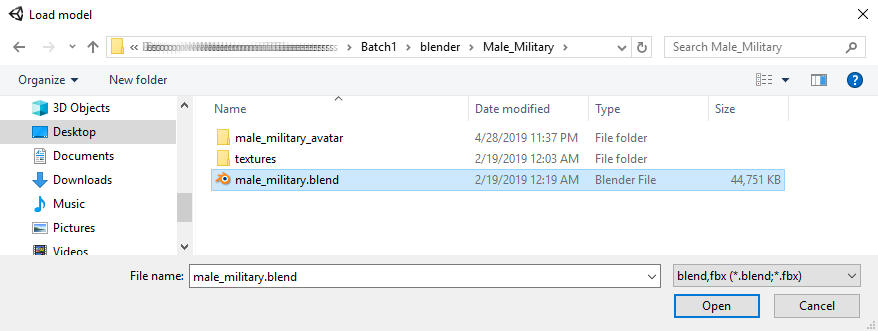
Blender Applicationfield points to the valid blender.exe installed on your PC (version 2.79b). - Then click the "Import Avatar Model" button to locate the .blend file containing the model you would like to import.
- The automation should do most of the work creating the assetbundle.
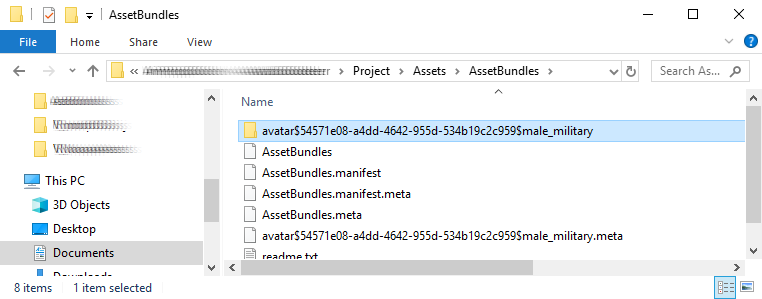
Copy the entire folder:
avatar$00000000-0000-0000-0000-000000000000$male_military
And paste it into the folder at the path:
%USERPROFILE%\appdata\LocalLow\Animation Prep Studios\AnimationPrepStudio_Lite\VR_MocapAssets
It is recommended to open this project using Unity 2019.2.4f1. You will also require Blender 2.79b to be installed.
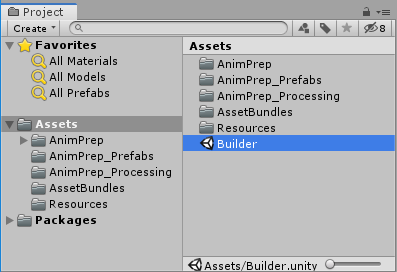
Start Unity hub and navigate to this project, then select the project directory to open the project. Then load Builder.unity
This project is licensed under the GNU GENERAL PUBLIC LICENSE - see the LICENSE.md file for details