Whitelist #70
Comments
|
That sounds useful! It's flexible enough that we could probably add that in, yes. Nothing in the current build touches the FL1 files, so I think it would end up being a second build output. Do you have a sample set of FL1 changes? I could look and see if anything suggests itself |
|
As much as I would like you guys to succeed, I'm rather sceptical. The point is to modify few JMPs from single bios module. Simple hex find&replace won't work here, as instruction opcodes differ between the bios versions. But even considering that we could sort this out with some heuristics, resulting module must be repacked back into some propertiary bios format. Another problem is that series xx30 and up "introduced new Intel security features that make it impossible to flash the [unsigned] BIOS using software". So users will end up with FL1 file that fails flashing. |
|
The bios update FL1 file is in a UEFI capsule format, the difficulty in patching it is usually because it needs to be signed (which can be side-stepped if you use a hardware programmer - that is what a lot of people seem to suggest). So at least, there is some hope of automating it - just the signing that is difficult. If there is a process for creating valid patches, then the repo could just store a different patch for each BIOS version - the moving instructions and limits on find&replace all apply to the EC firmware too, and just keeping a patch set for each version has worked there. Event if we cannot create signed updates, it might be useful to provide a resource for people to create binaries to use with a hardware programmer. Thanks for the links - I'll have a look at them when I next get a chance. |
|
The UEFIPatch can already change the bios. The thing is UEFIPatch it's a generic tool to change a bit for Hackintosh Power management. I didn't get into the code to understand how it does it, but since the EC is already "unlocked" maybe it isn't so far fetch to try change the bios. |
|
Unfortunately, the BIOS and the EC use completely different "locking" systems. So our success with the EC does not help with modding the BIOS - and I am fairly sure that there is some signature that needs to be correctly added to the BIOS to allow it to be uploaded without an external programmer. Also problematic is that the UEFITool is a GUI interface that is not automatable. However, if you had patches that apply to the UEFI sections, there might be a way to add and automate some or all of this. |
|
The only way to really mod the bios on some of the Thinkpads seems to be actually disassembling the Notebook and hooking the chip up to an external flasher. (Which in some cases isn't really possible without a hot air station and desoldering the chip). Which is quite a shame. |
|
@rad4day you are right - but we could still start collecting repository of known patches to help with building a new flash image once you have downloaded (and backed up) your current image. |
|
well i have a w530 and on the schematics i found a solder pad (CN100) on the motherboard with spi and jtag connections. There is no necessity to fully disassembly the laptop anymore, now we only need to remove the palmrest to solder cables and leave them hidden bellow the keyboard. It is possible that other laptops with "hidden" bios chips have this kind of shortcuts. Do you want me to create a list of laptops with easier places to connect a programmer?
|
|
some intel me info: |
|
Ok it's possible to show the hidden advance tab without rewriting the bios, but its necessary write access to nvram(it's unlock on thinkpads?): |
|
this is the patch file(UEFIPatch) to implement the wifi whitlist, advance tab, cpu multiplier and hackintosh power. |
|
This one change the Date Tab with the Advance Tab 32442D09-1D11-4E27-8AAB-90FE6ACB0489 10 P:04320b483cc2e14abb16a73fadda475f:778b1d826d24964e8e103467d56ab1ba |
|
ok for cpu multiplier management: |
|
Hackintosh Power management: |
|
the only thing i don't know is how to kill the write protection |
|
@edmalho do you mean write protection = secure flash? Secure flash can only be defeated by hardwarely flashing your modified bios. |
|
if you first hardware flash a modded bios with the write protection bypassed the next flash will be allowed and subsequently until you flash a official one again. |
|
I can confirm this behaviour on the T430s. |
|
@rad4day do you have the bios with write protection disable? can you send me the dump? |
|
@edmalho well I replaced mine with coreboot. But I'm probably able to remove the write protection from the original image. I'll take a look at it in the next days |
|
@edmalho I finally looked over my files. It's pretty easy actually. You have to dump your bios and just use ifdtool to unlock it. As I don't want to post the images publicly (as I'm not sure on the license on those) It would be kind to let me know your Email ;) |
|
https://forum.ixbt.com/topic.cgi?id=17:53248-29 |
|
@edmalho If it is then it may be useful to be able to sign our own FL1 and use the official mechanism to update bios (after replacing with our own public key of course) |
|
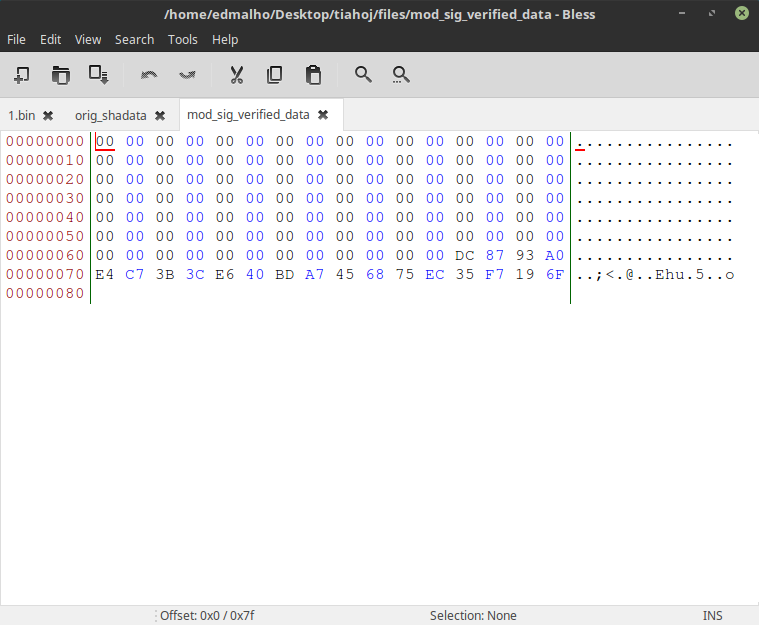
@JCBuck, ValdikSS discover the way that TPM verifies the bios at startup. so if you mod a bios the TPM validation fails and at startup the laptop beeps in 2 blocks of 5. so if you need the TPM and don't want the annoyance, you have to change the signatures. |
|
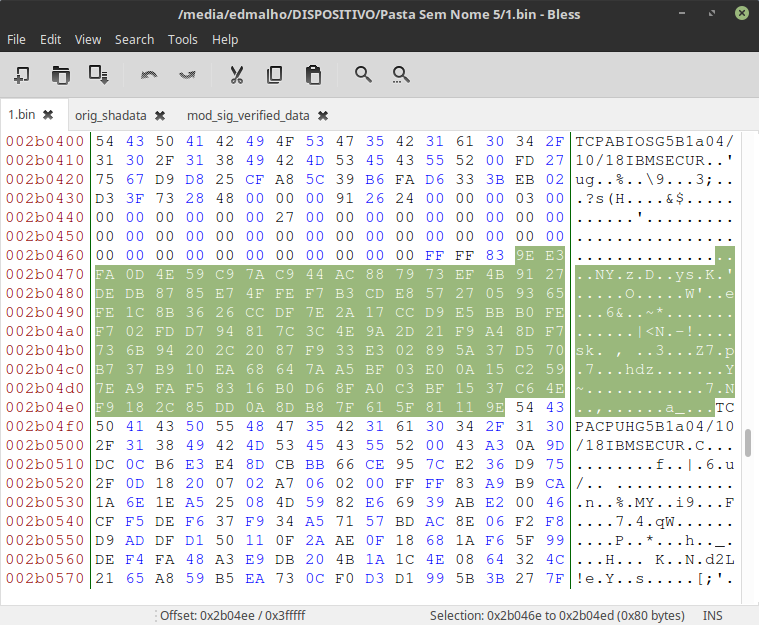
So the script don't work for me, the bios structure change... |


|
i'm trying to find the verification part of the firmware update. what and how it does it, really. |
|
This thread (https://www.bios-mods.com/forum/Thread-REQUEST-Lenovo-Thinkpad-W520-BIOS-1-42-whitelist-removal-8BUJ21UC) has quite a bit of information on the various patches. @edmalho already mentioned a few of these. From the remaining ones, these seem to be of interest:
Note, all of these still require a hardware programmer, but I think once you flash a modified version, future updates shouldn't require a hardware programmer. It should also be possible to switch back and forth from coreboot and patched BIOS without hardware programmer ? @edmalho, are you able to test these and incorporate them in your patch list ? |
|
@pgera It is. As coreboot doesn't set the lock bits for the bios chip regions. You can use flashrom with the "internal" programmer to just overwrite your bios chip while using the laptop. After flashing the original bios, the lock bits will be set again. (unless you modify the image to not be locked) |
|
@rad4day Yeah, I do have hardware to manually flash need be.
@pgera yes that can work too, i think in my case i wasn't able to find an
operation that was setting the flockdn register in the boot script, but I'd
have to check again i may have just missed it since i too had to set the
pr0-pr4 early in the script.
…On Sat, Sep 1, 2018, 9:15 AM pgera ***@***.***> wrote:
I was able to unlock the protected regions too. There is a separate
flockdn register that needs to be reset early in the boot script. This was
the command for that: sudo chipsec_main -m tools.uefi.s3script_modify -a
replace_op,mmio_wr,0xFED1F804,0x6008,0x2
Once you do this, you can reset the protection registers from the OS. You
don't need s3 boot scripts for that. I haven't tried flashing anything yet.
—
You are receiving this because you were mentioned.
Reply to this email directly, view it on GitHub
<#70 (comment)>,
or mute the thread
<https://github.com/notifications/unsubscribe-auth/AFGna9lFOQ0jCDHXqi85ULKyHnoFKPn0ks5uWrKTgaJpZM4SssSR>
.
|
|
@JCBuck , how do you move to a later bios in this mechanism ? Once the registers are unlocked, you can flash the modified version of the same bios (or even a newer one?) with fptw64, but that is just the bios region. How do you get to a newer fd region ? When you update from the regular update utility, that updates the fd regions too, right ? Also, what is the difference between the fl1 and fl2 files. When I downgraded, I ran winflash64 with the fl1 file. When does the fl2 file come into play ? Edit: So the flash descriptor region itself is probably not updated between even full bios updates, but I'm guessing that the ME region is. My current flashrom output is |
|
Right, I believe you cannot actually configure the FD since they're read from the SPI flash itself, which means I think you have to use a hardware programmer. There is another mechanism used for OEM manufacturers that if you short a specific pin on the southbridge? or SPI flash chip? it will unlock all of the FD for that boot. FL2 is the EC firmware, FL1 is UEFI bios i believe with some header information iirc |
|
So we cannot get to the latest patched bios using this method ? I get that unlocking the FD would need a programmer, but if you just want to apply the bios patches and leave the rest as is at the latest versions, is that doable ? The BIOS_CNTL can already be unlocked. If we patch flockdn in the bios too, would that allow us to use the vendor utilities to flash a patched FL1 file ? If that brings the rest of the stack up to the latest versions, that should be good enough |
|
I'm not sure what you mean by latest versions, (of which?) what do you mean by vendor utilities? (lenovos' default winflash package?) Yes you can certainly patch latest bios versions from Lenovo to prevent them from toggling BIOS_CNTL and SMM_BWP, FLOCKDN etc there's a separate EFI program that is used to flash a new bios in a capsule after a restart that is loaded by winflash and I believe it verifies if it has a valid signature |
|
@JCBuck I don't know if the ME/GBE/FD regions are updated when you update the BIOS using the regular lenovo's winflash. Are those things a part of the FL1 file ? Essentially, we can only update the BIOS region using fptw/flashrom. When we do a rollback, is it also rolling back other regions ? The end goal is to have latest patched BIOS + latest ME/GBe/FD. |
|
No, I don't believe lenovo update those regions with their bios updates. Generally ME/GBE don't get updated, and a separate tool from Intel is used for those. I think even then, they cannot be updated if the FD is configured to lock them down. I believe users who wanted to update those regions, for the purpose of say, getting a newer generation of Intel processors working on an older chipset or something, it needed to be hardware flashed from what I read. some more info here: |
|
Ok. In that case, I believe this method is good enough for updating or rolling back the BIOS region, and patching it as desired. For those who want to use the chipsec method, here's the summary of all the commands: I'll wait for a programmer before more experiments. I think most of the problems are solved in principle. The main thing left is self-signing. |
|
Yup, after this I use fptw64 to dump the current uefi bios, then apply patches (such as turbo bin overclocking, bios protect, advanced menu) using uefitool and uefipatch and can reflash it with fptw64 then restart (but really any utility that can do spi flashing could work) |
|
But fptw64/flashrom work with raw dumps. So everytime you want to upgrade, it has the additional step of first flashing the latest version and reading back the dump. Then you go back to old version and flash the patched dump. Is it possible to extract the relevant region from FL1 file, patching it, and flashing that with fptw64 ? That would also simplify maintaining and validating patches against FL1 files. Edit: You mentioned bios_protect. Are you patching FLOCKDN ? If you don't patch that, but only patch BIOS_CNTL, does it allow you to flash ? |
|
@pgera |
|
I wasn't able to find where FLOCKDN is set in the bios. If someone has time to look, it would be helpful for internal switching between coreboot and lenovo bios (i.e. bios -> coreboot. Other way round is fine). Again, this is for development purposes. Not recommended to leave everything unlocked otherwise. The bios_cntl location in File_DXE_driver_2EE81ACB-64B2-41AE-8635-7030D16C4AA8_PchBiosWriteProtect.efi_body is known, but that alone won't be sufficient without FLOCKDN. I tried looking for immediate value 0x4 in same file since FLOCKDN is SPIBAR + 0x4, but I'm not sure if it's set there. |
|
It was taking too long for the programmer to arrive. So I decided to flash it internally with fptw64. Everything went as expected. @edmalho 's instructions for fixing the TPM hashes were very helpful. The advanced bios menu also has an option to disable the ME. This seems to be a temporary disable mode, which is not exactly the same as the HAP/soft-disable mode. Here's the output from intelmetool: |
|
|
|
hi how to make patch file t440s |
|
I have created a more detailed guide teaching to reassign the BIOS: https://www.insanelymac.com/forum/topic/337333-guide-fix-insyde-h2o-bios-signature-5-beeps-on-lenovo/ @edmalho |
|
How to make Lenovo bios patch for Lenovo supervisor password unlock |
|
@edmalho , I have noticed a downside to this approach. After patching, you cannot clear or take ownership of the tpm chip. The tpm chip continues to work in its previous configuration before patching, but you will not be able to reset it. If you want to take ownership, you need to go back to the stock bios. |
|
Just as an update to this for anyone trying to follow along, someone's put together a very good and detailed guide on how to remove BIOS write protection from a xx30-series ThinkPad without a hardware flasher using chipsec. The guide/process could definitely be streamlined a bit further (e.g. recommending a bootable USB Linux distro to follow along with, since the one I had installed didn't have a new enough What's still missing at this point is a guide/script for patching the stock Lenovo BIOS (there's a post detailing and explaining a bunch of the possible patches here). Because xx30 BIOS mods until now have required hardware flashing over the whole chip, and apparently each chip has a bit of code unique to each machine, people have had to:
Of course, now that we've figured out removing flash protection from the stock BIOS without a flasher, it should be possible (based on my understanding, at least) to just modify the stock .FL1 file from the official Lenovo BIOS .iso and make a universal modified BIOS image that can be flashed the same way thinkpad-ec is (since the BIOS update only flashes over part of the chip and not the whole thing, so machine-specific regions aren't an issue). I guess the main work that'd need to be done here would be making sure the patches work across the BIOSes for different xx30 models and summarizing the patching / checksum fixing process into a step-by-step process (and eventually a script). |
|
Thanks for the update. The link seems to point to the ec patch instructions
instead of the bios wp bypass instructions. As for patching the bios
images,the free and open source tool uefitool or uefipatch works quite well
in reading in raw firmware dumps and doing byte replacements to apply fixes
such as whitelists or overclocking support. Theoretically it can be
automated. I don't remember exactly, but I did try to modify the stock
bios, but it does require a bit of work to unpack it.
…On Mon, Dec 9, 2019, 10:05 AM a-hurst ***@***.***> wrote:
Just as an update to this for anyone trying to follow along, someone's put
together a very good and detailed guide
<gch1p/thinkpad-bios-software-flashing-guide#1>
on how to remove BIOS write protection from a xx30-series ThinkPad without
a hardware flasher using chipsec.
The guide/process could definitely be streamlined a bit further (e.g.
recommending a bootable USB Linux distro to follow along with, since the
one I had installed didn't have a new enough flashrom to make a BIOS
backup and I had to jump through a bunch of extra steps trying to get a
newer version working), but for the most part it was pretty straightforward
to follow.
What's still missing at this point is a guide/script for patching the
stock Lenovo BIOS (there's a post detailing and explaining a bunch of the
possible patches here
<https://www.bios-mods.com/forum/Thread-REQUEST-Modify-X230-BIOS-with-clip?pid=104503#pid104503>).
Because xx30 BIOS mods until now have required hardware flashing over the
whole chip, and apparently each chip has a bit of code unique to each
machine, people have had to:
1. Dump the full contents of the BIOS chip with a hardware flasher
2. Create an account on bios-mods.com, post your dumped BIOS in the
x230 thread along with a list of the patches you'd like applied, and wait
for one of the people there to patch it and PM it back to you
3. Flash the patched BIOS onto the chip, again using the hardware
flasher
Of course, now that we've figured out removing flash protection from the
stock BIOS without a flasher, it *should* be possible (based on my
understanding, at least) to just modify the stock .FL1 file from the
official Lenovo BIOS .iso and make a universal modified BIOS image that can
be flashed the same way thinkpad-ec is (since the BIOS update only flashes
over part of the chip and not the whole thing, so machine-specific regions
aren't an issue). I guess the main work that'd need to be done here would
be making sure the patches work across the BIOSes for different xx30 models
and summarizing the patching / checksum fixing process into a step-by-step
process (and eventually a script).
—
You are receiving this because you were mentioned.
Reply to this email directly, view it on GitHub
<#70?email_source=notifications&email_token=ABI2O2Y57EEAQWO7FC22SETQXWRVPA5CNFSM4EVSYSI2YY3PNVWWK3TUL52HS4DFVREXG43VMVBW63LNMVXHJKTDN5WW2ZLOORPWSZGOEGHSYEA#issuecomment-563031056>,
or unsubscribe
<https://github.com/notifications/unsubscribe-auth/ABI2O22V6572JCLKPACECLTQXWRVPANCNFSM4EVSYSIQ>
.
|
|
Apologies, I believe I've fixed the link in my post. I've discovered the UEFITool/UEFIPatch utilites and have found some partial guides on how to use them, but I'm also wanting to be sure the patches posted here and elsewhere will work (and not break anything) with my particular model / BIOS version in case any of the patched code differs between models/versions (I'm being extra cautious here because I don't have a hardware flasher on hand). As for extracting the stock BIOS from the official Lenovo image, it's actually dead-easy on Linux: just extract the DOS flashing image from the .iso with and mount the resulting |
|
@a-hurst , 1) Get a programmer first no matter what. 2) If you don't have an nvidia card, I would strongly recommend coreboot instead of patching the bios. While bios patching works, it's not a long term sustainable solution since you need to do the back and forth every time the bios is updated. Also, it breaks TPM provisioning. |
|
@pgera I don't have an NVidia card (it's an x230 so integrated-only), but unfortunately I don't think Coreboot is an option since the one-and-only purpose for the cheap x230 I bought is to run macOS, and based on what I've read I don't think the Coreboot video blobs play nice with it (I'll do some more research though). An external programmer is definitely a good idea, I've just been reluctant to drop over 20$ + shipping on a Pomona SOIC8 clip + 10$ for a CH341A for a computer that's not really mission-critical for me (once the whitelist is gone, I'll get a macOS-compatible Wi-Fi card and it'll eventually replace my X220, but until then it's not getting used). On another note, something else I found that's relevant to the thread is this incredible blog post, where the poster goes through the process of reverse-engineering and patching the whitelist out of the stock T430 BIOS in great detail with images from radare2 & explanations of exactly what the patch is changing in the BIOS logic. |
|
You should try a single patch first that does just the wifi whitelist. The patches posted earlier in the thread are fine. It's a one line command with uefi patch. You'll get the beeps at boot, but you can deal with that later if you care about them by following the other detailed instructions. They are not essential. So your high level steps are 1) Disable write protect 2) Read from chip 3) Patch 4) Write to chip |
|
Thanks, I'll likely attempt this over the holidays. Actually, does anyone have known-working pre & post patch BIOS files they can share? I'm curious because I've found what appears to be a scriptable Python equivalent of UEFITool/UEFIPatch called uefi-firmware-parser, and it seems to work fine for parsing stock X230 BIOS extracted from the official Lenovo .iso, but it's not documented super-well and I want to make sure I can reproduce the working patches that UEFIPatch does before flashing anything it creates. The major upside to this (if it works) is that Python's hashlib has built-in SHA1 support and it also has a solid regex library, meaning that we could potentially script both the patches and the SHA1 fixes to remove the beeps, making the whole process massively easier. |
|
Stock BIOS v2.73: flashregion_1_bios.tar.gz (BIOS region only) Modified BIOS v2.73: 20180922_141118_bios.rom.tar.gz (entire ROM but I don't remember if it was with or without unlocking the ME etc regions) Several modifications enabled in this BIOS, including whitelist bypass. |
|
To add, someone much smarter than me did a 3 part writeup about removing the whitelist:
In particular, from part 3:
Maybe this helps? |
Can this project be expanded to whitelist cards, or even unlock overclock?
I can provide the changes needed on the FL1 file.
The text was updated successfully, but these errors were encountered: