- a Philips Hue Bridge
- some compatible Philips Hue lights
- Install your lights and make sure you can control them via the official Philips Hue mobile app.
- In the mobile app, go to settings > My Hue system > HUE BRIDGES > Philips hue > IP-address (e.g. 192.168.x.xxx).
- In the root of the project, create a .env file and add: BRIDGE_IP_ADDRESS='192.168.x.xxx'
-
In your .env file, add: APP_NAME='app_name#instance_name' (change to your actual app name, any string is fine).
-
Press the link button on your Hue Bridge
-
Open a terminal and run the following command:
node generate-key.mjs -
The response should contain 2 keys: a username and a clientkey. If not, make sure not to wait too long between step 2 and 3.
-
In your .env file, add: HUE_APPLICATION_KEY='xxx' (change xxx to the username, NOT the clientkey).
-
Run the following command:
node get-info.mjs -
The response is an array of lights. Each light has an id. (it might also have a legacy id_v1 that we will not use)
-
In your .env file, add: LIGHT_1_ID='xxx', LIGHT_2_ID='xxx', etc. (change xxx to the id, NOT the id_v1).
At this point, we are ready to change the state of the lights. Let's have a look at the code in change-state.mjs. We send a put request to one of our lights (the id of the light is in the url). The state we are sending is defined in the body of the put request, e.g.
const body = {
  on: { on: true },
  dimming: { brightness: 100 },
  color: { xy: { x: 0.20, y: 0.50 } },
}The on field speaks for itself, it can be true or false. Note however, that it is only needed if you actually want to turn the light on or off (i.e. change the on/off state). If a light is already on and you just want to change the color, it is recommended to omit the on field as unnecessary info slows down the bridge.
The brightness can be any number between 0 and 100.
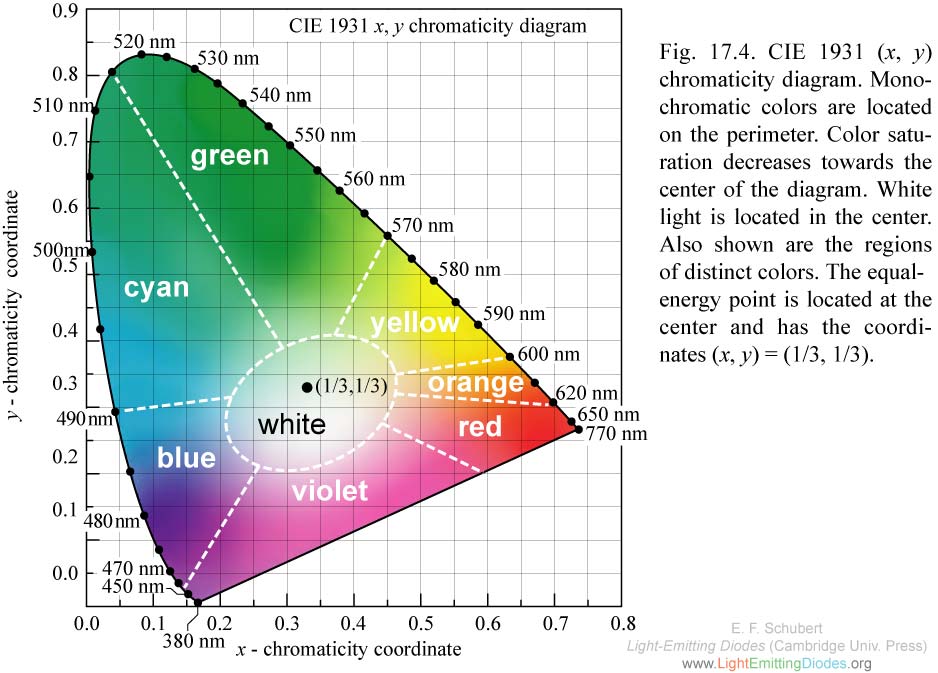
The color is defined by x and y coordinates on the CIE 1931 color space.
Try and change some values and run the script.
node change-state.mjsIt can be very useful to run scripts on a schedule. On Windows, this is very easy. Just open Task Scheduler, create a new task and fill in the options, here is an example.