How to configure Hiddify panel properly
 فارسی
فارسی
- Prerequisites
- Getting started
- Quick installation
- Dashboard
- Users
- Admins
-
Settings
- Domains
- Direct domain
- CDN domain
- Auto_CDN_IP domain
- Relay domain
- Fake domain
- Sub-only domain
- Proxies
- Other
- Admin settings
- Customizing user page
- General settings
- Proxy settings
- Domain Fronting
- Telegram proxy
- HTTP settings
- TLS settings
- Shadowsocks settings
- ShadowTLS Settings
- Advanced settings
- Very advanced settings
- Reality
- WARP
- Backup
- Domains
Before starting the configuration, it is necessary to explain that this panel is not supposed to perform miracles, but it is supposed to make things related to the use of proxies easier, and for this there are some prerequisites that should be available. So if you read this article to the end; And you did the configuration correctly, but your connections were not connected, read this topic.
You have chosen a server whose IP is clean. To be sure of this issue, read how to test the IP of server. If it is determined after the test that the IP is not clean; You need to change your IP server.
You have successfully installed the panel using the methods mentioned in the installation guide and you have received admin links. These links include the admin address and password. For more information about the correct format of the admin link, read this article.
Before configuring the panel, you must have a registered domain. If you are wondering about domain types and their registration ways, click here. You should also make sure that the registered domain is accessible. how to test
- If you have used the quick installation links for famous data centers such as Vultr, OVH etc; At the end after about 10 minutes, a one-time link will be generated for you, by which you will reach the admin page.

- If you have installed the panel through ssh, in this case the admin links will be displayed in the terminal at the end of installation. Open one of those links in the browser to reach the admin page.
In both cases, when you enter the admin page for the first time, the quick installation page will open.
Here is a parameter that is very critical; Enter your registered domain in the specified field. You can make other settings later. So enter your domain and click the register button.

Then click apply changes for saving configurations. If you face with a problem, Go here. If the changes are applied successfully; The panel is almost ready to use, but it is recommended to read the following contents till the end so that you can take the maximum advantages of this panel.
In this menu, information related to system resources is displayed graphically.

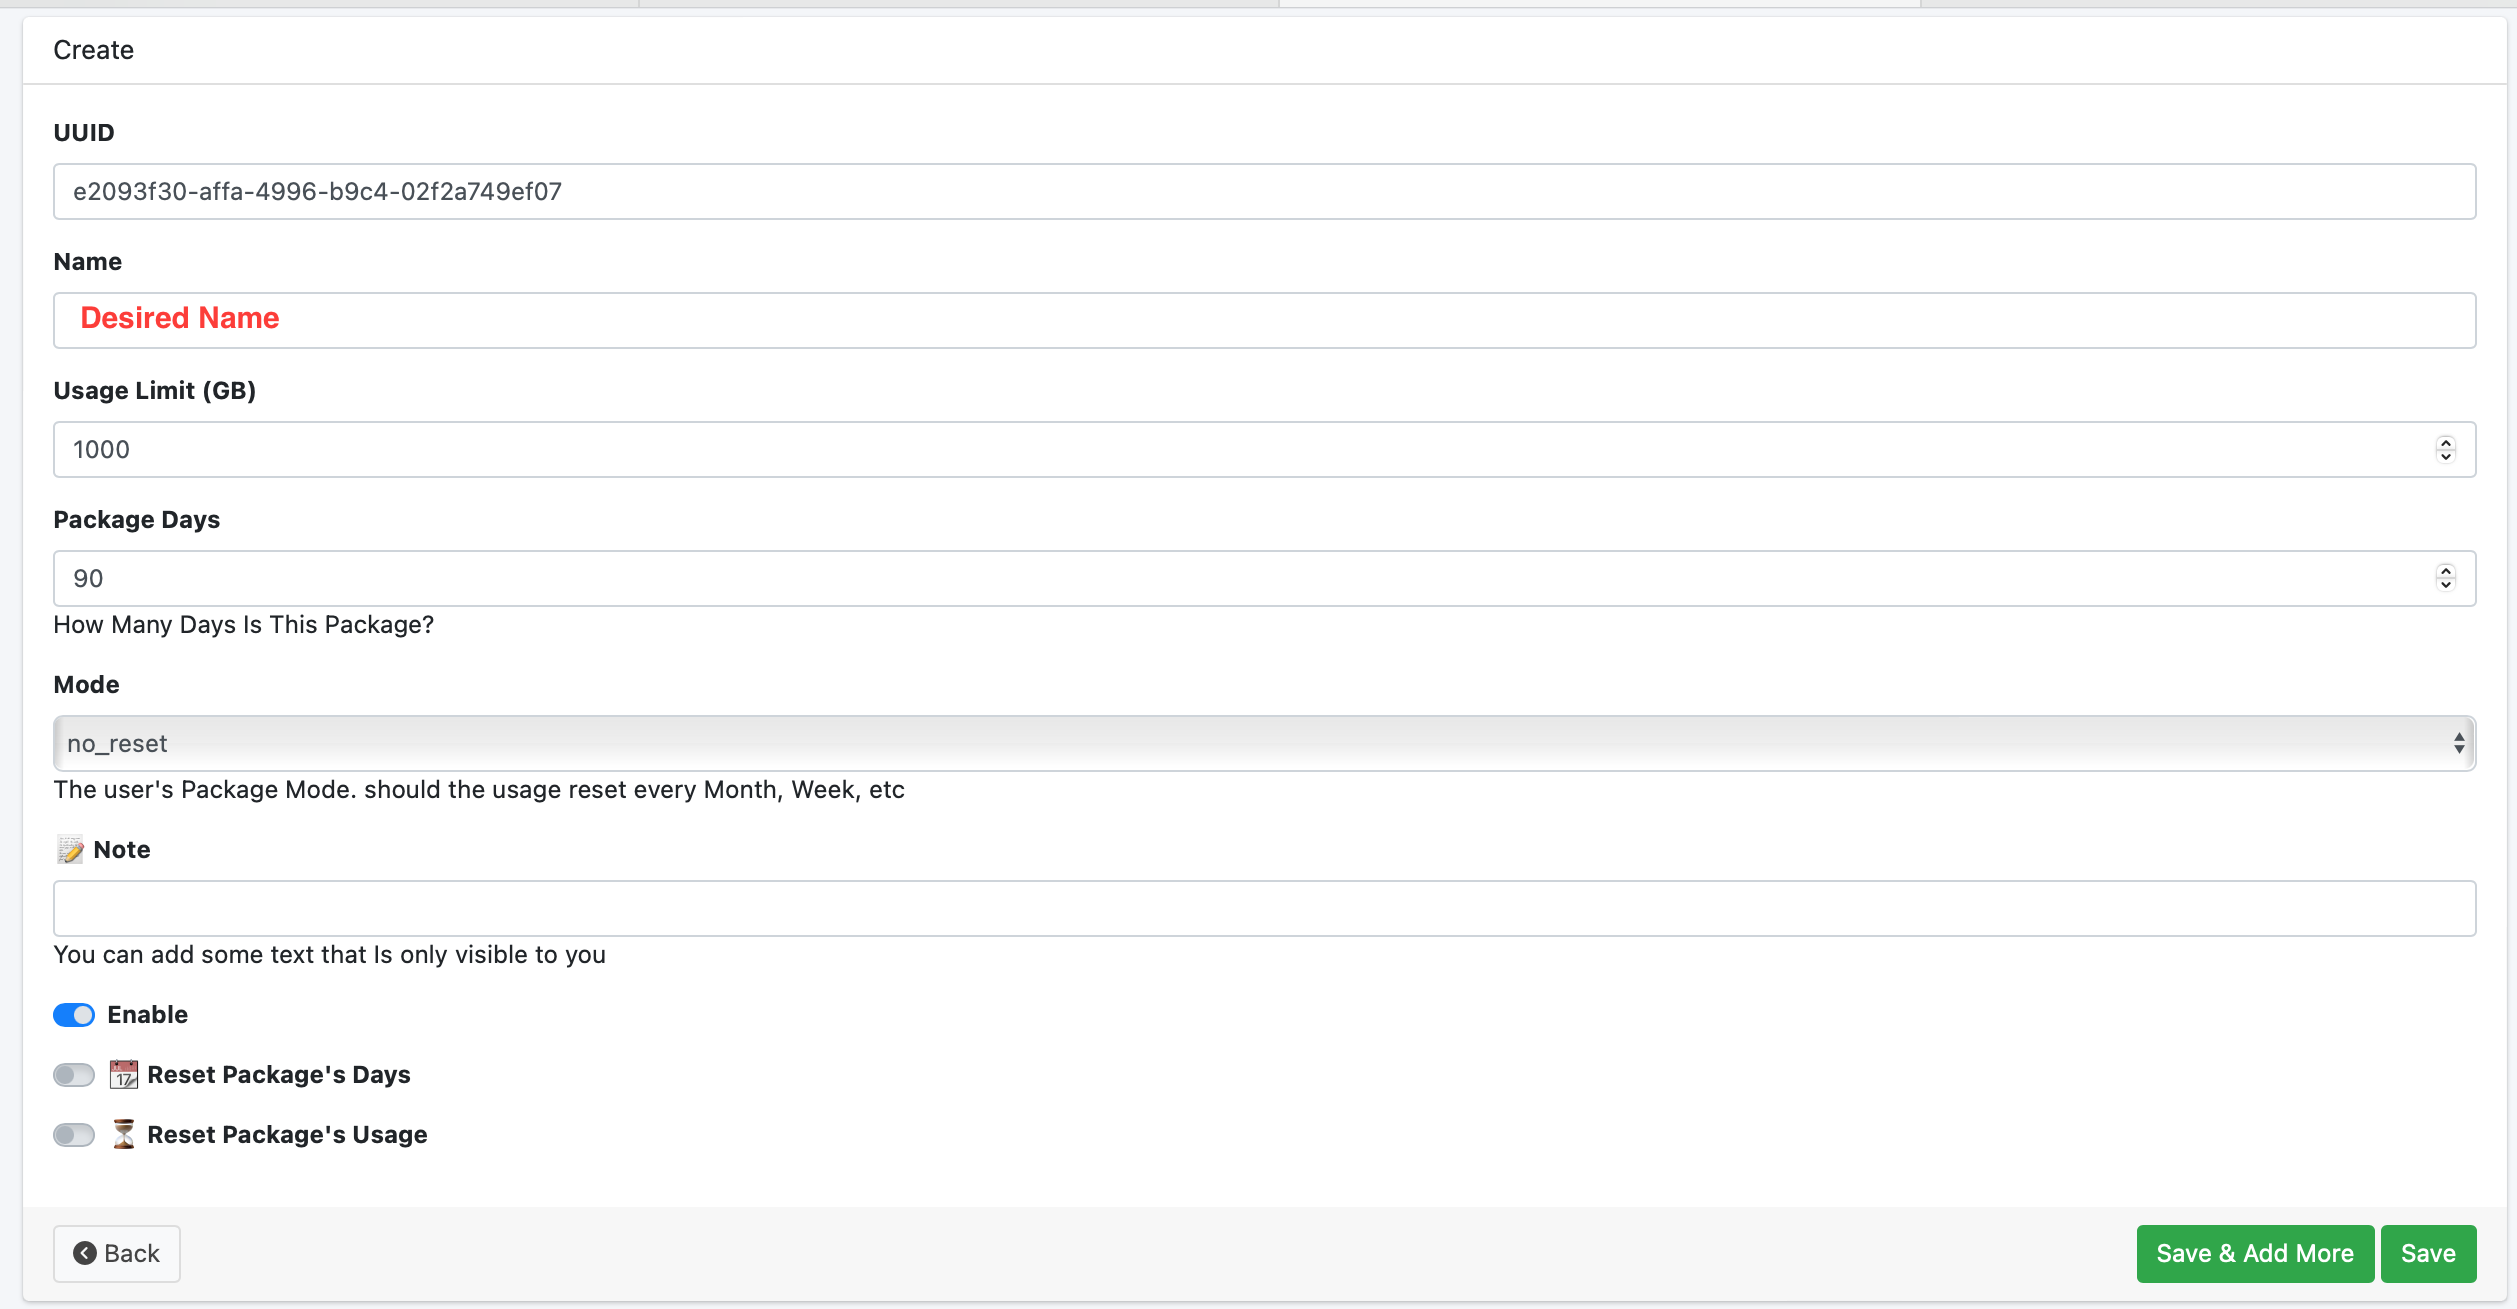
In this part, you can define accounts for users. Click on the Create button. You can specify Usage Limit, Package days, Mode etc.
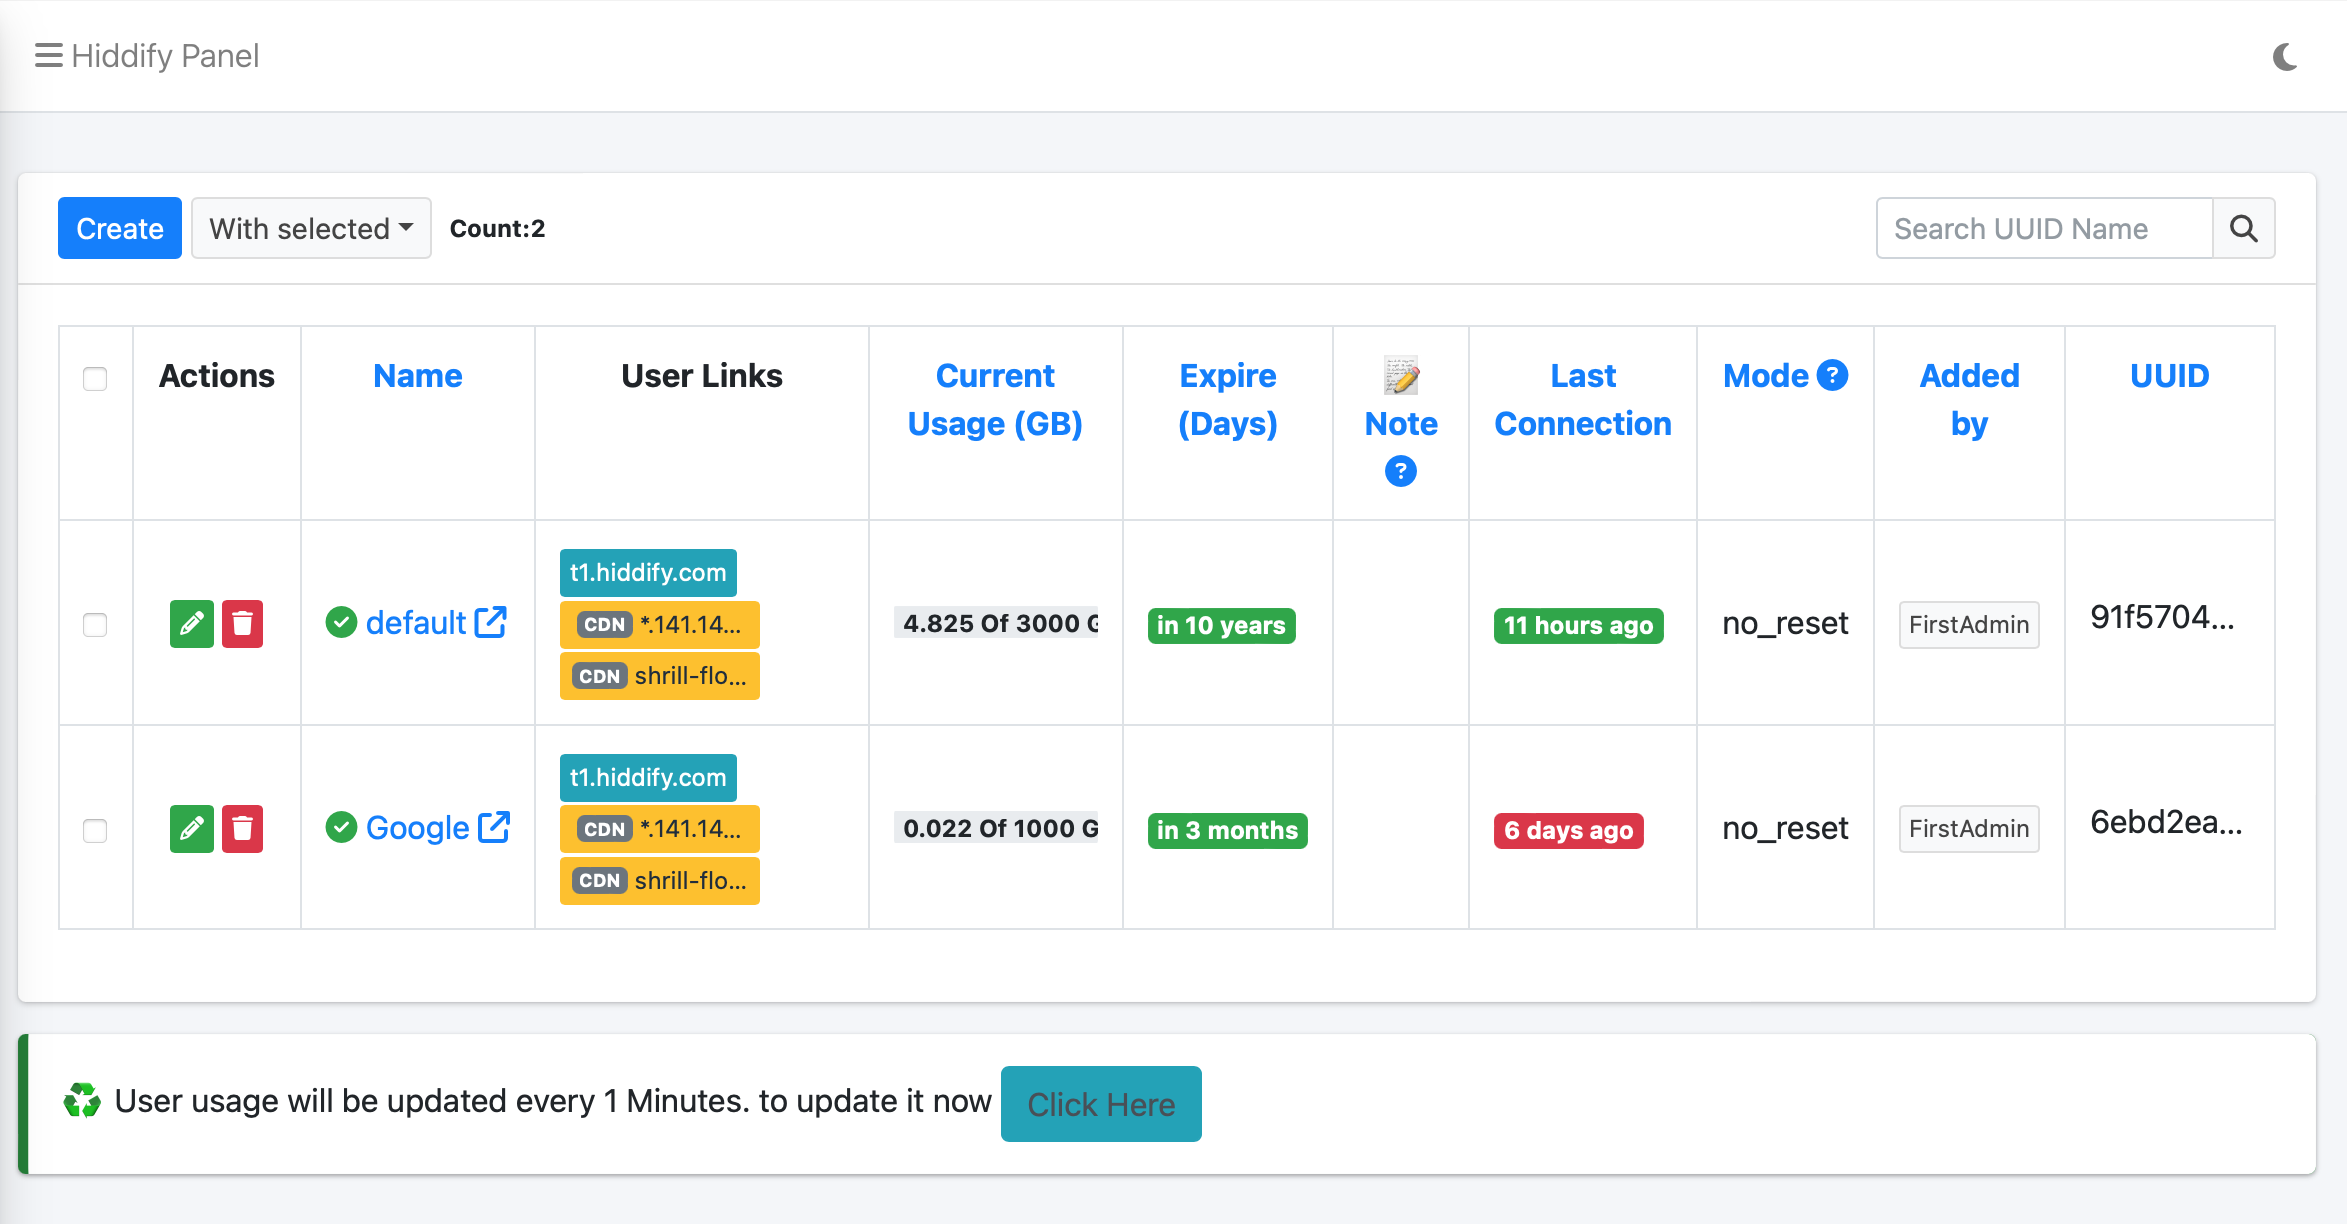
You can hit the Create button then go to the creating of new user
After creating accounts, you can browse dedicated page to each user via links next to them in which you can find all applications and configs. On to top of the page you can find and download client applications based on your OS.
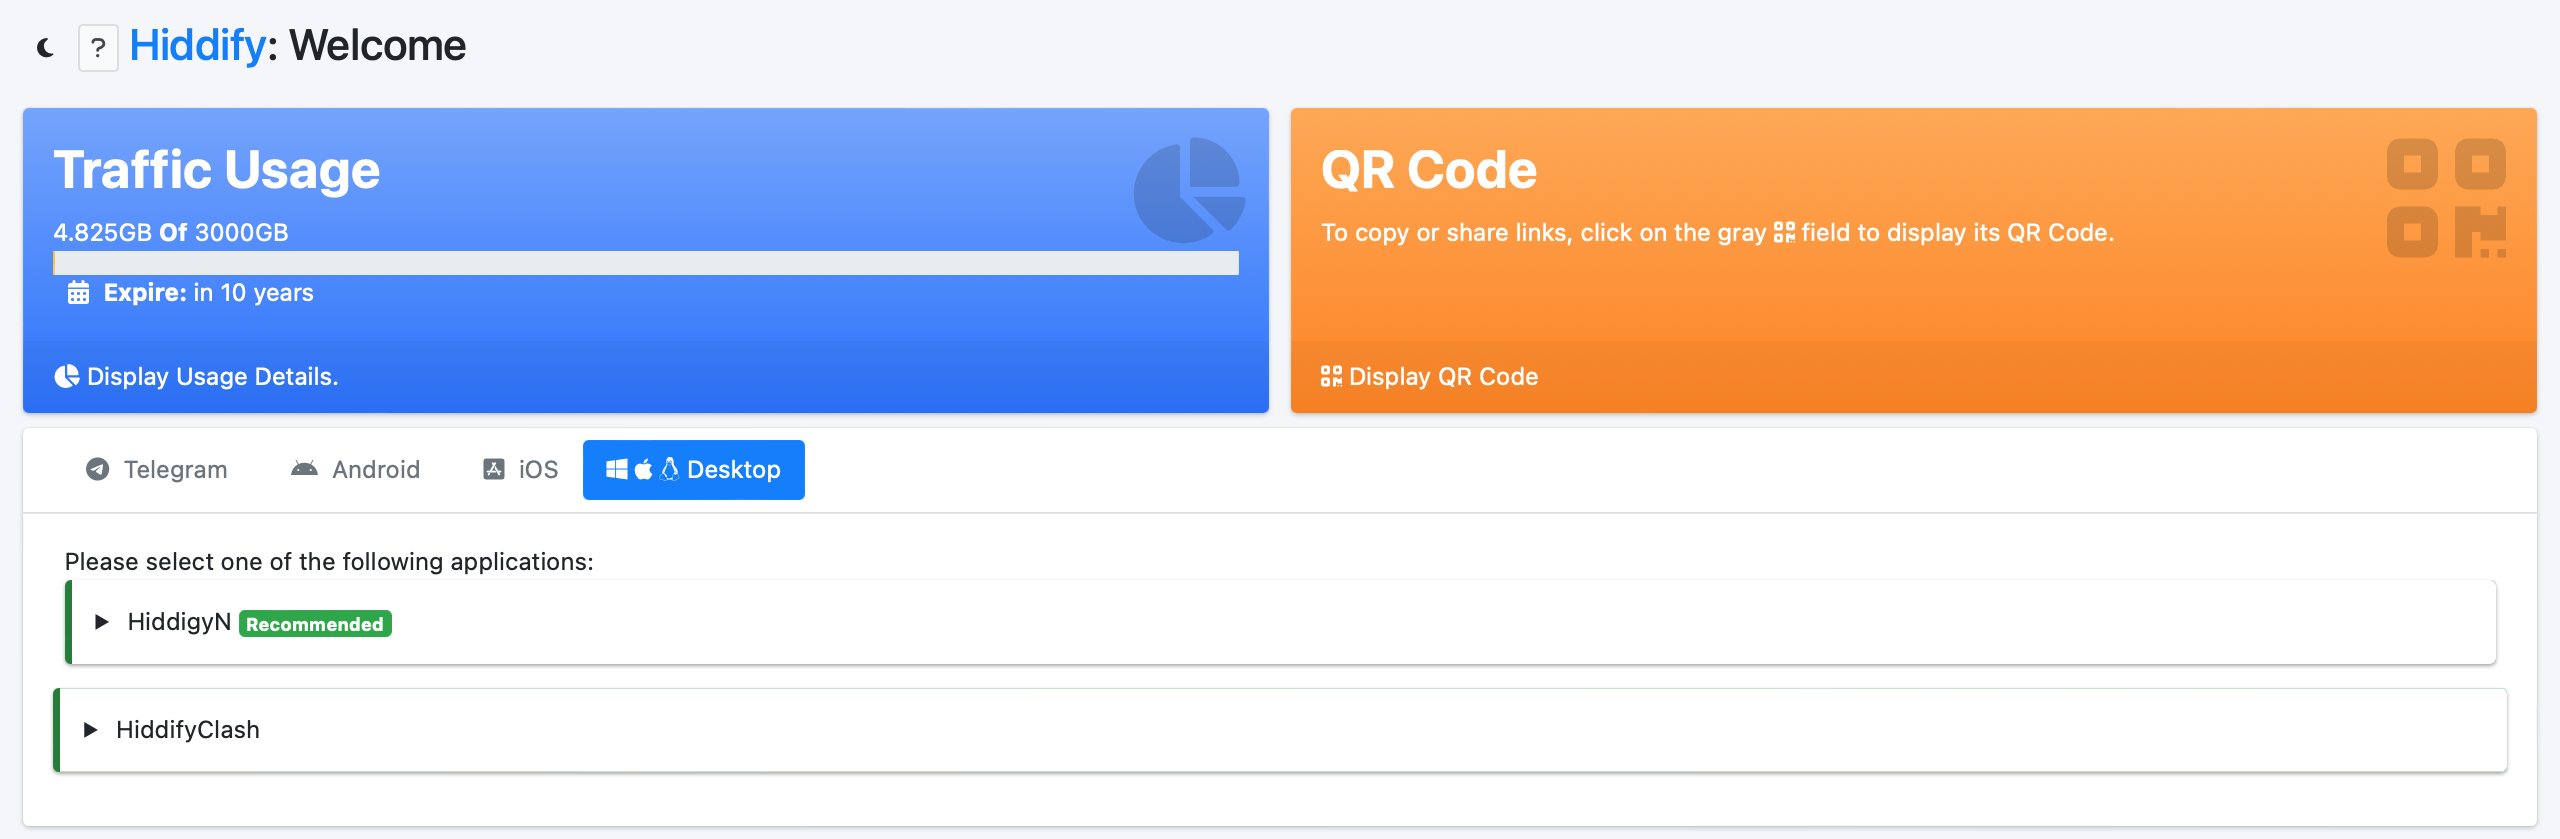
At the bottom of this page, you can see the configurations related to the user.

Several methods are suggested for providing links to users:
- The link of the related page should be provided to the user: this link can be accessed from the user page in the management panel.
- The link related to the user's subscription should be provided to them: in this case, it will be possible to update the scanners in case of changes.
- The connection link should be provided to the user: in this case, it is not possible to update the connections
If you need more information about how to connect the client to the server, please visit our YouTube Channel in order to find a playlist in this regard.
In this section, you can define for the admin panel.
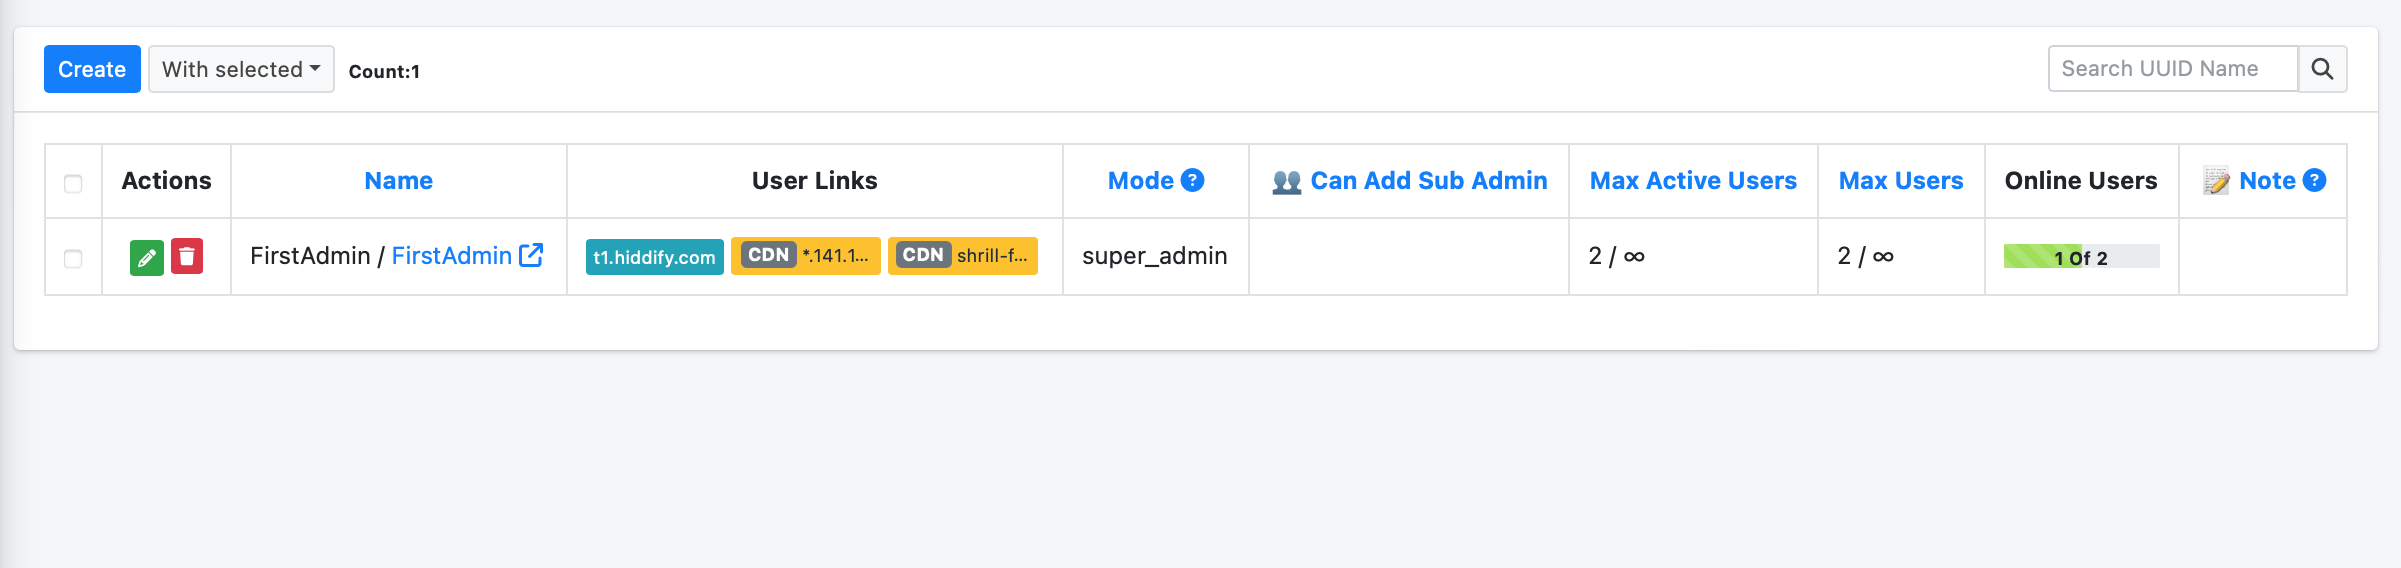
Just click the create button and create the desired admin.
There are several admin types:
- Super admin: he is the admin of the whole system and has full access to all settings.
- Admin: has access to a number of settings. Can manage users.
- Agent: can only manage users.
- For each of the admins, you can set a limit on the number of users and the number of active users.
- You can add a sub-admin for each.
- You can also change the admin password.
Note:
The admin password is also available in the admin page link, which changes the address of the panel completely. To see more information about the correct format of the admin link, click here
Also, on the page of all tutorials on the wiki, you can see the tutorials on how to use client apps based on the OS type here.
Go to the Domains menu to add your domains. There are 5 modes here.
Click the Create button. In the opened page, act according to the figure.

Be careful:
If you want the desired domain not to be displayed in the configurations; Enter a custom name in the Display Name field.
In this case, there is no need to complete the forced use of host field. This field is only used for CDN domains.
In the domain configuration display field from these settings, you can specify the configurations of which domains the users who view the user panel with this domain can view.
This is a bonus tip. You can choose a domain to use as subscription only domain. This way you can separate connections from subscription links and your link will never be blocked. Then your links can be updated all the time.

After connecting Sub-only domain to the Connection domains, you can go to the user page via this sub-only domain. You see the configs are connected to this domain.
Tip: We recommend using direct domains as Sub-only domains because they are fast if your server's IP is clean. Moreover direct domains wont be locked if they are used as Sub-only links. Additionally you can use PHP sites as subscription links. More info
Click on the create button and follow the instructions on the page that opens.

Pay attention:
If you want the desired domain not to be displayed in the configurations; Enter a custom name in the Display Name field. If you want the desired domain not to be displayed in the configurations; Enter a custom name in the Display Name field. In the forced to use host field , it is suggested to use a normal domain record (without proxy). In this way, panel settings and configurations remain constant. When changing a new clean IP, it is enough to update the desired DNS record with the new IP (for example, in Cloudflare).
If you need more information about how to find clean Cloudflare IPs, read this article.
In the domain configuration display field , you can specify which domains users who view the user panel with this domain should see.
Due to the long and detailed description of this mode; You can read [this article](https://github.com/hiddify/hiddify-config/wiki/Guide-for-using-mode-Auto_CDN_IP-in-Hidify) to learn how to set it up.
Click on the create button and follow the instructions on the page that opens.

Note:
If you want the desired domain not to be displayed in the configurations; Enter a custom name in the Display Name field.

In this case, there is no need to complete the forced use of host field. This field is only used for CDN domains.

In the domain configuration display field , you can specify which domains users who view the user panel with this domain should see.
For view more information about this domain, please view this article.
For view more information about this domain, please view this article.
Read this [article](https://github.com/hiddify/hiddify-config/wiki/How-to-use-the-Cloudflare-worker-domain-on-Hiddify) in this regard
If you use several domains and also a large number of users connect to the panel and you need to assign a specific domain to each user; It is recommended to read [this topic]
In this part of the panel, you can specify general and detailed settings for proxies and enable or disable each of them. General settings include the following:
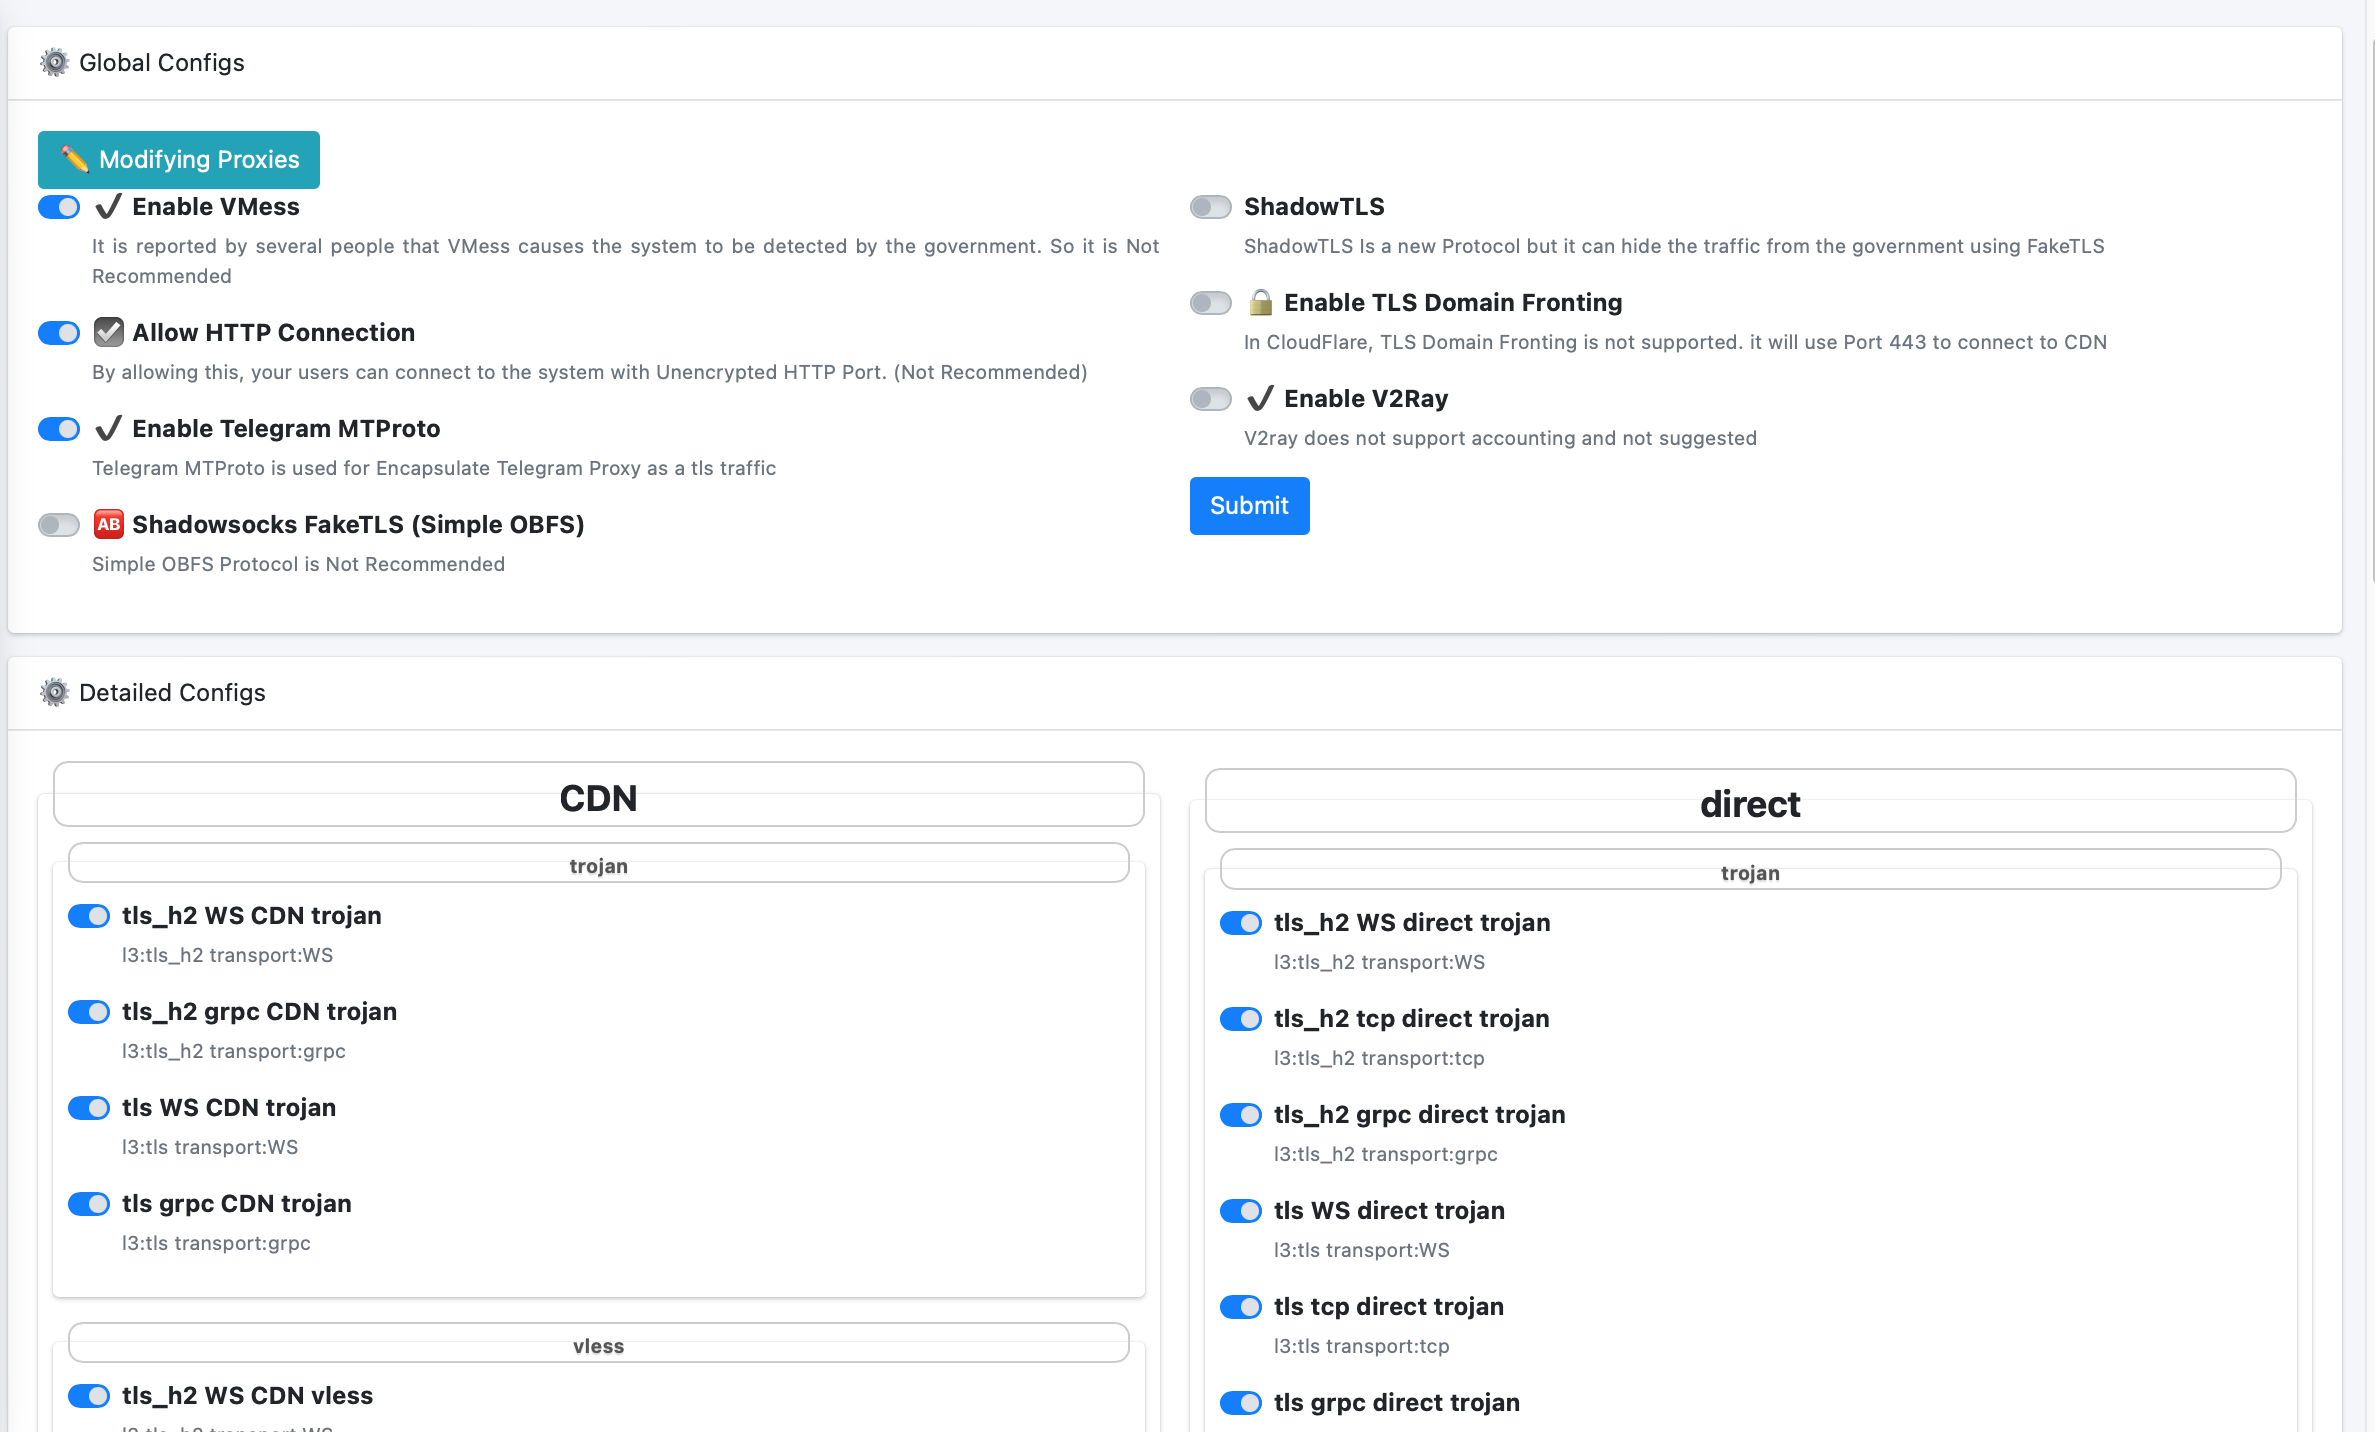
In detailed settings, you can enable or disable individual proxies (connections). Connections are grouped.
Pay attention:
HTTP connections are unencrypted, but TLS is.
Here are the admin settings.
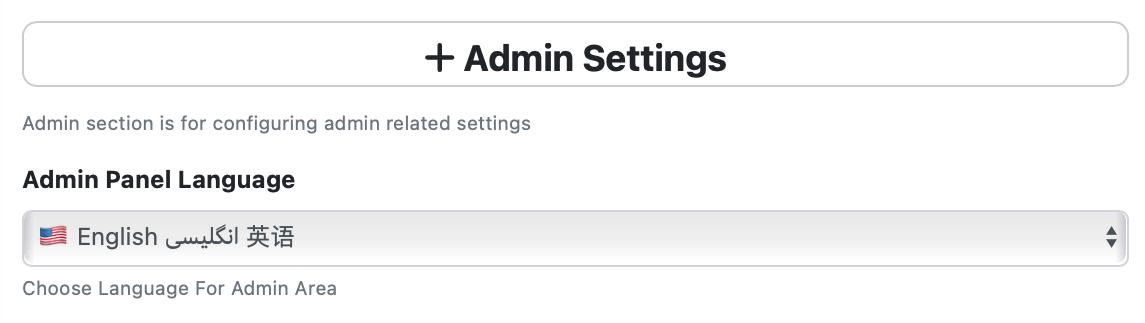
- You can set the language of the admin page.
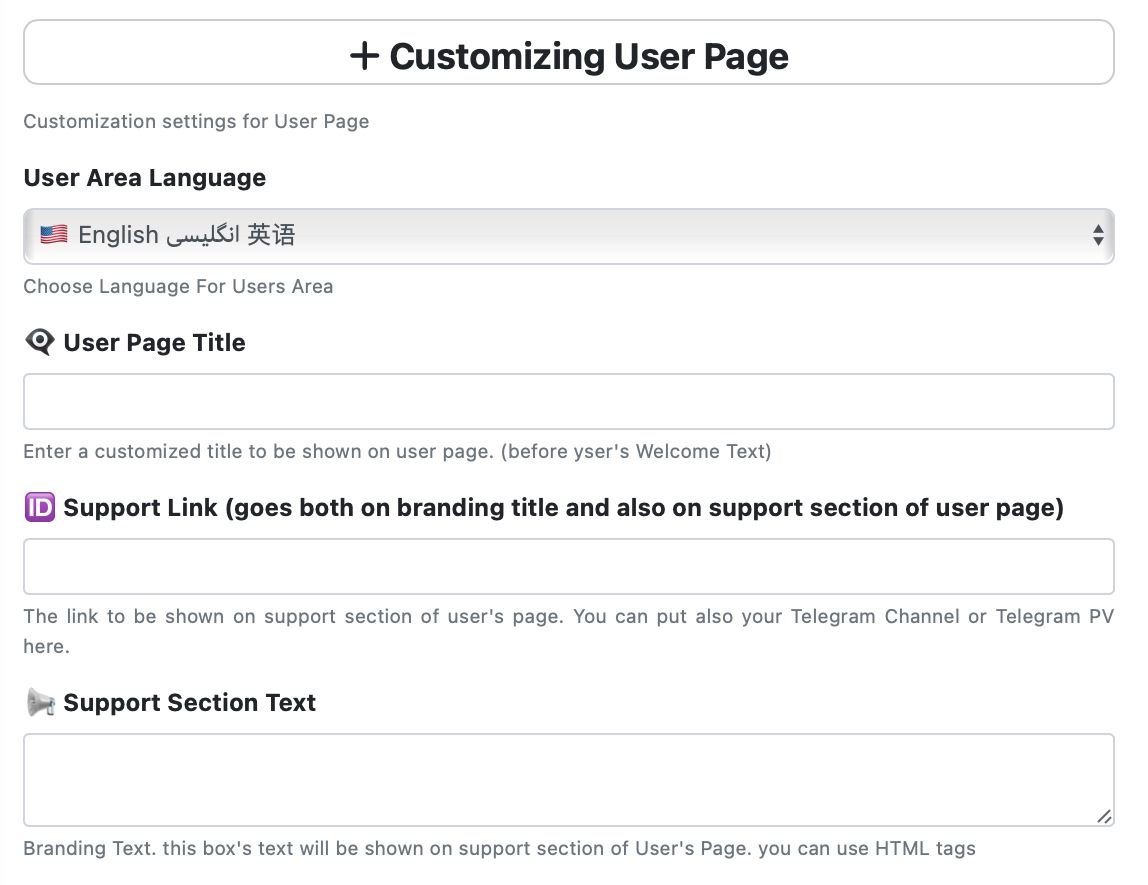
In this section, you can set the page related to users.
-
You can enter the message related to the user support department.
-
If you need to provide a link for support, you can put it in the related field.
-
You can also enter your brand name in the related field. This title can be seen at the top right of the user page.
-
Finally, you can specify the language of the user page.
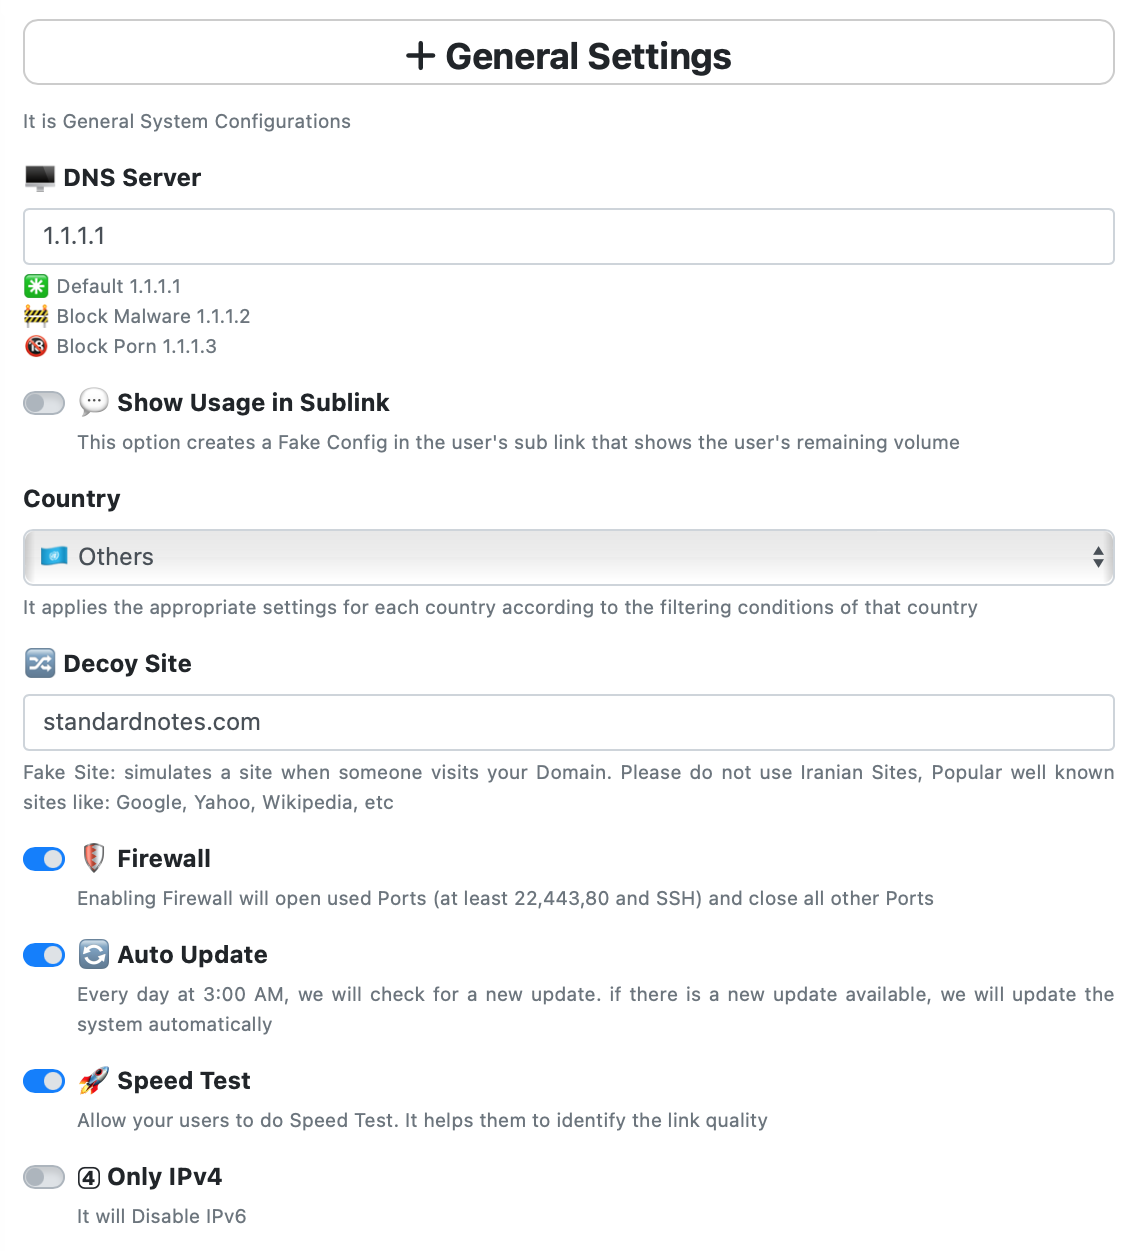
In this section, there are some general settings related to the panel.
-
You can determine how to update the server.
-
You can set IP version 6 to be disabled.
-
You can enable or disable the speed test for users, which enables them to test configurations and service quality.
-
Specify or change the address of the fake site. This site is used to deceive the filtering system and if this system opens your panel, it will be redirected to the defined fake site. In this way, by using this option, it becomes less possible to identify your panel.
-
You can enable or disable the firewall. By activating the firewall, the main service ports such as 80,443,22 remain active and other ports are disabled.
In this section, you can make specific proxy settings.
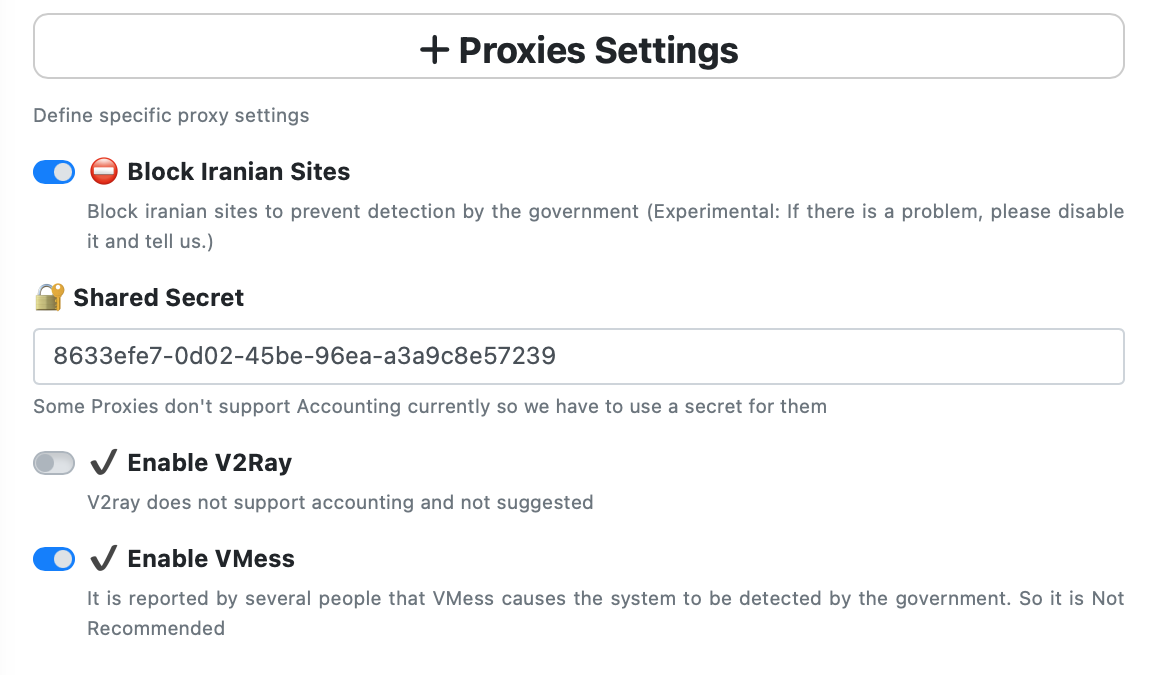
- Block domestic sites. By activating it, all traffic destined for sites inside Iran or sites that are on the ir domain; They are blocked through the server. This option is very effective for not identifying the server by the filtering system. He suggested that it should be activated.
It is also suggested to use lite.yml configuration to connect to proxies. If this configuration is activated on the app client, traffic related to Iranian sites will be sent directly to the user's device without going through a proxy, and only the proxy will be used for filtered sites. This is an optimal mode because the traffic is not sent to the server in vain.
- V2Ray mode can be activated or deactivated.
- Vmess can be enabled or disabled.
- The shared password can be changed. This password is used for connections that do not calculate traffic volume.
- You can choose browser fingerprint emulation from Chrome, Android, Safari and Firefox options.
This option is used to simulate another website instead of your website in SNI. Therefore, the filtering system cannot detect packets whose main destination is your domain, but fakely pretends to be sent to another destination, and as a result, it can be bypassed. This option may not work on all networks. more information
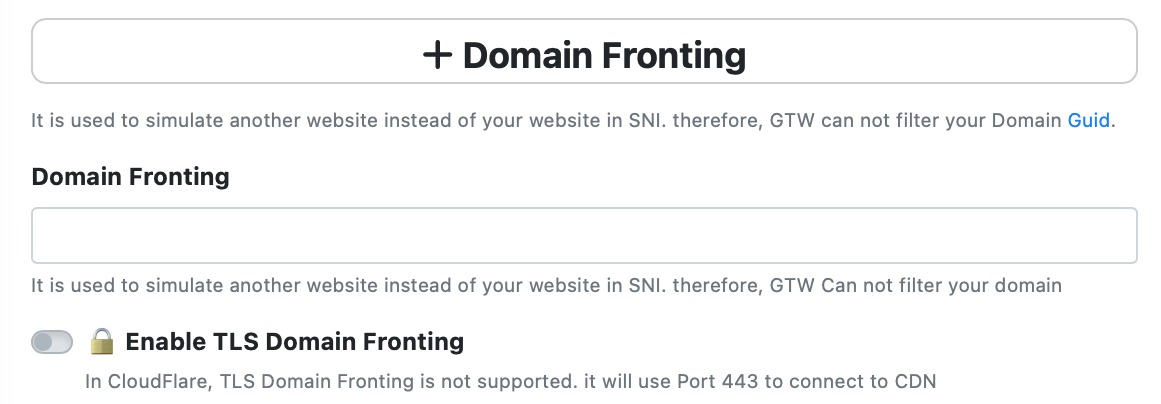
- For this purpose, you can specify the desired fake website.
- You can enable this option for HTTP protocol (no encryption).
- You can enable this option for TLS protocol (with encryption).
- Please note that this feature is disabled on Cloudflare, and you must use other CDNs to use it.
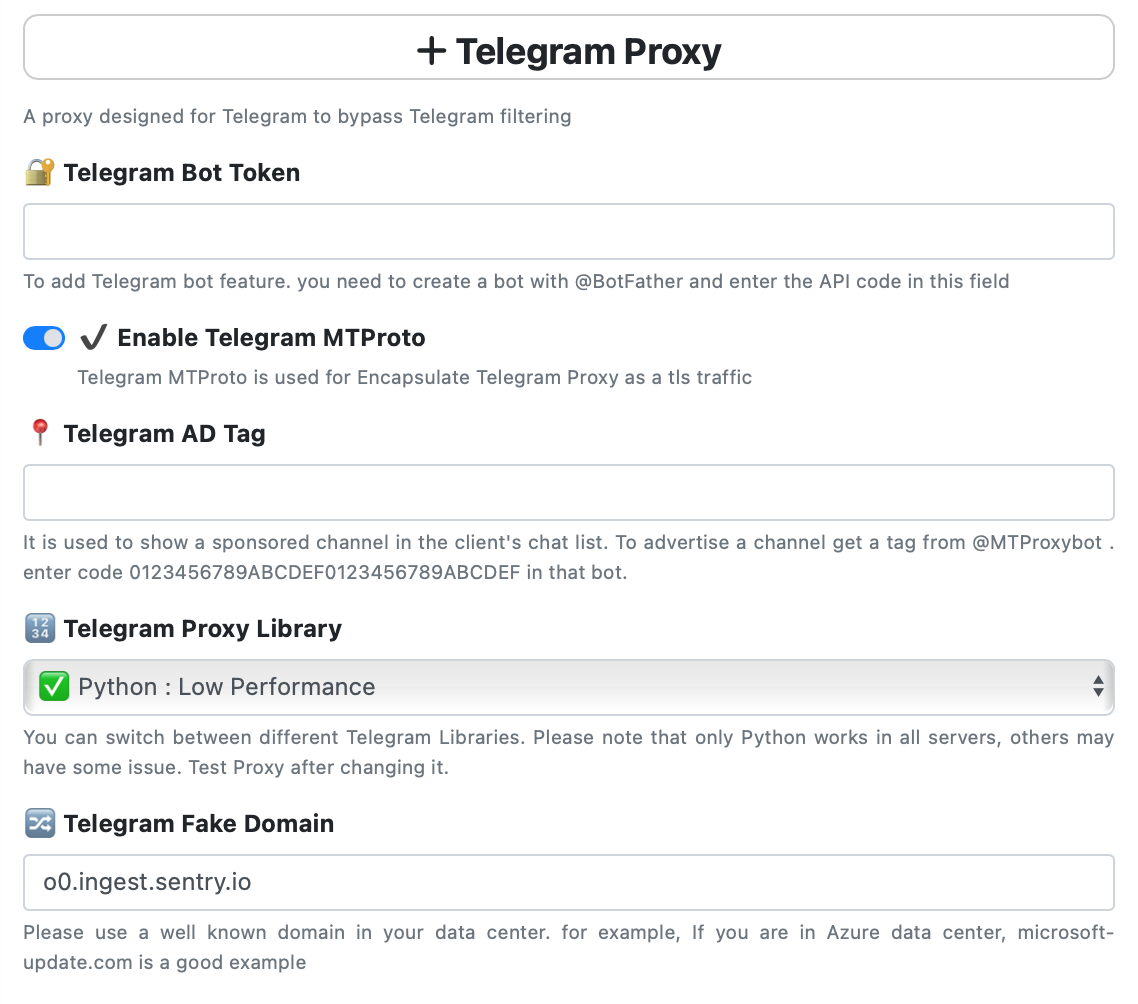
Telegram proxy is designed to be used inside the Telegram app to bypass Telegram filtering.
-
It is possible to activate or deactivate it.
-
You can define an advertising tag to be displayed in the user's Telegram chats.
-
A fake domain can be used to encapsulate packets and bypass filtering, which must be entered in the relevant field.
-
Telegram proxy model can also be selected.
-
You can choose different Telegram libraries. Note that only Python works correctly on all systems and others may have bugs. Be sure to test after the change.
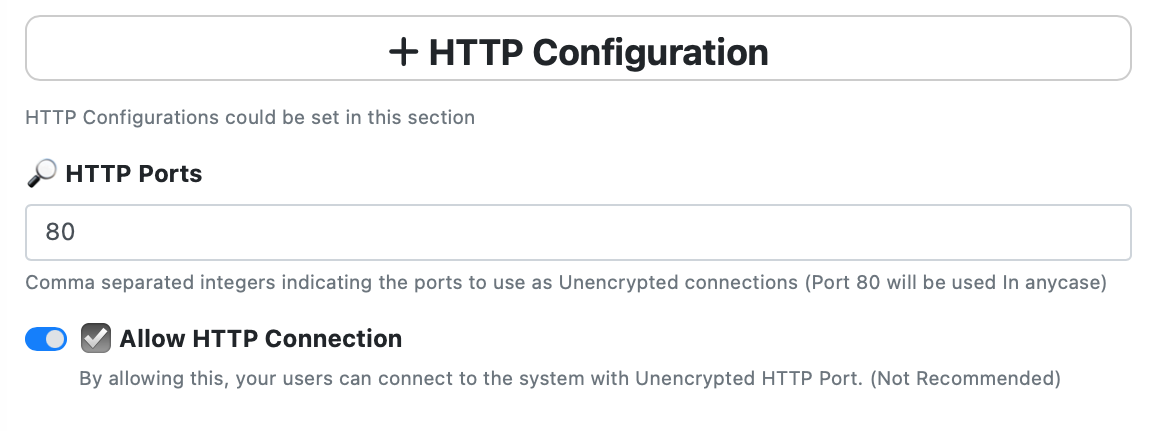
In this section, the HTTP protocol is enabled or disabled. Due to the lack of encryption, its activation is not recommended.
-
If activated, the port of this service can be specified. Port 80 exists by default and cannot be removed, but other ports can be added to it.
-
Commas can be used to add other ports. Also, you should only use cloudflare's http ports. For example, 80,8080. More information about cloudflare ports
In this section you can set TLS.
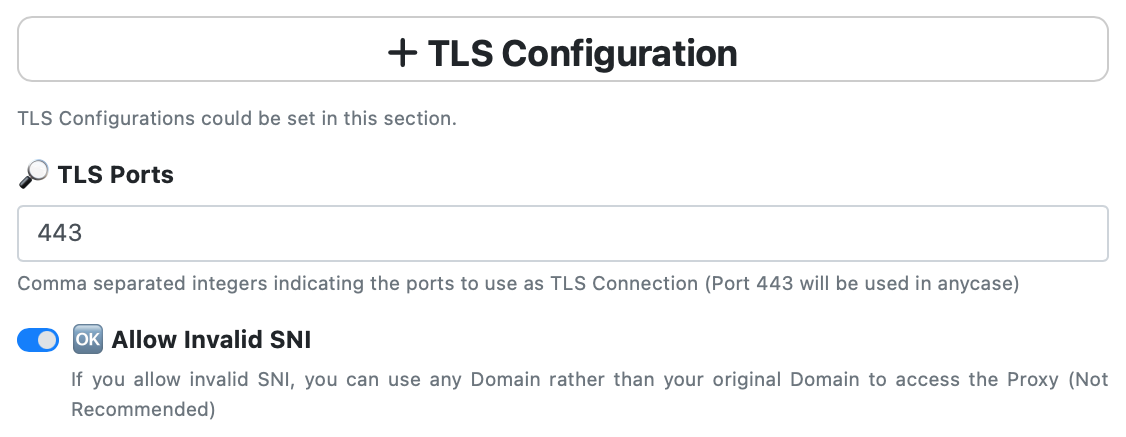
It is possible to enable or disable the TLS protocol in this section. In addition, you can specify the ports used in this regard, port 443 cannot be changed, but you can add other Cloudflare HTTPS ports, which can be separated by commas. For example, 443,2053. More information about cloudflare ports
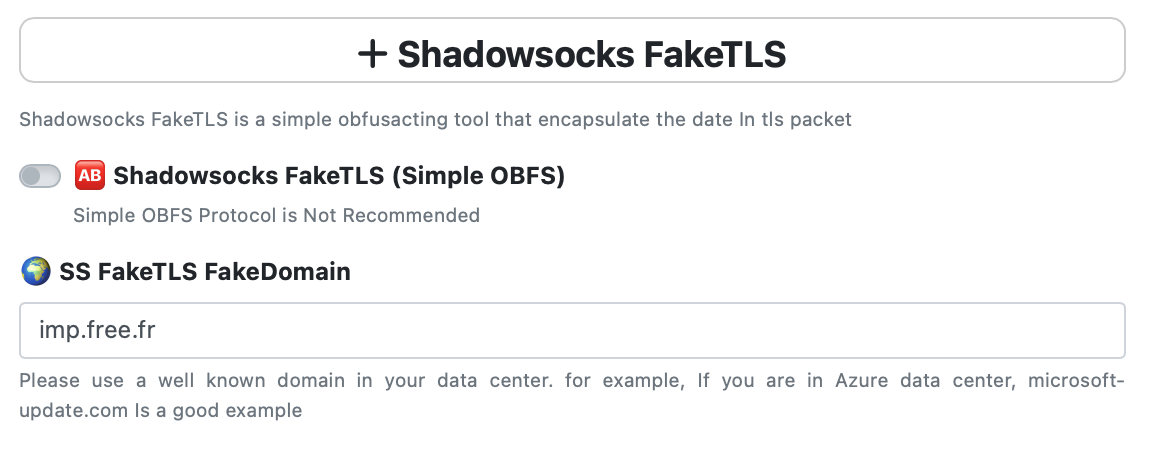
ShadowSax FakeTLS is a simple obfuscation method that encapsulates data in a TLS packet to fool the filter.
-
Here, one of the algorithms of this protocol called simple obfs can be activated, which is not recommended.
-
You can also set a fake domain to obfuscate packets by ShadowSocks
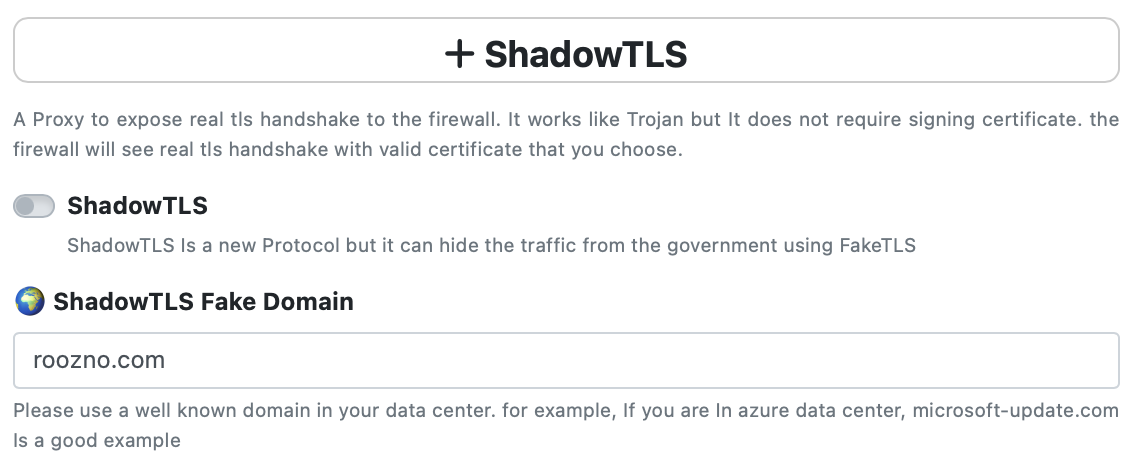
A Proxy to expose real tls handshake to the firewall. It works like Trojan but It does not require signing certificate. the firewall will see real tls handshake with valid certificate that you choose.
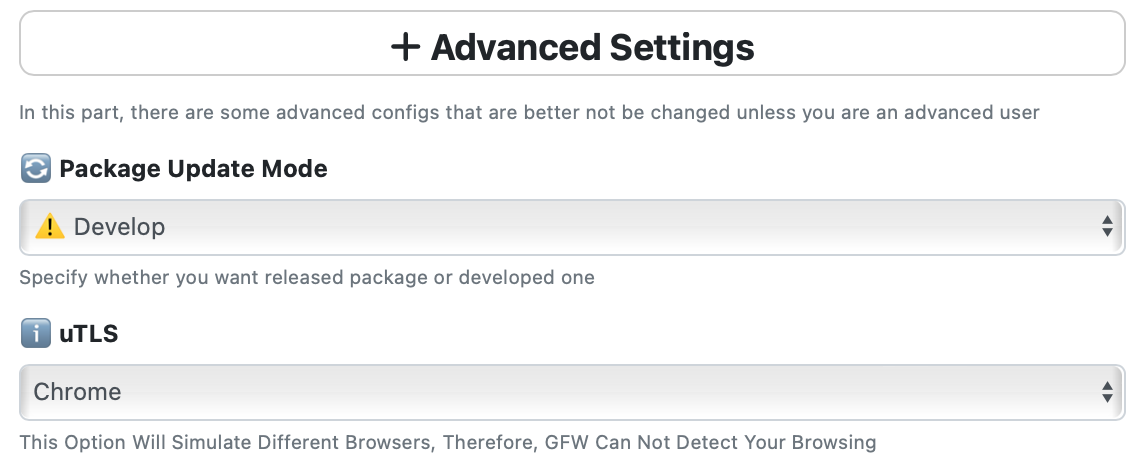
In this section, there are configurations that are needed by a few users and are designed for professional users.
-
It is possible to choose the type of panel update from the stable version and the latest version.
-
It is possible to connect to the central panel (multi server). After connecting to the encrypted panel, users can be defined in an integrated manner on the central panel and the amount of usage of all servers can be added cumulatively.
-
The hidden proxy path can be changed in this section. This route is used to hide connections from filtering
-
Telegram bot token settings are also located in this section, through which you can connect to a Telegram bot and report user account information.
In this section, you can set the proxy path.
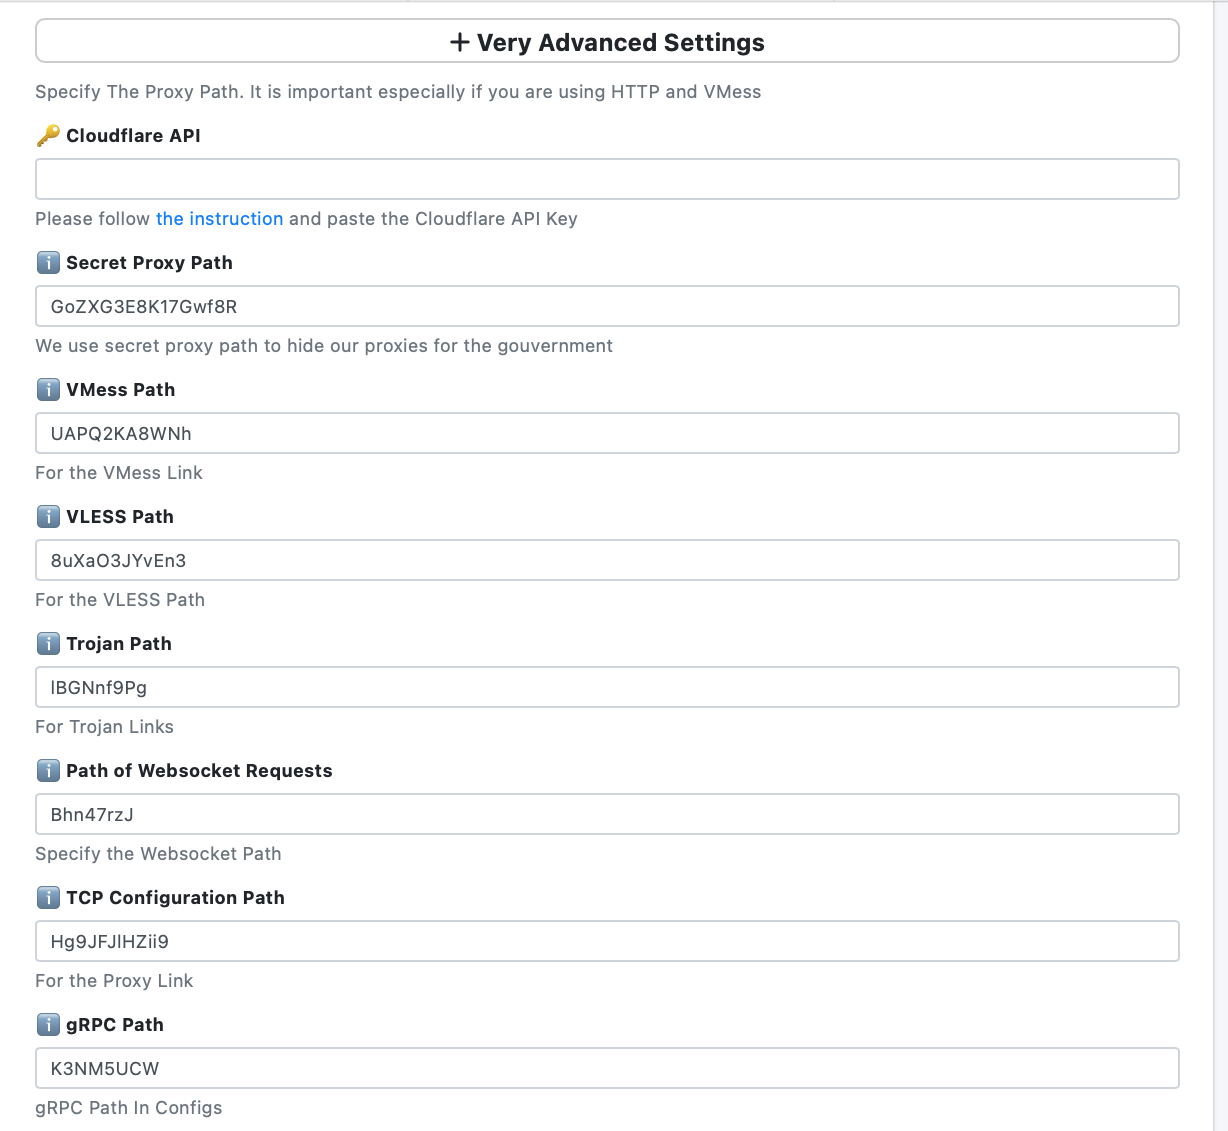
This is especially important when you use proxies with lower security (http and vmess).
This is done automatically by the panel, but you can change it if you want
If you need to get some information related to enabling WARP on Hiddify, read this link.
For view more information about this protocol, please view this article.
In this menu, you can take a backup from the panel or restore your previous backup.
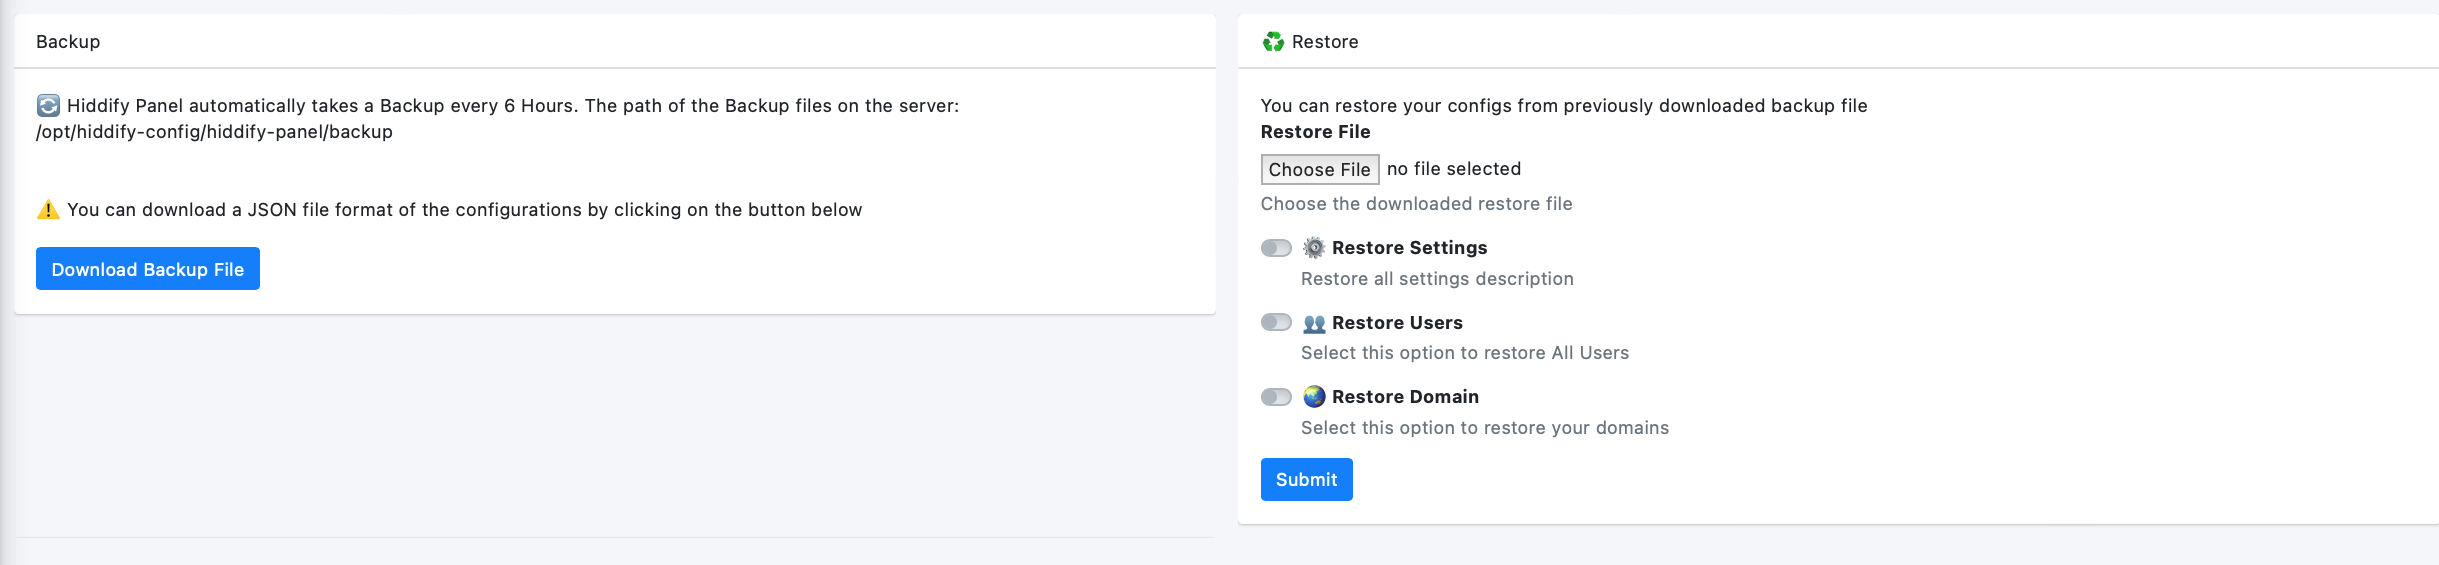
- The output format of the backup file is Json.
- When restoring the backup on the panel, it is possible to choose the type of restoration from the options of restoring settings, restoring users and restoring domains.
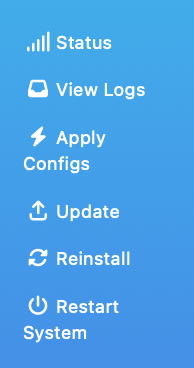
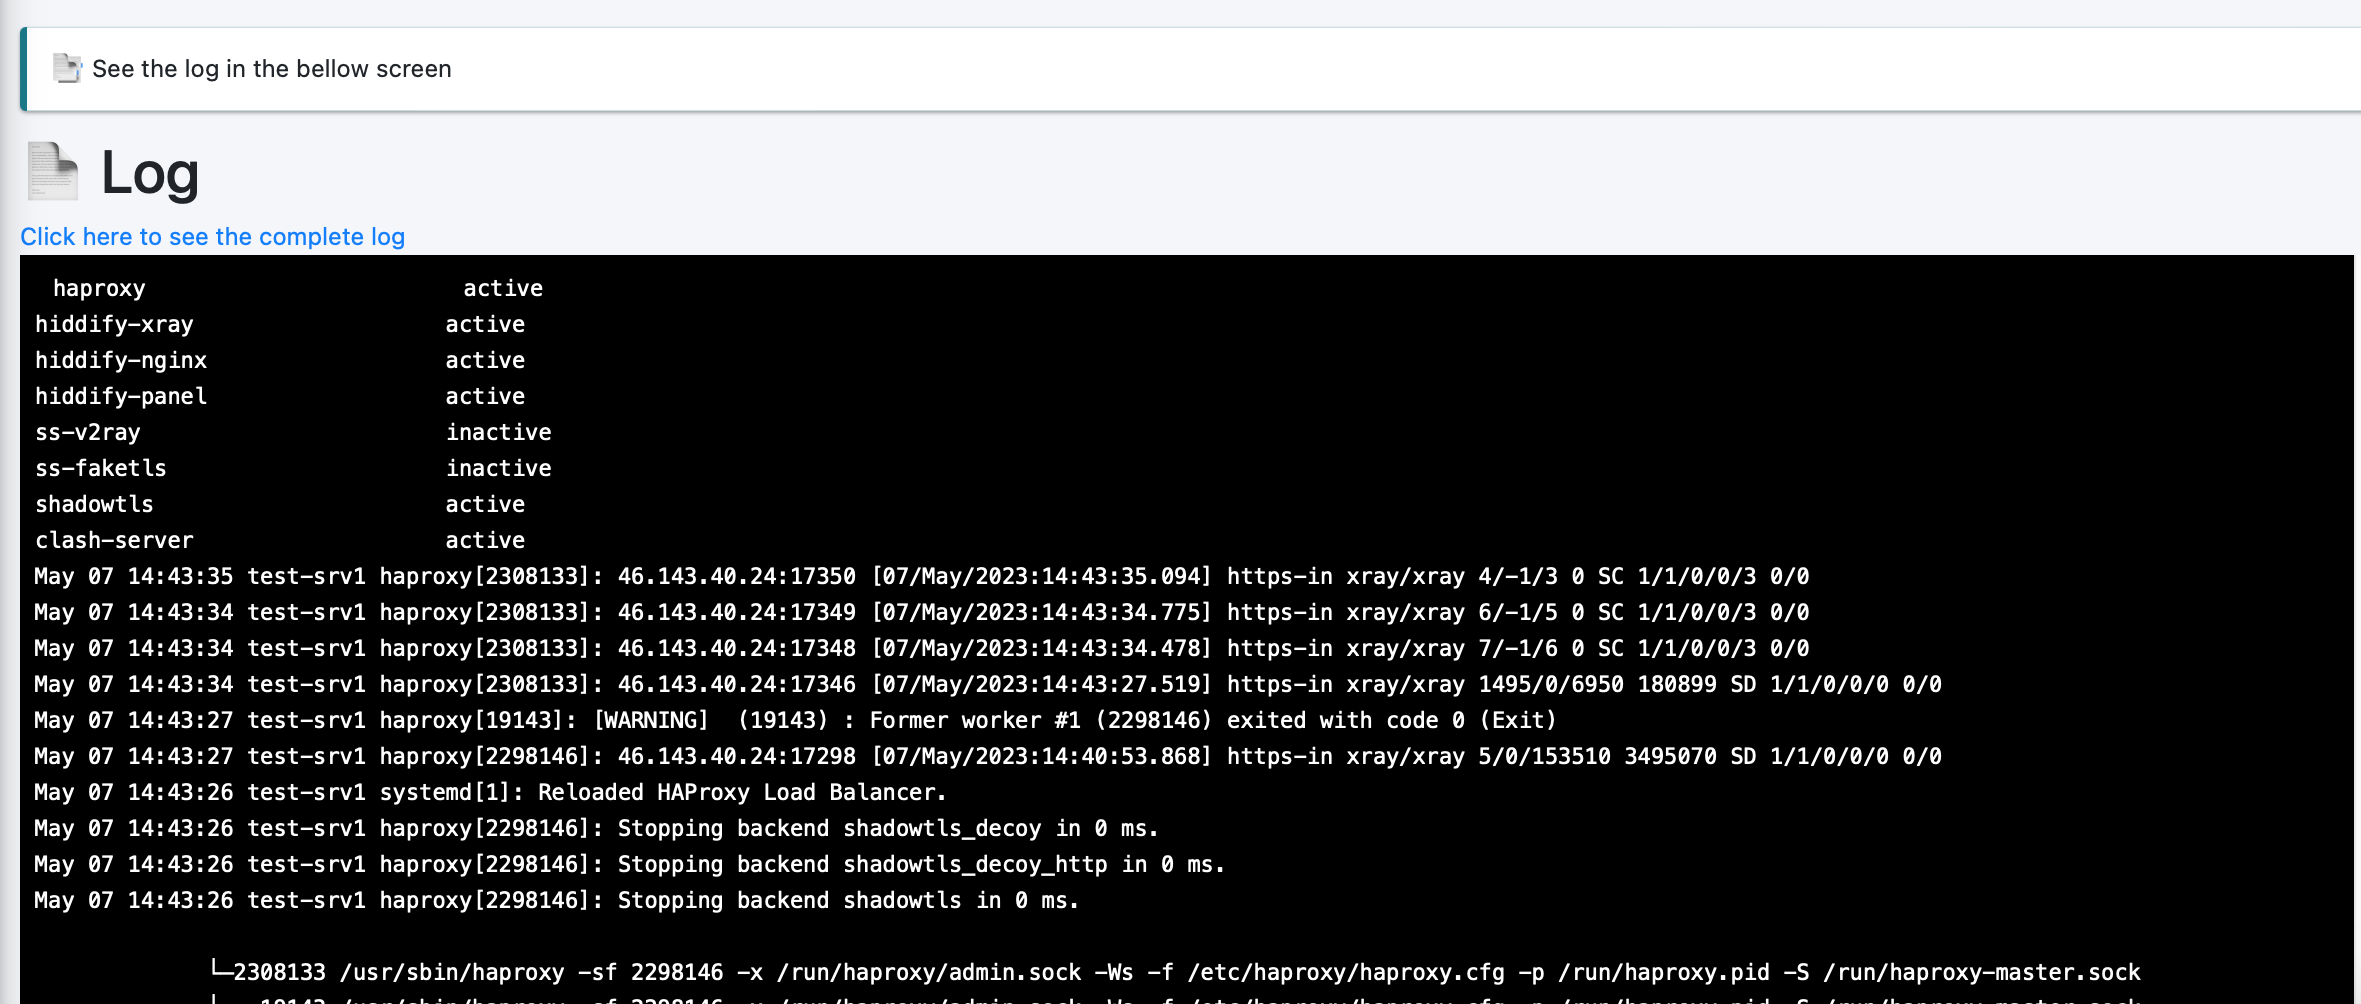
In this menu, a simulated terminal is displayed, through which a series of actions related to maintenance, troubleshooting and installation of the panel can be performed.
This menu executes the system status display script and displays the related logs.
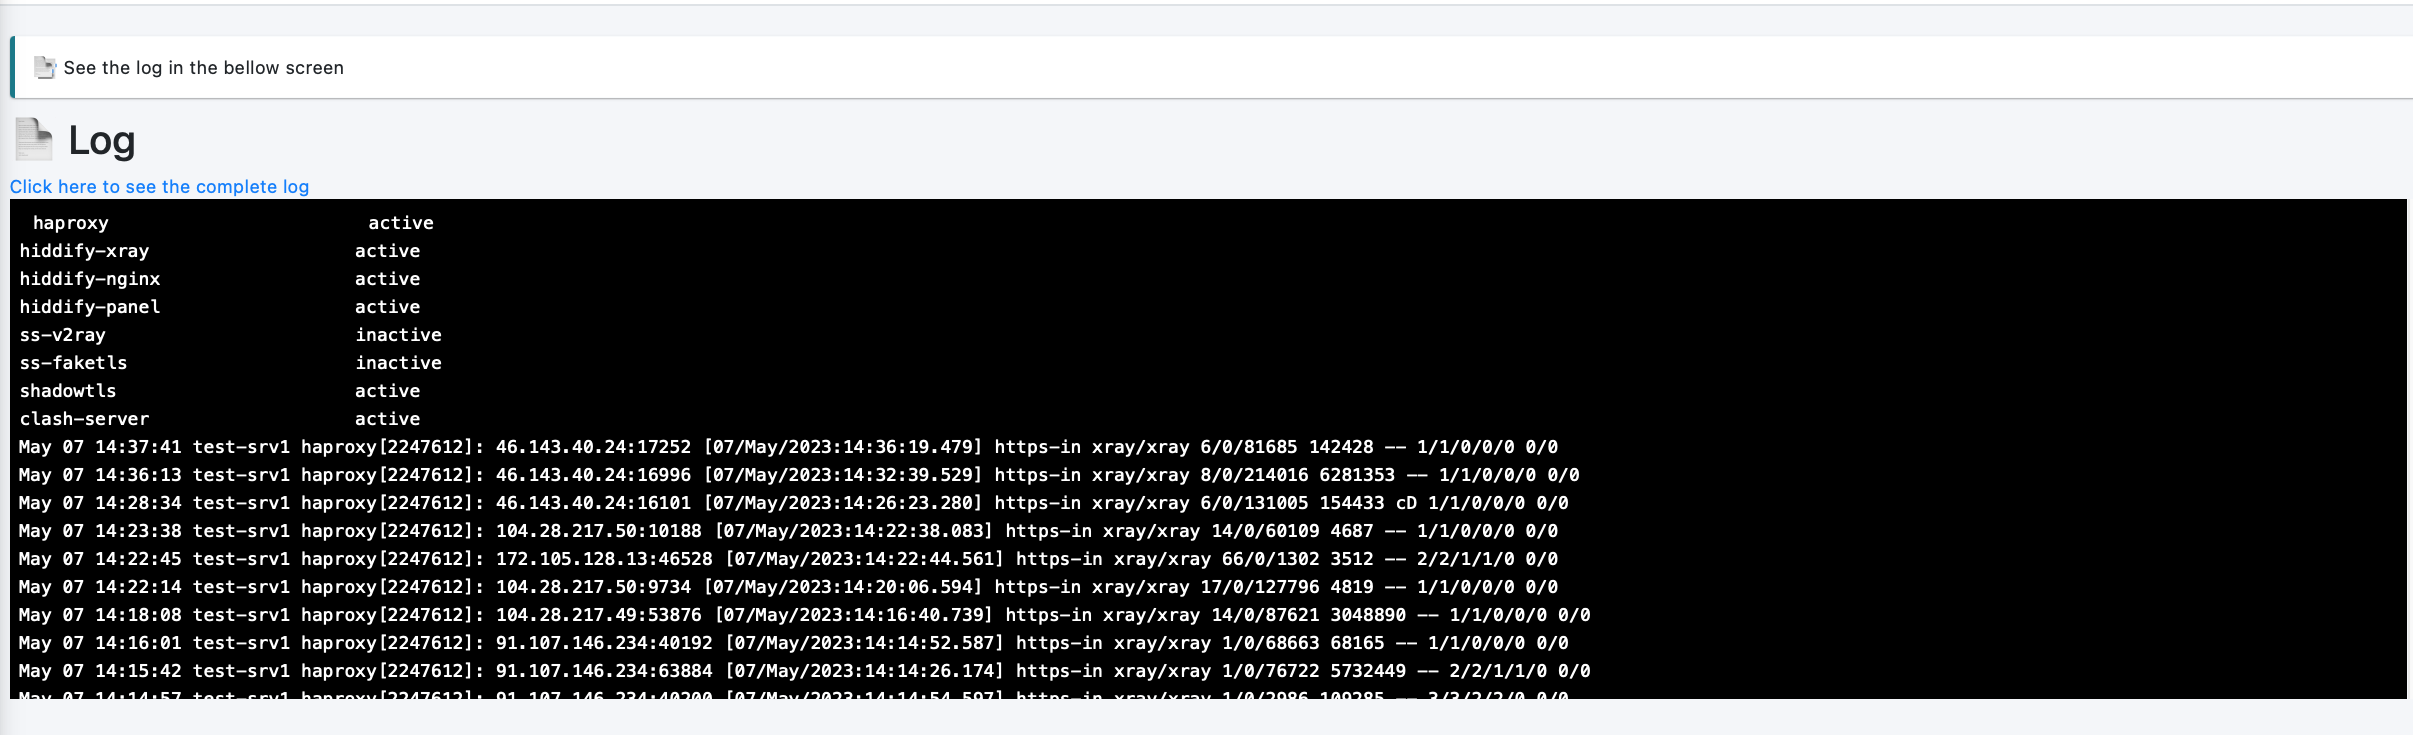
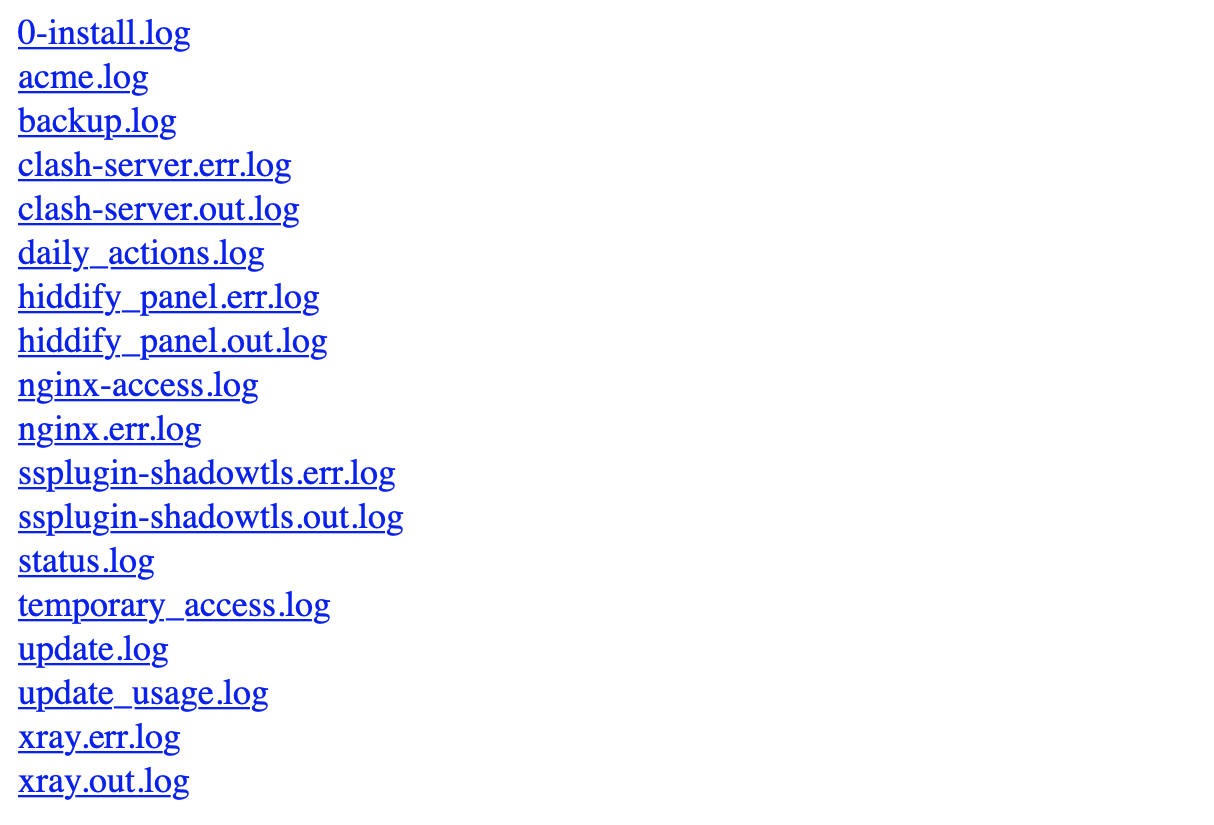
In this section, the service logs will be visible in categories.
Settings registered in other menus are applied through this section.
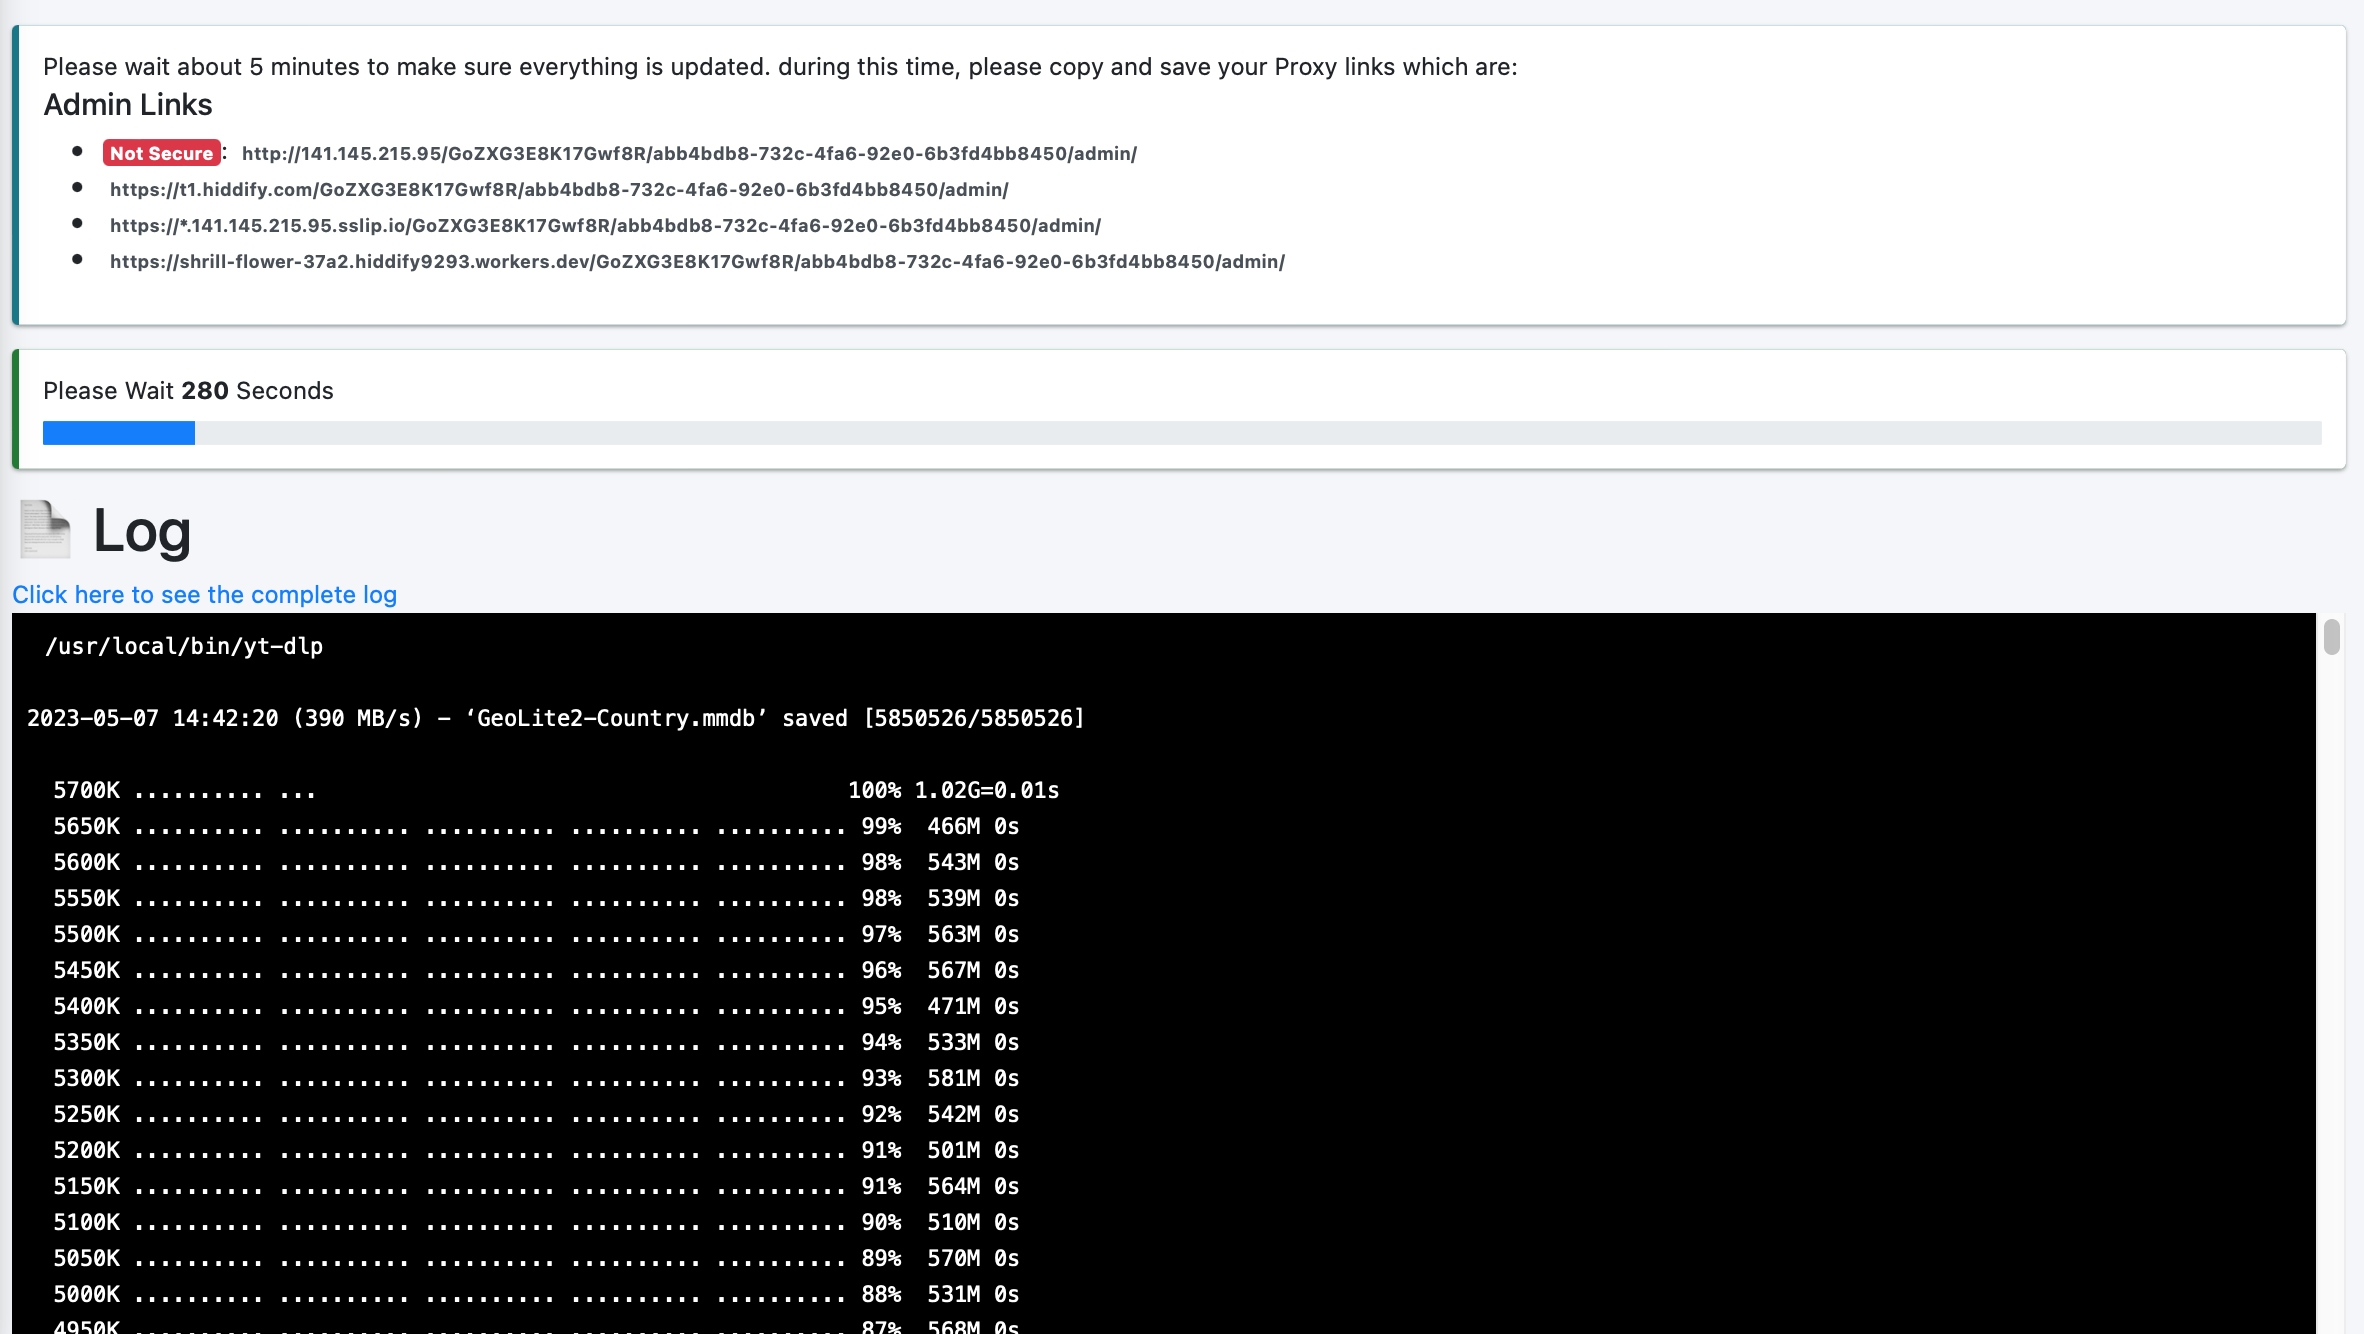
Important points related to applying changes:
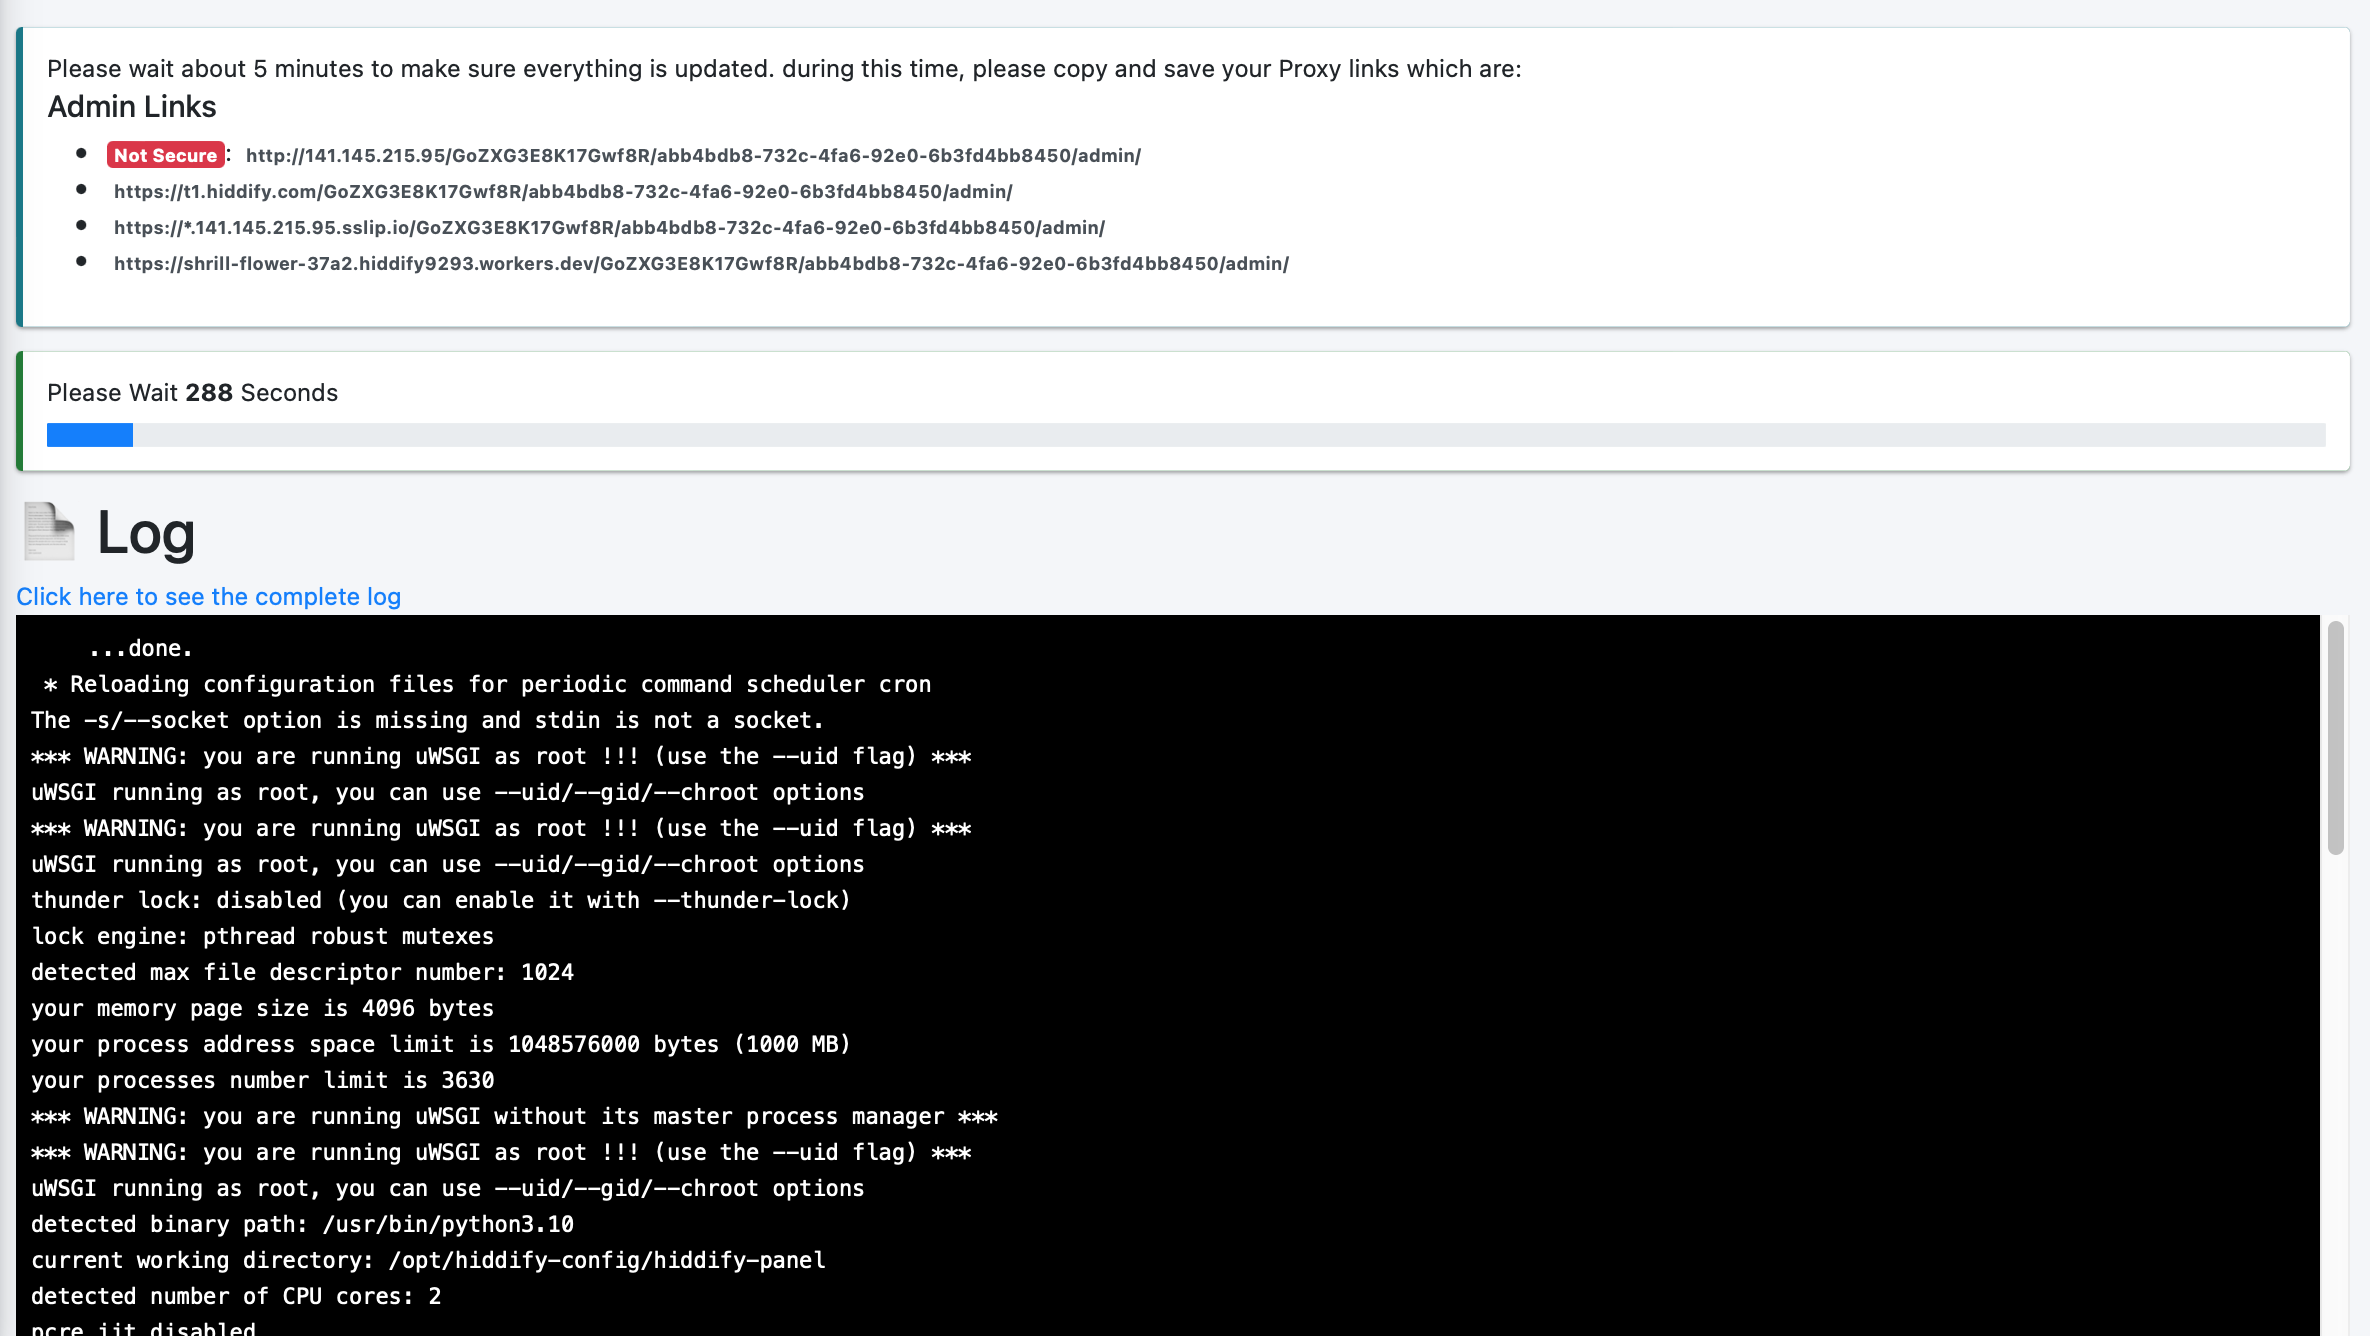
When applying changes, you need to wait at least 5 minutes and maximum 10 minutes for the changes to be applied. Do not refresh the browser while performing the operation.

Be sure to copy the emergency link before leaving this page. If for any reason there is a problem in applying the changes, the only way to access the panel is through the emergency link.

When the changes are applied, a green message will appear indicating that the operation was successful. If for any reason this message does not appear; And the panel won't open anymore; Use the emergency link to access the server.

If you have lost the emergency link, you should solve the problem through ssh. [more information](https://github.com/hiddify/hiddify-config/wiki/How-to-connect-and-troubleshoot-via-SSH)
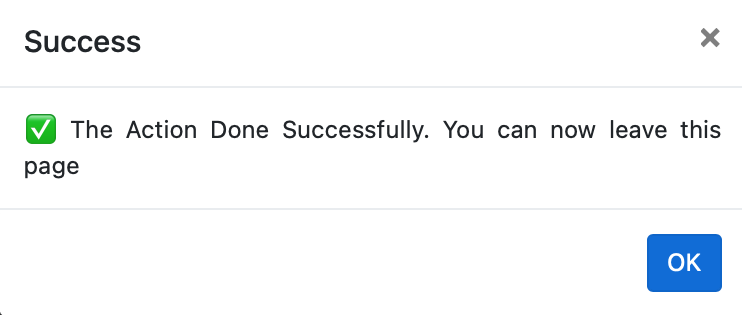
At the end, the panel shows you a message like this. It means every thin applied successfully.
It is possible to install the update panel in this way.
which usually should be done between 5 and 10 minutes. As a precaution, be sure to copy the emergency link to use in case of a problem.
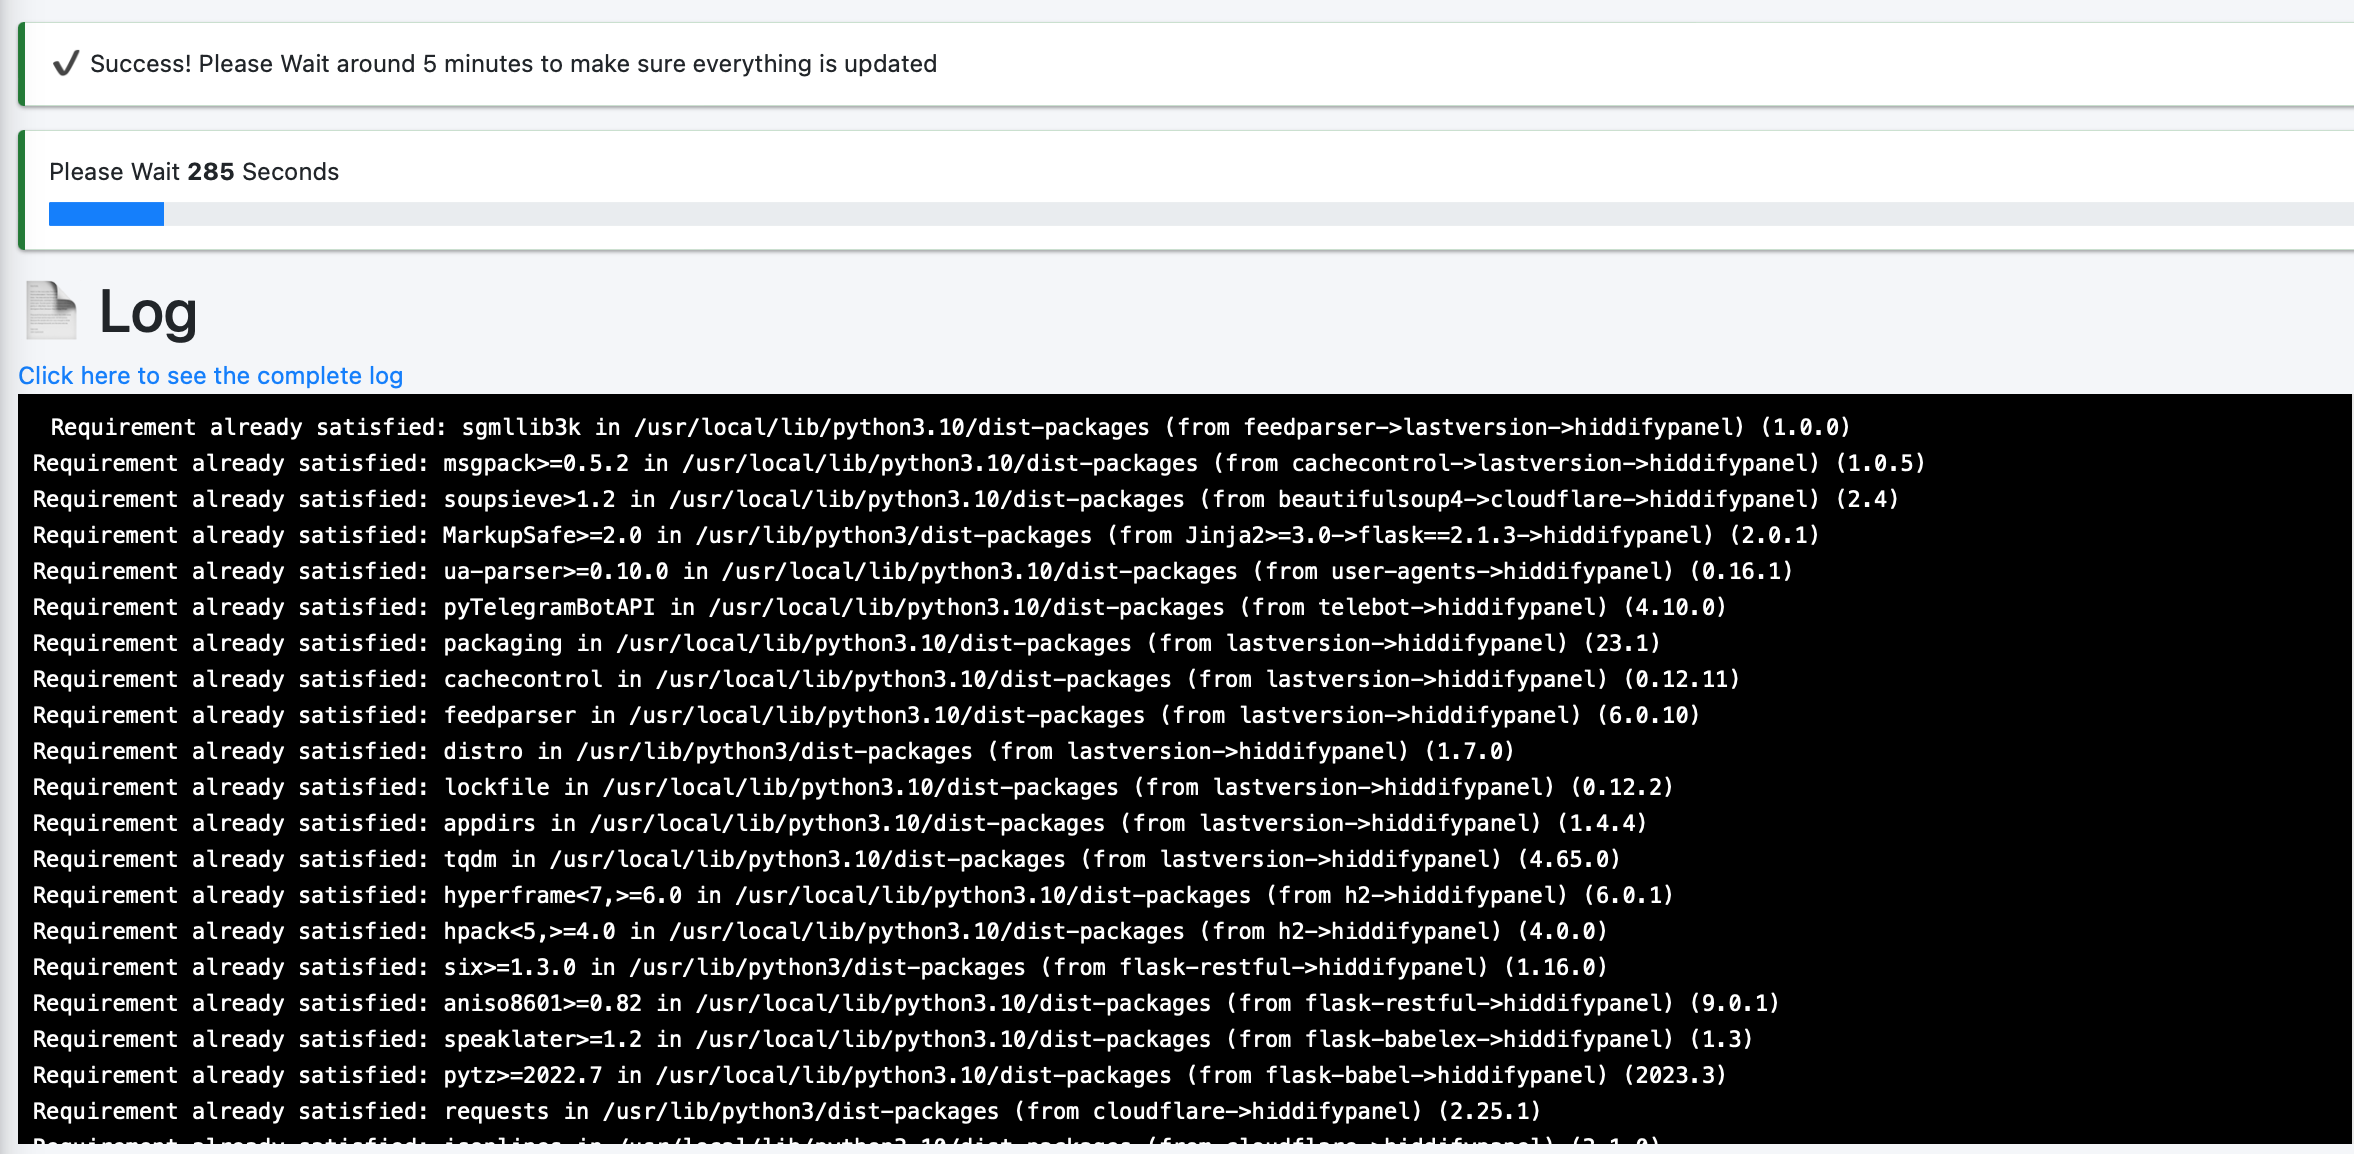
The panel startup script will be executed again and the corresponding log will be displayed. By doing this, the database of users and links will not change, so there is no need to worry, but be sure to copy the emergency link as a precaution.
Sometimes the green message that the operation is successful may not be shown, but through the simulated terminal, you can see the completion of the operation.
If you need to reset the server, you can do it from this section.
After performing this operation, because the system will be restarted once; The page format may be messed up, so don't rush at all and wait at least 5 minutes for the service to be restored
Through this link, you will have access to categorized content and all tutorials and videos.