#HƯỚNG DẪN CÀI ĐẶT OPENSTACK-JUNO TRÊN UBUNTU 14.04.1
Bài viết này tham khảo tại địa chỉ http://docs.openstack.org/juno/install-guide/install/apt/content/
Các mật khẩu trong quá trình cài đặt đều là : osjuno123a@
C. Kiểm tra lại quá trình cài đặt

- Mô hình cài đặt Openstack Juno theo 3 node
####1. Cấu hình địa chỉ IP và hostname
- Cấu hình địa chỉ IP
vi /etc/network/interfaces
# The loopback network interface
auto lo
iface lo inet loopback

# NIC MGNT
auto eth0
iface eth0 inet static
address 10.10.10.200
netmask 255.255.255.0

# NIC EXT
auto eth1
iface eth1 inet static
address 172.16.69.200
netmask 255.255.255.0
gateway 172.16.69.1
dns-nameserver 8.8.8.8- Cấu hình file host
vi /etc/hosts
10.10.10.200 controller
10.10.10.201 network
10.10.10.202 compute
####2. Add Repo và update hệ thống
# apt-get update
# apt-get install ubuntu-cloud-keyring
# echo "deb http://ubuntu-cloud.archive.canonical.com/ubuntu" \
  "trusty-updates/juno main" > /etc/apt/sources.list.d/cloudarchive-juno.list
# apt-get update -y && apt-get dist-upgrade -y- Sau khi update tiến hành reboot hệ thống
# init 6
####3. Cài đặt NTP service
NTP - Network Time protocol, đây là service quan trọng để đồng bộ hóa thời gian giữa các máy chủ trong cùng một hệ thống
- Download và cài đặt NTP service
# apt-get install ntp -y
- Cấu hình NTP service
# vi /etc/ntp.conf
- Sửa dòng
server ntp.ubuntu.com
thành
server 0.vn.pool.ntp.org iburst
server 1.asia.pool.ntp.org iburst
server 2.asia.pool.ntp.org iburst- Sửa đoạn
restrict -6 default kod notrap nomodify nopeer noquery
restrict -4 default kod notrap nomodify nopeer noquery
thành
restrict -4 default kod notrap nomodify
restrict -6 default kod notrap nomodify- Restart NTP service
# service ntp restart
####4. Cài đặt RabbitMQ - Messaging service RabbitMQ là một dịch vụ phục vụ cho việc giao tiếp thông điệp giữa các thành phần trong cùng một project với nhau.
- Download và cài đặt RabbitMQ
# apt-get install rabbitmq-server -y
- Đặt lại mật khẩu cho RabbitMQ
# rabbitmqctl change_password guest osjuno123a@
Changing password for user "guest" ...
...done.
####5. Cài đặt Database server
Openstack và các dịch vụ của nó cần phải có một hệ quản trị cơ sở dữ liệu để lưu trữ thông tin. Ở phiên bản Openstack Kilo, nhà phát triển khuyến cáo sử dụng mariadb-server (Tuy nhiên người dùng cũng có thể sử dụng mysql-server để thay thế cho mariadb-server, tùy vào hoàn cành sử dụng)
- Download và cài đặt mariadb
# apt-get install mariadb-server python-mysqldb -y
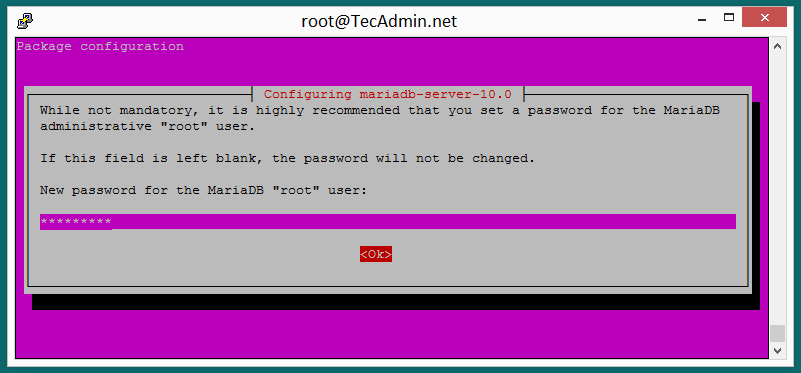
- Nhập mật khẩu cho user root tại bước:
- Cấu hình lại mariadb-server
Cấu hình để cho phép các node khác trong mạng có thể truy cập đến Database server được cài đặt trên controller node, và cấu hình các tùy chọn hữu ích khác.
vi /etc/mysql/my.cnf
Tại section [mysqld] Sửa dòng bind-address = 127.0.0.1 thành đoạn dưới:
bind-address = 0.0.0.0
default-storage-engine = innodb
innodb_file_per_table
collation-server = utf8_general_ci
init-connect = 'SET NAMES utf8'
character-set-server = utf8- Secure database service
# mysql_secure_installation
- Thực hiện tuần tự theo các bước sau
Enter current password for root (enter for none): [your password]
Change the root password? [Y/n]: n
Remove anonymous users? [Y/n]: y
Disallow root login remotely? [Y/n]: y
Remove test database and access to it? [Y/n]: y
Reload privilege tables now? [Y/n]: y- Restart lại mariadb-server
# service mysql restart
- Tạo database cho các project trong Openstack
Các project chính của Openstack gồm có Keystone, Glance, Nova, Neutron, Cinder Mỗi một project này cần một database riêng để lưu trữ cơ sở dữ liệu của mình. Tiến hành tạo lần lượt database cho các project tương ứng ở trên.
# mysql -u root -posjuno123a@
CREATE DATABASE keystone;
GRANT ALL PRIVILEGES ON keystone.* TO 'keystone'@'%' IDENTIFIED BY 'osjuno123a@';
GRANT ALL PRIVILEGES ON keystone.* TO 'keystone'@'localhost' IDENTIFIED BY 'osjuno123a@';
GRANT ALL PRIVILEGES ON keystone.* TO 'keystone'@'10.10.10.200' IDENTIFIED BY 'osjuno123a@';

CREATE DATABASE glance;
GRANT ALL PRIVILEGES ON glance.* TO 'glance'@'%' IDENTIFIED BY 'osjuno123a@';
GRANT ALL PRIVILEGES ON glance.* TO 'glance'@'localhost' IDENTIFIED BY 'osjuno123a@';
GRANT ALL PRIVILEGES ON glance.* TO 'glance'@'10.10.10.200' IDENTIFIED BY 'osjuno123a@';

CREATE DATABASE nova;
GRANT ALL PRIVILEGES ON nova.* TO 'nova'@'%' IDENTIFIED BY 'osjuno123a@';
GRANT ALL PRIVILEGES ON nova.* TO 'nova'@'localhost' IDENTIFIED BY 'osjuno123a@';
GRANT ALL PRIVILEGES ON nova.* TO 'nova'@'10.10.10.200' IDENTIFIED BY 'osjuno123a@';

CREATE DATABASE neutron;
GRANT ALL PRIVILEGES ON neutron.* TO 'neutron'@'%' IDENTIFIED BY 'osjuno123a@';
GRANT ALL PRIVILEGES ON neutron.* TO 'neutron'@'localhost' IDENTIFIED BY 'osjuno123a@';
GRANT ALL PRIVILEGES ON neutron.* TO 'neutron'@'10.10.10.200' IDENTIFIED BY 'osjuno123a@';

CREATE DATABASE cinder;
GRANT ALL PRIVILEGES ON cinder.* TO 'cinder'@'%' IDENTIFIED BY 'osjuno123a@';
GRANT ALL PRIVILEGES ON cinder.* TO 'cinder'@'localhost' IDENTIFIED BY 'osjuno123a@';
GRANT ALL PRIVILEGES ON cinder.* TO 'cinder'@'10.10.10.200' IDENTIFIED BY 'osjuno123a@';

exit;
####6. Cài đặt Keystone
Keystone - Identity Service là một project trong Openstack, có nhiệm vụ chính là kiểm soát, xác thực người dùng, tenant, và giữa các dịch vụ trong Openstack
- Cài đặt Keystone
# apt-get install keystone python-keystoneclient -y
- Cấu hình Keystone
# vi /etc/keystone/keystone.conf
[DEFAULT]
...
admin_token=osjuno123a@
verbose = True
[database]
...
connection = mysql://keystone:osjuno123a@@10.10.10.200/keystone
[token]
...
provider = keystone.token.providers.uuid.Provider
driver = keystone.token.persistence.backends.sql.Token- Xóa database mặc định và đồng bộ lại database của keystone
# rm -f /var/lib/keystone/keystone.db
# su -s /bin/sh -c "keystone-manage db_sync" keystone- Restart Keystone
# service keystone restart
- Xóa các token hết hạn
Theo mặc định, Identity service sẽ vẫn lưu các token hết hạn trong database, điều này làm tăng kích thước của database và giảm hiệu suất dịch vụ. Để cấu hình xóa các token hết hạn này theo 1 giờ ta thực hiện câu lệnh sau:
# (crontab -l -u keystone 2>&1 | grep -q token_flush) || \
  echo '@hourly /usr/bin/keystone-manage token_flush >/var/log/keystone/keystone-tokenflush.log 2>&1' \
>> /var/spool/cron/crontabs/keystone- Tạo các Tenant, User, Role
Dịch vụ xác thực (Identity service) trong Open stack ngoài nhiệm vụ xác thực người dùng, còn được dùng để xác thực và ủy quyền giữa các dịch vụ với nhau trong Openstack. Để tạo các user, service entity, service endpoint tương ứng cho từng dịch vụ ta thực hiện tuần tự theo các bước sau:
- Tạo tenant admin và user admin
export OS_SERVICE_TOKEN=osjuno123a@
export OS_SERVICE_ENDPOINT=http://10.10.10.200:35357/v2.0
keystone tenant-create --name admin --description "Admin Tenant"
keystone user-create --name admin --pass osjuno123a@ --email admin_osjuno@gmail.com
keystone role-create --name admin
keystone user-role-add --user admin --tenant admin --role admin
Chú ý: OS_SERVICE_TOKEN phải trùng với admin_token ở file /etc/keystone/keystone.conf vừa khai báo ở trên
- Tạo tenant service và các service user
keystone tenant-create --name service --description "Service Tenant"
keystone user-create --name glance --pass osjuno123a@
keystone user-create --name nova --pass osjuno123a@
keystone user-create --name neutron --pass osjuno123a@
keystone user-create --name cinder --pass osjuno123a@
keystone user-role-add --user glance --tenant service --role admin
keystone user-role-add --user nova --tenant service --role admin
keystone user-role-add --user neutron --tenant service --role admin
keystone user-role-add --user cinder --tenant service --role admin- Tạo các service entity cho từng service ở bước trên
keystone service-create --name keystone --type identity \
  --description "OpenStack Identity"
keystone service-create --name glance --type image \
  --description "OpenStack Image Service"
keystone service-create --name nova --type compute \
  --description "OpenStack Compute"
keystone service-create --name neutron --type network \
  --description "OpenStack Networking"
keystone service-create --name cinder --type volume \
--description "OpenStack Block Storage"- Tạo các endpoint tương ứng cho từng service
keystone endpoint-create \
  --service-id $(keystone service-list | awk '/ identity / {print $2}') \
  --publicurl http://10.10.10.200:5000/v2.0 \
  --internalurl http://10.10.10.200:5000/v2.0 \
  --adminurl http://10.10.10.200:35357/v2.0 \
  --region regionOne

keystone endpoint-create \
  --service-id $(keystone service-list | awk '/ image / {print $2}') \
  --publicurl http://10.10.10.200:9292 \
  --internalurl http://10.10.10.200:9292 \
  --adminurl http://10.10.10.200:9292 \
  --region regionOne

keystone endpoint-create \
  --service-id $(keystone service-list | awk '/ compute / {print $2}') \
  --publicurl http://10.10.10.200:8774/v2/%\(tenant_id\)s \
  --internalurl http://10.10.10.200:8774/v2/%\(tenant_id\)s \
  --adminurl http://10.10.10.200:8774/v2/%\(tenant_id\)s \
  --region regionOne

keystone endpoint-create \
  --service-id $(keystone service-list | awk '/ network / {print $2}') \
  --publicurl http://10.10.10.200:9696 \
  --adminurl http://10.10.10.200:9696 \
  --internalurl http://10.10.10.200:9696 \
  --region regionOne

keystone endpoint-create \
  --service-id $(keystone service-list | awk '/ volume / {print $2}') \
  --publicurl http://10.10.10.200:8776/v1/%\(tenant_id\)s \
  --internalurl http://10.10.10.200:8776/v1/%\(tenant_id\)s \
  --adminurl http://10.10.10.200:8776/v1/%\(tenant_id\)s \
--region regionOne- Tạo script biến môi trường
Script này để khi thực thi sẽ lấy thông tin về tài khoản admin (Giống như khi đăng nhập và sử dụng Openstack bằng tài khoản admin), phục vụ cho các hoạt động sau này.
vi admin-openrc.sh
Với nội dung sau
export OS_TENANT_NAME=admin
export OS_USERNAME=admin
export OS_PASSWORD=osjuno123a@
export OS_AUTH_URL=http://10.10.10.200:35357/v2.0
####7. Cài đặt Glance
Glance - Image Service là một project để quản lý (tạo, sửa, xóa) các file image phục vụ cho quá trình launch máy ảo trong hệ thống Openstack.
- Download và cài đặt:
# apt-get install glance python-glanceclient -y
- Cấu hình Glance API
# vi /etc/glance/glance-api.conf
[database]
...
connection = mysql://glance:osjuno123a@@10.10.10.200/glance

[keystone_authtoken]
...
auth_uri = http://10.10.10.200:5000/v2.0
identity_uri = http://10.10.10.200:35357
admin_tenant_name = service
admin_user = glance
admin_password = osjuno123a@

[paste_deploy]
...
flavor = keystone

[glance_store]
...
default_store = file
filesystem_store_datadir = /var/lib/glance/images/

[DEFAULT]
...
notification_driver = noop
verbose = True
rabbit_host = 10.10.10.200
rabbit_password = osjuno123a@
qpid_hostname = 10.10.10.200- Cấu hình Glance registry
# vi /etc/glance/glance-registry.conf
[database]
...
connection = mysql://glance:osjuno123a@@10.10.10.200/glance

[keystone_authtoken]
...
auth_uri = http://10.10.10.200:5000/v2.0
identity_uri = http://10.10.10.200:35357
admin_tenant_name = service
admin_user = glance
admin_password = osjuno123a@

[paste_deploy]
...
flavor = keystone
[DEFAULT]
...
notification_driver = noop
verbose = True
rabbit_host = 10.10.10.200
rabbit_password = osjuno123a@
qpid_hostname = 10.10.10.200- Xóa database mặc định của Glance và đồng bộ lại database:
# rm -f /var/lib/glance/glance.sqlite
# su -s /bin/sh -c "glance-manage db_sync" glance- Restart lại Glance:
#service glance-registry restart
#service glance-api restart
####8. Cài đặt Nova
Nova - Compute service là một project trong Openstack có nhiệm vụ chính trong việc quản lý (tạo, sửa, xóa) máy ảo.
- Download và cài đặt Nova
apt-get install nova-api nova-cert nova-conductor nova-consoleauth \
nova-novncproxy nova-scheduler python-novaclient -y- Cấu hình Nova
vi /etc/nova/nova.conf
[database]
...
connection = mysql://nova:osjuno123a@@10.10.10.200/nova

[DEFAULT]
...
rpc_backend = rabbit
rabbit_host = 10.10.10.200
rabbit_password = osjuno123a@
auth_strategy = keystone
my_ip = 10.10.10.200
vncserver_listen = 10.10.10.200
vncserver_proxyclient_address = 10.10.10.200
verbose = True

[keystone_authtoken]
...
auth_uri = http://10.10.10.200:5000/v2.0
identity_uri = http://10.10.10.200:35357
admin_tenant_name = service
admin_user = nova
admin_password = osjuno123a@

[glance]
...
host = 10.10.10.200- Xóa database mặc định và đồng bộ lại database cho Nova
# rm -f /var/lib/nova/nova.sqlite
# su -s /bin/sh -c "nova-manage db sync" nova- Restart lại Nova
service nova-api restart
service nova-cert restart
service nova-consoleauth restart
service nova-scheduler restart
service nova-conductor restart
service nova-novncproxy restart
####9. Cài đặt Neutron
Neutron - Network component là thành phần trong Openstack phụ trách toàn bộ về network cho các máy vật lý và các máy ảo bên trong.
- Download và cài đặt Neutron
# apt-get install neutron-server neutron-plugin-ml2 python-neutronclient -y
- Cấu hình Neutron
# vi /etc/neutron/neutron.conf
[database]
...
connection = mysql://neutron:osjuno123a@@10.10.10.200/neutron

[DEFAULT]
...
rpc_backend = rabbit
rabbit_host = 10.10.10.200
rabbit_password = osjuno123a@
auth_strategy = keystone
core_plugin = ml2
service_plugins = router
allow_overlapping_ips = True
notify_nova_on_port_status_changes = True
notify_nova_on_port_data_changes = True
nova_url = http://10.10.10.200:8774/v2
nova_admin_auth_url = http://10.10.10.200:35357/v2.0
nova_region_name = regionOne
nova_admin_username = nova
nova_admin_tenant_id = 4636e2407a73422e8158bab7d7f9b53f
nova_admin_password = osjuno123a@
verbose = True

[keystone_authtoken]
...
auth_uri = http://10.10.10.200:5000/v2.0
identity_uri = http://10.10.10.200:35357
admin_tenant_name = service
admin_user = neutron
admin_password = osjuno123a@
Chú ý nova_admin_tenant_id = , Ta dùng lệnh keystone tenant-get service để lấy id tương ứng
- Cấu hình ml2-plugin
vi /etc/neutron/plugins/ml2/ml2_conf.ini
[ml2]
...
type_drivers = flat,gre
tenant_network_types = gre
mechanism_drivers = openvswitch

[ml2_type_gre]
...
tunnel_id_ranges = 1:1000

[securitygroup]
...
enable_security_group = True
enable_ipset = True
firewall_driver = neutron.agent.linux.iptables_firewall.OVSHybridIptablesFirewallDriver- Cấu hình Nova sử dụng neutron phục vụ network cho các máy ảo
vi /etc/nova/nova.conf
[DEFAULT]
...
network_api_class = nova.network.neutronv2.api.API
security_group_api = neutron
linuxnet_interface_driver = nova.network.linux_net.LinuxOVSInterfaceDriver
firewall_driver = nova.virt.firewall.NoopFirewallDriver

[neutron]
...
url = http://10.10.10.200:9696
auth_strategy = keystone
admin_auth_url = http://10.10.10.200:35357/v2.0
admin_tenant_name = service
admin_username = neutron
admin_password = osjuno123a@- Đồng bộ neutron database
# su -s /bin/sh -c "neutron-db-manage --config-file /etc/neutron/neutron.conf \
--config-file /etc/neutron/plugins/ml2/ml2_conf.ini upgrade juno" neutron- Restart nova
service nova-api restart
service nova-scheduler restart
service nova-conductor restart- Restart Neutron
service neutron-server restartCài đặt cinder
- Tạo Physical Volume và Volume Group
fdisk -l
pvcreate /dev/vdb
vgcreate cinder-volumes /dev/vdb
Chú ý thay thế vdb với ổ đĩa tương ứng. Để thực hiện việc này ta sử dụng lệnh lsblk như sau:

- Cài đặt Cinder
apt-get install -y cinder-api cinder-scheduler cinder-volume iscsitarget open-iscsi iscsitarget-dkms python-cinderclient lvm2
- Cấu hình cinder
vi /etc/cinder/cinder.conf
[DEFAULT]
verbose = True

rootwrap_config = /etc/cinder/rootwrap.conf
api_paste_confg = /etc/cinder/api-paste.ini
iscsi_helper = tgtadm
volume_name_template = volume-%s
volume_group = cinder-volumes
verbose = True
auth_strategy = keystone
state_path = /var/lib/cinder
lock_path = /var/lock/cinder
volumes_dir = /var/lib/cinder/volumes

auth_strategy = keystone

rpc_backend = rabbit
rabbit_host = 10.10.10.200
rabbit_password = osjuno123a@

my_ip = 10.10.10.200

[keystone_authtoken]
auth_uri = http://10.10.10.200:5000/v2.0
identity_uri = http://10.10.10.200:35357
admin_tenant_name = service
admin_user = cinder
admin_password = osjuno123a@

[database]
connection = mysql://cinder:osjuno123a@@10.10.10.200/cinder- Đồng bộ Database
su -s /bin/sh -c "cinder-manage db sync" cinder
- Restart Cinder
service cinder-api restart
service cinder-scheduler restart
service cinder-volume restart####1. Cấu hình địa chỉ IP và hostname
- Cấu hình địa chỉ IP
vi /etc/network/interfaces
# The loopback network interface
auto lo
iface lo inet loopback

# NIC MGNT
auto eth0
iface eth0 inet static
address 10.10.10.201
netmask 255.255.255.0

# NIC EXT
auto eth1
iface eth1 inet static
address 172.16.69.201
netmask 255.255.255.0
gateway 172.16.69.1
dns-nameserver 8.8.8.8

# NIC DATA VM
auto eth2
iface eth2 inet static
address 10.10.20.201
netmask 255.255.255.0
ifdown -a && ifup -a
- Cấu hình file host
vi /etc/hosts
10.10.10.200 controller
10.10.10.201 network
10.10.10.202 compute
####2. Add Repo và update hệ thống
# apt-get update
# apt-get install ubuntu-cloud-keyring
# echo "deb http://ubuntu-cloud.archive.canonical.com/ubuntu" \
  "trusty-updates/juno main" > /etc/apt/sources.list.d/cloudarchive-juno.list
# apt-get update -y && apt-get dist-upgrade -y- Sau khi update tiến hành reboot hệ thống
# init 6
####3. Cài đặt NTP và các gói bổ trợ cần thiết
# apt-get install ntp python-mysqldb -y
- Cấu hình NTP:
# vi /etc/ntp.conf
Comment lại các dòng sau
#server 0.ubuntu.pool.ntp.org
#server 1.ubuntu.pool.ntp.org
#server 2.ubuntu.pool.ntp.org
#server 3.ubuntu.pool.ntp.org
Sửa dòng
server ntp.ubuntu.com thành server 10.10.10.200 iburst
- Restart lại NTP
# service ntp restart
####4. Cài đặt Neutron
- Cấu hình các thông số mạng
echo "net.ipv4.ip_forward=1" >> /etc/sysctl.conf
echo "net.ipv4.conf.all.rp_filter=0" >> /etc/sysctl.conf
echo "net.ipv4.conf.default.rp_filter=0" >> /etc/sysctl.conf
# sysctl -p
- Download và cài đặt Neutron
apt-get install neutron-plugin-ml2 neutron-plugin-openvswitch-agent \
neutron-l3-agent neutron-dhcp-agent -y- Cấu hình neutron-dhcp-agent
vi /etc/neutron/neutron.conf
[DEFAULT]
...
rpc_backend = rabbit
rabbit_host = 10.10.10.200
rabbit_password = osjuno123a@
auth_strategy = keystone
core_plugin = ml2
service_plugins = router
allow_overlapping_ips = True
verbose = True

[keystone_authtoken]
...
auth_uri = http://10.10.10.200:5000/v2.0
identity_uri = http://10.10.10.200:35357
admin_tenant_name = service
admin_user = neutron
admin_password = osjuno123a@- Cấu hình ml2-plugin
vi /etc/neutron/plugins/ml2/ml2_conf.ini
[ml2]
...
type_drivers = flat,gre
tenant_network_types = gre
mechanism_drivers = openvswitch

[ml2_type_flat]
...
flat_networks = external

[securitygroup]
...
enable_security_group = True
enable_ipset = True
firewall_driver = neutron.agent.linux.iptables_firewall.OVSHybridIptablesFirewallDriver

[ovs]
...
local_ip = 10.10.20.201 #(Chu y: la ip cua may network theo dai vm-data)
enable_tunneling = True
bridge_mappings = external:br-ex

[agent]
...
tunnel_types = gre- Cấu hình l3-agent
vi /etc/neutron/l3_agent.ini
[DEFAULT]
...
interface_driver = neutron.agent.linux.interface.OVSInterfaceDriver
use_namespaces = True
external_network_bridge = br-ex
verbose = True- Cấu hình dhcp-agent
vi /etc/neutron/dhcp_agent.ini
[DEFAULT]
...
interface_driver = neutron.agent.linux.interface.OVSInterfaceDriver
dhcp_driver = neutron.agent.linux.dhcp.Dnsmasq
use_namespaces = True
verbose = True- Cấu hình metadata agent
vi /etc/neutron/metadata_agent.ini
[DEFAULT]
...
auth_url = http://10.10.10.200:5000/v2.0
auth_region = regionOne
admin_tenant_name = service
admin_user = neutron
admin_password = osjuno123a@
nova_metadata_ip = 10.10.10.200
metadata_proxy_shared_secret = osjuno123a@
verbose = True- QUAY LẠI CONTROLLER NODE
vi /etc/nova/nova.conf
[neutron]
...
service_metadata_proxy = True
metadata_proxy_shared_secret = osjuno123a@- Restart nova trên controller node
service nova-api restart
####5. Cấu hình dịch vụ OpenVswitch
OVS giúp tạo ra mạng ảo cho các instance. br-int xử lý traffic bên trong, br-ex xử lý các traffic bên ngoài. Vì thế br-ex cần dùng một interface vật lý bên ngoài để cho phép các truy cập mạng bên ngoài. Về bản chất, cổng này kết nối mạng ảo với mạng vật lý bên ngoài
Tại network node
- Restart OVS
service openvswitch-switch restart
- Tạo external-br
ovs-vsctl add-br br-ex
ovs-vsctl add-port br-ex eth1
Chú ý: Sau khi thực hiện bước tạo external-br và add port br-ex vào eth1 sẽ bị mất kết nối ssh đến network node, để thực hiện các cấu hình tiếp theo ta có nhiều cách để truy cập vào network node. Có thể cấu hình trực tiếp trên máy ảo VMware, hoặc từ máy controller ta sử dụng câu lệnh ssh uvdc@10.10.10.201 sau đó nhập password để truy cập vào máy network với username là uvdc theo dải mạng management nối giữa các máy
- Tạm thời vô hiệu hóa GRO trên external interface
ethtool -K eth1 gro off
- Cấu hình lại mạng cho network node
vi /etc/network/interfaces
auto lo
iface lo inet loopback

auto eth0
iface eth0 inet static
address 10.10.10.201
netmask 255.255.255.0
network 10.10.10.0

auto eth1
iface eth1 inet manual
up ifconfig $IFACE 0.0.0.0 up
up ip link set $IFACE promisc on
down ip link set $IFACE promisc off
down ifconfig $IFACE down

auto br-ex
iface br-ex inet static
address 172.16.69.201
netmask 255.255.255.0
network 172.16.69.0
gateway 172.16.69.1
dns-nameserver 8.8.8.8

auto eth2
iface eth2 inet static
address 10.10.20.201
netmask 255.255.255.0
network 10.10.20.0- restart lại network node
init 6
####1. Cấu hình địa chỉ IP và hostname
- Cấu hình địa chỉ IP
vi /etc/network/interfaces
# The loopback network interface
auto lo
iface lo inet loopback

# NIC MGNT
auto eth0
iface eth0 inet static
address 10.10.10.202
netmask 255.255.255.0

# NIC EXT
auto eth1
iface eth1 inet static
address 172.16.69.202
netmask 255.255.255.0
gateway 172.16.69.1
dns-nameserver 8.8.8.8

# NIC DATA VM
auto eth2
iface eth2 inet static
address 10.10.20.202
netmask 255.255.255.0
ifdown -a && ifup -a
- Cấu hình file host
vi /etc/hosts
10.10.10.200 controller
10.10.10.201 network
10.10.10.202 compute
####2. Add Repo và update hệ thống
# apt-get update
# apt-get install ubuntu-cloud-keyring
# echo "deb http://ubuntu-cloud.archive.canonical.com/ubuntu" \
  "trusty-updates/juno main" > /etc/apt/sources.list.d/cloudarchive-juno.list
# apt-get update -y && apt-get dist-upgrade -y- Sau khi update tiến hành reboot hệ thống
# init 6
####3. Cài đặt NTP và các gói bổ trợ cần thiết
# apt-get install ntp python-mysqldb -y
- Cấu hình NTP:
# vi /etc/ntp.conf
Comment lại các dòng sau
#server 0.ubuntu.pool.ntp.org
#server 1.ubuntu.pool.ntp.org
#server 2.ubuntu.pool.ntp.org
#server 3.ubuntu.pool.ntp.org
Sửa dòng
server ntp.ubuntu.com thành server 10.10.10.200 iburst
- Restart lại NTP
# service ntp restart
####4. Download và cài đặt Nova
apt-get install nova-compute sysfsutils -y
vi /etc/nova/nova.conf
[DEFAULT]
...
rpc_backend = rabbit
rabbit_host = 10.10.10.200
rabbit_user = guest
rabbit_password = osjuno123a@
auth_strategy = keystone
my_ip = 10.10.10.202
vnc_enabled = True
vncserver_listen = 0.0.0.0
vncserver_proxyclient_address = 10.10.10.202
novncproxy_base_url = http://10.10.10.200:6080/vnc_auto.html
verbose = True

[keystone_authtoken]
...
auth_uri = http://10.10.10.200:5000/v2.0
identity_uri = http://10.10.10.200:35357
admin_tenant_name = service
admin_user = nova
admin_password = osjuno123a@

[glance]
...
host = 10.10.10.200- Xác định xem compute node có hỗ trợ KVM không
egrep -c '(vmx|svm)' /proc/cpuinfo
Nếu trả về giá trị >= 1 thì compute node hỗ trợ KVM và không cần cấu hình thêm.
Nếu trả về giá trị = 0 thì phải cấu hình lại để compute node sử dụng nền tảng ảo hóa qemu
vi /etc/nova/nova-compute.conf
[libvirt]
...
virt_type = qemu- Restart Nova
service nova-compute restart
- Xóa database mặc định của nova
rm -f /var/lib/nova/nova.sqlite
####5. Cài đặt Neutron
- Cấu hình các thông số mạng
echo >> "net.ipv4.conf.all.rp_filter=0" /etc/sysctl.conf
echo >> "net.ipv4.conf.default.rp_filter=0" /etc/sysctl.conf
sysctl -p
- Cài đặt Neutron
apt-get install neutron-plugin-ml2 neutron-plugin-openvswitch-agent -y
- Cấu hình neutron trên compute node
vi /etc/neutron/neutron.conf
[DEFAULT]
...
rpc_backend = rabbit
rabbit_host = 10.10.10.200
rabbit_password = osjuno123a@
auth_strategy = keystone
core_plugin = ml2
service_plugins = router
allow_overlapping_ips = True
verbose = True

[keystone_authtoken]
...
auth_uri = http://10.10.10.200:5000/v2.0
identity_uri = http://10.10.10.200:35357
admin_tenant_name = service
admin_user = neutron
admin_password = osjuno123a@- Cấu hình ml2-plugin-ml2
vi /etc/neutron/plugins/ml2/ml2_conf.ini
[ml2]
...
type_drivers = flat,gre
tenant_network_types = gre
mechanism_drivers = openvswitch

[ml2_type_gre]
...
tunnel_id_ranges = 1:1000

[securitygroup]
...
enable_security_group = True
enable_ipset = True
firewall_driver = neutron.agent.linux.iptables_firewall.OVSHybridIptablesFirewallDriver

[ovs]
...
local_ip = 10.10.20.202
enable_tunneling = True

[agent]
...
tunnel_types = gre- Cấu hình OVS
service openvswitch-switch restart
vi /etc/nova/nova.conf
[DEFAULT]
...
network_api_class = nova.network.neutronv2.api.API
security_group_api = neutron
linuxnet_interface_driver = nova.network.linux_net.LinuxOVSInterfaceDriver
firewall_driver = nova.virt.firewall.NoopFirewallDriver
[neutron]
...
url = http://10.10.10.200:9696
auth_strategy = keystone
admin_auth_url = http://10.10.10.200:35357/v2.0
admin_tenant_name = service
admin_username = neutron
admin_password = osjuno123a@- Restart Nova
service nova-compute restart
- Restart OVS
service neutron-plugin-openvswitch-agent restart
Sau khi thực hiện xong các bước cài đặt ở trên tất cả các node, ta quay lại controller node và thực hiện cài đặt horizon-dashboard
- Cài đặt Openstack-dashboard
apt-get install openstack-dashboard apache2 libapache2-mod-wsgi memcached python-memcache -y
- Xóa theme mặc định Ubuntu
dpkg --purge openstack-dashboard-ubuntu-theme
REBOOT tất cả các node
- Truy cập vào địa chỉ http://172.16.69.200/horizon

Đăng nhập với username/password: admin/osjuno123a@
#C . Kiểm tra lại quá trình cài đặt
####a. Kiểm tra hoạt động của các dịch vụ
-
Vào controller node kiểm tra các dịch vụ đã hoạt động tốt chưa


- Truy cập vào địa chỉ http://172.16.69.200/horizon
- Chọn admin -> networks

- Chọn Create network

- Nhập các thông tin -> Create network

-
#####Tạo subnet cho external network
-
Chọn external

- Chọn Create Subnet

- Nhập thông tin cần thiết -> Next

- Nhập các địa chỉ được cho phép sử dụng ở dải external ->create

- Thông báo như sau là thành công

- Để tạo mới một internal network: Chọn Project -> Networks

- Chọn Create Network

- Nhập các thông tin cho internal network -> Next

- Tạo subnet cho internal network

- Add các địa chỉ được sử dụng trong dải internal -> create

- Để tạo router chọn Project -> Network -> Router
 - *Chọn create router*

- Đặt tên cho router -> chọn Next

- Đặt gateway cho router cho phép ra mạng bên ngoài

- Chọn external -> Set Gateway

-
**Thêm 1 interface mới cho mạng bên trong đi qa router**
- Click chọn Router

- Chọn Internal network -> Add interface

####e. Kiểm tra lại mô hình mạng
- Để kiểm tra mô hình mạng ta chọn Project -> Network -> Network Topology

- Chọn Normal

- Để khởi tạo 1 instace ta chọn Project -> Compute -> Instances

- Chọn Launch instance

- Chọn các cấu hình như sau -> Launch

- Tại phần Network chọn Internal (click vào dấu +) -> Launch

- Clik chọn vào instance vừa khởi tạo

- Chọn console

- Đăng nhập với username/password hiển thị trên màn hình

- Kiểm tra kết nối của instace

Cài đặt openstack thành công
http://docs.openstack.org/juno/install-guide/install/apt/content/
https://github.com/vietstacker/openstack-juno-multinode-U14.04-v1
Video hướng dẫn sử dụng dashboard https://www.youtube.com/watch?v=O119UIscdvg
Video hướng dẫn cài đặt Openstack Juno bằng shell script https://www.youtube.com/watch?v=IaZtWQmDjks