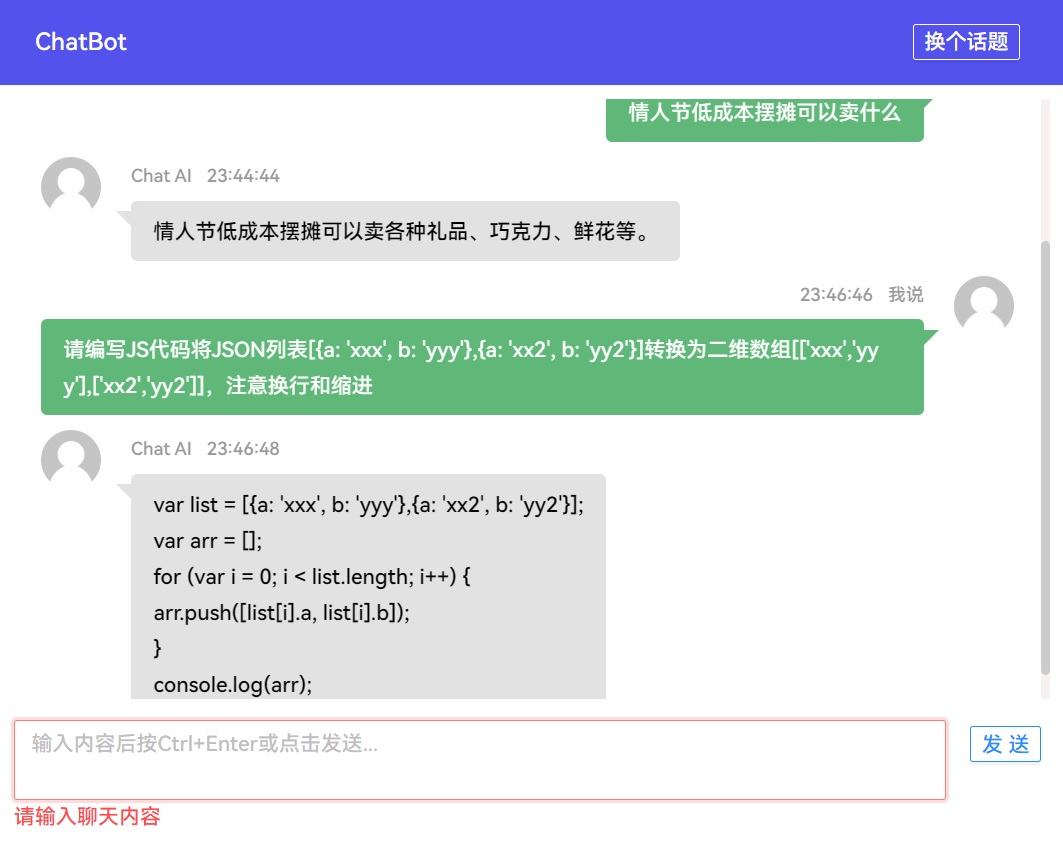
A web application based on OpenAI API with streamed message communication, Markdown and Latex rendering support. Demo
一个基于OpenAI API的Web聊天机器人,使用流式消息传输,支持Markdown渲染、Latex渲染。Demo
Please ensure the dependencies below have been installed.
请确保已安装以下环境
- Python 3
- NodeJs 16
- Nginx
- Git
Then clone this repository.
然后克隆这个Repo
git clone https://github.com/huanghaozi/chatbot.gitUse command below to install dependencies.
使用如下命令安装依赖
cd backend
pip install -r requirements.txtPlease modify the API Key in backend/main.py before running.
在运行main.py前,请修改backend/main.py中的API Key
Then run main.py normally for test.
然后正常运行main.py进行测试
python main.pyPlease create a configure file whose content is like below (Please replace the {content} depend on your environment), a reference for its path is /etc/systemd/system/chatbot-backend.service,
请创建一个配置文件,内容如下(请将{带花括号内容}根据您的环境替换掉),路径参考/etc/systemd/system/chatbot-backend.service
Attention: Please modify the code to generate secret_key randomly to fixed cause that different worker might use different key if randomly
请注意: 由于worker运行在不同进程上,随机生成key可能导致会话无法保持,请将后端代码中随机生成key的代码app.config['SECRET_KEY'] = os.urandom(24)替换为自定义key
[Unit]
Description=Gunicorn instance to serve chatbot backend
After=network.target

[Service]
WorkingDirectory=/{path-to-project}/backend
Environment="PATH=/{path-to-python}/bin"
ExecStart=/{path-to-python}/bin/gunicorn -w4 -b127.0.0.1:1217 main:app --timeout 300

[Install]
WantedBy=multi-user.target
Then enable and start the service using systemctl command as below.
然后使用systemctl命令启用并打开这个服务,内容如下
systemctl enable chatbot-backend.service
systemctl start chatbot-backend.servicePlease add a piece of code in Nginx configuration file as below and replace your.domain.com to yours.
请将如下代码添加进Nginx配置文件中,并将your.domain.com换成您自己的域名
server {
    listen 80;
    server_name your.domain.com;
    location / {
         add_header Access-Control-Allow-Origin *;
         add_header Access-Control-Allow-Methods 'GET, POST, OPTIONS';
         add_header Access-Control-Allow-Headers 'DNT,X-Mx-ReqToken,Keep-Alive,User-Agent,X-Requested-With,If-Modified-Since,Cache-Control,Content-Type,Authorization';
         proxy_set_header Connection '';
         proxy_http_version 1.1;
         chunked_transfer_encoding off;
         proxy_buffering off;
         proxy_cache off;
         proxy_pass http://127.0.0.1:1217/;
    }
}
Use command below to install dependencies.
使用如下命令安装依赖
npm installOr use yarn if you can
有条件也可以用Yarn
yarn installUse command below to generate code for production.
使用如下命令生成生产环境代码
npm run buildOr use yarn if you can
有条件也可以用Yarn
yarn run buildUse configuration below to deploy the frontend project. Please replace your.domain.com and {path-to-dist} depend on your environment to get the configuration valid.
使用如下Nginx配置部署前端,请根据您自己的环境修改your.domain.com and {path-to-dist}使配置生效
server {
    listen 80;
    server_name your.domain.com;
    location / {
        root /{path-to-dist};
        index index.html index.htm;
    }
}
Please ensure that your domain DNS configuration is right. And then use the command below to test if Nginx configuration is valid.
请确保您正确配置了域名DNS服务,然后使用如下命令测试Nginx配置文件的有效性
sudo nginx -tAfter these steps, you can restart the Nginx service to apply the configuration.
完成以上步骤后,您可以重启Nginx服务以应用配置
sudo service nginx restart