This is a collection of Python tools for map classification, that is, the automated extraction of geo-spatial information from cartographic maps in bitmap format.
The code is very much work in progress. It's currently just a collection of classes and methods, distributed across several stand-alone modules that have proven useful for my own work. If it turns out to be sufficiently generic, I might package this eventually.
You're happily invited to contribute, just leave me a message!
The PixelClassifier class in the pixel_classifier.py module performs supervised color-based image pixel classification. Since documentation is missing, I'll provide a brief usage example (which is also contained in the pc_example.py script).
First, we load the module, as well as OpenCV's Python bindings, and import the image to be classified (the "target map"). In this case, a publicly available CIA map of Iraq, stored in the data folder of this project
from pixel_classifier import PixelClassifier
import cv2
# Load image to be classified
target_im = cv2.imread("data/cia_iraq_physiography.jpg")
Next, we load two training images, which were created "by hand" using GIMP. The first image ("data/iraq_train1.png") simply contains largely arbitrary extracts of the target map. The second one is a duplicate of the first, but all pixels to be identified in the classification routine are marked with an identification color. In this case, the identification color is a perfect green (RGB=[0, 255, 0]), which is never observed in the target map. These images provide the training data for the classification routine. Once a model is fitted using these training data, it may be used to classify any map employing the same coloring scheme.
# Load training images
unclass_im = cv2.imread("data/iraq_train1.png")
class_im = cv2.imread("data/iraq_train2.png")
Next, we initialize a PixelClassifier instance and set the training images with the according method.
# Initialize PixelClassifier instance and set training images
pc = PixelClassifier()
pc.set_training_images(im_class=class_im, im_orig=unclass_im)
Perfect green is the default identification color implemented in the set_training_images method. In case another color was chosen for the training images, it can be set via the lothres and upthres attributes, which specify an according region in the RGB color space.
Next, we identify an appropriate classification model via tuning. That is, we estimate a number of candidate models using different input parameters, evaluate their performance using k-fold cross validation and accuracy scores, and select the best one as our pixel classifier. The tune method takes several lists with parameter ranges as an input, and all possible permutations of these input parameters are swept. The model that is being fitted under the hood is a random forest classifier, and the first list passed to the tune method (n_estimators_list) refers to the number of trees to be used in the model. All other lists passed to the tune method define the filter to be applied to the input image before it is transformed into tabular training data. Applying a filter to the image data prior to classification removes noise from the image, and thus greatly improves performance. The only currently implemented filter is the bilateral filter, which has proven very useful for a number of applications. The final argument, cv, controls the number of folds to be used in cross validation.
# Tune classifier
pc.tune(n_estimators_list=[10], filtername_list=["bilateral"], filter_d_list=range(5,30,5), filter_sigmacolor_list=range(20,100,20), filter_sigmaspace_list=range(20,100,20), cv=5)
Finally, we use the fitted model to perform pixel classification using the predict method. The predict method returns a binary image, whereas all pixels are assigned a value of 0 (negative) or 255 (positive).
# Classify
final_im = pc.predict(target_im)
# Save result
cv2.imwrite('data/iraq_classified.png', final_im)
This is the end result:
![Iraq Pixel Classified] (https://raw.githubusercontent.com/hunzikp/map-classification/master/data/iraq_classified.png)
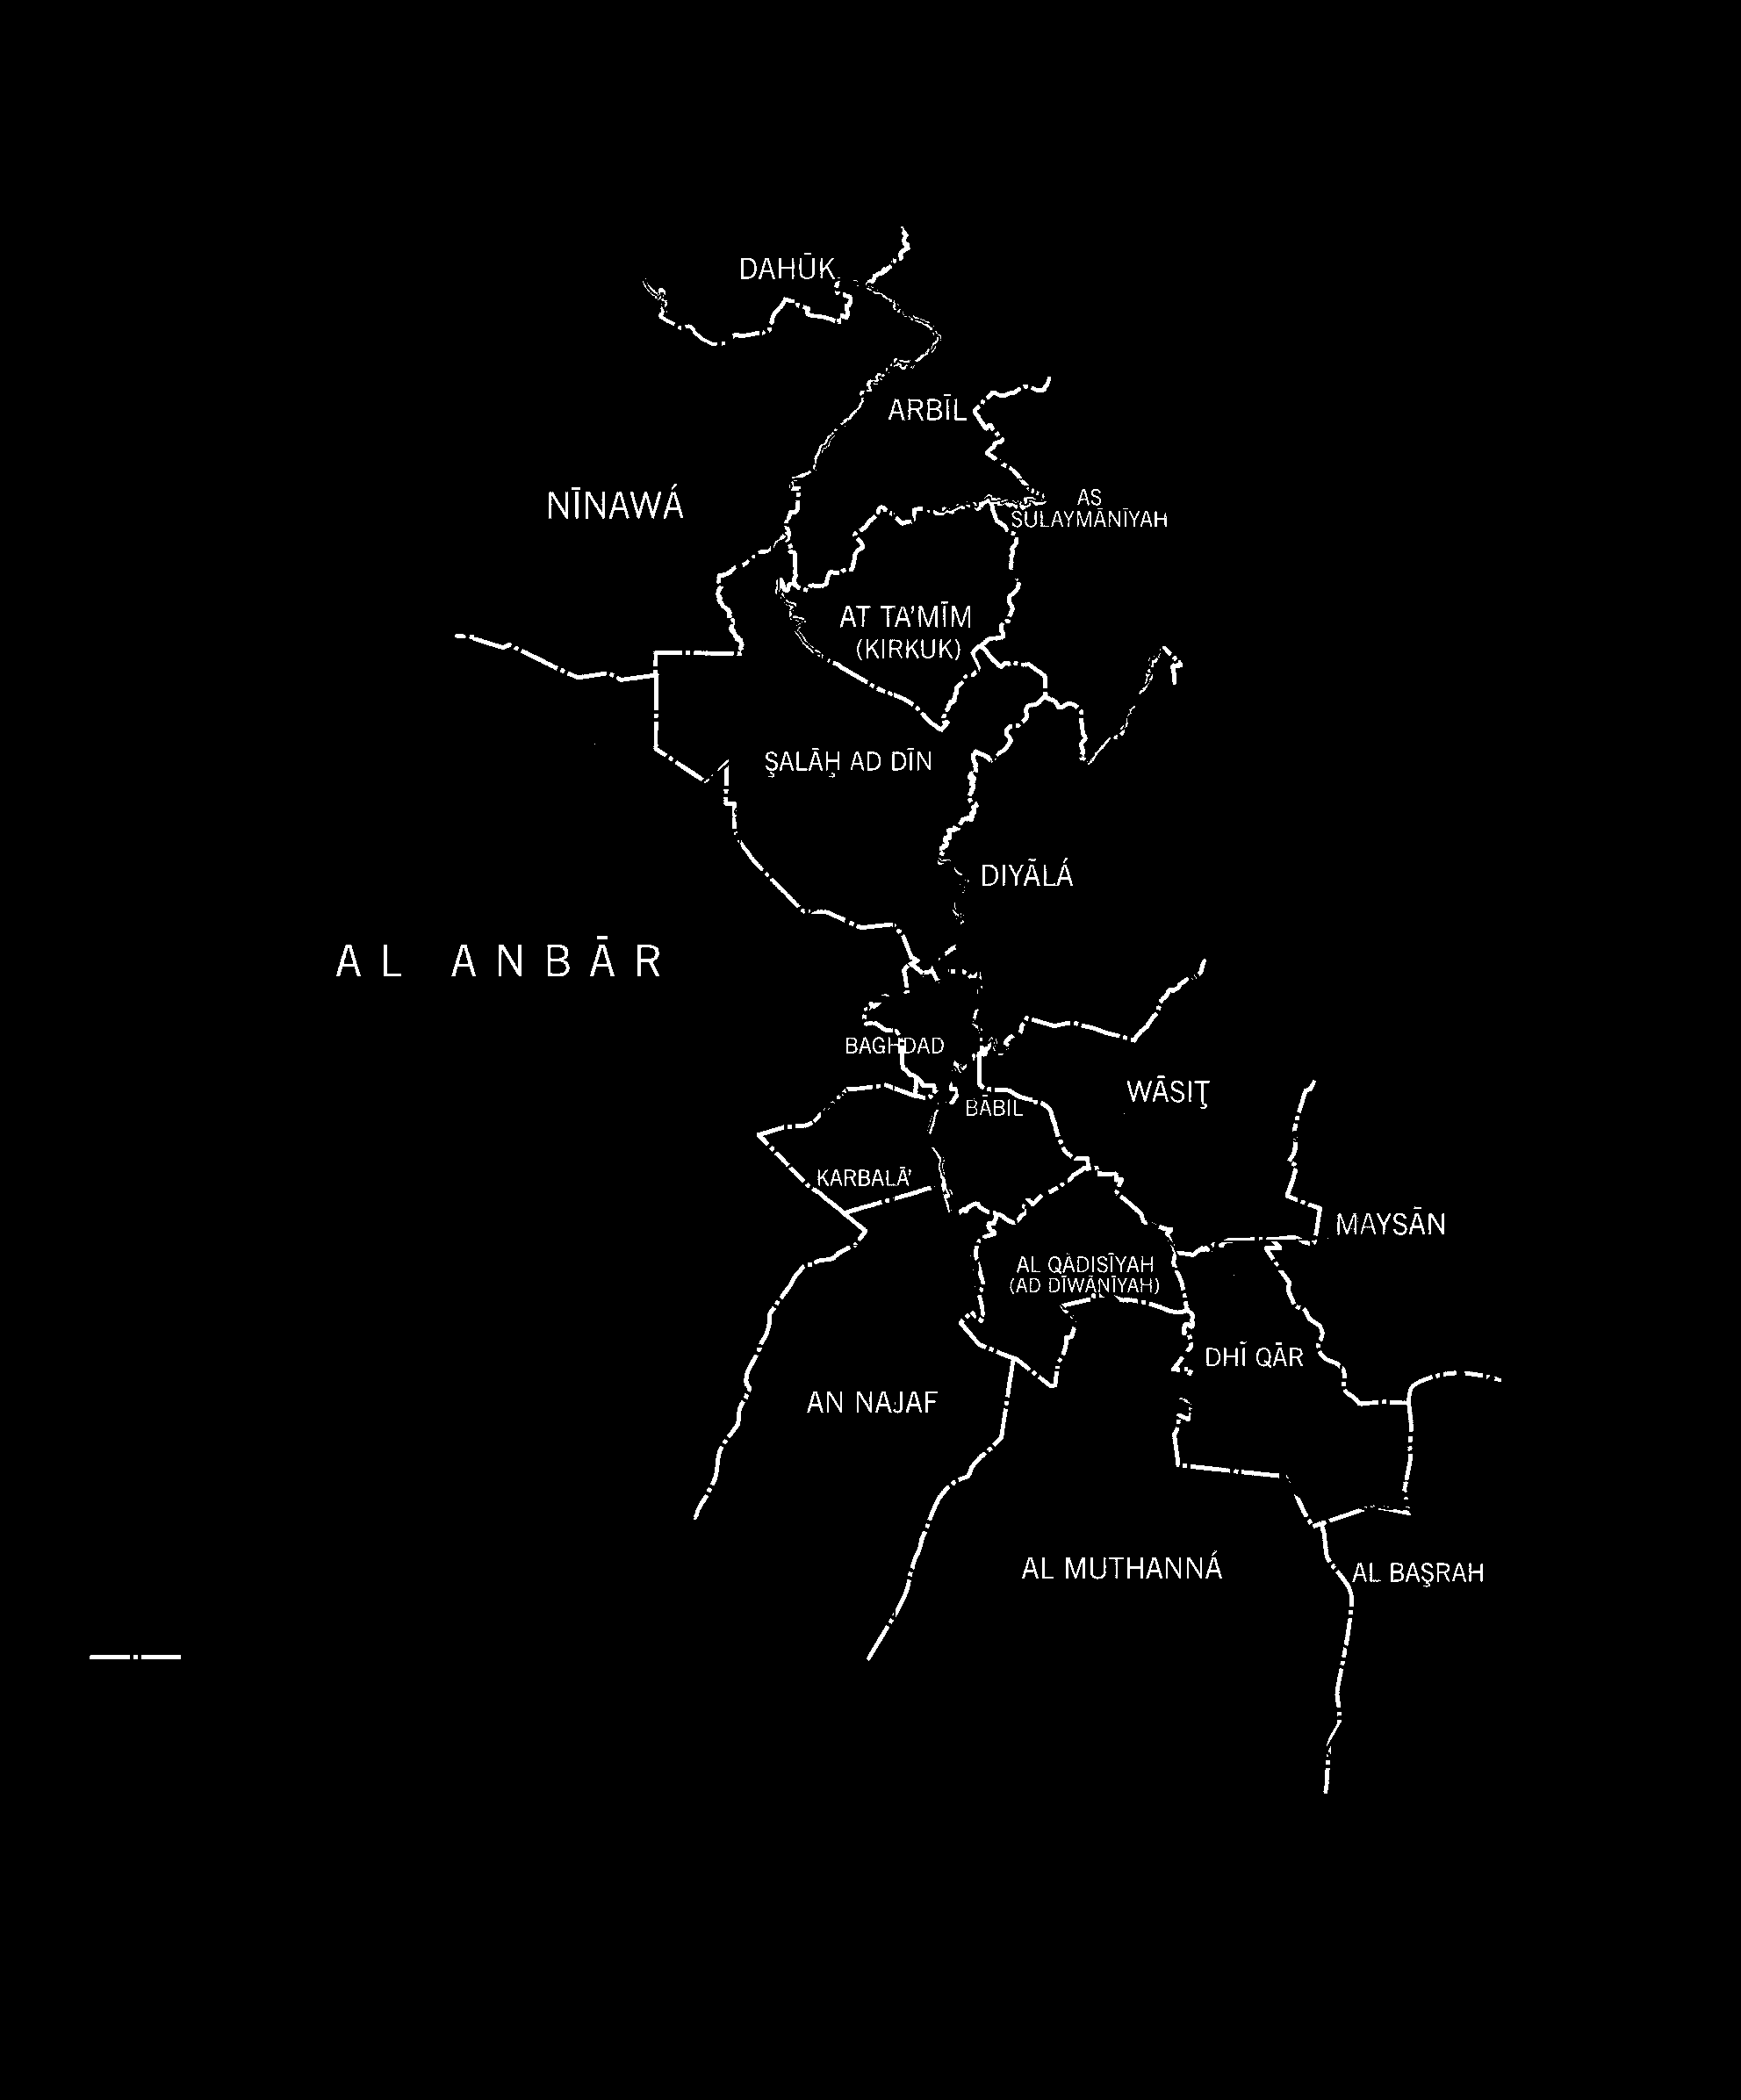
The various classes in the character_classifier.py module allow detecting and recognizing single English letter characters in binary images.
The two basic building blocks of this module are the ImageComponents and CharacterClassifier classes. An ImageComponents (IC) object stores a single binary image, together with information on the location and properties of all its connected components (i.e., continuously connected neighborhoods of positive pixels). A fitted CharacterClassifier may then be used to predict whether any component in an IC object represents a character, and if so, which character.
Training a CharacterClassifier object is performed via a set of labeled IC objects (collected in a ImageComponentCollection object). A labeled IC object is one where it is known for each connected component whether it represents a character, and if so, which one. Labeling IC object can either be performed externally (e.g., by converting images of single characters to IC objects and assigning the label programatically), or via the character_classifier.py module's own GUI.
Once a collection of labeled IC objects is ready, the CharacterClassifier class is fitted in two steps. First, all labeled components are resized into MxM binary pixel images. The resulting pixels represent this observation's M^2 features. Thus, from the N labeled connected components, a training data frame of dimension NxM is created. This data frame is piped to random forest classifier which is tuned via k-fold cross-validation.
Because the labeling GUI is not fully functional yet, the following example code only briefly demonstrates the usage of the CharacterClassifier class using a pre-fitted classifier. Pre-fitted classifiers can easily be saved to and loaded from pickeled files using the CharacterClassifier class.
The classifier in question has been fitted with several thousand images of labeled English language characters in various fonts, together with images of random shapes and lines to learn negative cases (i.e., components not representing characters). This "general-purpose character classifier" (gpcc) has proven fairly useful in my own work, and is available in the data folder of this project.
To perform charcter classification, we first load the according module together with the OpenCV Python bindings. Then we load the binary image to be classified (the "target image"), which is the output of the pixel classification example above.
from character_classifier import *
import cv2
# Load binary image with text
im = cv2.imread("data/iraq_classified.png", cv2.CV_LOAD_IMAGE_GRAYSCALE)
We then create an instance of the CharacterClassifier class and load the pre-fit general-purpose character classifier. This allows to classify the target image.
# Load general-purpose character classifier
clf = CharacterClassifier()
clf.load("data/gpcc.pkl")
# Predict characters
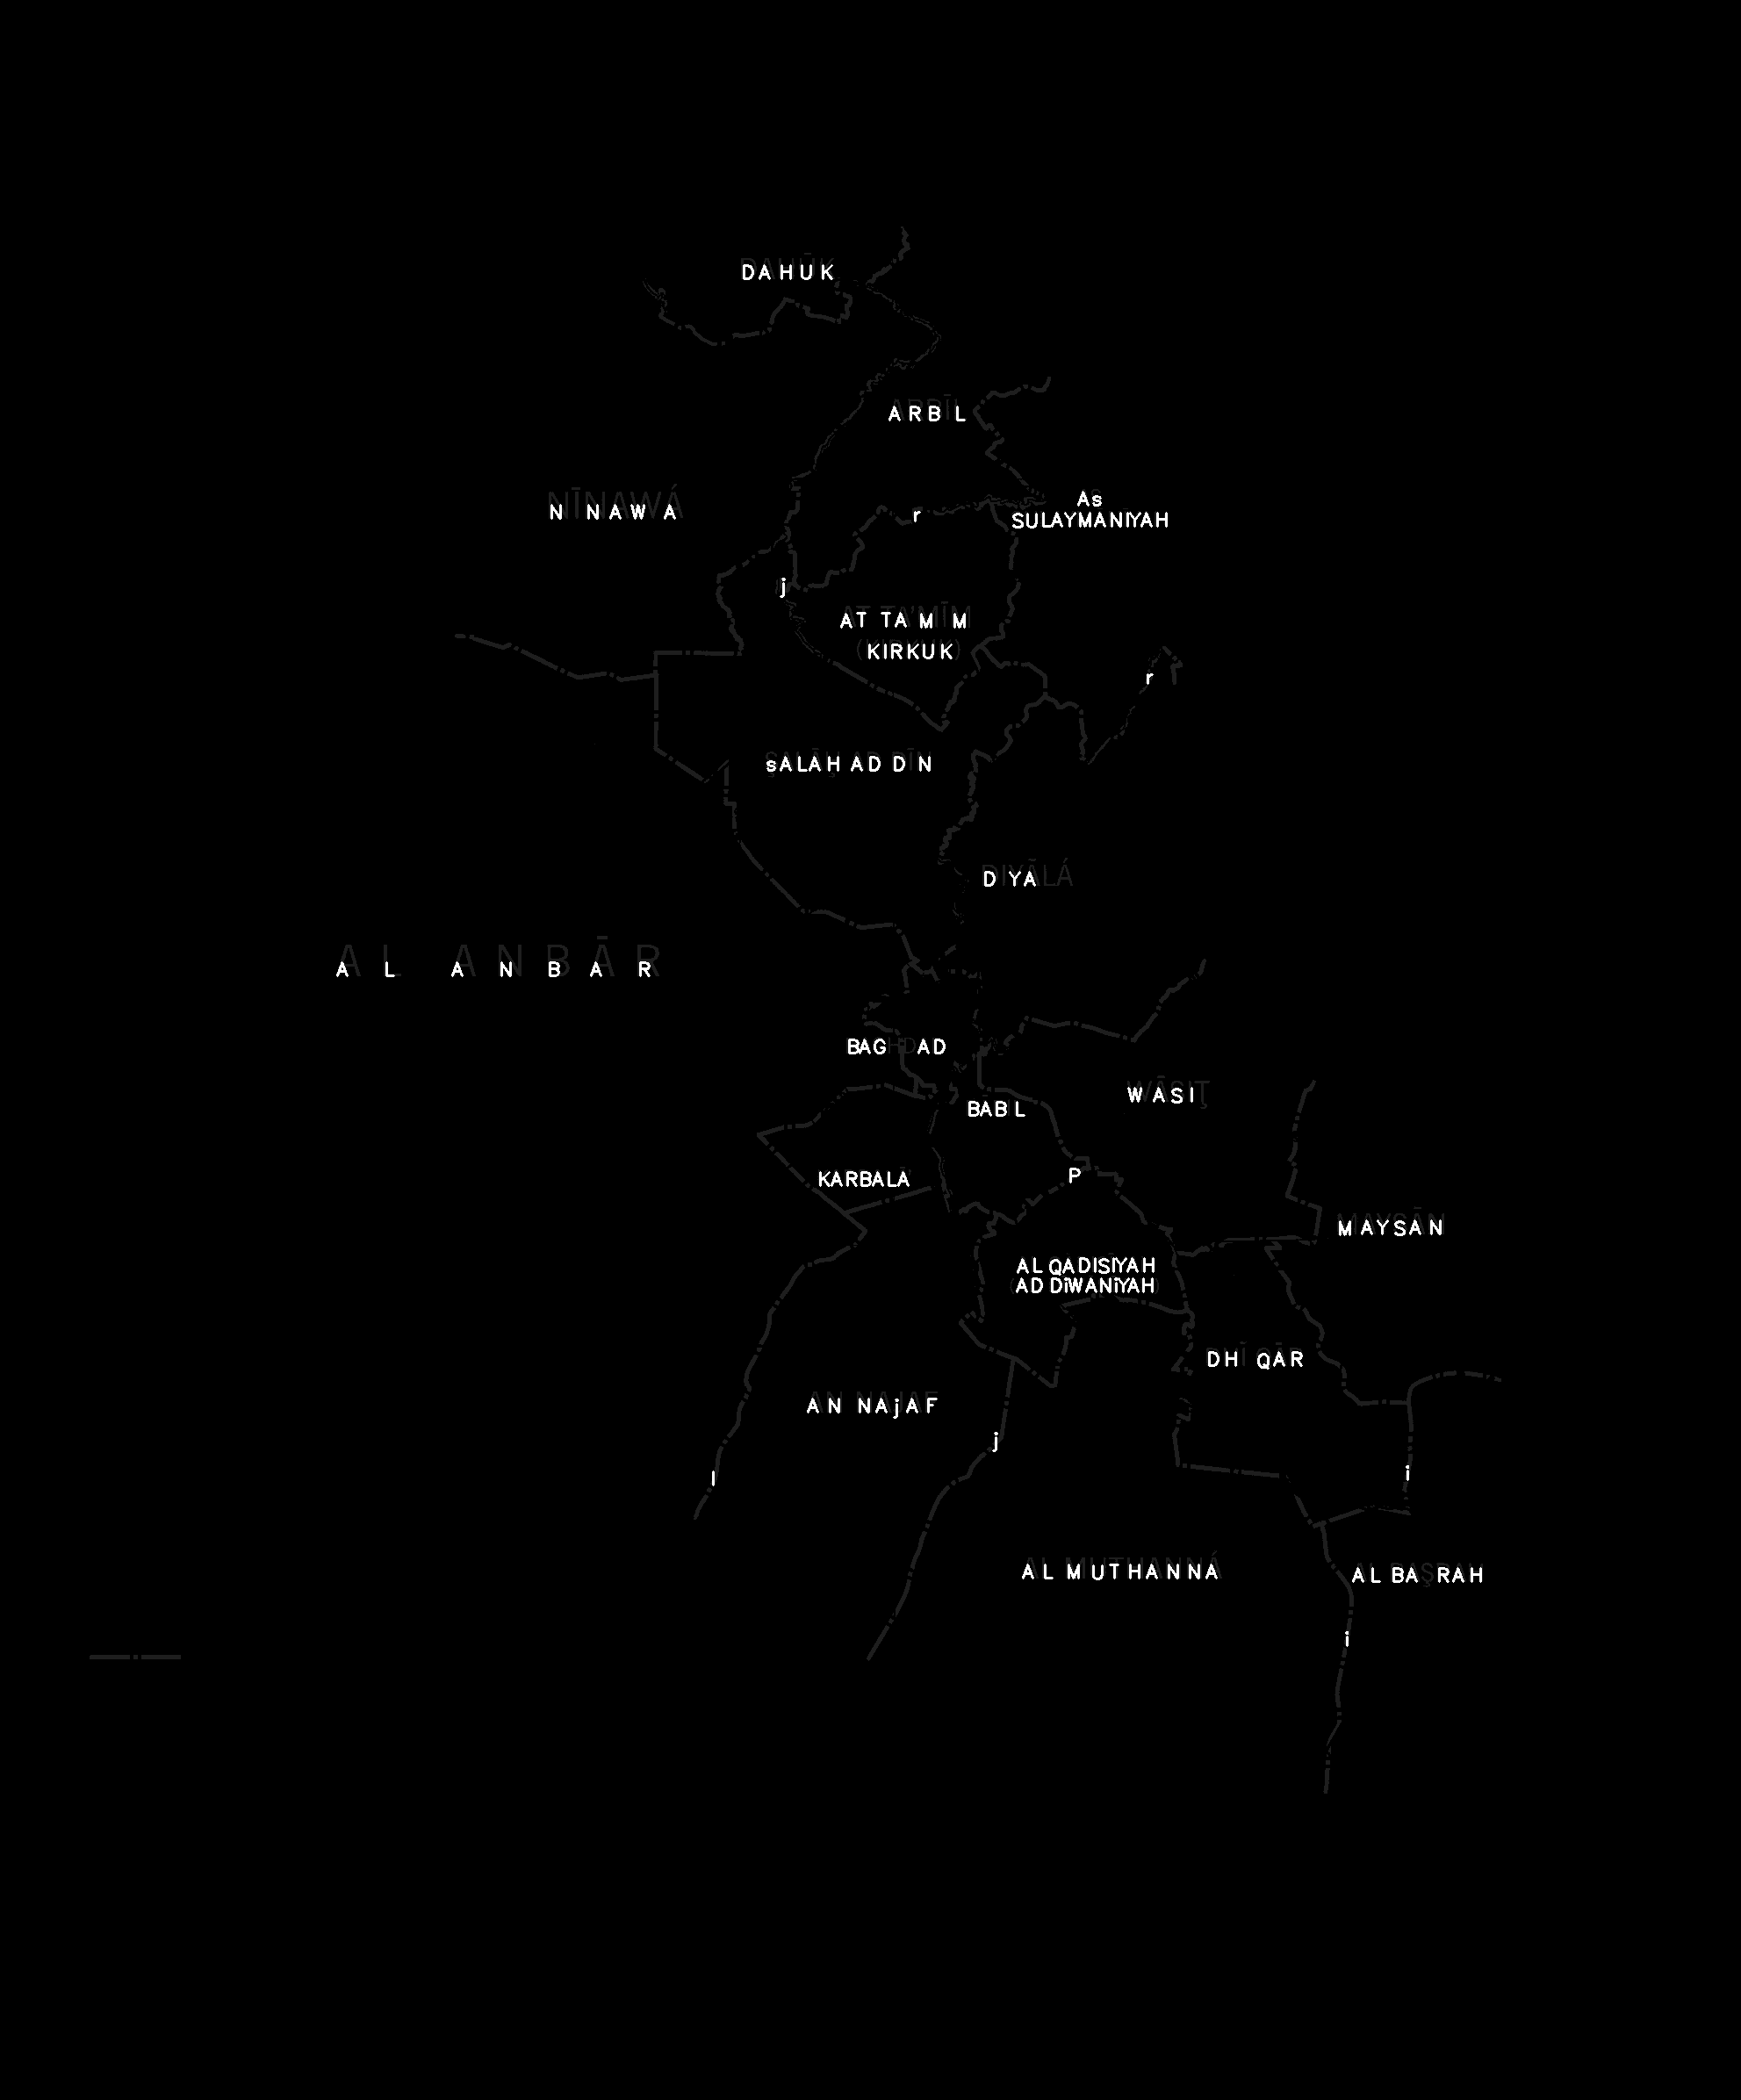
ic = clf.predict_image(im)The predict_image method returns an IC object. This may be used to locate characters by iterating through all connected components contained within the IC object. Alternatively, we can print all detected and recognized characters onto the input image:
# Produce an image showing the predicted character labels
labeled_im = ic.labeledimage(fontscale=0.7, thickness=2)
cv2.imwrite("data/iraq_characters.png", labeled_im)
![Iraq Pixel Classified] (https://raw.githubusercontent.com/hunzikp/map-classification/master/data/iraq_characters.png)
Overall, the general-purpose classifier appears to work fairly well. The occasional false positive can easily be removed in later processing steps, since these are isolated letters. Whether the false negatives matter depends on the application at hand. In my own applications I am mainly concerned with removing text from maps. For this purpose, I use a text collector class (yet to be uploaded) that collects classified characters and nearby components that might be characters and removes them from the image. Using this procedure, I am able to remove almost all text from the image, since the false negatives are usually in between correctly classified characters.