IdeaPress is an app template that powers the transformation of any WordPress website into a Windows Store App.
Building on the foundation of version 1 and the feedback from the community, version 2 has undergone major additions to its architecture that include:
- Modularization – creates separatio of functions and enhances extendibility
- WordPress.com Support – sites hosted on WordPress.com are now supported as well
- Theme/Template System
- Offers easy and flexible customization
- Has a number of default color themes and templates to choose from
- Live Tile Support – display new posts by pulling the WordPress website with a background task
IdeaPress is primarily constructed using HTML5, WinJS, and Cascading Style Sheet (CSS).
| Functionality | Self-Hosted WordPress | Wordpress.com |
|---|---|---|
| Recent Posts | Yes | Yes |
| Posts by Category | Yes | Yes |
| Pages | Yes | Yes |
| Bookmarking | Yes | Yes |
| Sharing | Yes | Yes |
| Auto Fetch when scroll to the end | Yes | Yes |
| Show Related Posts | Yes | Yes |
| Show Comments | Yes | Yes |
| Post Commenting | Yes | Yes Requires Client ID/Secret from Wordpress.com |
| Live Tile | Yes | Yes |
| Search | Yes | Yes |
Download IdeaPress from GitHub: https://github.com/ideanotion/ideapress
Unzip the downloaded file, compile, and run the IdeaPress solution in Visual Studio 2013 on your Windows 8.1 system. As you compile, it will bring up the IdeaPress App, but it connects to http://ideanotion.net by default.
Open up option.js in the js folder, find http://ideanotion.net and replace it with your website’s URL.
If your WordPress site is self-hosted, make sure that you have the plugin JSON API installed - http://wordpress.org/extend/plugins/json-api/
The default options included both Self-hosted WordPress and WordPress.com modules. If WordPress is self-hosted, please include only wp.module.js and remove anything associated to ** wordpresscomModule**. Otherwise if you WordPress is at WordPress.com, use wpcom.module.js and remove anything associated to wordpressModule.
Self-hosted website is the website where you manage your hosting.
In this case, your options.js will look like this:
modules: [
{ name: wordpressModule, options: { apiUrl: 'http://{youdomain.com}/', title: "Pages", typeId: wordpressModule.PAGES, pageIds: [{PageIDs}] } },
{ name: wordpressModule, options: { apiUrl: 'http://{youdomain.com}/', title: "Recent News", typeId: wordpressModule.MOSTRECENT } },
{ name: wordpressModule, options: { apiUrl: 'http://{youdomain.com}/', title: "Bookmark", typeId: wordpressModule.BOOKMARKS } },
{ name: wordpressModule, options: { apiUrl: 'http://{youdomain.com}/', title: {CategoryName}, typeId: wordpressModule.CATEGORY,categoryId: {CategoryID} } },
],
searchModule: { name: wordpressModule, options: { apiUrl: 'http://{youdomain.com}/', title: "Search" } },
liveTileModule: { name: wordpressModule, options: { apiUrl: 'http://{youdomain.com}/', title: "Live Tile", squareTileType: Windows.UI.Notifications.TileTemplateType.tileSquarePeekImageAndText04, wideTileType: Windows.UI.Notifications.TileTemplateType.tileWideImageAndText01 } },
Wordpress.com site is the blog that is hosted on Wordpress.com which usually looks liek this: http://{mydomain}.wordpress.com. Or if it is a VIP wordpress site, you wil have your own domain, but you are still required to enter the original wordpress.com address for IdeaPress setup.
In this case, your options.js will look like this:
modules: [
{ name: wordpresscomModule, options: { apiUrl: 'http://{youdomain}.wordpress.com/', title: "Pages", typeId: wordpresscomModule.PAGES, pageIds: [{PageIDs}], clientId: {clientId}, clientSecret: {clientSecret} } },
{ name: wordpresscomModule, options: { apiUrl: 'http://{youdomain}.wordpress.com/', title: "Recent News", typeId: wordpresscomModule.MOSTRECENT, clientId: {clientId}, clientSecret: {clientSecret} } },
{ name: wordpresscomModule, options: { apiUrl: 'http://{youdomain}.wordpress.com/', title: "Bookmark", typeId: wordpresscomModule.BOOKMARK, clientId: {clientId}, clientSecret: {clientSecret}S } },
{ name: wordpresscomModule, options: { apiUrl: 'http://{youdomain}.wordpress.com/', title: {CategoryName}, typeId: wordpresscomModule.CATEGORY,categoryId: {Slug}, clientId: {clientId}, clientSecret: {clientSecret} } },
],
searchModule: { name: wordpresscomModule, options: { apiUrl: 'http://{youdomain}.wordpress.com/', title: "Search" } },
liveTileModule: { name: wordpresscomModule, options: { apiUrl: 'http://{youdomain}.wordpress.com/', title: "Live Tile", squareTileType: Windows.UI.Notifications.TileTemplateType.tileSquarePeekImageAndText04, wideTileType: Windows.UI.Notifications.TileTemplateType.tileWideImageAndText01 } },
Use your own App Title by specifying the value in appTitle. Or if you wish to use an image instead, specify the image URL using appTitleImage.
![image alt][1]
Each item in the modules array (line 15) represents a module for the App to load.
{name: wordpressModule, options: {apiUrl: ‘http://ideanotion.net’, title: “Pages”, typeId: wordpersssModule.PAGES, pagesIds: [2, 546, 565]}}
The following sets up the categories and pages to display from your wordpress site.
Assign wordpressModule.CATEGORY to typeId, choose a title, and assign the category Id to categoryId. For example: typeId: wordpressModule.CATEGORY, categoryId: 45, title: "Tech"
NOTE For Self-Hosted WordPress, you can find your categoryId by going to the WordPress admin. When you edit your category, the tag ID is shown on the URL. 95![image alt][2]
NOTE: For WordPress.com hosted sites, use slug instead of Category ID.
Assign wordpressModule.PAGES to typeId and assign an array of page IDs to pageIds. For example: typeId: wordpressModule.PAGES, pageIds: [2, 243, 33]
To find your pageIDs, please goto WordPress admin. When you edit your page, the post ID is shown on the URL. 95![image alt][3]
Assign wordpressModule.MOSTRECENT to typeId.
Assign wordpressModule.BOOKMARKS to typeId.
Compile your solution and run again to have your own Windows Store App!
This section will provide a brief breakdown of the Visual Studio solution for IdeaPress v2. Whether you download the release version or clone from github, you will find a IdeaPress.sln file and a IdeaPress folder. If desired, you may rename the solution file from IdeaPress.sln to your own project name.

You need Visual Studio 2013 to open the solution. Upon opening it, you will see the following files and folder:

The css folder contains a default.css and a theme folder. default.css consists of the styles applied throughout the App that makes it look and behave consistently.
Each CSS file in the themes folder defines a theme. A theme CSS file can either be imported in the default.css or be included in default.html at the root of the solution. More detail is provided in section 5.
The images folder stores the required images of the App, as well as any other custom images you might have.
The js folder contains the core JavaScript files for the App. The main file that needs to be edited is options.js which is used for configuring the App.
- default.js – starting point of the App
- hub.js – loads up hub.html and sets things up by calling functions defined in core.js (Section 4.5.1)
- liveTileTask.js – handles the support of live tiles
- core.js – contains core logics of the application
- navigator.js – controls the navigational behaviors of the App
- options.js – configures the application and the modules (Section 4.3)
- share-source.js – handles the Sharing functionality
The pages folder contains hub.html and about-flyout.html.
The Hub page (hub.html and hub.js) handles all the modules included in the Hub (The main page).
- Each included module is initialized when the application is first loaded.
- Render() function is called whenever there is a change in layout or viewing mode (back and forward on page)
- Update() function is called when there is navigational changes (back and forward of pages)
- Refresh() function is called when the Refresh button is clicked
If you wish to extend or implement a new module, please refer to Section 4.1 Modules for details on implementation of a module that conforms to the Hub page’s requirement.
The file about-flyout.html is defined for the About page specified in the Settings Charm (Section 4.8).

This is the default container page for the IdeaPress App.
This section will provide details on the main feature components that constitute IdeaPress.
Modularization emphasizes separating the functionality of a program into independent, interchangeable modules, such that each contains everything necessary to execute only one aspect of the desired functionality. IdeaPress modules are designed and developed following this paradigm. It represents a separation of concerns, and improves maintainability by enforcing logical boundaries between components.
Each module consists of its own HTML, CSS, and JavaScript files. A module serves two main purposes:
- Specifying the data source
- Determining how initialization happens, what and when content will be rendered, updated, refreshed, or called. Specifically, a module maintains its own data access, caching, and rendering of content.
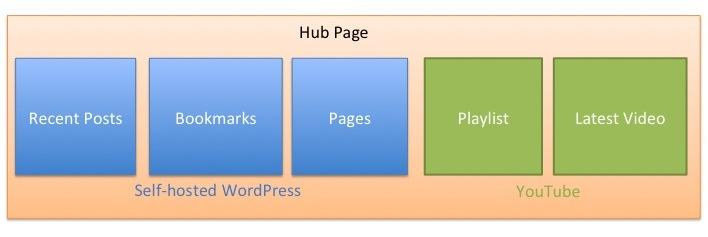
Modules are selected in options.js. The main application (Hub page, Section 4.5.1) interacts with each module by a set of basic functions such as Render(), Update(), Refresh(), Cancel(), and other functions that handle Search and Live Tiles. To perform functions, each module needs to be instantiated with a specific task. The application can include multiple instances of modules, each managing or manipulating module data in a different ways. For example, showing recent posts vs. showing pages of the website or producing YouTube playlist vs. pulling the latest videos.
To implement a module that the Hub page consumes, one constructor and six methods must be implemented.
| Method Name | constructor(ideaPress, options) |
|---|---|
| Input Params | ideaPress – ideaPress object options – JSON object options |
| Output | None |
| Desctiption | Setup the module with the passed in options |
| Method Name | render(elem) |
|---|---|
| Input Params | elem – the HTML element from Hub Page to render module content |
| Output | Promise Object |
| Desctiption | Create a promise object and render the HTML fragment or dynamically create HTML elements and append to “elem”. This is call every time user navigates to the hub page |
| Method Name | update(viewState) |
|---|---|
| Input Params | viewState – Application View State |
| Output | N/A |
| Desctiption | Update the content (Grid/ListView) by fetching from data source or cached. This is call onload or when viewState changes |
| Method Name | refresh(viewState) |
|---|---|
| Input Params | viewState – Application View State |
| Output | N/A |
| Desctiption | This is called when User click on the refresh command. Clear the cached data, and update the content (Grid/ListView) by fetching from data source |
| Method Name | cancel() |
|---|---|
| Input Params | None |
| Output | None |
| Desctiption | This is when to hook up the search charm. For example: Windows.ApplicationModel.Search.SearchPane.getForCurrentView().onquerysubmitted = function(args) { … } This is called when application is ready. |
| Method Name | getLiveTileList() |
|---|---|
| Input Params | None |
| Output | None |
| Desctiption | This is called from a background task in (Worker scope). Fetch and return a list of data in this format: { imgUrl: “” title : “” } |
IdeaPress v2 currently includes two types of modules that can be instantiated: one that supports WordPress.com hosted websites and the other for self-hosted WordPress websites.
The WordpressComModule works with any WordPress.com website. An instance of this module can display the following: Most Recent Posts, Pages, Posts by a category, or bookmarked posts. The module can be initialized to handle Search and Live Tile as well.
In options.js, instance of module can be configured by these parameters:
| Options Parameter | Description |
|---|---|
| title | Title to display in the Hub Page on top of its GridView If typeId is set to wordpresscomModule.PAGES, title will not be displayed. |
| siteDomain | User’s WordPress.com site domain URL. Do not include “http://” prefix. i.e. (ideapress.wordpress.com) |
| typeId | Defines the type of this module. It can be one of the following values: wordpresscomModule.CATEGORY: category wordpresscomModule.PAGES: pages wordpresscomModule.BOOKMARK: bookmarked pages or posts wordpresscomModule.MOSTRECENT: most recent posts |
| categoryId | Defines the category this module will fetch from user’s WordPress.Com website. Use category slur in string (i.e. “Tech”). This is only applicable if typeId = wordpresscomModule.CATEGORY. i.e. "Tech" |
| pageIds | Array of page ID to fetch from user’s WordPress.com website. This is only applicable if typeId = wordpresscomModule.PAGES. i.e. ([1,2,8]) |
| clientId | In order to allow user to post comment to user’s WordPress.com website, a WordPress Application Client ID/Secret must be generated and provided here. See this link on how to create Client ID/Secret:https://developer.wordpress.com/apps/new/ |
| clientSecret | See above. |
The WordpressModule works with any self-hosted WordPress website. The WordPress website must have already install
the JSON API plugin in order for IdeaPress to interact with. An instance of this module can display the following:
Most Recent Posts, Pages, Posts by a category, or bookmarked posts. The module can be initialized to handle Search and
Live Tile as well.
In options.js, instance of module can be configured by these parameters:
| Options Parameter | Description |
|---|---|
| title | Title to display in the Hub Page on top of its GridView If typeId is set to wordpressModule.PAGES, title will not be displayed. |
| apiURL | User’s self-hosted WordPress website URL. Please use full url in this format “http://www.ideanotion.com/” |
| typeId | Defines the type of this module. It can be one of the following values: wordpressModule.CATEGORY: category wordpressModule.PAGES: pages wordpressModule.BOOKMARK: bookmarked pages or posts wordpressModule.MOSTRECENT: most recent posts |
| categoryId | Defines the category this module will fetch from user’s WordPress website. This is only applicable if typeId = wordpressModule.CATEGORY. i.e. 6 |
| pageIds | Array of page ID to fetch from user’s WordPress website. This is only applicable if typeId = wordpressModule.PAGES. i.e. ([1,2,8]) |
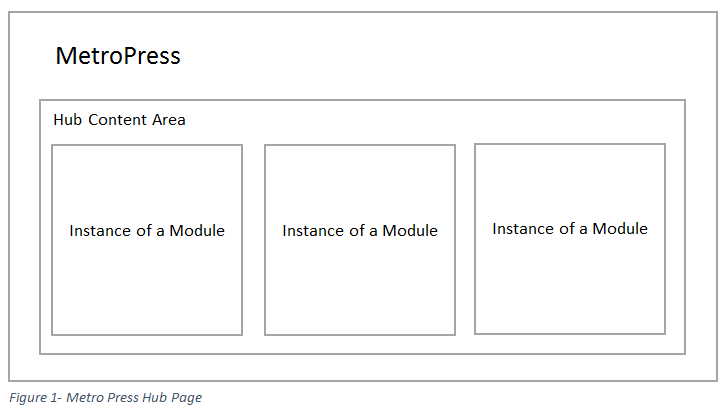
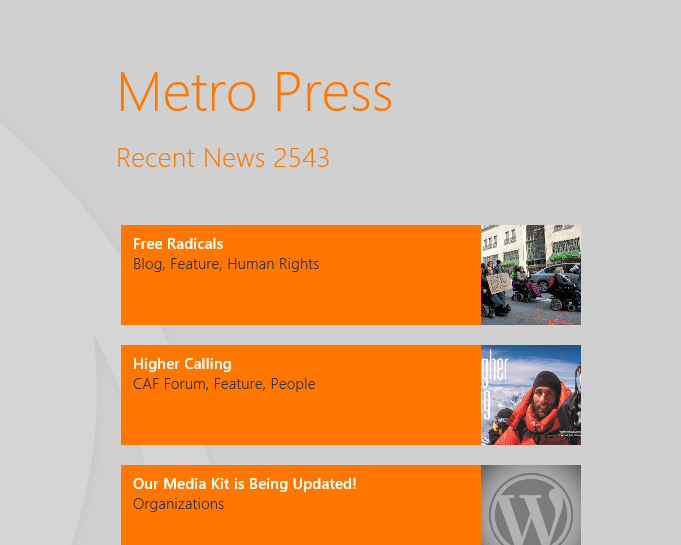
The Hub Page (~/pages/hub.html) is the landing page when the application launches. hub.js will initialize each
module, and trigger the module to render and update its content on the Hub Content Area.
The application and modules are setup in options.js. It imports the module JavaScripts and sets all the options. It is essential to understand options.js in order to correctly setup IdeaPress.
| Options Parameter | Description |
|---|---|
| appTitleImage | Title Image Url ; If specified, it will ignore the appTitle parameter |
| appTitle | Title text |
| cacheTime | # of Minutes to keep the cached data |
| mainUrl | Main Url to share when user click the Share Charm in the hub page |
| privacyUrl | Url for the privacy page, launch from Settings Charm |
| modules | See module options section below |
| searchModule | See module options section below |
| liveTileModule | See module options section below |
The following are the default set of images for the App.
| File name | Dimension | Purpose |
|---|---|---|
| background.png | Varies | Background image of the app. A good resolution will be 1920 by 1080. If you want to enable the scrolling background effect, use a double wide background such as 3840 x 1080 or higher |
| badgelogo.png | 24x24px | Badge icon on Win8 start screen |
| blank.png | Varies | Default background when no featured image |
| logo.png | 150x150px | The default app logo |
| smalllogo.png | 30x30px | Smaller dimension of the default app logo |
| splashscreen.png | 620x300px | Image for the splash screen |
| storelogo.png | 50x50px | Logo displayed in Windows Store |
| widelogo.png | 310x150px | Large icon on Win8 start screen |
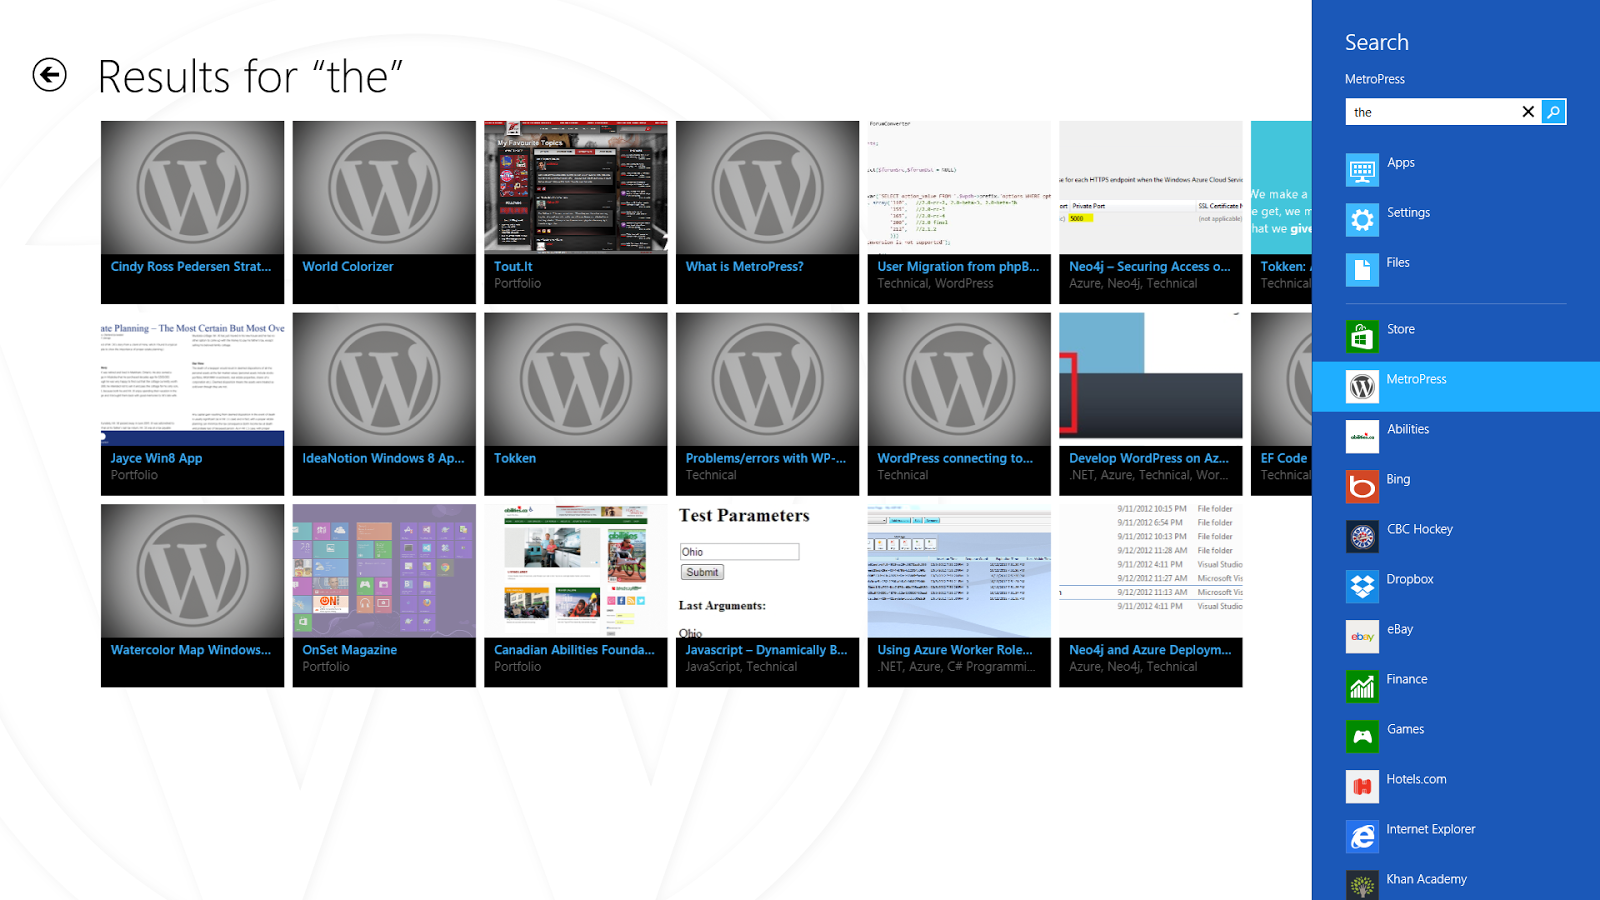
Both modules can be configured in options.js to handle Search Charm. When user enters a query into the search charm,
the application navigates to the module’s search page displaying the results.
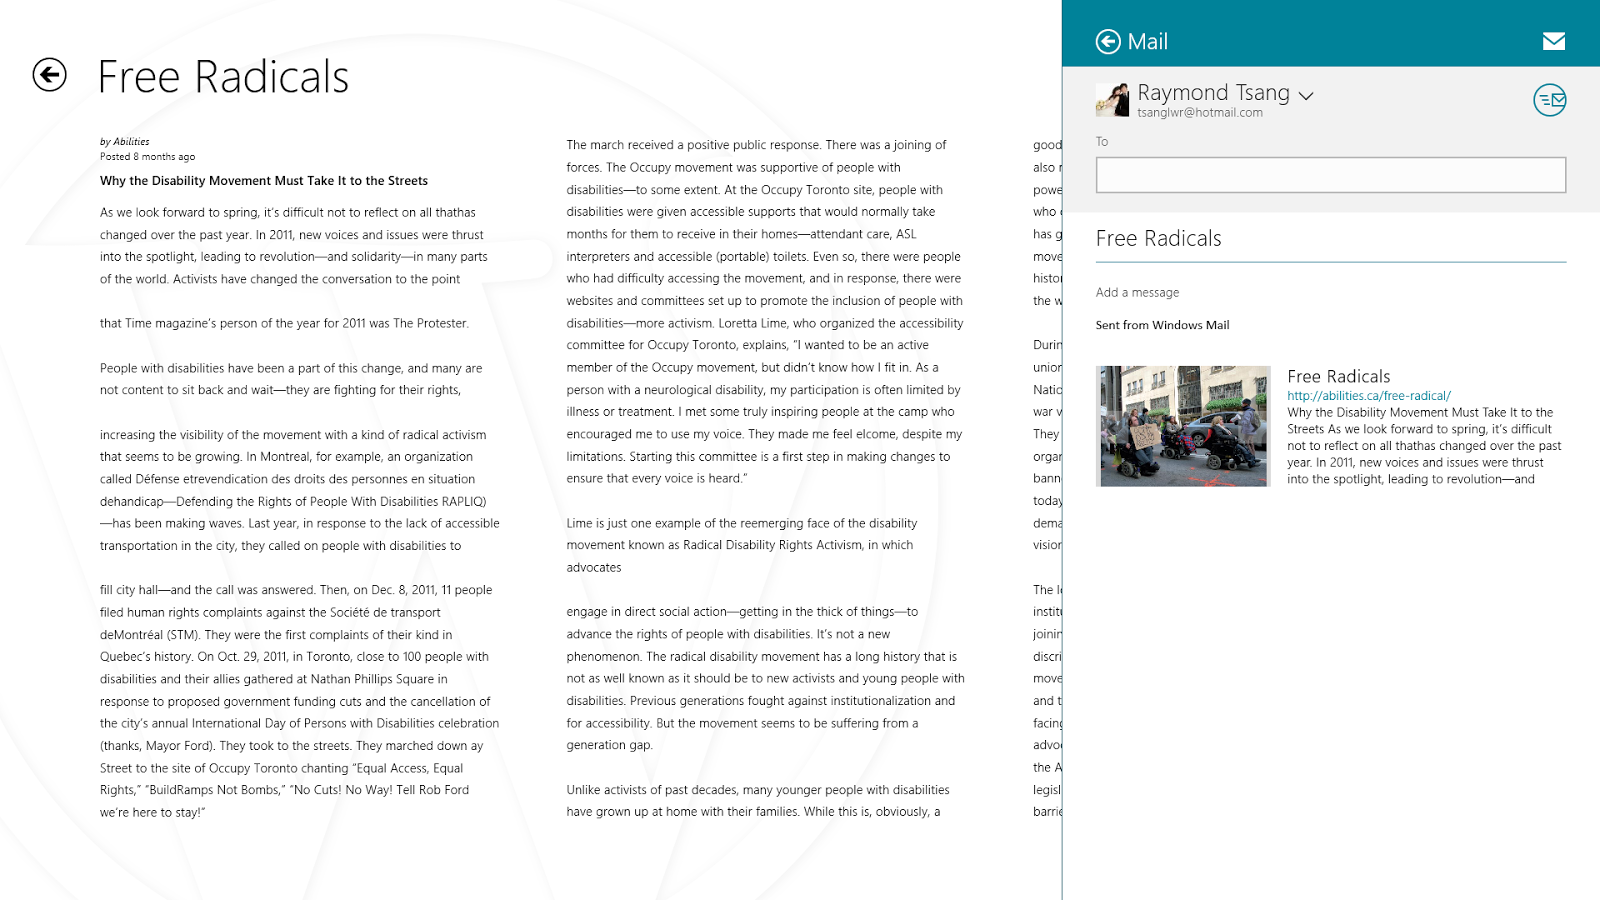
Share Charm is handled by IdeaPress. The default behavior is to share the mainUrl defined in options.js. This is useful in hub page or other pages that doesn’t have content to share. However, a module can override that behavior if the page has a special Div element:
<div class="mp-share" title="this is the title" permalink="http://blah.com">
 This is the description...
</div>
The Share Charm will use the title, permalink and div inner Html as description. The class mp-share will by default keep
the element hidden.
Live Tiles is improved in version 2 by using background task to update the tile. Both modules can be configured in
options.js to handle Live Tiles. Live tiles will show the latest 5 posts. This is the general flow:

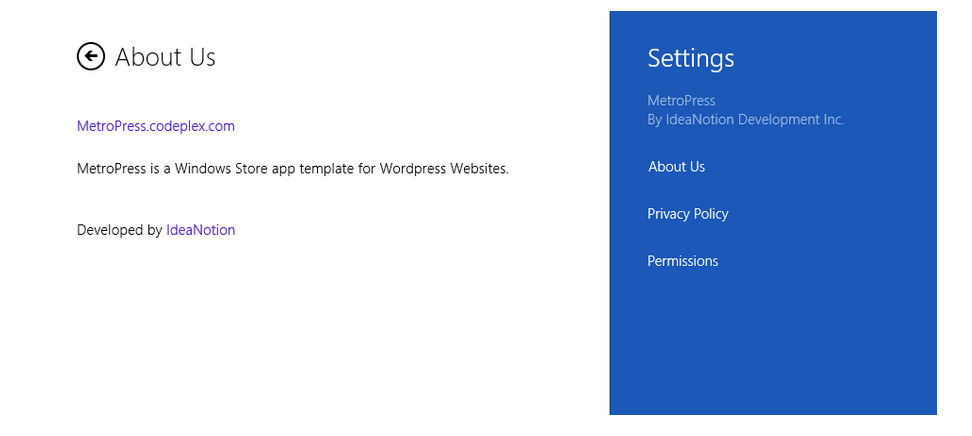
Two menu items were added to the Settings Charm.
- About Us flyout defined in /html/About-flyout.html
- Privacy Policy will launch Internet Explorer to display the privacy URL defined in options.j
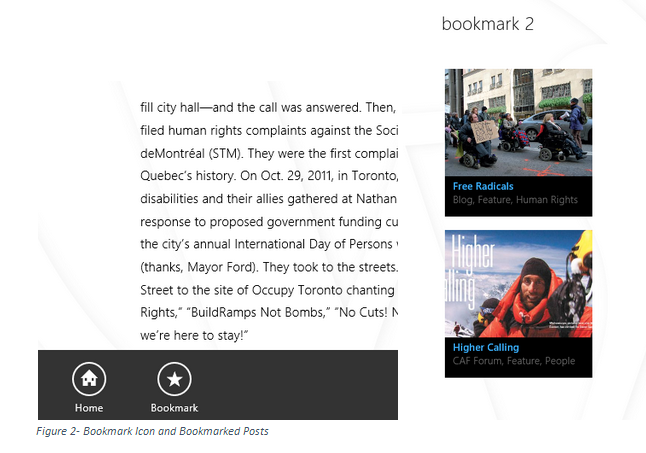
User can bookmark any post or page to view it at a later time. Bookmarked items will only be shown at the Hub page if one instance of the module is configured as Bookmark type.
IdeaPress and modules utilize LocalStorage to cache data to improve performance, and allow off line access. The modules stored fetched posts, and pages into localStorage along with a timestamp. When loading from localStorage, the timestamp is used to check if it exceeded the CacheTime set by the options.js.
During development, one may need to flush the cache, and the quickest way is to increment the localStorageSchemaVersion. This will clear the EVERYTHING from the localStorage when the application launches.
var ideaPress = {
   // Change Storage Version to empty the local storage
   localStorageSchemaVersion: '20130101-1',
   modules: [],
   initialized: false,
   accessToken: null,
}| Type | Path | Description | Extendable |
|---|---|---|---|
| Application | /css/default.css | Default elements such as typography, Size, common controls, and other non-theme-able elements. | No |
| Theme | /css/themes/custom.*.css | Theme elements such as font, colors, background colors, background images | Yes |
| Module | /modules/css/*.css | Module specific styling | No |
| Template | /modules/css/templates/*.css | Defines the main Grid View layout template | Yes |
Default.css defines the positioning, layout of the application, common controls, and HTML elements. Default.css have rules specific to different application View State (i.e. snapped). Default.css is less likely to be modified, it is recommended that styles are changed in Theme CSS.
The theme CSS defines the colors, font, and background of a IdeaPress App. It also defines CSS classes and common HTML elements such as <1> to <6>, <a>, <body>, etc;.
Few default themes were provided: custom.light.css, custom.dark.css, and custom.orange.css. They are a good starting place to extend and customize your own IdeaPress application.
To choose one of the default themes, open default.css and find the import statement at the beginning of the file.
Then change the file name to apply a different theme:
@import url('themes/custom.light.css');This is a breakdown of CSS classes that custom.*.css must define:
| CSS Class Name | Description |
|---|---|
| .mp-color-header | Default font color for header and <1> to <6> |
| .mp-color-text | Default font color for text and body text |
| .mp-color-title | Default font color for title used by modules |
| .mp-color-subtitle | Default font color for sub-title used by modules |
| .mp-color-link | Default font color for links |
| .mp-bg-main | Default background color for the main application |
| .mp-bg-overlay | Default background color for the Grid text overlay |
| .win-backbutton | Back button color |
Theme Custom.*.css Colors Diagram
These CSS defines the overall module styling and such as positioning of various controls and elements. They are located at folder ~/modules/{module name}/css
IdeaPress uses ListView (GridView) to group and display WordPress posts and pages into tiles. GridView is highly customizable through CSS, and can easily achieve different looks by changing CSS rules. The CSS rules that control the layout of the GridView were extracted into Template CSS. They are located in folder ~/modules/{module name}/css/ templates
Three default templates were provided: normal.css, large.css, and wide.css. To choose a template, open modules//css/.module.css. Then locate the import statement at the beginning of the file. Change the file path name to apply a different template:
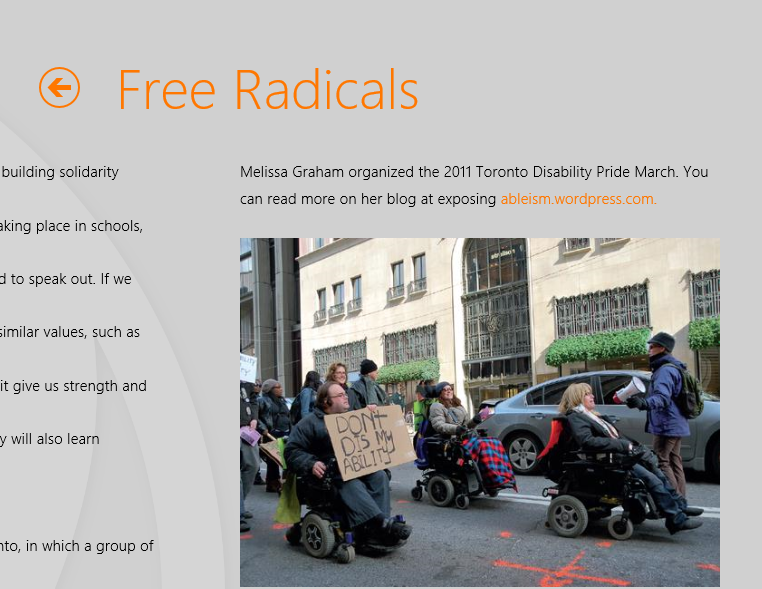
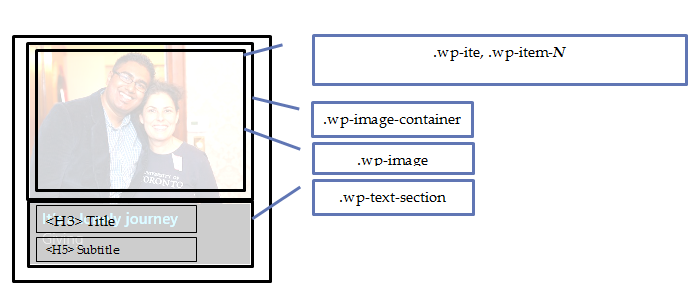
@import url('templates/normal.css');A WordPress post or page tile is composed using 3 piece of information: image, title and subtitle. Below we will show a walk-through on how a “normal” template tile is being styled and layout.
The Html template is defined below:
<div class="wp-item wp-item-0" >
	<div class="wp-image-container">
		<div class="wp-image"></div>
    </div>
        <div class="wp-text-section mp-bg-overlay">
			<h3 class="mp-color-title win-type-ellipsis">…</h3>
       		<h5 class="mp-color-subtitle win-type-ellipsis">…</h5>
    </div>
</div>
The normal.css control the layout of the tile using -ms-grid and related CSS rules.
- Formats the tile into a square 220x220px, and 2 rows – one for image, one for the text section.
.wp-list .wp-item {
   overflow: hidden;
   display: -ms-grid;
   -ms-grid-columns: 1fr;
   -ms-grid-rows: 160px 60px;
   width: 220px;
   height: 220px;
}- Fit the image container into the first row, and assign 160px height to the image
.wp-list .wp-item .wp-image-container {
   overflow: hidden;
   position: relative;
   -ms-grid-row: 1;
   -ms-grid-row-span: 1;
}

.wp-list .wp-item .wp-image-container .wp-image{
   height:160px;
   width:220px;
   background-position: center;
   background-size:cover;
}- Fit the text section into row 2
.wp-list .wp-item .wp-text-section {
   padding: 4px 12px 8px;
   -ms-grid-row: 2;
   z-index: 1;
   width: calc(100% - 24px);
   height: 100%;
}
Here is a schematic look of the HTML and CSS classes:
Copyright (c) 2013 Idea Notion Development Inc.