
Passing data through props is an important Vue.js concept that is best understood by hands-on practice. We'll use this exercise to help you solidify your understanding of props.
We will be cloning an existing piece of UI from a popular app, Twitter. Let's get started!
-
Fork this repo
-
Clone this repo
-
Open the LAB and start:
$ cd lab-vue-c-tweets
$ npm install
$ npm run dev
-
Upon completion, run the following commands:
git add .
git commit -m "done"
git push origin main
-
Create a Pull Request so that your TAs can check your work.
-
We will use Font Awesome for the icons in our app. Add the following stylesheet in the
headof theindex.htmlpage:<link rel="stylesheet" href="https://pro.fontawesome.com/releases/v5.10.0/css/all.css" integrity="sha384-AYmEC3Yw5cVb3ZcuHtOA93w35dYTsvhLPVnYs9eStHfGJvOvKxVfELGroGkvsg+p" crossorigin="anonymous" />
To allow you to focus on Vue.js without having to worry about the styling we provided you with the CSS styles. All the CSS is included in the starter code in the src/App.vue file inside the <style> tag.
We have also provided you with the initial content of the App.vue and we included the HTML structure for the Tweet.vue component. Before you start working, take a moment to go over these two files.
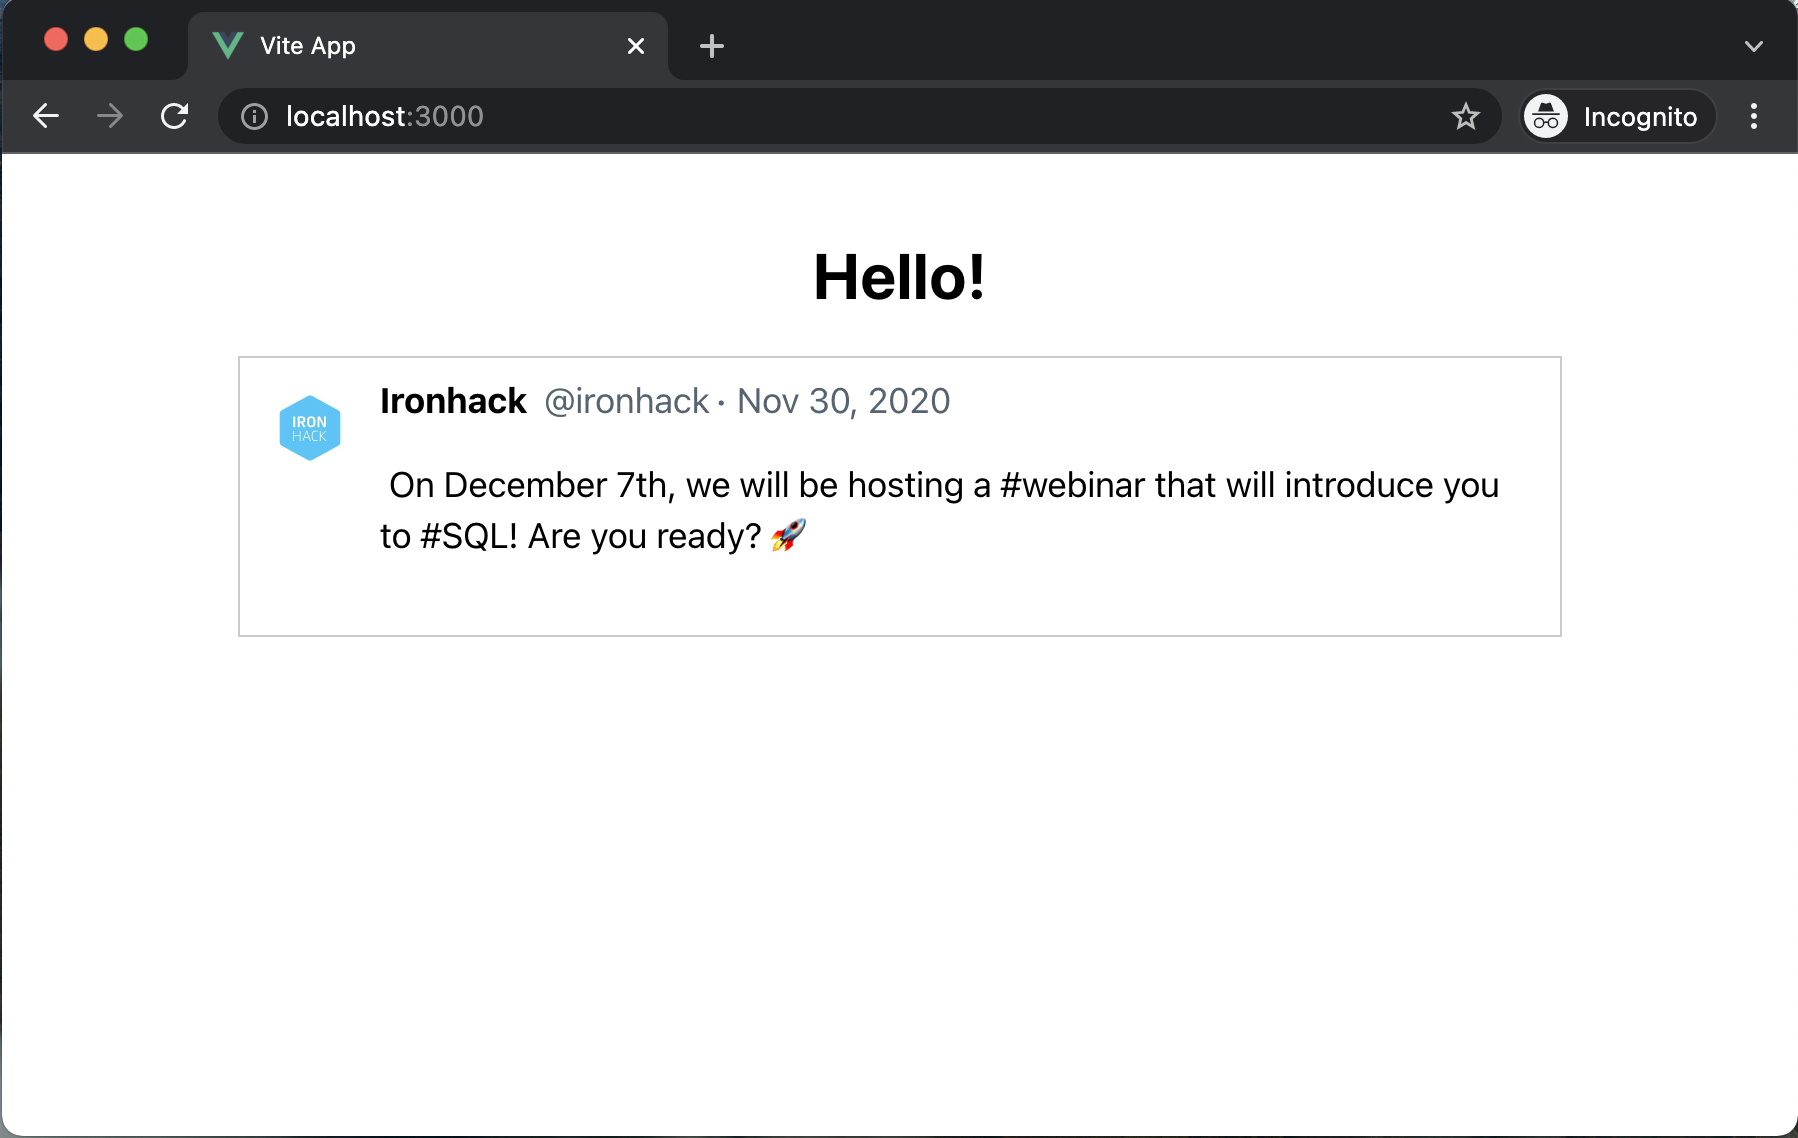
Once you initially run the app, you should see the following:
The Tweet component is at the moment rendering static content. We will change this in the next iteration. We'll update the Tweet component to display the content coming from the props.
In App.vue, we have an array named tweets that holds objects representing tweets. We will use the Tweet component to display these tweet objects. In the Tweet, we will display the user's name, user image, user handle, tweet timestamp and the message.
Pass the tweet as a prop
Pass the first data object from the tweets as a prop to the Tweet component:
<!-- src/App.vue -->
<!-- ... -->

<Tweet :tweet="tweets[0]" />
Display the tweet content in the Tweet component
Update the Tweet component to display the values coming from the tweet prop. Remember that the value we passed is an object!
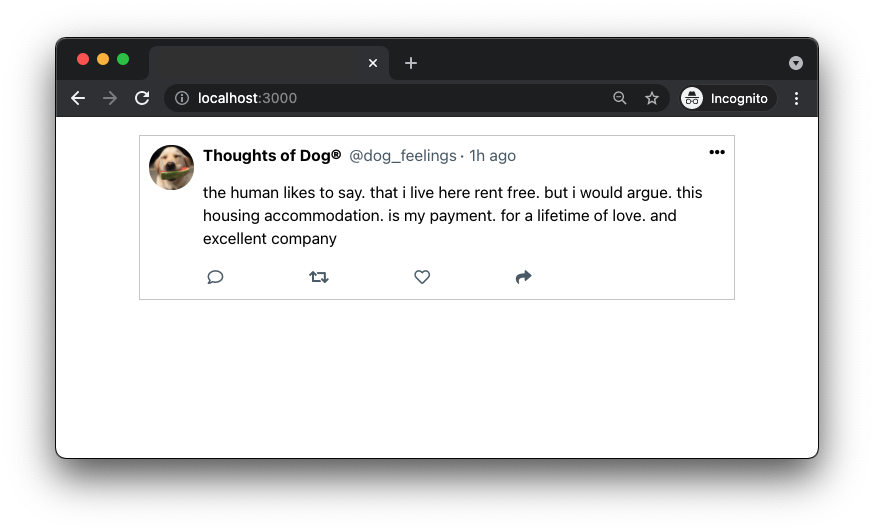
Expected Result
Once done, your Tweet component should display the following content:
We will now create new files for the components that we'll make in the following iterations. Inside the folder src/components/ create the following new files:
src/components/ProfileImage.vue,src/components/User.vue,src/components/Timestamp.vue,src/components/Message.vueandsrc/components/Actions.vue.
In the following iterations, you will need to refactor the Tweet component. You will be asked to extract parts of the existing HTML structure into new components:
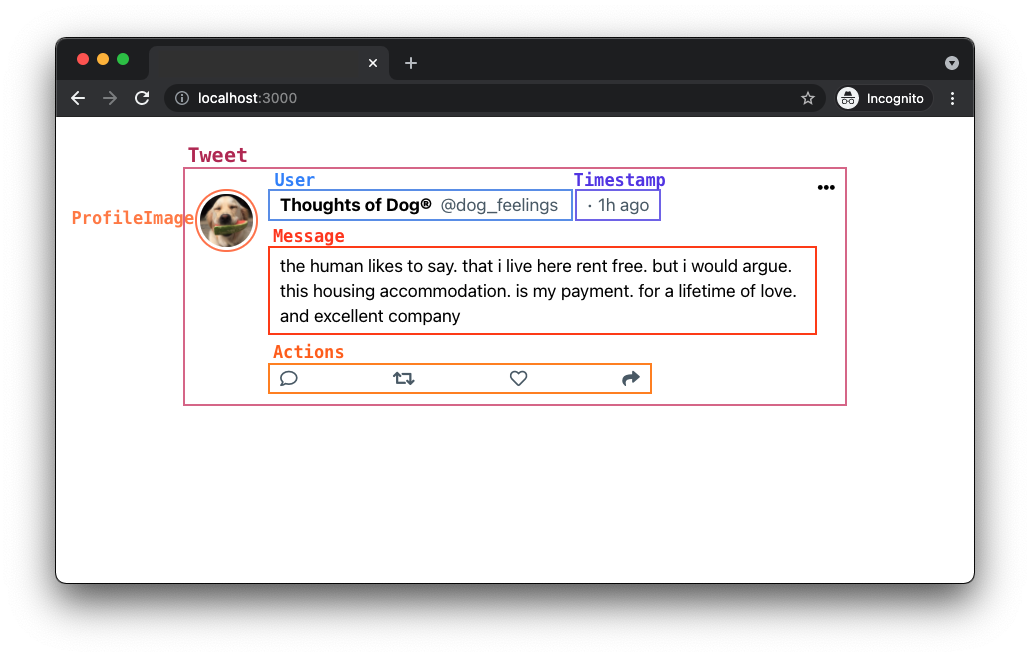
When done with all of the iterations, the final version of your Tweet component will look like this:
Click to see the code
<!-- FINAL VERSION -->

<template>
  <div class="tweet">
    <ProfileImage image="user.image" />

    <div class="body">
      <div class="top">
        <User userData="user" />
        <Timestamp time="timestamp" />
      </div>

      <Message message="message" />
      <Actions />
    </div>

    <i class="fas fa-ellipsis-h"></i>
  </div>
</template>

<script>
  const props = defineProps({
    user: Object,
    timestamp: String,
    message: String
  });
</script>
❗ Don't copy-paste the above code directly into the Tweet component!
You will do it in the next iterations, one step at a time. You will be replacing the parts of HTML as you create each new component.
Extract HTML
Extract the existing img tag and render it through the ProfileImage component:
<img src="IMAGE_URL" class="profile" alt="profile"/>Render the component
Once done, import the ProfileImage component to Tweet.js. After importing it, render the component inside of Tweet in the following way:
<!-- ... -->
<template>
  <div class="tweet">
    <ProfileImage image="user.image" />
<!-- ... -->
Access the Props
ProfileImage receives a prop image. Set this value as the src of the <img /> tag.
Extract HTML
Extract the existing span tags displaying the user information and render them through the User component:
<span class="user">
  <span class="name"> USER_NAME </span>
  <span class="handle">@ USER_HANDLE</span>
</span>
Render the component
Import the User component to Tweet.js. After importing it, render the component inside of Tweet in the following way:
<!-- ... -->

<template>
  <div class="tweet">
    <ProfileImage image="user.image" />

    <div class="body">
      <div class="top">
        <User userData="user" />

<!-- ... -->
Access the Props
We passed the object with the user information through the prop userData. Access and display the user's name and Twitter handle.
Extract HTML
Extract the existing span tag displaying the timestamp information and render it through the Timestamp component:
<span class="timestamp"> TWEET_TIMESTAMP </span>Render the component
Import the Timestamp component to Tweet.js. After importing it, render the component inside of Tweet in the following way:
<!-- ... -->

<template>
  <div class="tweet">
    <ProfileImage image="user.image" />

    <div class="body">
      <div class="top">
        <User userData="user" />
        <Timestamp time="timestamp" />

<!-- ... -->
Access the Props
Timestamp receives a prop time. Display this value as the content of the span tag.
Extract HTML
Extract the existing p tag and render it through the Message component:
<p class="message"> TWEET_MESSAGE </p>Render the component
When done, import the Message component and render it in the Tweet.js in the following way:
<!-- ... -->

<template>
  <div class="tweet">
    <ProfileImage image="user.image" />

    <div class="body">
      <div class="top">
        <User userData="user" />
        <Timestamp time="timestamp" />
      </div>

      <Message message="message" />
<!-- ... -->
Access the Props
Message receives a prop message. Display this value in the p tag.
Extract HTML
Extract the existing message div.actions tag and render it through the Actions component:
    <div class="actions">
      <i class="far fa-comment"></i>
      <i class="fas fa-retweet"></i>
      <i class="far fa-heart"></i>
      <i class="fas fa-share"></i>
    </div>
Render the component
When done, import the Actions component and render it in the Tweet.js like this:
<!-- ... -->

<template>
  <div class="tweet">
    <ProfileImage image="user.image" />

    <div class="body">
      <div class="top">
        <User userData="user" />
        <Timestamp time="timestamp" />
      </div>

      <Message message="message" />
      <Actions />

<!-- ... -->
The Actions component doesn't take any props.
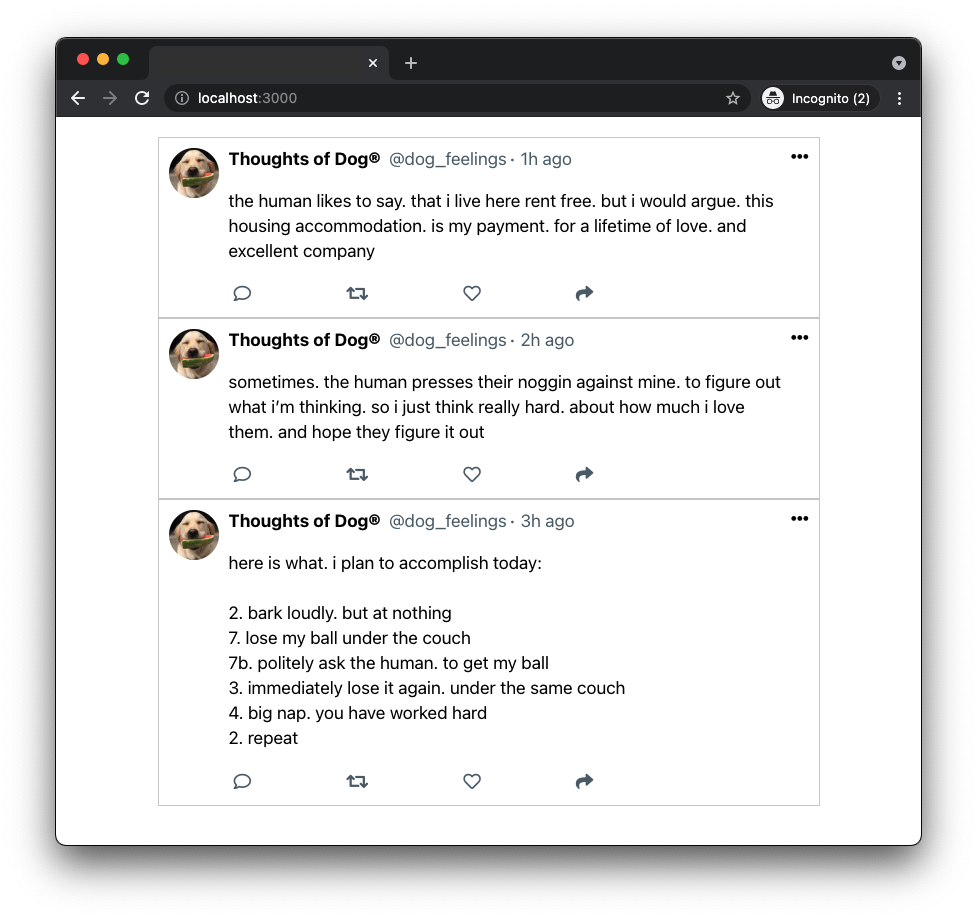
Once you are done refactoring the Tweet component, update App.vue to display three <Tweet /> components. Each <Tweet /> should receive a separate tweet object from the tweetsArray.
Once finished, your app should be displaying the following content:
Click to see the image
Happy coding! 💙