- The song database has been migrated from JSON to SQLite3.
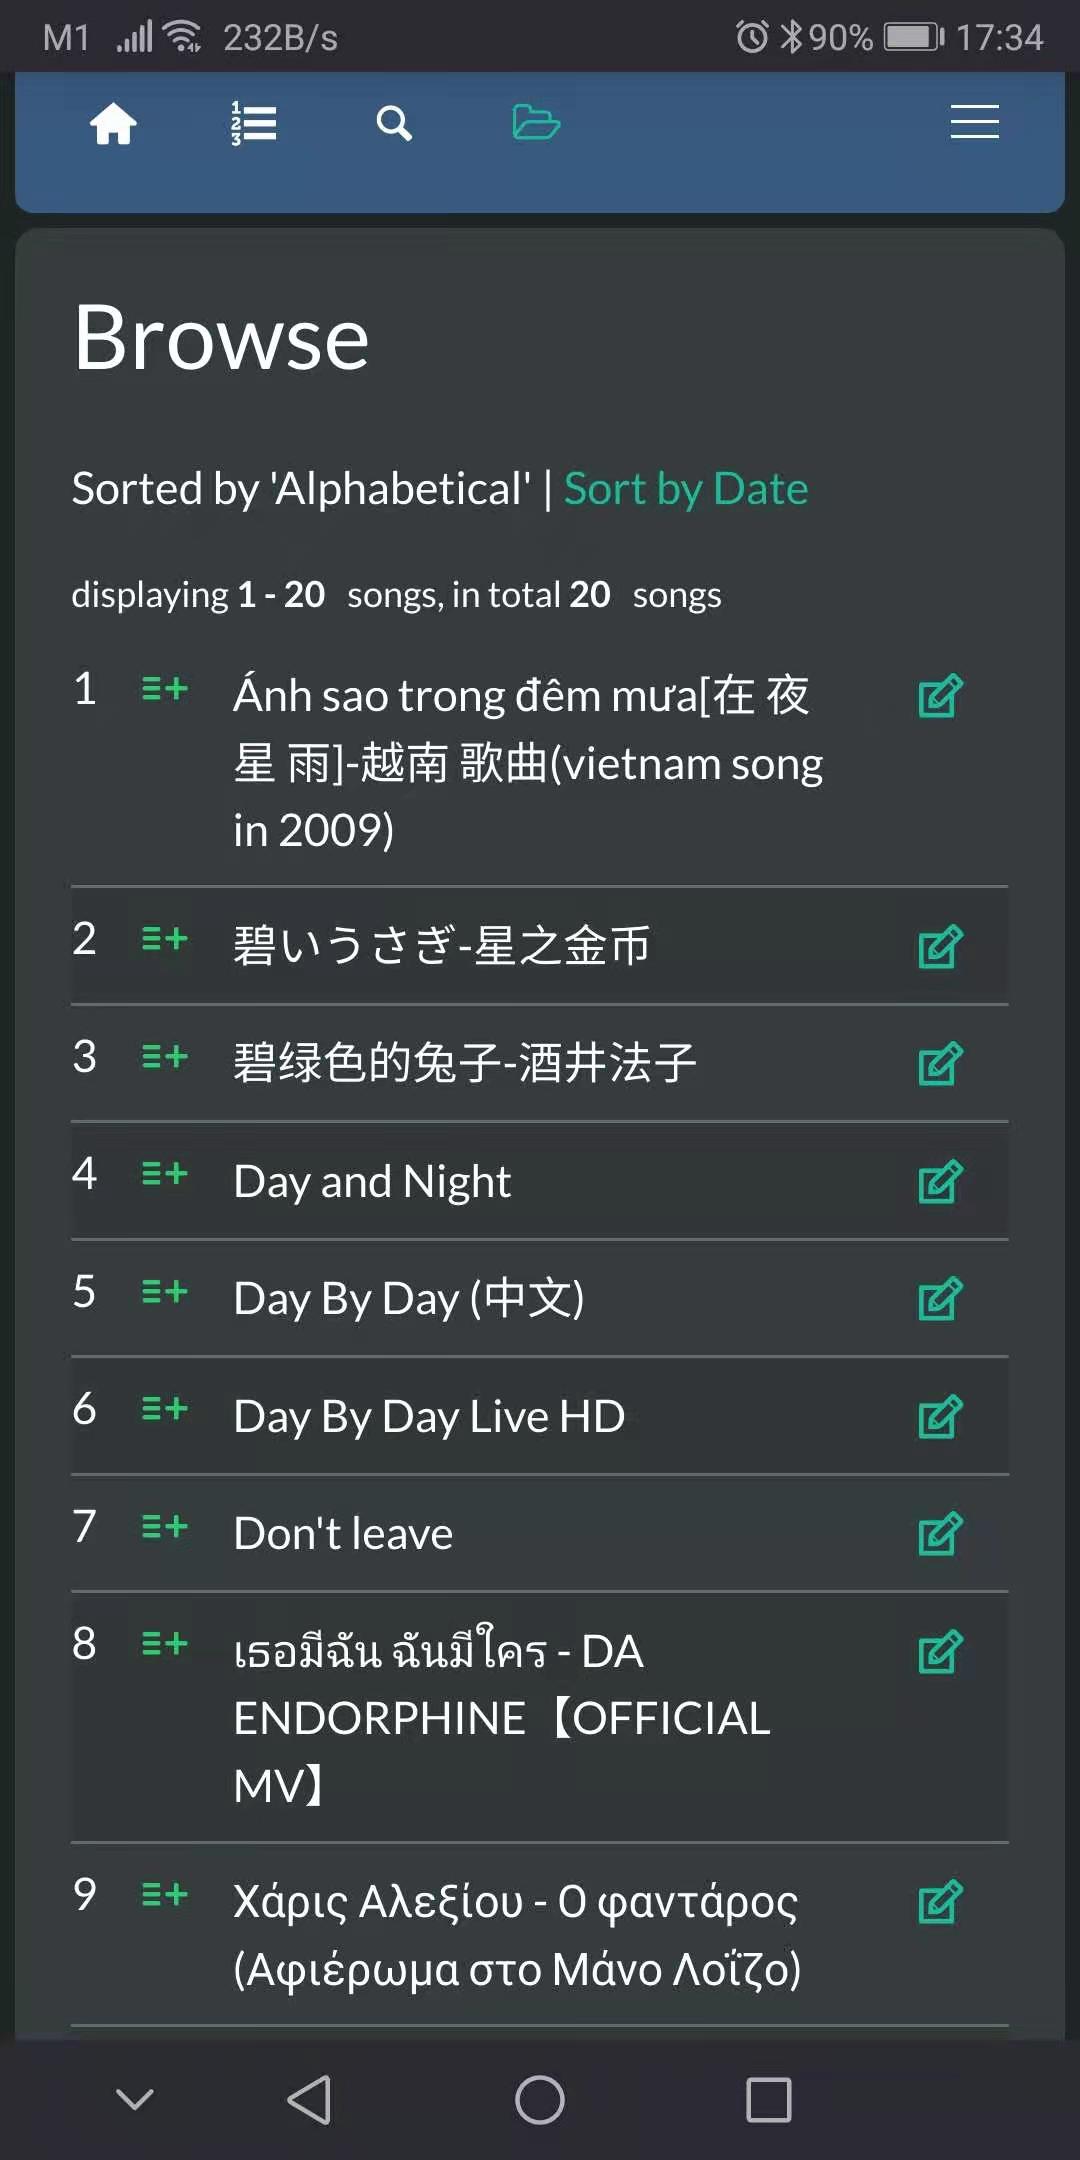
- The selection button on the browse page has been replaced with a radio button.
- Song count has been added for the favorite songs in the favorite list.
- User's name is now included in the history list.
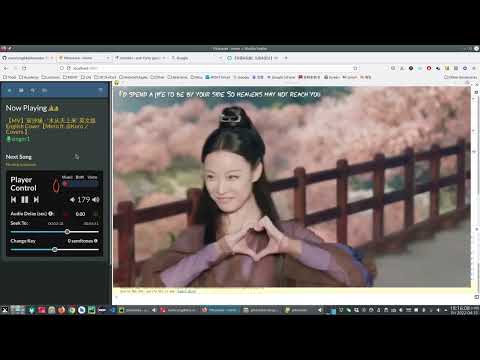
- Player control is visible by default on the home page, regardless of admin status.
- FFmpeg environment variable setup is no longer required. FFmpeg is included in the zip file. Run Setup_FFmpeg.exe to install it.
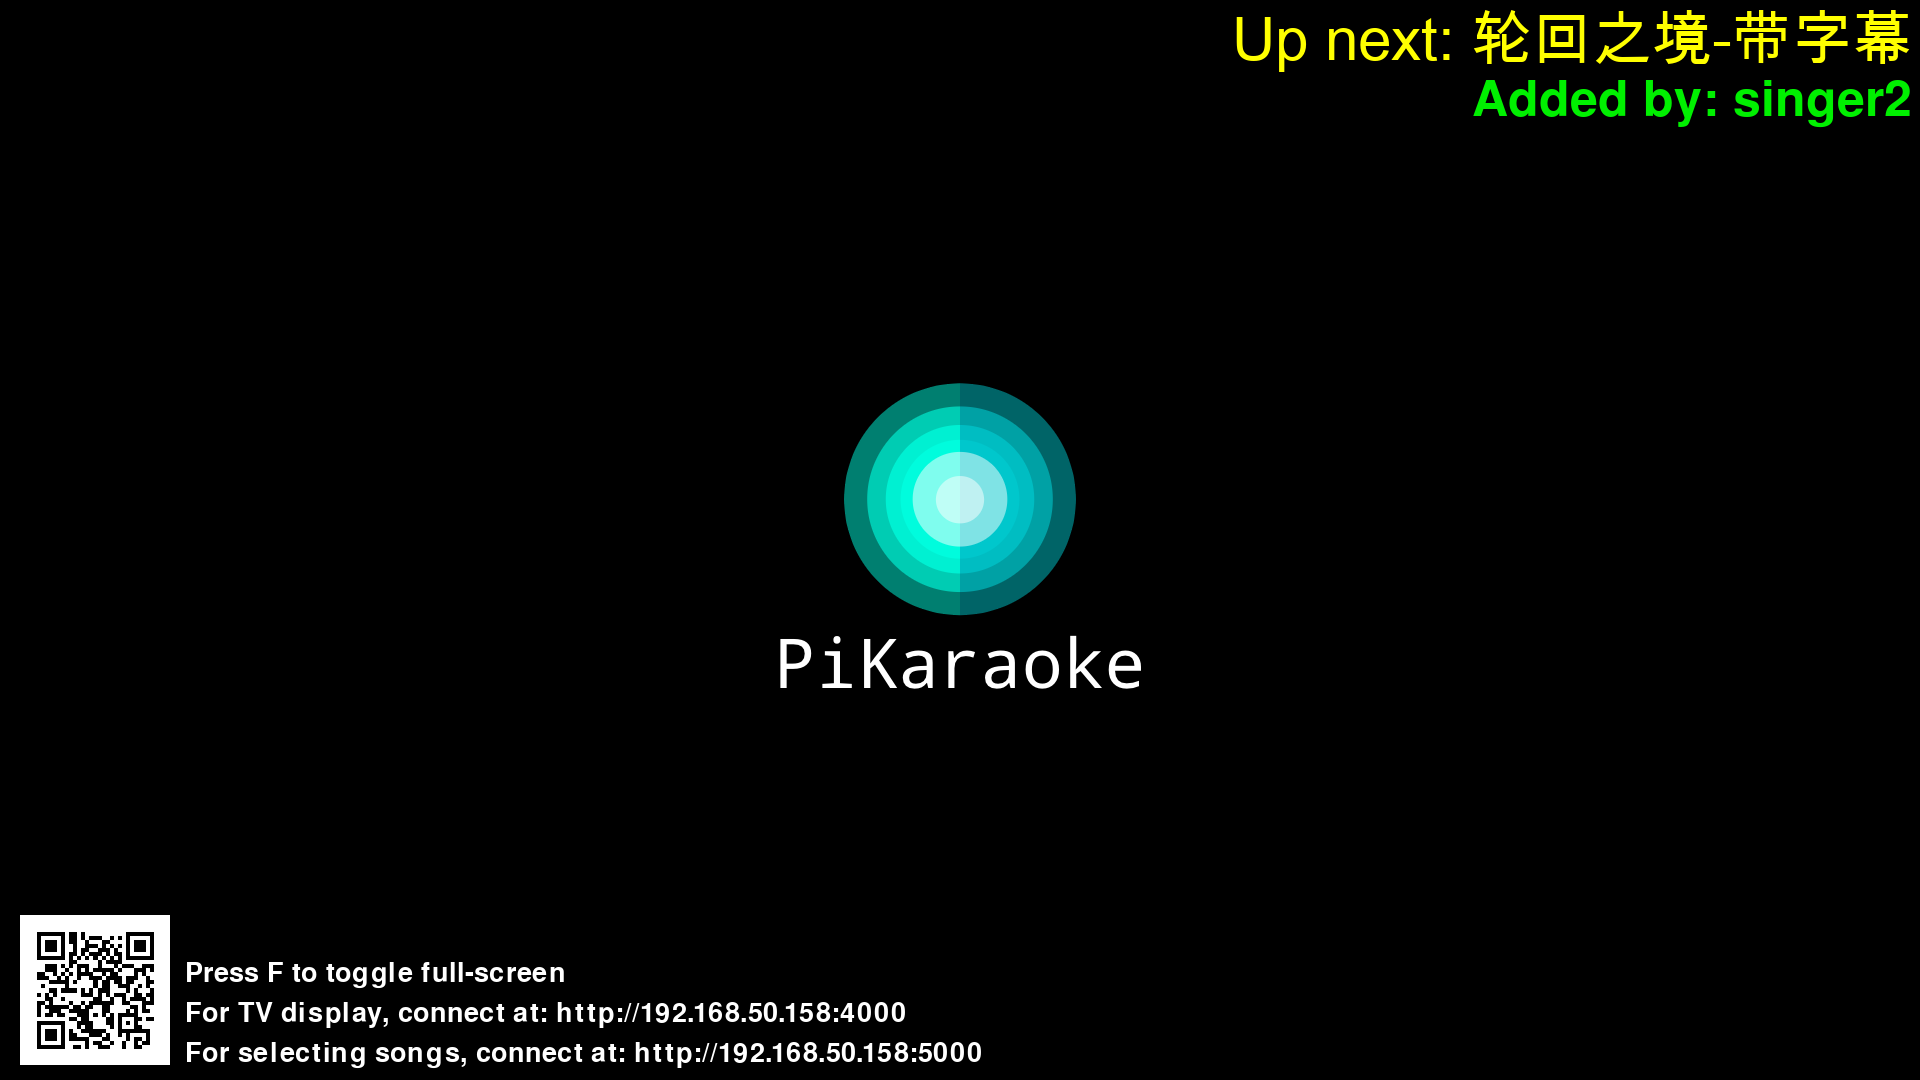
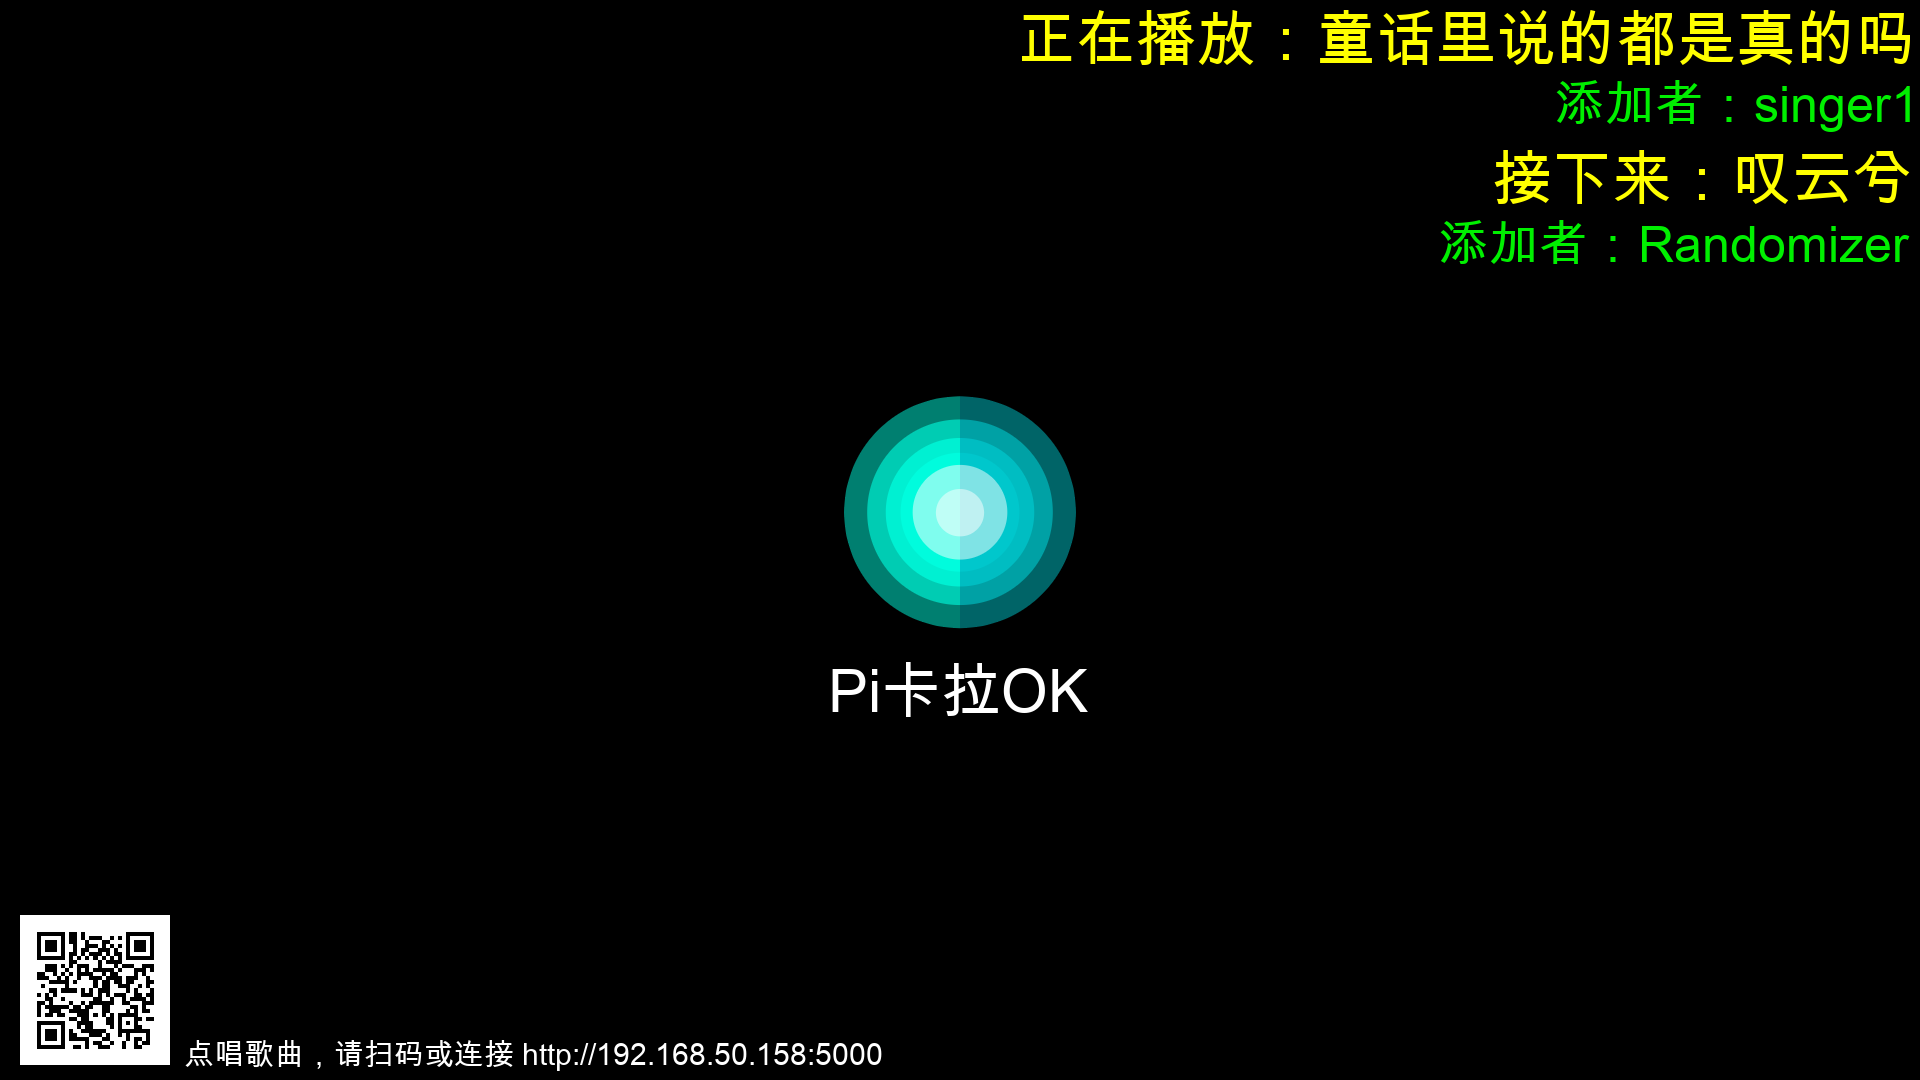
- Auto-generated SRT added as "Up Next" song notice on the screen, effective for MP4 files. Display time: 30-40 seconds and 2:00-2:10 minutes. If no next song, "Please select a song" is displayed due to VLC holding the SRT file during playback.
- Other optimizations.
Note: This fork is specifically developed for the Windows operating system. It may require significant modifications and recoding to make it compatible with other operating systems such as Raspberry Pi or Linux.
This is the world's best open-source Python-based YouTube Karaoke system up to today (2022.4), forked from @vicwomg's repo (thanks) and thoroughly revamped and incorporated @tsurumeso's DNN-based (deep neural network) vocal splitter (thanks to https://github.com/tsurumeso/vocal-remover). PiKaraoke is a "KTV"-style Karaoke song search and queueing system. It connects to your TV either via an HDMI cable, or screen sharing, or using TV's web-browser (backend KTV player is screen-captured and streamed to HTTP), and shows a QR code for computers and smartphones to connect to a web interface. From there, multiple users can seamlessly search your local track library, queue up songs, add an endless selection of new Karaoke tracks from YouTube, and more. Works on Raspberry Pi, OSX, Windows, and Linux!
See a demo on YouTube:
- DNN-based (Deep Neural Network) vocal splitter (need PyTorch, preferably with GPU support), you can choose to play instrumental, vocal or both
- Playing instrumental sound by the traditional stereo track subtraction method (disable DNN in Advanced Control Options)
- Web interface for multiple users to queue tracks
- Splash screen with connection QR code and "Next up" display
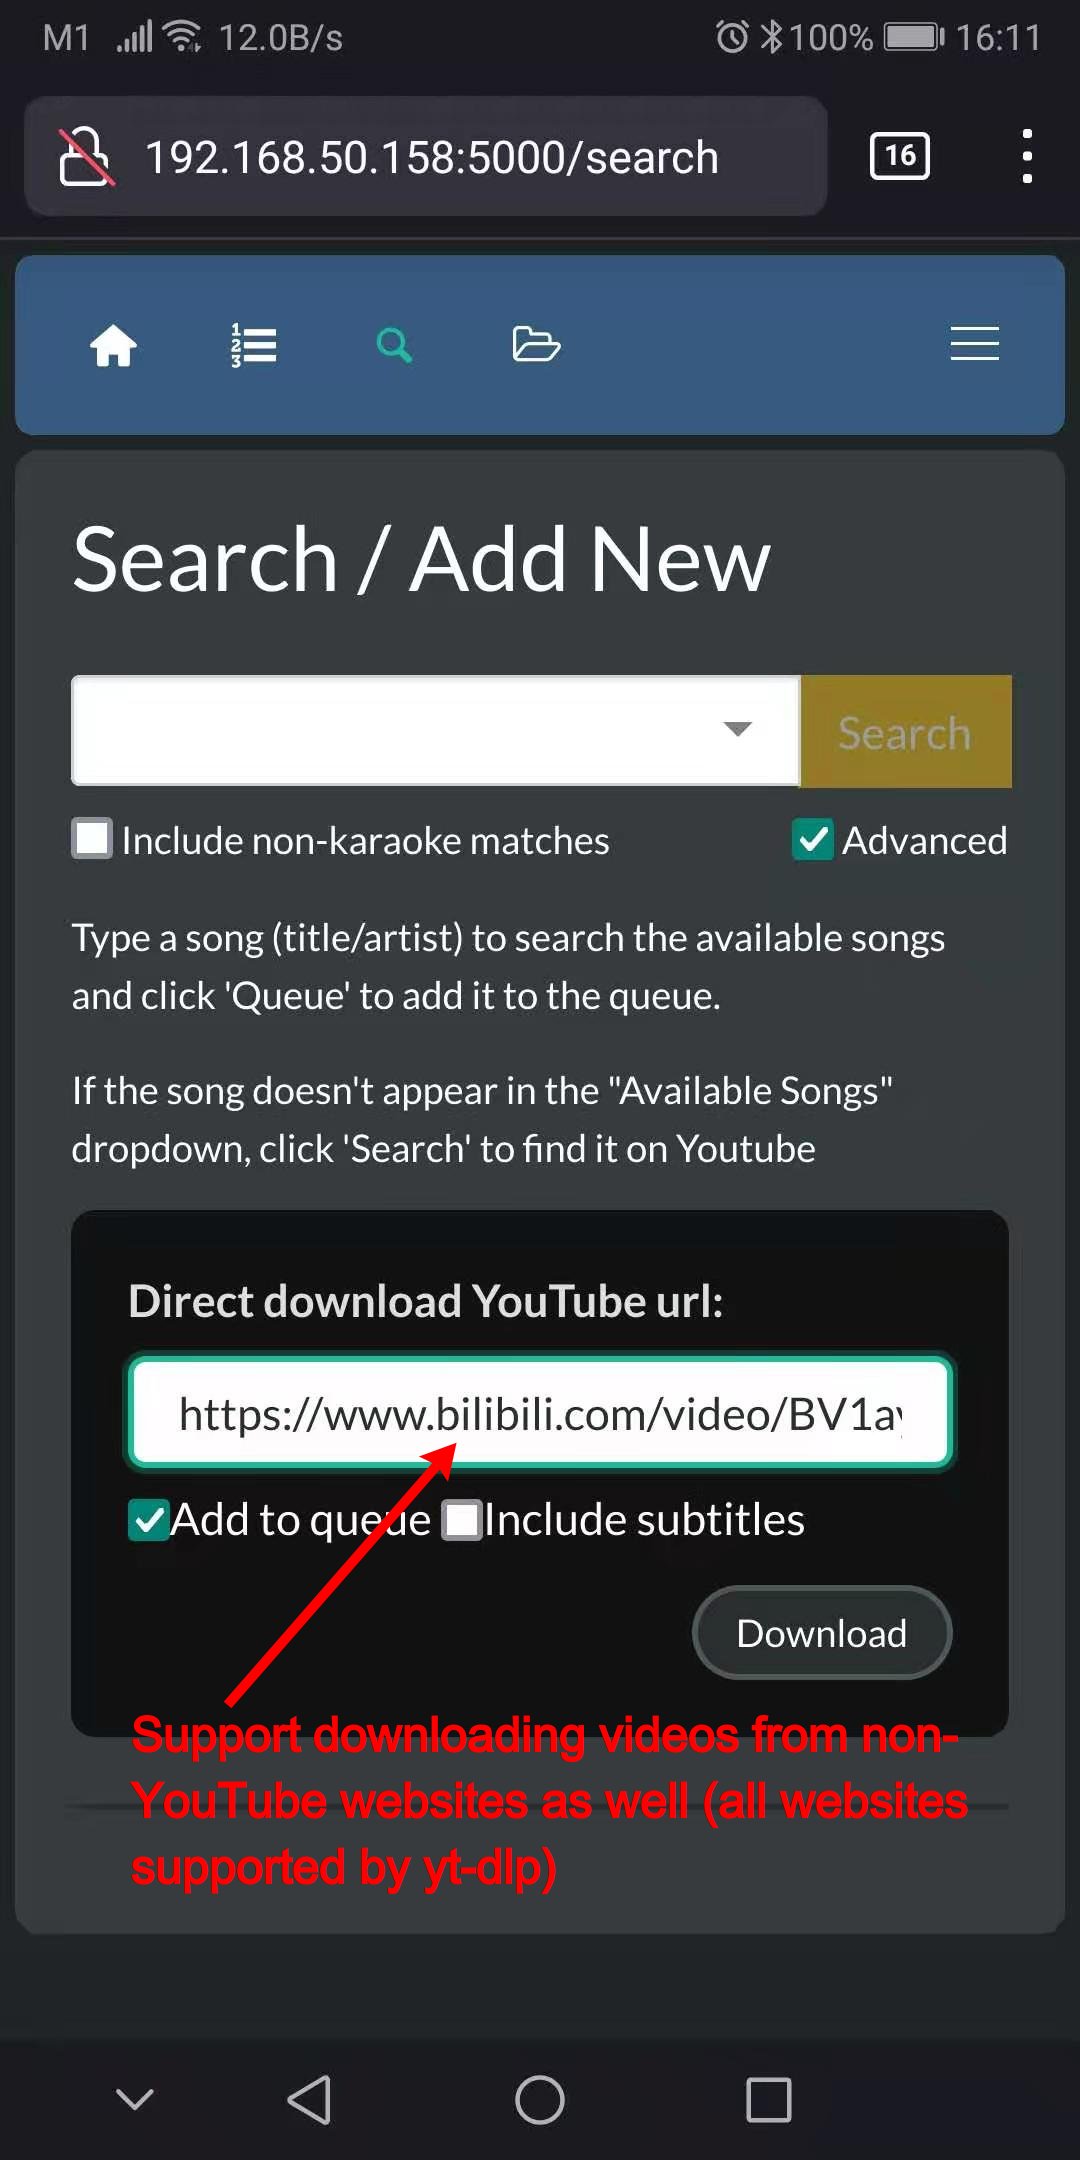
- Searching/browsing a local song library
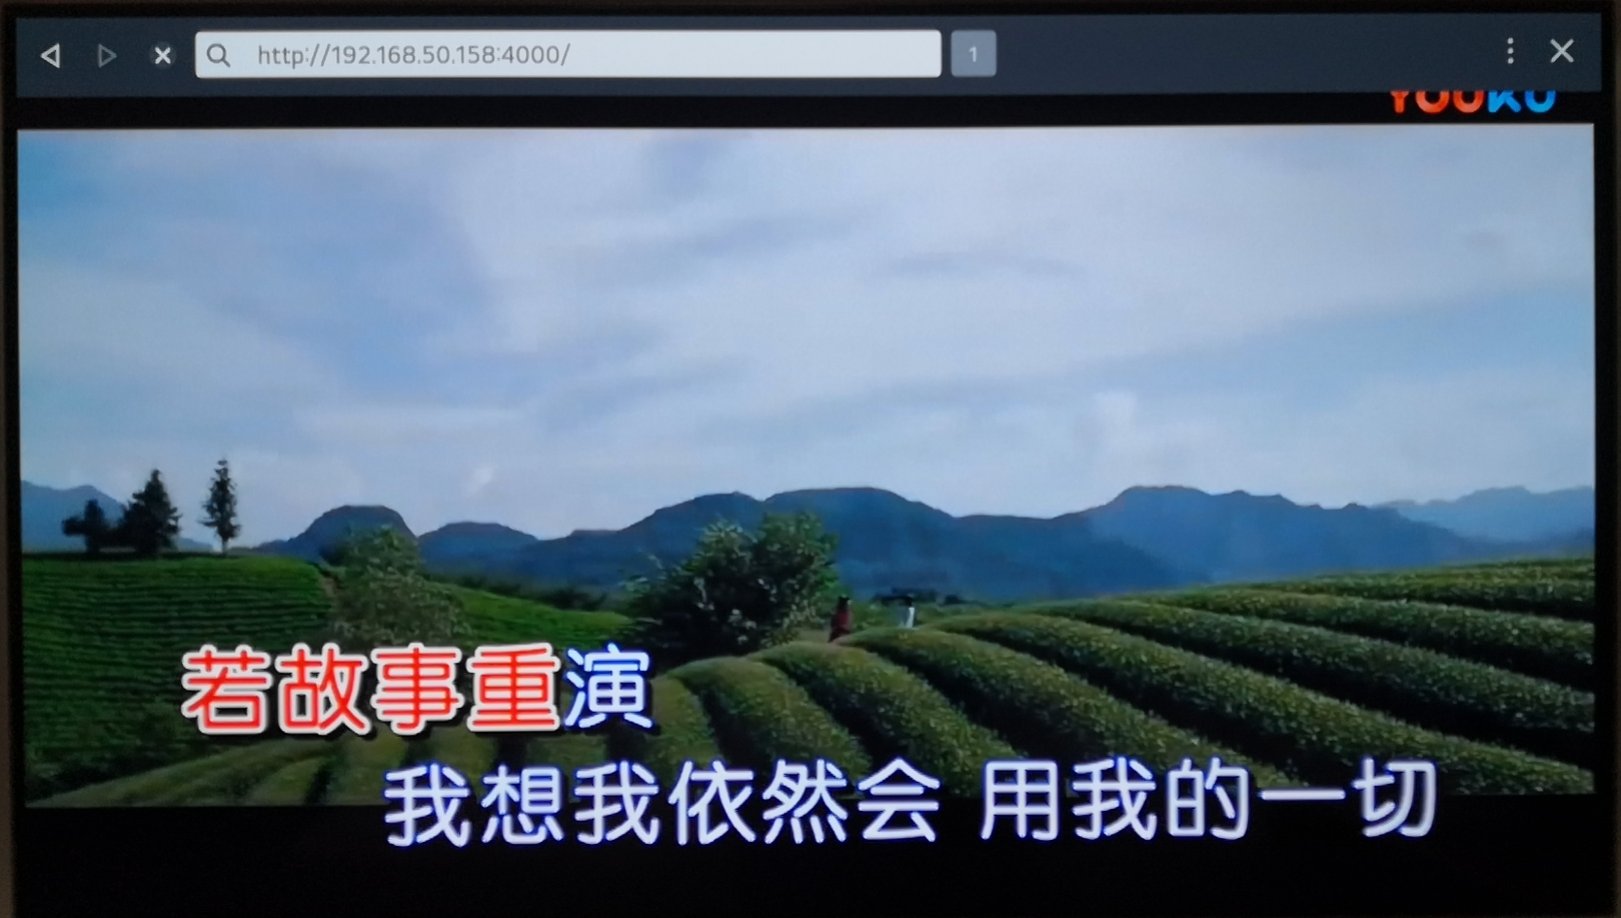
- Search for songs on YouTube and download new songs from YouTube and many other video websites such as Youku, Bilibili, etc
- mp3 + cdg support, including compressed .zip bundles
- Pause/Skip/Restart and volume control
- Support renaming and deletion of downloaded files
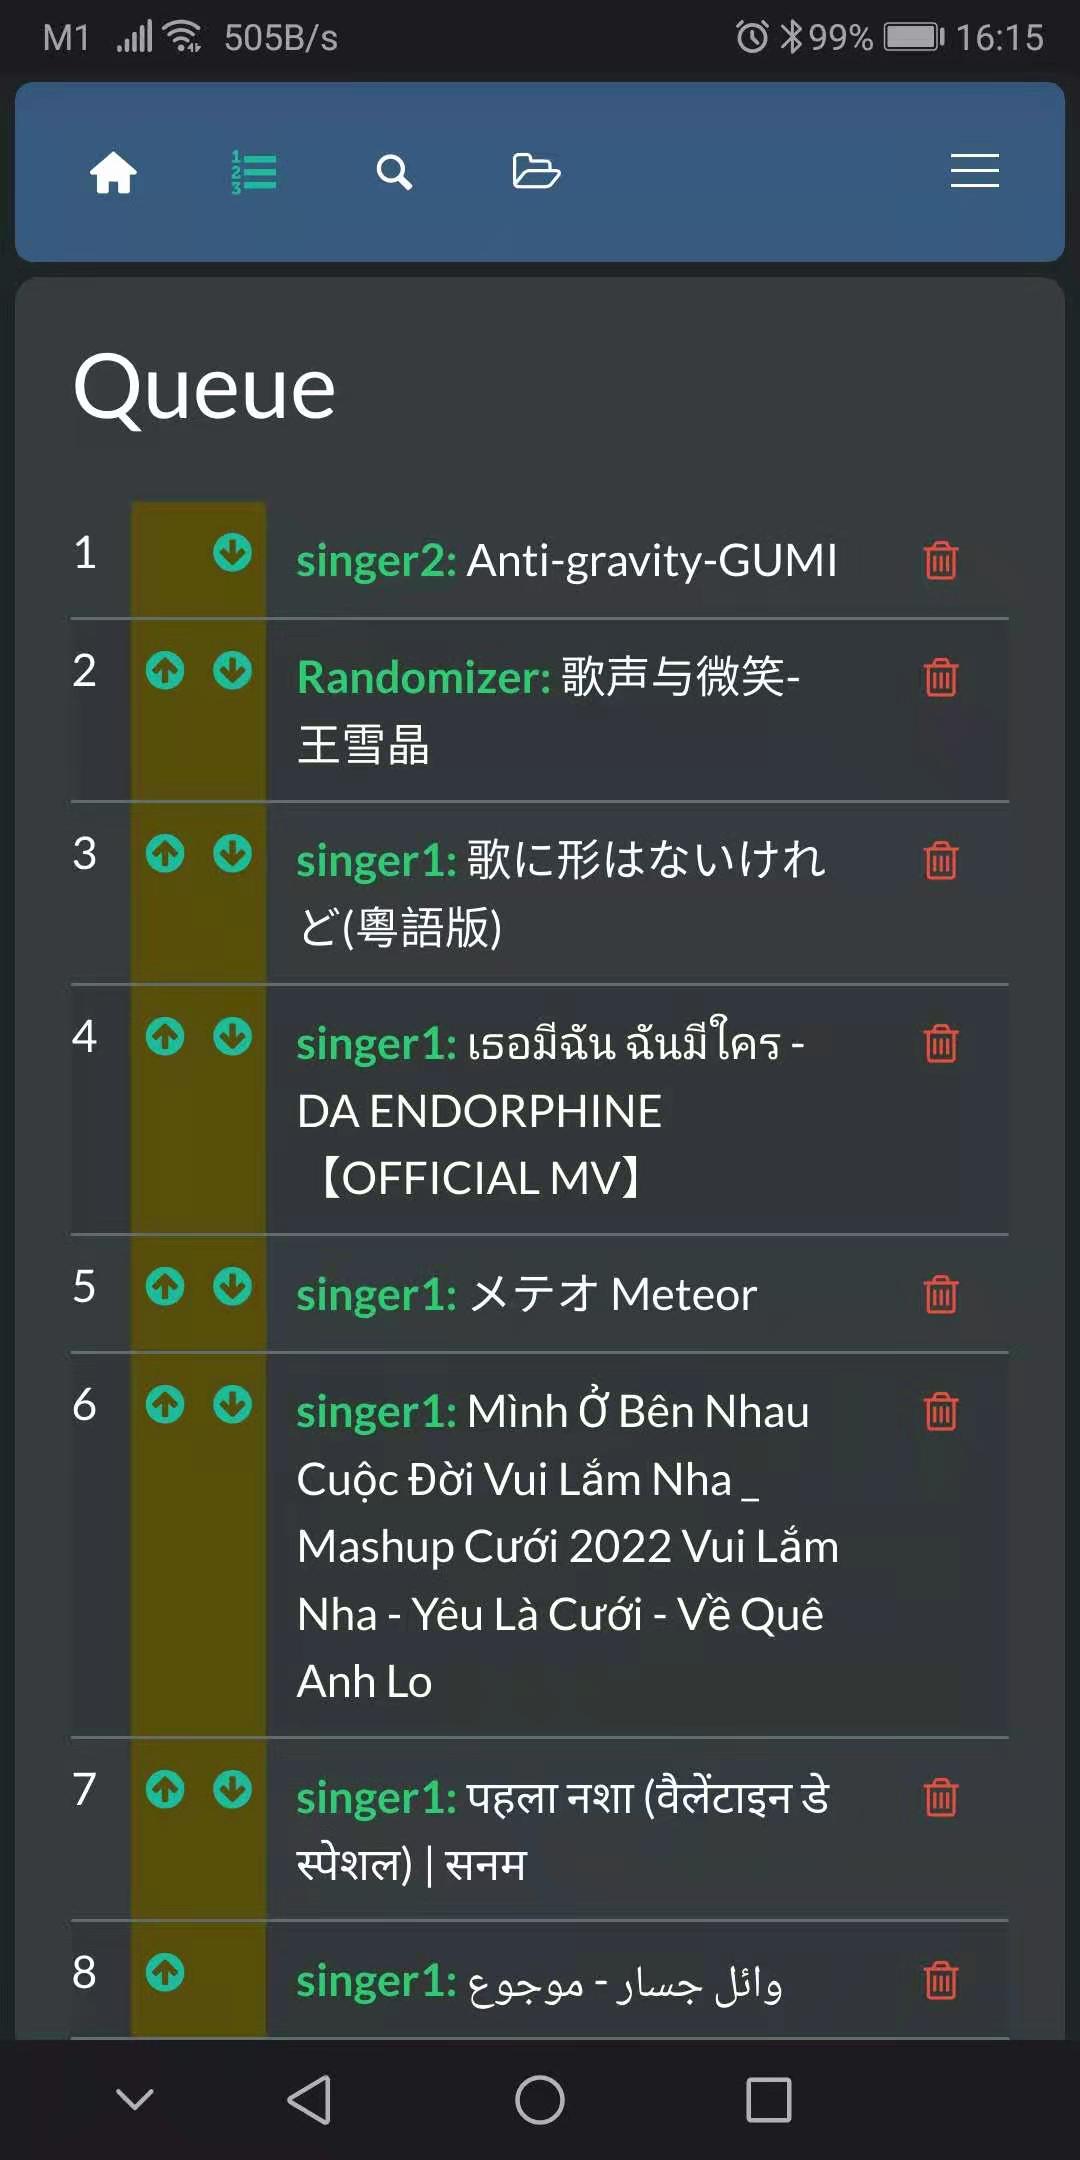
- Queue management, support dragging of a song to any position in the queue
- Key Change / Pitch shifting
- Volume normalization (all songs will sound equally loud)
- Lock down features with admin mode
- Seek to play position (you can practice singing a specific sentence over and over again)
- Audio delay adjustment (YouTube MTVs often have synchronized lyrics, this makes singing difficult as there is not enough time to look at the lyrics)
- Subtitle delay adjustment for easier singing (subtitle control will be displayed only if the currently-playing media file contains subtitle tracks)
- Stream-to-HTTP allows any TV (or IT device) with a web browser to watch the KTV (on Windows and MacOS, you can use wireless-display/screen-projection and Airplay respectively)
- Support song titles in all languages (including Chinese/Japanese/Arabic/Greek/Korean/Vietnamese/Hindi/etc.), filenames containing non-English characters are sorted according to their English transliteration
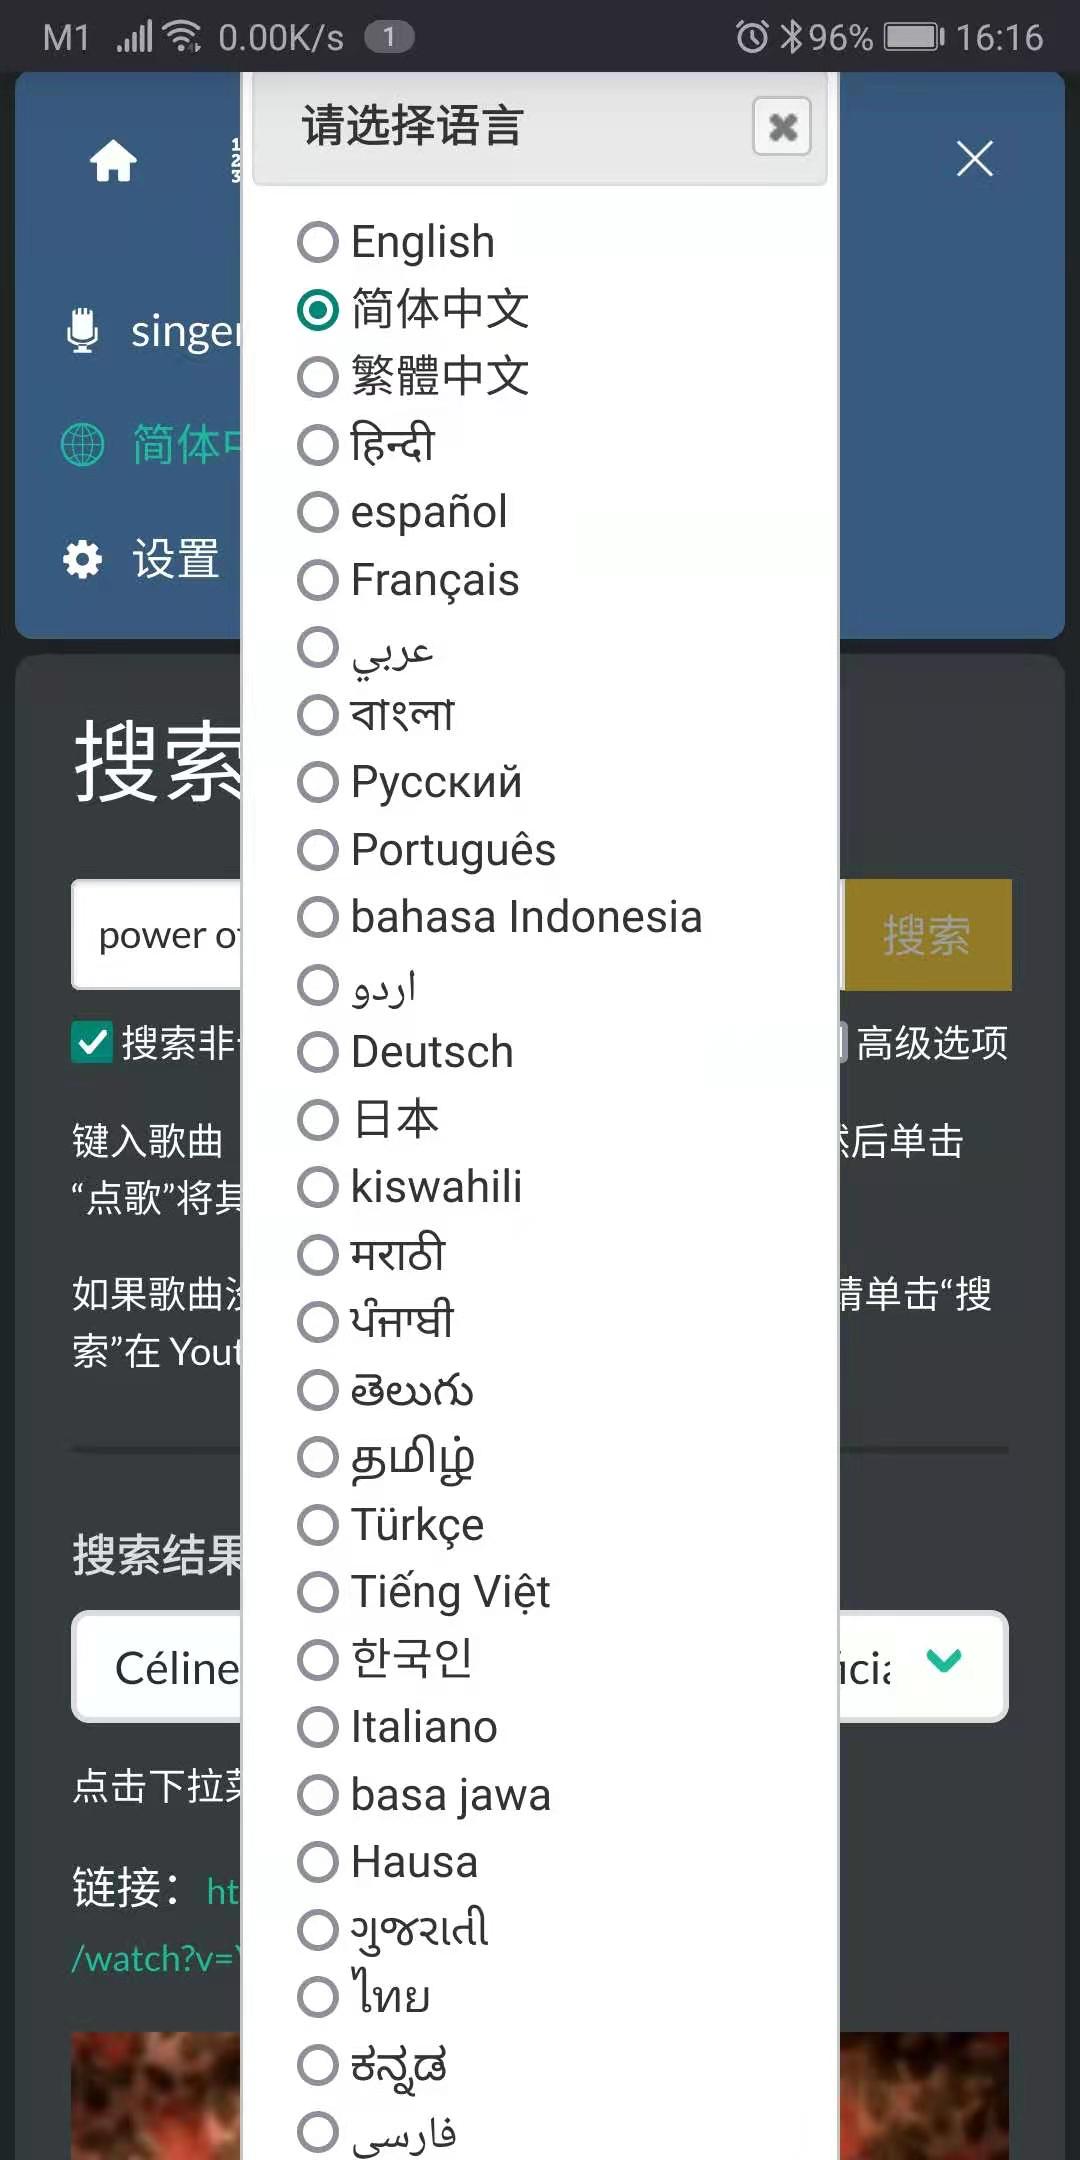
- Multi-lingual support in both Web UI and backend system UI

This should work on Windows, Linux machines and all Raspberry Pi devices (multi-core models recommended). @vicwomg did most development on a Pi Zero W and did as much optimization as he could handle, while I did all the revamp work on Ubuntu/Linux, Mac OS and Windows. However, certain things like concurrent downloads and browsing big song libraries might suffer. All this runs excellently on Windows, Linux and RPi (3 and above).
If you're on a Raspberry Pi, you might want to just use the pre-built image to save time installing dependencies:
- Download the zip file of the raspberrry pi image and extract it: latest release
- Write the image to an SD card. Instructions on how to install pi img files
- Before plugging it in, configure your wifi
- Reconnect the SD card on the computer you used to flash the file
- In the /boot drive that shows up, make a copy of wpa_supplicant.conf.example to wpa_supplicant.conf
- Edit this wpa_supplicant.conf and replace with your wifi router's ssid, password, and if necessary, the country code. Save the file
- Plug in the SD card to your pi device and turn it on
- You should eventually see the Pikaraoke splash screen
- On your phone, connect to the IP address on the screen (or use the QR code).
- In the web interface, go to the "Pikaraoke" submenu in the titlebar.
- Click the link to update youtube-dl and give it a couple of minutes to complete
- Click the link to expand the Raspberry Pi filesystem to fill the rest of your SD card
- Pi will reboot. You should be all set!
- The credentials to log in to the pi are - username: pi / password: pikaraoke
Firstly, for all OS:
- Install git, if you haven't already. (on Raspberry Pi:
sudo apt-get update; sudo apt-get install git) - Clone this repo,
git clone https://github.com/xuancong84/pikaraoke.git - Download and install Anaconda3 (https://www.anaconda.com/products/individual), it contains Python3, pip/pip3 and common Python libraries
- Install pip dependencies, in the conda environment, cd into the project folder and run
pip install -r requirements.txt - Create song download directory
$HOME/pikaraoke-songs(by default) or specify it on the command line. - Create
nonvocalandvocalsub-folders inside the song download directory to enable automatic extraction of instrumental and vocal tracks in the background, e.g.,$HOME/pikaraoke-songs/nonvocaland$HOME/pikaraoke-songs/vocalby default. - Make sure
VLC(https://www.videolan.org/) andffmpeg(https://ffmpeg.org/download.html) are installed, and their executables are in the execution PATH environment variable
Run the setup script:
./setup-pi.sh
You will then probably need to reboot since this changes a boot setting (gpu_mem=128). This is to prevent certain videos from showing visual artifacts (green pixel distortion)
sudo reboot
- Install tmux,
sudo apt install tmux - You can activate conda environment by
export PATH=$HOME/anaconda3/bin:$PATH - yt-dlp should be automatically installed when you run
pip install -r requirements.txt - Make sure you can run
yt-dlp,ffmpegandvlc(optionallycvlc) directly - For GPU-accelerated vocal splitter, install Nvidia driver (Google on how to install); and use Anaconda3's pip to install PyTorch (see https://pytorch.org/)
- Install VLC (to its default location): https://www.videolan.org/
- Install MS Visual C++ (required to launch youtube-dl/yt-dlp in pip dependencies) https://www.microsoft.com/en-US/download/details.aspx?id=5555
- Install PyTorch (with CUDA recommended) using pip in Anaconda3's prompt/powershell, this is required only if you want to use the DNN-based vocal splitter
- You can copy a .exe file into
C:\Windows\system32folder to make it runnable everywhere or add its path to environment variable (see https://www.computerhope.com/issues/ch000549.htm)
Note: if you have trouble installing pygame, there's apparently an incompatibility with Python 3.8. Try upgrading to the latest python version or downgrading to 3.7.
On Linux/Mac-OS, run:
cd into the pikaraoke directory and run: PATH=~/anaconda3/bin:$PATH ./run.sh
On Raspberry Pi:
sudo env PATH=<anaconda3-bin>:$PATH python3 app.py
You must run as sudo on pi devices if you are running directly from the console since PiKaraoke uses pygame to control the screen buffer. You can probably run as non-sudo from the Raspbian desktop environment, but may need to specify a different download directory than the default with the -d option.
On Windows:
In Anaconda3's prompt/powershell, cd to the pikaraoke directory and run:
python3 app.py -d <your-song-download-folder>
The app should launch and show the PiKaraoke splash screen and a QR code and a URL. Using a device connected to the same wifi network as the Pi, scan this QR code or enter the URL into a browser. You are now connected! You can start exploring the UI and adding/queuing new songs directly from YouTube.
Here is the full list of command line arguments on OSX as an example (may not be up to date, run python3 app.py --help for the latest):
usage: app.py [-h] [-u NONROOT_USER] [-p PORT] [-d DOWNLOAD_PATH] [-o OMXPLAYER_PATH] [-y YOUTUBEDL_PATH]
              [-v VOLUME] [-V] [-s SPLASH_DELAY] [-L LANG] [-l LOG_LEVEL] [--hide-ip]
              [--hide-raspiwifi-instructions] [--hide-splash-screen] [--adev ADEV] [--dual-screen]
              [--high-quality] [--use-omxplayer] [--use-vlc] [--vlc-path VLC_PATH] [--vlc-port VLC_PORT]
              [--logo-path LOGO_PATH] [--show-overlay] [-w] [--admin-password ADMIN_PASSWORD]
              [--developer-mode]

optional arguments:
  -h, --help            show this help message and exit
  -u NONROOT_USER, --nonroot-user NONROOT_USER
                        Since tmux must be launched by a non-root user (to run pacmd to select recording
                        source), this is required for sending keys to tmux.
  -p PORT, --port PORT  Desired http port (default: 5000)
  -d DOWNLOAD_PATH, --download-path DOWNLOAD_PATH
                        Desired path for downloaded songs. (default: ~/pikaraoke-songs)
  -o OMXPLAYER_PATH, --omxplayer-path OMXPLAYER_PATH
                        Path of omxplayer. Only important to raspberry pi hardware. (default:
                        /usr/bin/omxplayer)
  -y YOUTUBEDL_PATH, --youtubedl-path YOUTUBEDL_PATH
                        Path of youtube-dl. (default: /home/xuancong/anaconda3/bin/yt-dlp)
  -v VOLUME, --volume VOLUME
                        If using omxplayer, the initial player volume is specified in millibels. Negative
                        values ok. (default: 0 , Note: 100 millibels = 1 decibel).
  -V, --run-vocal       Explicitly run vocal-splitter process from the main program (by default, it only
                        run explicitly in Windows)
  -s SPLASH_DELAY, --splash-delay SPLASH_DELAY
                        Delay during splash screen between songs (in secs). (default: 5 )
  -L LANG, --lang LANG  Set display language (default: None, set according to the current system locale
                        en_US)
  -l LOG_LEVEL, --log-level LOG_LEVEL
                        Logging level int value (DEBUG: 10, INFO: 20, WARNING: 30, ERROR: 40, CRITICAL:
                        50). (default: 20 )
  --hide-ip             Hide IP address from the screen.
  --hide-raspiwifi-instructions
                        Hide RaspiWiFi setup instructions from the splash screen.
  --hide-splash-screen  Hide splash screen before/between songs.
  --adev ADEV           Pass the audio output device argument to omxplayer. Possible values:
                        hdmi/local/both/alsa[:device]. If you are using a rpi USB soundcard or Hifi audio
                        hat, try: 'alsa:hw:0,0' Default: 'both'
  --dual-screen         Output video to both HDMI ports (raspberry pi 4 only)
  --high-quality        Download higher quality video. Note: requires ffmpeg and may cause CPU, download
                        speed, and other performance issues
  --use-omxplayer       Use OMX Player to play video instead of the default VLC Player. This may be
                        better-performing on older raspberry pi devices. Certain features like key change
                        and cdg support wont be available. Note: if you want to play audio to the
                        headphone jack on a rpi, you'll need to configure this in raspi-config: 'Advanced
                        Options > Audio > Force 3.5mm (headphone)'
  --use-vlc             Use VLC Player to play video. Enabled by default. Note: if you want to play audio
                        to the headphone jack on a rpi, see troubleshooting steps in README.md
  --vlc-path VLC_PATH   Full path to VLC (Default: /usr/bin/cvlc)
  --vlc-port VLC_PORT   HTTP port for VLC remote control api (Default: 5002)
  --logo-path LOGO_PATH
                        Path to a custom logo image file for the splash screen. Recommended dimensions ~
                        500x500px
  --show-overlay        Show overlay on top of video with pikaraoke QR code and IP
  -w, --windowed        Start PiKaraoke in windowed mode
  --admin-password ADMIN_PASSWORD
                        Administrator password, for locking down certain features of the web UI such as
                        queue editing, player controls, song editing, and system shutdown. If unspecified,
                        everyone is an admin.
  --developer-mode      Run in flask developer mode. Only useful for tweaking the web UI in real time.
                        Will disable the splash screen due to pygame main thread conflicts and may require
                        FLASK_ENV=development env variable for full dev mode features.
Upon launch, the connected monitor/TV should show a splash screen with the IP of PiKaraoke along with a QR code.
If there's a keyboard attached, you can exit pikaraoke by pressing "esc". You can toggle fullscreen mode by pressing "f"
Make sure you are connected to the same network/wifi. You can then enter the shown IP or scan the QR code on your smartphone/tablet/computer to open it in a browser. From there you should see the PiKaraoke web interface. It is hopefully pretty self-explanatory, but if you really need some help:
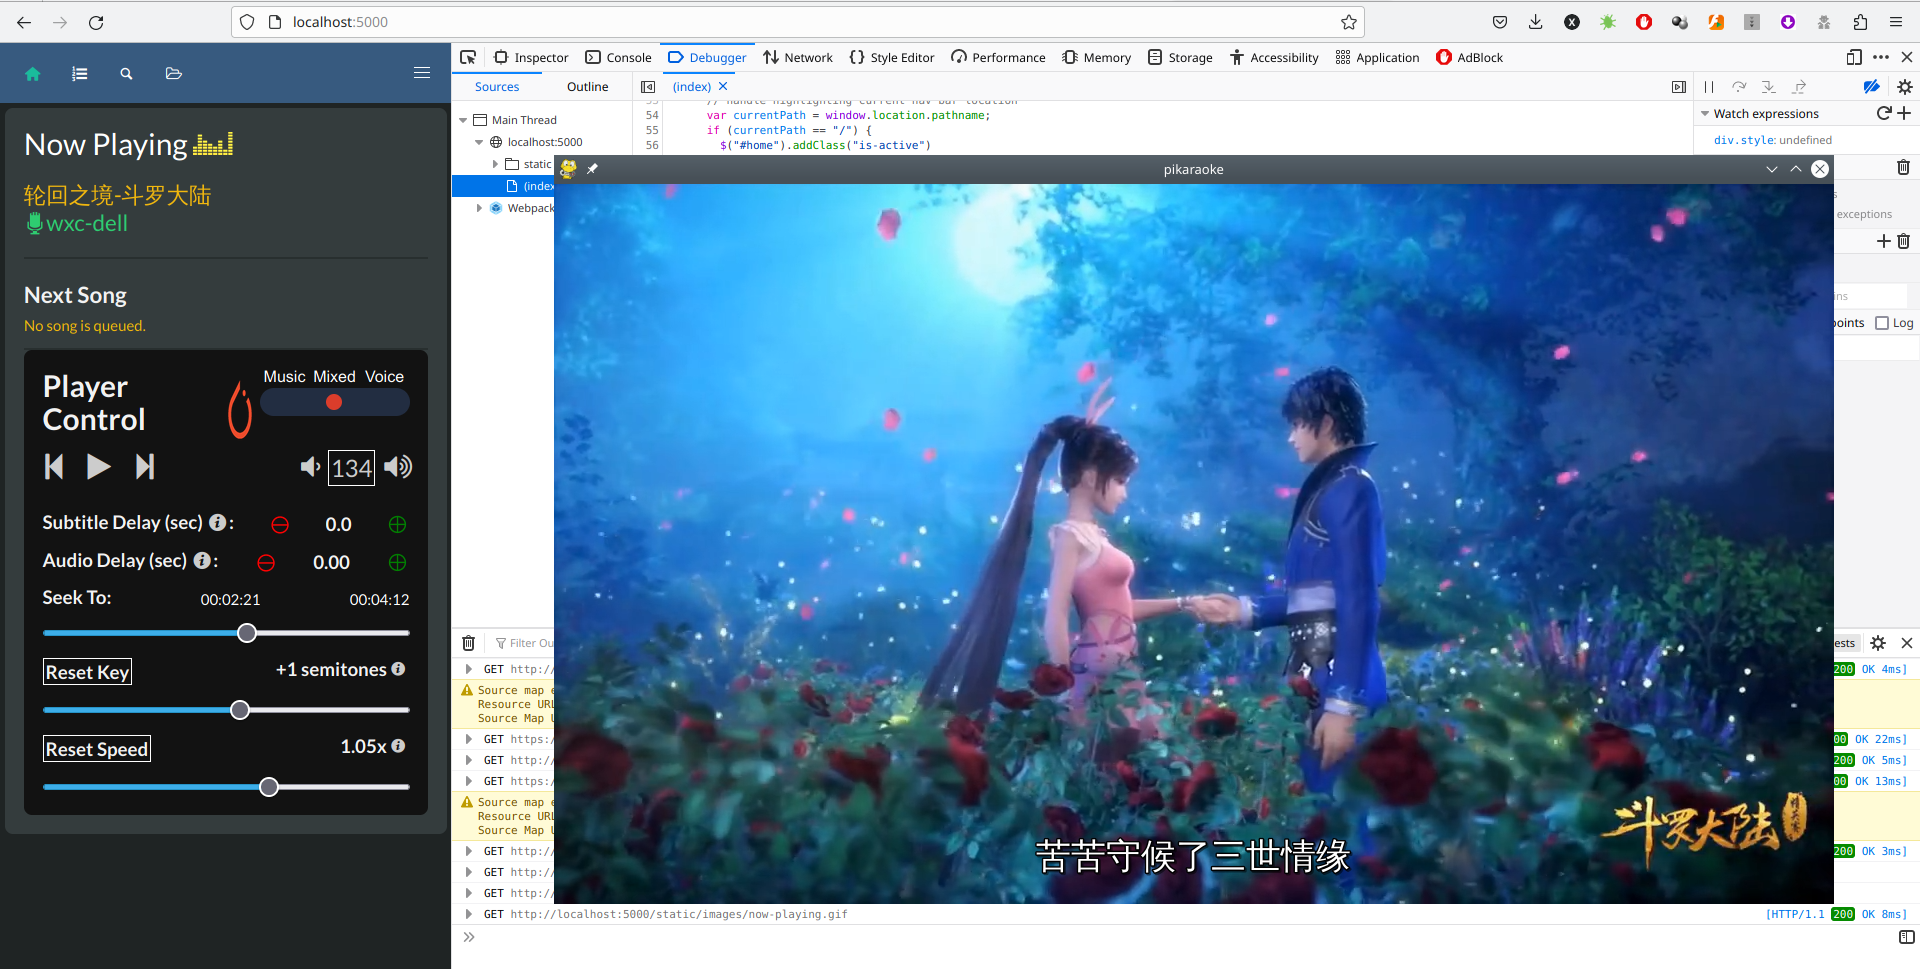
- View Now Playing and Next tracks
- Access controls to repeat, pause, skip and control volume
- Transpose slider to change playback pitch
- Edit the queue/playlist order (up and down arrow icons)
- Delete from queue ( x icon )
- Add random songs to the queue
- Clear the queue
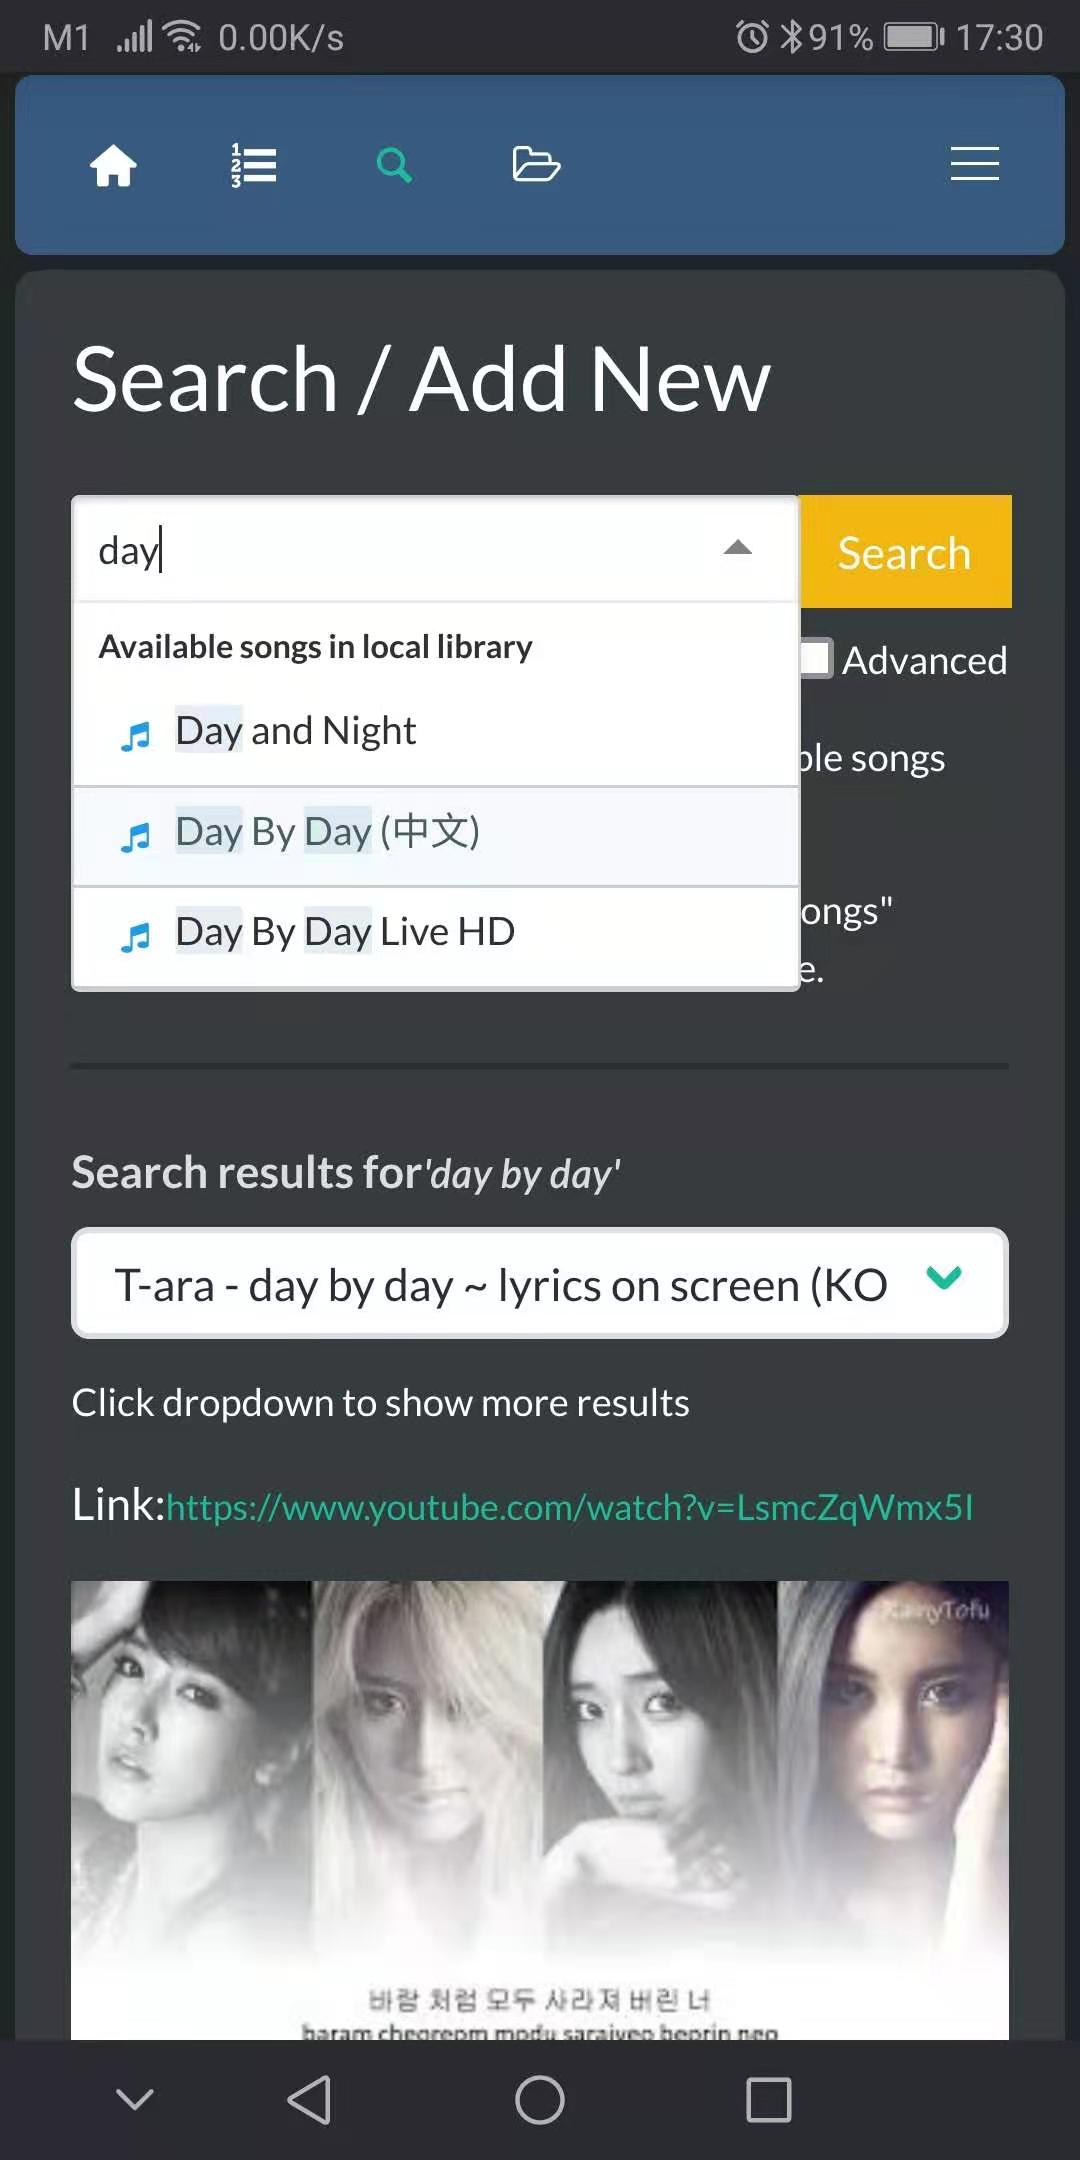
- Add songs to the queue by searching current library on local storage (likely empty at first), search is executed autocomplete-style
- Add new songs from the internet by using the second search box
- Click browse to view the full library. From here you can edit files in the library (rename/delete).
- Shows the IP and QR code to share with others
- Shows CPU / Memory / Disk Use stats
- Allows updating the song list and youtube-dl version
- Allows user to quit to console, shut down, or reboot system. Always shut down from here before you pull the plug on pikaraoke!
By default the raspbian outputs to HDMI audio when it's available. Pikaraoke tries to output to both HDMI and headphone, but if it doesn't work you may need to to force it to the headphone jack. This is definitely the case when using VLC. To do so, change following setting on the pi:
sudo raspi-config
Advanced Options > Audio > Force 3.5mm (headphone)
See: https://www.raspberrypi.org/documentation/configuration/audio-config.md
If you're still having issues with hearing audio, it has been reported this helps on raspberry pi 4 devices:
sudo nano /usr/share/alsa/alsa.conf
Scroll down and change defaults.ctl.card and defaults.pcm.card to "1"
defaults.ctl.card 1
defaults.pcm.card 1
Note this value might be different in older versions of Raspbian or if you have external audio hardware. See source article for details: https://raspberrypi.stackexchange.com/a/39942
I'm still having audio issues with the headphone jack, external sound card, or other audio device with omxplayer
If using omxplayer with --use-omxplayer, it tends to have some inconsistent results across different hardware combinations. Try experimenting with the --adev option, which specifies the audio device to omxplayer. Defaults to 'both' which is hdmi and headphone out. Other possible values are: hdmi/local/both/alsa[:device].
If you're hearing distorted audio output, try '--adev alsa' with omxplauer.
If you're using an external USB sound card or hifi audio hat like the hifiberry, you'll need to add the argument '--adev alsa:hw:0,0' when you launch pikaraoke
Make sure youtube-dl is up to date, old versions have higher failure rates due to security changes in Youtube. You can see your current version installed by navigating to Info > System Info > Youtube-dl version. The version number is usually the date it was released. If this is older than a couple of months, chances are it will need an update.
You can update youtube-dl directly from the web UI. Go to Info > Update Youtube-dl (depending on how you installed, you may need to be running pikaraoke as sudo for this to work)
Or, from the CLI (path may vary):
yt-dlp -U or pip install yt-dlp -U
I brought my pikaraoke to a friend's house and it can't connect to their network. How do I change wifi connection without ssh?
These are my preferred ways to do it, but they might require either a USB keyboard or a computer with an SD Card reader.
- Completely Headless: I can highly recommend this package: https://github.com/jasbur/RaspiWiFi . Install it according to the directions and it will detect when there is no network connection and act as a Wifi AP allowing you to configure the wifi connection from your smartphone, similar to a Chromecast initial setup. You can even wire up a button to GPIO18 and 3.3V to have a manual wifi reset button. This, along with auto-launch in rc.local makes PiKaraoke a standalone appliance!
- USB Keyboard: plug in a USB keyboard to the pi. After it boots up, log in and run "sudo raspi-config" and configure wifi through the Network Options section. If the desktop UI is installed, you can also run "startx" and configure wifi from the Raspbian GUI. You can also manually edit /etc/wpa_supplicant/wpa_supplicant.conf as desribed below.
- SD Card Reader: Remove the pi's SD card and open it on a computer with an SD card reader. It should mount as a disk drive. On the BOOT partition, add a plaintext file named "wpa_supplicant.conf" and put the following in it:
ctrl_interface=DIR=/var/run/wpa_supplicant GROUP=netdev
update_config=1
country=<Your 2-letter country code, ex. US>
network={
  ssid="<the wifi ap ssid name>"
  psk="<the wifi password>"
  key_mgmt=WPA-PSK
}
Add the SD card back to the pi and start it up. On boot, Raspbian should automatically add the wpa_supplicant.conf file to the correct location and connect to wifi.
Actually, yes! But you can only access your existing library and won't be able to search or download new songs from the Internet, obviously.
If you run your Pi as a Wifi access point, your browser can connect to that access point, and it should work. See: https://www.raspberrypi.org/documentation/configuration/wireless/access-point.md
Or an even easier approach, if you install this: https://github.com/jasbur/RaspiWiFi (used for configuring wifi connections headless, see above). While it's in AP mode, you can connect to the pi as an AP and connect directly to it at http://10.0.0.1:5000
Ideally, you'd have a mixer and amplifier that you could run the line out of the pi to, as well as the microphones. I used this affordable wireless microphone set from amazon: https://amzn.to/2OXKXdc (affiliate link) It has a line-in so you can also run PiKaraoke into the mix, and output to an amplifier.
The pi doesn't have a hardware audio input. Technically, you should be able to run a microphone through it with a USB sound card attached to the pi, but I personally wouldn't bother due to latency and audio quality issues.
While a song is playing, the home screen of the web interface will show a transpose slider. Slide it up or down based on your preference.
If you don't see this option, you may be running the --use-omxplayer option. Omxplayer does not support key change.
You'll need to add them manually by copying them to the root of your download folder. Run python app.py --help and look under DOWNLOAD_PATH to find out what the default folder is, or specify your own. Only cdg/mp3 pairs and .zip files are supported.
CDG files must have an mp3 file with an exact matching file name. They can also be bundled together in a single zip file, but the filenames in the zip must still match. They must also be placed in the root of the download directory and not stashed away in sub-directories.
If you only hear audio, you may be running the --use-omxplayer option. Omxplayer does not support cdg.
You might be able to just drag the windows to the target screen (press 'f' to toggle fullscreen). But in my experience there can be issues figuring out which monitor to use once videos start playing. For now you'd probably have the most consistent experience using single-screen mirrored mode.
Pip install py-googletrans: pip install googletrans==3.1.0a0
You must manually edit lang/en_US and lang/zh_CN, and then run ./translate-all.sh -c to re-generate Google translations for the rest. If you just want to add a new language from Google translate, omit the -c option.