
Install npm first:
npm install --prefix clientNote: Make sure you're installing npm in the client folder and not outside of the client.
To start the frontend
npm start --prefix clientTo create database (Type on Linux based console like Ubuntu)
rails db:create
rails db:migrate
To pre-fill user database using Faker gem (Optional) First, go to db/seeds.rb file then
rails db:seedTo start the backend
bundle install
rails s- Create an application that can perform CRUD action.
- It needs to have Ruby on Rails backend and React.js frontend.
- It needs to have user authentication features. Such as logging in, logging out, sessions, and sign out.
- Involves one-to-many and many-to-many relationships in the backend.
I decided to create a blogging website that can perform CRUD actions on blog posts and involves authentication.
Here's my diagram that I created to structure out my plan.
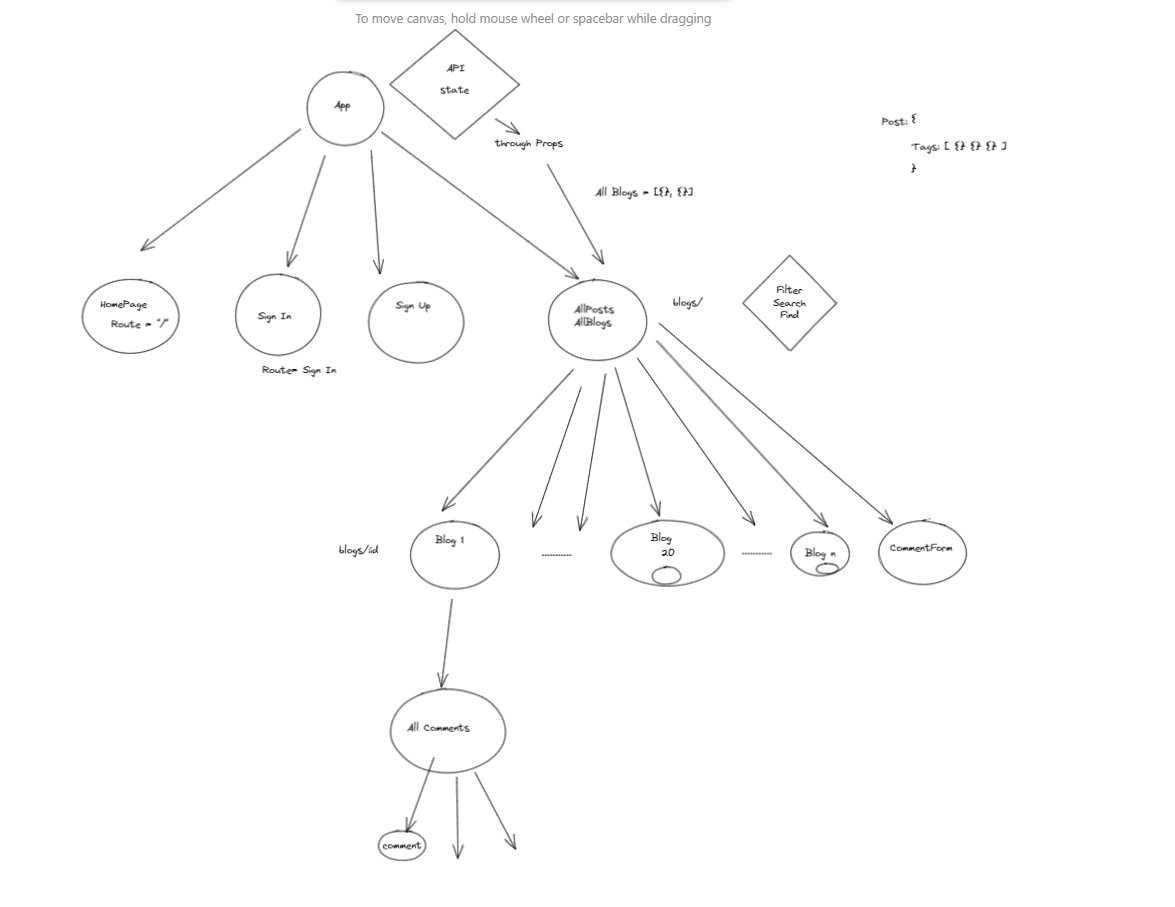 My app component is placed at the highest level and I will create a navbar that can track if the user is logged in or not. Users can create posts using their unique session id. Without their sessions, they are not authorized to create any posts.
##Interface
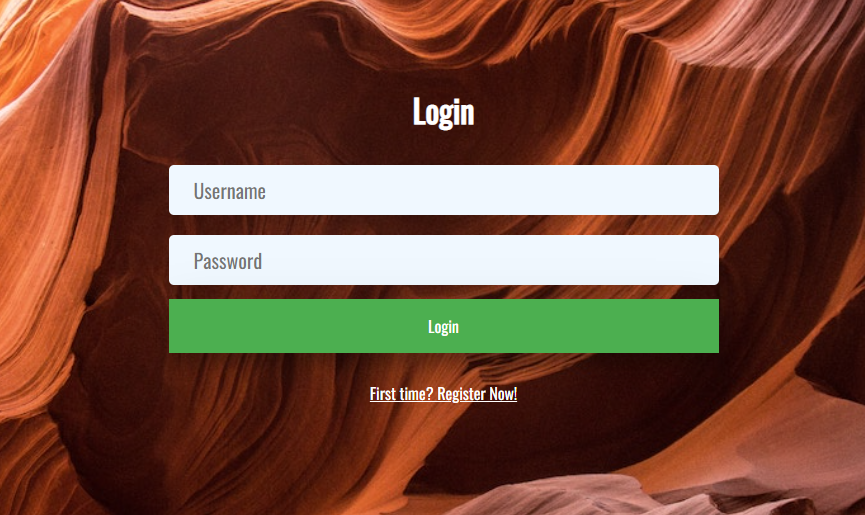
When the program runs, it will show this page without showing any posts.
 Users can always pre-fill the posts database using the Faker gem that is installed duing the installation process above.
Please use the following format when you do:
Users can always pre-fill the posts database using the Faker gem that is installed duing the installation process above.
Please use the following format when you do:
Type these into the Seeds.rb file:
newUser = User.create(first_name: "Type in First name", last_name: "Type in Last name", username: "Enter new username", email: "Enter new email", password: "Enter new password");newUser.Post.create(title: "Enter title", content: "Enter content", tags: "enter tags using commas", user_id: "Enter id of user that you want to assign this post");then type on this on console:
rails db:seedAddtional information about Faker gem can be found here: https://github.com/faker-ruby/faker
You can now login with your newly created account!
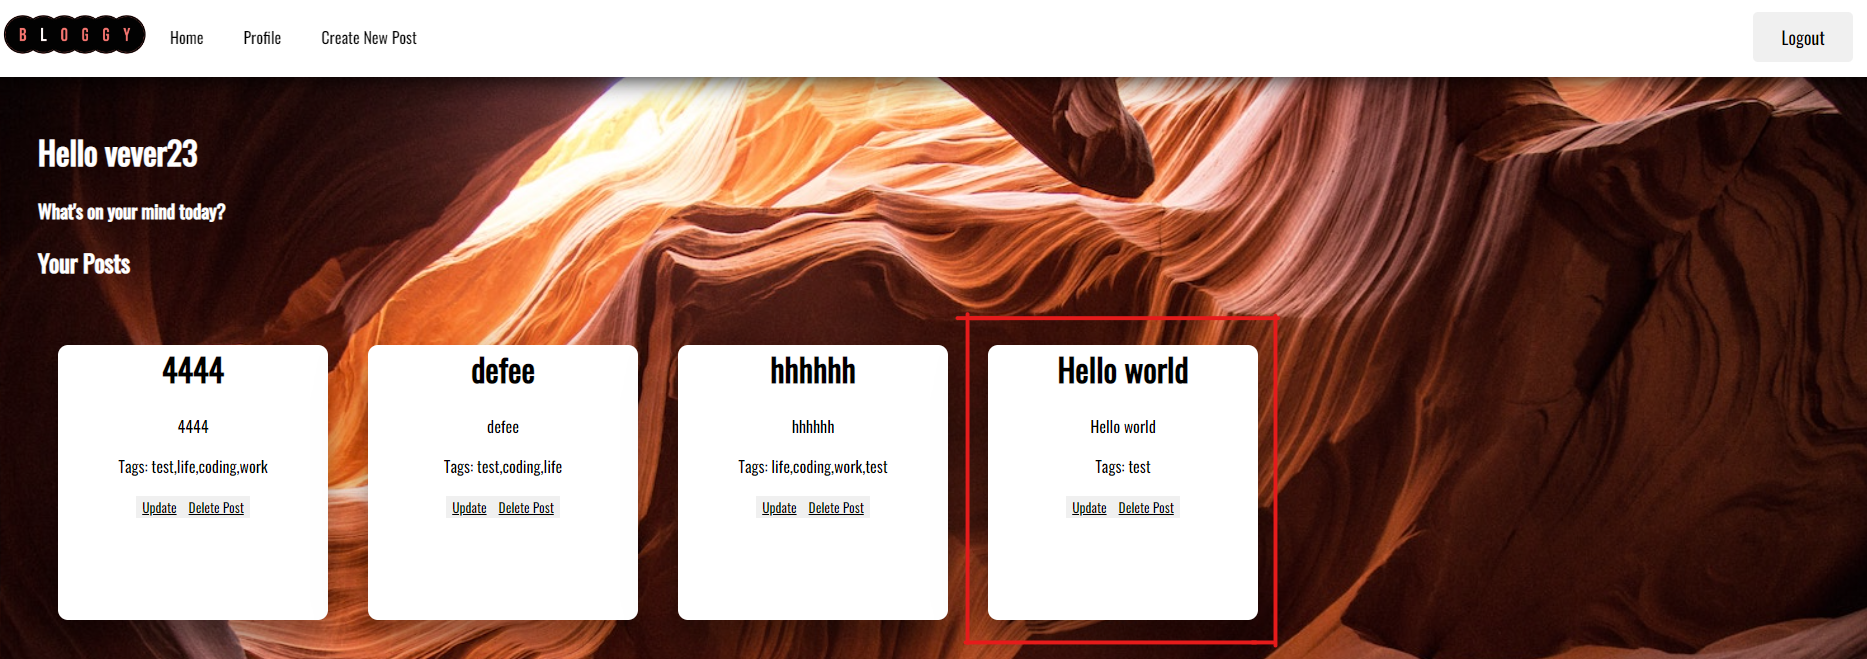
After logging in, you can see your own profile section that looks like this:
 Your profile will not have any cards like the ones in the image unless you created post.
So, let's create a new post! First, you go to "Create New Post" screen by pressing the button on the navigation bar.
Then, fill out all the necessary informations into the fields. Make sure that you entered all the inputs otherwise, it will throw you an error message.
Your profile will not have any cards like the ones in the image unless you created post.
So, let's create a new post! First, you go to "Create New Post" screen by pressing the button on the navigation bar.
Then, fill out all the necessary informations into the fields. Make sure that you entered all the inputs otherwise, it will throw you an error message.
 After filling out informations, press submit at the bottom of the tags input section.
 Success! Now there's a new post for your account! Everyone can see your post at the homepage!
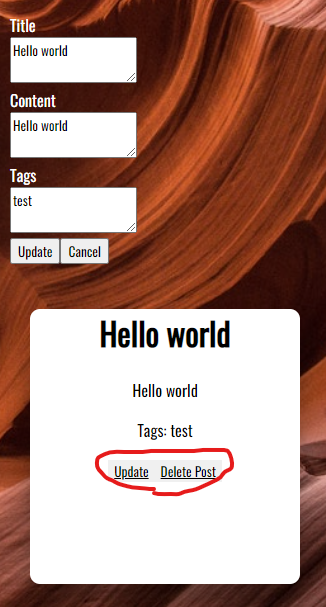
You can also update and delete the post using the options on the card.
When you're done, you can sign out using the button "Log out" at the top-right corner of the screen.
##Future plans
- Add filter feature that users can use to search any posts based on title and tags.
- Create some form of communication feature between users to communicate them directly in real time.