Provides a quick and easy way to get up and running with a local deepracer training environment using Docker Compose. This repo just creates a wrapper around the amazing work done by Alex found here: https://github.com/alexschultz/deepracer-for-dummies. This repo adds some additional functionanlity such as a GUI and a lot of under-the-hood improvements. Please refer to his repo to understand more about what's going on under the covers. For additional help, submit an issue or join the deepracer slack for some more support.
-
This project is specifically built to run on Ubuntu 18.04 with an Nvidia GPU. It is assumed you already have CUDA/CUDNN installed and configured.
-
You also need to have Docker installed as well as the Nvidia-Docker runtime.
-
You should have an AWS account with the AWS cli installed. The credentials should be located in your home directory (~/.aws/credentials)
-
ensure you have vncviewer installed
NOTE: If you already have these prerequisites setup then you can simply run the init.sh script described in the Initialization section. If you are setting everything up for the first time, then the information provided here can help you to get your environment ready to use this repo.
If you are running Windows and would like to use this repo, you will need to modify the process to get everything to run on Windows (not recommended as you will not be able to take advantage of the GPU during training) Many users have found it useful to dual-boot (Windows/Linux). There are many tutorials online for how to do this. You can follow the instructions provided below as guidance.
https://medium.com/bigdatarepublic/dual-boot-windows-and-linux-aa281c3c01f9
When it gets to the Disk Management part, to make space for your Ubuntu installation, followed this guide and specifically look at the 2nd method (MiniTool Partition Wizard):
https://win10faq.com/shrink-partition-windows-10/?source=post_page---------------------------
pip install -U awscli
Then Follow this: https://docs.aws.amazon.com/cli/latest/userguide/cli-chap-configure.html
* Installing Docker-ce (steps from https://docs.docker.com/install/linux/docker-ce/ubuntu/ )
sudo apt-get remove docker docker-engine docker.io containerd runc
sudo apt-get update

  sudo apt-get install \
apt-transport-https \
ca-certificates \
curl \
gnupg-agent \
software-properties-common

curl -fsSL https://download.docker.com/linux/ubuntu/gpg | sudo apt-key add -
sudo apt-key fingerprint 0EBFCD88

sudo add-apt-repository \
"deb [arch=amd64] https://download.docker.com/linux/ubuntu \
$(lsb_release -cs) \
stable"

  sudo apt-get update
sudo apt-get install docker-ce docker-ce-cli containerd.io
Verify docker works
sudo docker run hello-world
3. Installing Docker-compose (from https://docs.docker.com/compose/install/#install-compose )
curl -L https://github.com/docker/compose/releases/download/1.24.1/docker-compose-`uname -s`-`uname -m` -o     /usr/local/bin/docker-compose
sudo chmod +x /usr/local/bin/docker-compose
Verify installation
docker-compose --version
NOTE: You can also choose to install docker-compose via another package manager (i.e. pip or conda), but if you do, make sure to do so in a virtual env. Many OS’s have python system packages that conflict with docker-compose dependencies.
Additionally, make sure your user-id can run docker without sudo (from https://docs.docker.com/install/linux/linux-postinstall/ )
sudo groupadd docker
sudo usermod -aG docker $USER
Log out and log back in so that your group membership is re-evaluated.
And configure Docker to start on boot.
sudo systemctl enable docker
The NVIDIA Container Toolkit allows users to build and run GPU accelerated Docker containers.
Nvidia-docker essentially exposes the GPU to the containers to use: https://github.com/NVIDIA/nvidia-docker
You may want to note what you have installed currently.
sudo apt list --installed | grep nvidia
Then prepare for clean installation of Nvidia drivers.
sudo apt-get purge nvidia*
Installing nvidia-docker runtime (from https://github.com/NVIDIA/nvidia-docker/wiki/Installation-(version-2.0) )
distribution=$(. /etc/os-release;echo $ID$VERSION_ID)
curl -s -L https://nvidia.github.io/nvidia-docker/gpgkey | sudo apt-key add -
curl -s -L https://nvidia.github.io/nvidia-docker/$distribution/nvidia-docker.list | sudo tee /etc/apt/sources.list.d/nvidia-docker.list
sudo apt-get update
sudo apt-get install nvidia-docker2
sudo pkill -SIGHUP dockerd
Check for driver version here according to your GPU(s): https://www.nvidia.com/Download/index.aspx?lang=en-us In the dropdown for OS, choose “show all OS’s” to see if there are Ubuntu specific choices. Otherwise choose Linux. If you get a dropdown for “cuda toolkit”, choose 10.0)
sudo add-apt-repository ppa:graphics-drivers
sudo apt-get update
sudo apt install nvidia-driver-410 && sudo reboot
Verify the driver installation:
nvidia-smi
nvcc --version
This doc is straight forward: https://www.techspot.com/downloads/5760-vnc-viewer.html
We've made a GUI to make training locally as simple as possible. Follow this guide for using the GUI.
If you are receiving segmentation fault errors try rebuilding the GUI using qmake gui.pro and make in the /gui directory. Then rerun ./gui to see if your problem has been fixed.
If you have problems with the log analysis tool make sure that you have installed virtualenv for python. sudo apt-get install virtualenv
NOTE: You can apparently use Anaconda instead to install CUDA/CUDNN. I have not tried this, however some users have and have reported that this method is much easier. If you use this approach, you will need to first install Anaconda. Once installed you can then use the conda package manager to install the desired versions of CUDA and cuDNN. The following installation configuration has been reported to work together successfully
sudo apt-get update -y && sudo apt-get upgrade -y
cd /tmp/
sudo wget https://repo.anaconda.com/archive/Anaconda3-2019.03-Linux-x86_64.sh
bash Anaconda3-2019.03-Linux-x86_64.sh
"yes" for using the default directory location
“yes” for running conda init
source ~/.bashrc
conda list
conda install cudnn==7.3.1 && conda install -c fragcolor cuda10.0
This guide was built to run on Ubuntu 18.04. We know it runs on Ubuntu 16.04, and there's reports on it running on OS X and Windows as well, if you've managed to make it run on those platforms, submit a issue ticket and let us know, we'd love to know how you did it!
Follow these guides for setting up the environment and getting started:
In a command prompt, simply run "./init.sh". This will set everything up so you can run the deepracer local training environment.
init.sh performs these steps so you don't have to do them manually:
- Clones Chris's repo: https://github.com/crr0004/deepracer.git
- Does a mkdir -p ~/.sagemaker && cp config.yaml ~/.sagemaker
- Sets the image name in rl_deepracer_coach_robomaker.py to "crr0004/sagemaker-rl-tensorflow:nvidia”
- Also sets the instance_type in rl_deepracer_coach_robomaker.py to “local_gpu”
- Copies the reward.py and model-metadata files into your Minio bucket
To start or stop the local deepracer training, use the scripts found in the scripts directory.
Here is a brief overview of the available scripts:
-
training
- start.sh
- starts the whole environment using docker compose
- it will also open a terminal window where you can monitor the log output from the sagemaker training directory
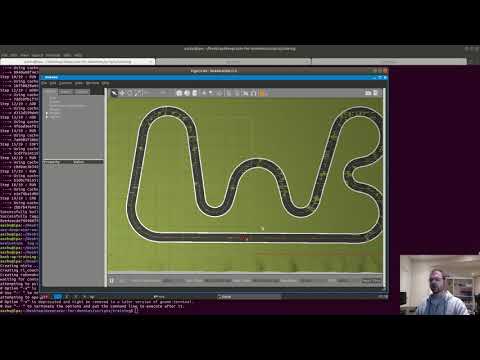
- it will also automatically open vncviewer so you can watch the training happening in Gazebo
- For the memoryManager.py make sure to enter your user password into the opened terminal in order to run the program in sudo
- stop.sh
- stops the whole environment
- automatically finds and stops the training container which was started from the sagemaker container
- upload-snapshot.sh
- uploads a specific snapshot to S3 in AWS. If no checkpoint is provided, it attempts to retrieve the latest snapshot
- set-last-run-to-pretrained.sh
- renames the last training run directory from rl-deepracer-sagemaker to rl-deepracer-pretrained so that you can use it as a starting point for a new training run.
- delete-last-run.sh
- (WARNING: this script deletes files on your system. I take no responsibility for any resulting actions by running this script. Please look at what the script is doing before running it so that you understand)
- deletes the last training run including all of the snapshots and log files. You will need sudo to run this command.
- start.sh
-
evaluation
- start.sh
- starts the whole environment using docker compose to run an evaluation run
- it will also open a terminal window where you can monitor the log output from the sagemaker training directory
- it will also automatically open vncviewer so you can watch the training happening in Gazebo
- stop.sh
- stops the whole environment
- automatically finds and stops the training container which was started from the sagemaker container
- start.sh
-
log-analysis
- start.sh
- starts a container with Nvidia-Docker running jupyter labs with the log analysis notebooks which were originally provided by AWS and then extended by Tomasz Ptak
- the logs from robomaker are automatically mounted in the container so you don't have to move any files around
- in order to get to the container, look at the log output from when it starts. You need to grab the URL including the token query parameter and then paste it into the brower at localhost:8888.
- stop.sh
- stops the log-analysis container
- start.sh
Once you've trained your model, you can upload your model to be evaluated and submitted to the DeepRacer league. Follow the guide linked below:
You can modify training hyperparameters from the file rl_deepracer_coach_robomaker.py.
The action-space and reward function files are located in the deepracer-for-dummies/docker/volumes/minio/bucket/custom_files directory
The track selection is controled via an environment variable in the .env file located in the deepracer-for-dummies/docker directory