Home Assistant integration for the Elecrow GrowCube, a smart plant watering device.
Please note that a Growcube device can only be connected to one client at a time. That means you will not be able to connect using the phone app while Home Assistant is running the integration, or vice versa.
Click the button to add this repository to HACS.

Then restart Home Assistant.
You can also do the above manually:
- Open the Home Assistant web interface and navigate to the HACS store.
- Click on the "Integrations" tab.
- Click on the three dots in the top right corner and select "Custom repositories".
- Enter the URL (
https://github.com/jonnybergdahl/HomeAssistant_Growcube_Integration) and select "Integration" as the category. - Click "Add".
- Once the repository has been added, you should see the Elecrow GrowCube integration listed in the HACS store.
- Click on the integration and then click "Install".
- Restart Home Assistant.
Click the button to add a Growcube device to Home Assistant.

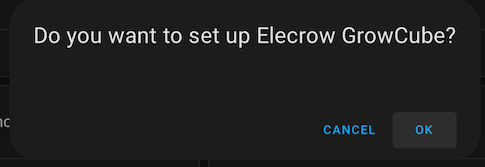
Click OK when it asks if you want to setup the Elecrow Growcube integration.
Enter the IP address of the Growcube device and click Submit.
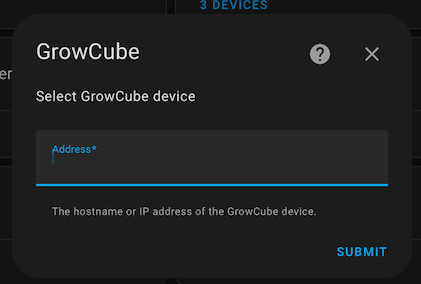
Remember to close down the phone app before this step to avoid connection issues.
You can also do this manually:
- Open the Home Assistant web interface.
- Click on "Configuration" in the left-hand menu.
- Click on "Integrations".
- Click on the "+" button in the bottom right corner.
- Search for "GrowCube" and click on it.
- Enter the IP address (or host name) of the device.
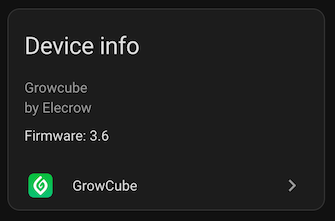
And that's it! Once you've added your GrowCube device, you should be able to see its status and control it from the Home Assistant web interface.
You can file bugs in the issues section on Github.
You can also reach me at #jonnys-place on Brian Lough's Discord.
The integration adds sensors for temperature, humidity and four sensors for moisture.

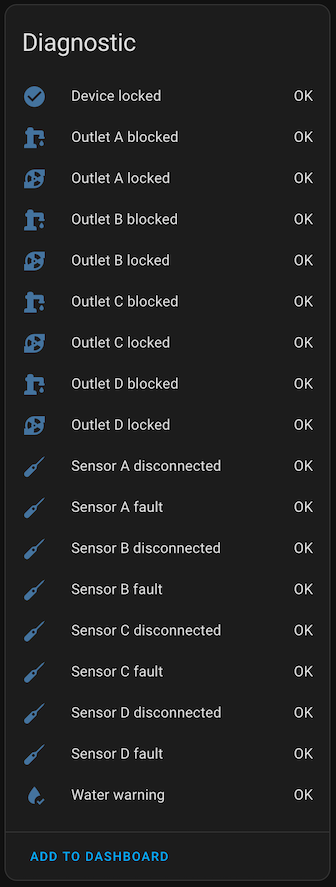
The diagnostics sensors includes things such as device lock, sensor disconnect warnings and pump blocked warnings.
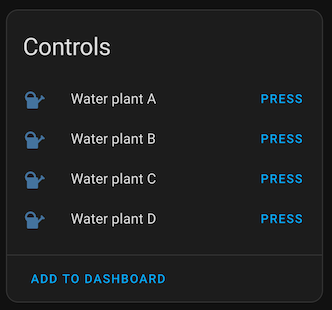
There are controls to let you manually water a plant. Thee will activate the pump for 5 seconds for a given outlet.
There are also services for manual watering and setup of automatic watering modes.
This is a service for watering a plant, to be used in automations.
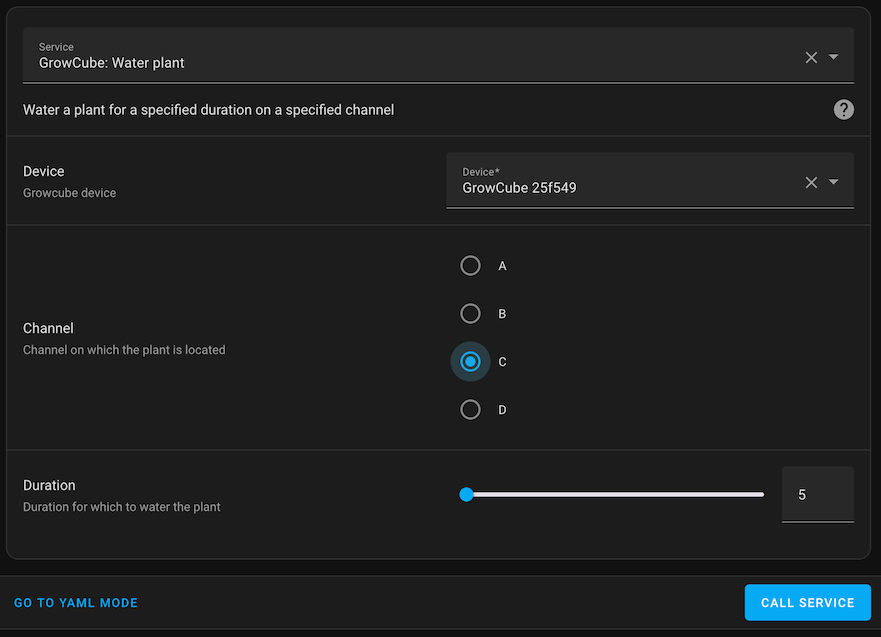
Use channel names A-D and a duration value in seconds.
This is a service to set smart watering for a plant, to be used to setup min and max moisture levels for the plant.
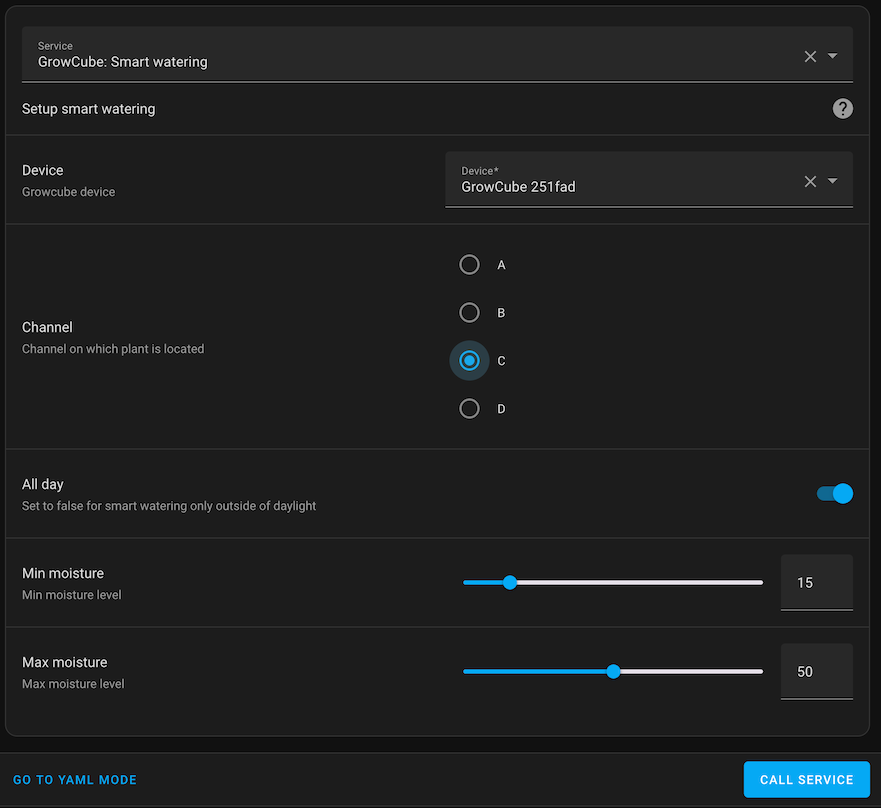
Use channel names A-D and set moisture percentages for min and max values. Use the All day switch to allow watering during daylight.
This a service to setup scheduled watering for a plant, to be used to setup a fixed interval and duration for watering.
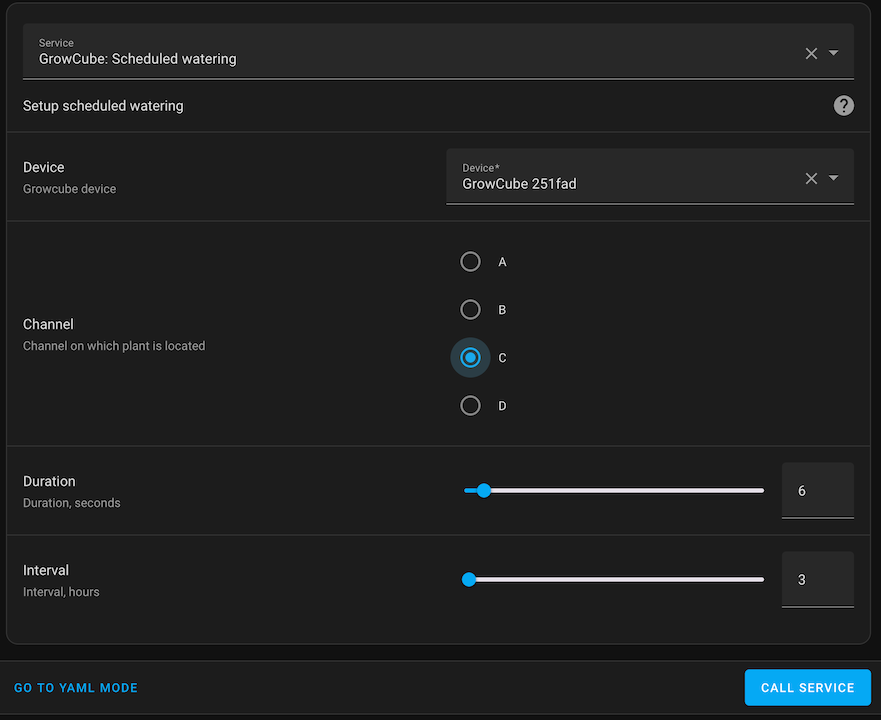
Use channel names A-D, set a watering duration in seconds, and an interval in hours.
This is a service to remove smart or scheduled watering for a plant.
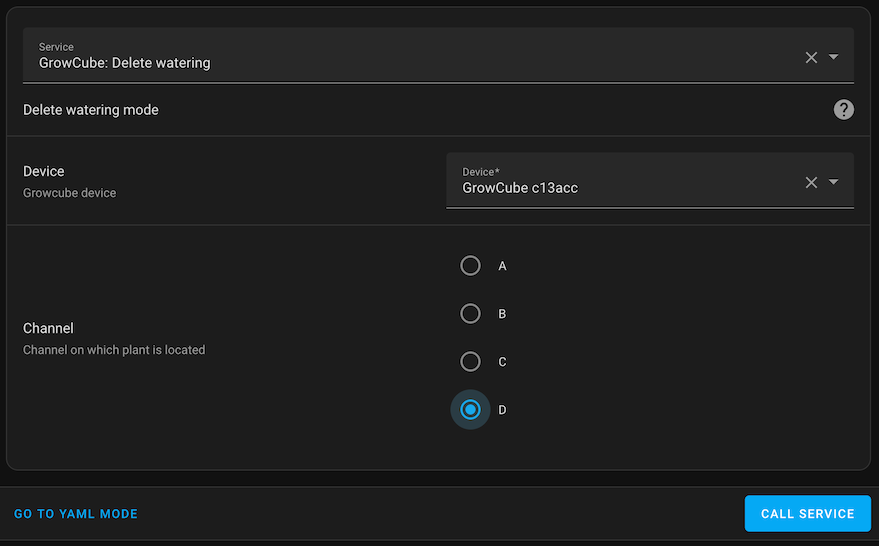
Use channel named A-D.