
The project uses GitHub's Large File Storage (LFS). Make sure you install git lfs before cloning this repository (requires git >= 1.8.2).
git lfs install
If you cloned the repository before installing LFS, pull the files again after FLS is installed.
git lfs pull
See Git LFS Tutorial for more information on using git-lfs.
- Introduction
- Prerequisites
- Running the Demo
- Controls
- Compiling
- Configuration
- Troubleshooting
- Known Issues
- FAQ
- Contributors
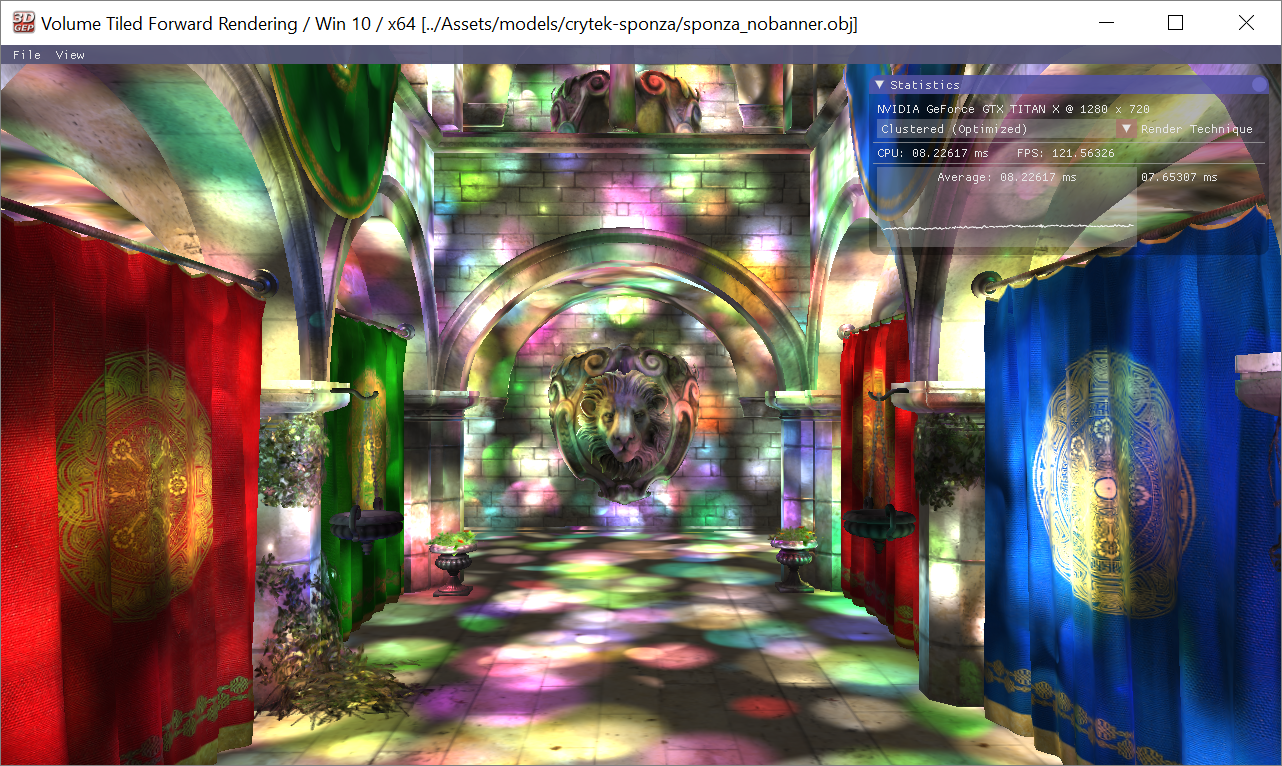
This project demonstrates the following rendering techniques:
- Forward Rendering
- Tiled Forward Shading (Forward+)
- Volume Tiled Forward Shading
- Volume Tiled Forward Shading with BVH Optimization
To compile and run the game, see the Compiling section below.
The project comes with a precompiled (release) build executable that can be used to test the project. The project was built using the Windows 10 SDK (10.0.16299.0). If you just want to run the demo without first installing Visual Studio, the Microsoft Visual C++ redistributable must be installed first.
The Visual C++ redistributable installer can be found in the Redist\MSVC\ folder.
The project and solution files are generated using the CMake build configuration system. The following generators should work to generate the solution and project files:
- Visual Studio 15 2017 Win64
- Visual Studio 14 2015 Win64
The Ninja generator may also work but I've experienced some issues with precompiled headers when using the Ninja generator.
Refer to the GenerateProjectFiles.bat to generate the project files depending on the version of Visual Studio that is currently installed.
Although the project uses CMake to define the project settings, Visual Studio 2017 (15.4) was used to compile the project. It was tested with Visual Studio Enterprise but there is no reason it shouldn't work with Visual Studio Community.
The project has been compiled and tested using the Windows 10 SDK (10.0.16299.0). The latest Windows 10 SDK can be downloaded from the Windows 10 SDK website here.
Before running the demo, decompress the included assets by executing the DecompressAssets.bat batch file in the root folder. The model files assets have been compressed using 7-zip (included in the Tools\7Zip folder) to reduce the download time. The uncompressed assets require 1.5 GB of disk space.
The demo must be run from the bin folder. To run the pre-compiled release build, exectute the Run_Release.bat. This batch file will run the demo from the correct folder to ensure that the default configuration file can be loaded. By default, the DefaultConfiguration.3dgep configuration file will be loaded which imports the Crytek Sponza Atrium scene.
To test with different configuration settings, open the Conf folder and run the RegisterFileType_Win10_Rel_x64.bat batch file to register a file handler for the .3dgep file extension. After registering the file handler, you should be able to double-click on any .3dgep configuration file to run the demo using that configuration. Use the UnregisterFileType_Win10_Rel_x64.bat batch file to remove the file handler.
For a complete explanation about the format of the configuration files, see the Configuration section below.
The demo uses the following keyboard keys:
| Key | Action |
|---|---|
ESC |
Exits the application. |
Alt+F4 |
Exits the application. |
Q |
Pan the camera down (along the camera's local Y axis). |
E |
Pan the camera up (along the camera's local Y axis). |
W |
Pan the camera forward (along the camera's local Z axis). |
A |
Pan the camera left (along the camera's local X axis). |
S |
Pan the camera backward (along the camera's local Z axis). |
D |
Pan the camera right (along the camera's local X axis). |
F |
Moves the camera (Focus) to the currently selected light. |
0 |
Move the camera to the world origin. |
R |
Resets the camera to the position specified in the configuration file. |
Shift |
Hold shift while pressing one of the other movement keys to move the camera faster. |
M |
Toggle Muilti-Sample Anti Aliasing (MSAA) |
L |
Toggle rendering of debug light volumes. |
V |
Toggle V-sync (turn this on if you experience screen tearing). |
Space |
Toggle animation of the lights in the scene. |
1 |
Render using Forward Rendering. |
2 |
Render using Tiled Forward Shading (Forward+). |
3 |
Render using Volume Tiled Forward Shading. |
4 |
Render using Volume Tiled Forward Shading with BVH. |
Ctrl+1 |
Toggle Statistics UI. |
Ctrl+2 |
Toggle Profiler UI. |
Ctrl+3 |
Toggle Generate Lights UI. |
Ctrl+4 |
Toggle Light Editor UI. |
Ctrl+5 |
Toggle Options UI |
While viewing the Tiled Forward Shading (Forward+) rendering technique, the following actions are available.
| Key | Action |
|---|---|
F1 |
Toggle display of the tile heatmap. |
While viewing the Volume Tiled Forward Shading rendering technique, the following actions are available.
| Key | Action |
|---|---|
F1 |
Toggle display of volume tile heatmap. |
F2 |
Toggle display of debug volume tiles. |
Shift+F |
Toggle the update of the volume tiles. Makes it possible to observe the volume tiles while the debug volume tiles are rendered. |
The camera for this demo uses a First-Person Shoter style controller. To rotate the view, click and drag on the screen using the left-mouse button (LMB). Use the W, A, S, D, to move the camera forward, left, backward, and right (respectively). Use the Q, and E keys to move the camera up and down in the camera's local space. Hold the Shift key to move the camera faster. LMB clicking and dragging on a UI window will move that window instead of rotating the camera.
The demo supports XInput controllers (XBox 360, XBox One, or any similar input device).
The demo handles the following button events from the controller.
LS - Left analog stick. (Also a button).
RS - Right analog stick (Also a button).
RB - Right bumper.
LB - Left bumper.
LT - Left trigger.
RT - Right trigger.
| Button | Action |
|---|---|
LS |
Toggle faster translation. |
RS |
Toggle raster rotation. |
LT |
Pan the camera down. |
RT |
Pan the camera up. |
The demo handles the following axis events from the controller.
| Axis | Action |
|---|---|
LS |
Pan camera. |
RS |
Rotate camera. |
To generate the Visual Studio solution and project files, run the GenerateProjectFiles.bat file in the root of the repository. This will generate the project files in the following folders depending on which version of Visual Studio was detected:
| Visual Studio Version | Folder |
|---|---|
| 2017 (15.0) | Build_VS15 |
| 2014 (14.0) | Build_VS14 |
The project comes with CMake 3.9.0 executable so there is no need to download CMake if it is not installed or the installed version of CMake is earlier than 3.9.0. You may choose to generate the project files yourself if either you have a new version of CMake installed or you want to use a different generator (for example Ninja). I have experienced some issues using Ninja to generate the build files which is discussed in the Known Issues secion below.
All of the configuration settings to run the demo are specified a configuration file. Configuration files are found in the Conf folder. The -c or --config command line option can be used to specify the configuration file to use when running the demo. Registering the file handler for the .3dgep file extension (as previously explained in the Running the Demo section above) should make it possible to simply double-click on the .3dgep configuration files to run that configuration in the demo.
The easiest way to create a new custom configuration file is to copy the DefaultConfiguration.3dgep file and edit the settings according to the table below.
Do not delete the DefaultConfiguration.3dgep file as this one is used if no configuration file is specified on the command-line when running the programing (for example, if the executable is launched by double-clicking on the .exe file in Windows Explorer).
The configuration files are XML documents that contain the following information:
| Property | Type | Setting |
|---|---|---|
| WindowWidth | int | The width of the window's client area in pixels. |
| WindowHeight | int | The height of the window's client area in pixels. |
| FullScreen | int | Currently unsupported. Set to 0 for windows mode, or 1 for fullscreen mode. |
| SceneFileName | string | The path to the model file to load. This path is expressed relative to the configuration file. |
| SceneScaleFactor | float | A scale factor to apply to the scene after loading. |
| CameraPosition | float3 | A 3-component vector representing the initial 3D position of the camera. |
| CameraRotation | float4 | A rotation quaternion representing the initial 3D rotation of the camera. No rotation is (0, 0, 0, 1) |
| NormalCameraSpeed | float | The speed of the camera. |
| FastCameraSpeed | float | The speed of the camera while the [SHIFT] key is pressed. |
| CameraPivotDistance | float | The initial distance that the cameras rotation pivot point is placed in front of the camera. |
| PointLights | Array | The point lights array should only be configured using the on-screen GUIs. |
| SpotLights | Array | The spot lights array should only be configured using the on-screen GUIs. |
| DirectionalLights | Array | The directional lights array should only be configured using the on-screen GUIs. |
| LightsMinBounds | float3 | The minimum bounds to generate lights. |
| LightsMaxBounds | float3 | The maximum bounds to generate lights. |
| MinSpotAngle | float | The minimum spot light angle (in degrees) to use when generating spot lights. |
| MaxSpotAngle | float | The maximum spot light angle (in degrees) to use when generating spot lights. |
| MinRange | float | The minimum range of generated light sources. |
| MaxRange | float | The maximum rnage of generated light sources. |
| NumPointLights | int | The number of point lights to randomly generate. |
| NumSpotLights | int | The number of spot lights to randomly generate. |
| NumDirectionalLights | int | The number of directional lights to randomly generate. |
It should not be necessary to specify the light sources in the configuration file. In order to generate lights sources in the scene, use the Generate Lights GUI described in the next section.
The demo uses ImGUI to provide various user interfaces. In this section, the Generate Lights GUI is explained.
To open the Generate Lights GUI, press Ctrl+3 on the keyboard or select View > Generate Lights from the menu bar.
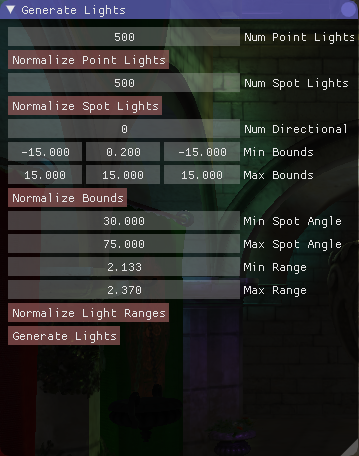
The following options are available in the Generate Lights GUI:
| Option | Type | Description |
|---|---|---|
| Num Point Lights | unsigned int | The number of point light sources to generate. |
| Num Spot Lights | unsigned int | The number of spot light sources to generate. |
| Num Directional Lights | unsigned int | Then number of directional light sources to generate. |
| Normalize Point Lights | button | Compute the number of point light sources to achieve an average light density of 1 light / unit3 given the current bounds and light ranges. |
| Normalize Spot Lights | button | Compute the number of spot light sources to achieve an average light density of 1 light / unit3 given the current bounds and light ranges. |
| Min Bounds | float3 | The minimum point of the bounding volume to generate the light sources. |
| Max Bounds | float3 | The maximum point of the bounding volume to generate the light sources. |
| Normalize Bounds | button | Compute the minimum and maximum bounds (assume [0, 0, 0] is the center of the bounding volume) to achieve an average light density of 1 light / unit3 given the number of lights and max light range. |
| Min Spot Angle | float | The minimum cone angle (degrees) to use when generating spot lights. |
| Max Spot Angle | float | The maximum cone angle to use when generating spot lights. |
| Min Range | float | The minimum light range to use when generating light sources (point and spot). |
| Max Range | float | The maximum light range to use when generating light sources (point and spot). |
| Normalize Light Ranges | button | Compute the maximum light range to achieve an average light density of 1 light / unit3 given the bounds volume and the number of light sources to generate. The minimum light range is set to 10% less than the maximum point range. |
| Generate Lights | button | Randomly generate light sources in the scene. |
This section describes troubleshooting tips if the demo does not run.
- If the demo does not run make sure you have read the Prerequisite section of this document.
- If it is still not working, post an issue in the Issues for this repo on GitHub.
Website for more information: https://www.3dgep.com/volume-tiled-forward-shading/
- There is still a minor issue with the Volume Tiled Forward Shading with BVH that some lights are missing. I think this has something to do with the BVH traversal. The error does not occur when not using the BVH optimization.
- Only tested with NVidia graphics cards (GTX 980, GTX Titan X). It may not work with an AMD graphics cards.
- Precompiled headers are not working when using the Ninja build system.
- Q: How is Volume Tiled Forward Shading different from Clustered Forward Shading?
- A: This technique differs primarily in the way the cluster keys are stored and how the keys are sorted/compacted to produce the list of unique cluster keys.
- In Clustered Shading, the cluster keys are stored in a 2D screen-space texture. This cannot account for transparent geometry. In Volume Tiled Forward Shading, the cluster keys are stored using a full 3D grid that natively supports both opaque and transparent geometry in the scene.
- In Clustered Shading, the cluster keys are sorted using local sorting within a screen-space tile. In Volume Tiled Forward Shading, sorting of the cluster keys is not required since the active volume tiles are stored directly in the 3D grid (keys are not duplicated).
- In Clustered Shading, the cluster keys are compacted (using some run-length encoding technique not fully explained in the paper). In Volume Tiled Forward Shading, the unique active volume tile IDs are written to an array (Structured Buffer). The index of the array to write the tile ID is atomically incremented.
This project is maintained by