This is the main repository for CADI AI, a desktop application for identifying disease, abiotic stress and pest infestations in cashew plants.
- Introduction
- Problem Statement
- Project Description
- Contributing
- Building a Custom CADI AI
- Conclusion
CADI AI - Cashew Disease Identification with Artificial Intelligence - is a demo-application that uses the technology Artificial Intelligence (AI). It looks at drone images of cashew trees and informs users whether cashew trees suffer from:
- pest infection, i.e. damage to crops by insects or pests
- disease, i.e. attacks on crops by microorganisms
- abiotic stress caused by non-living factors (e.g. environmental factors like weather or soil conditions or the lack of mineral nutrients to the crop).
CADI AI shall support farmers as an early warning system to quickly identify problems in their cashew farms and to keep their crops healthier and more yielding. KaraAgro AI developed CADI AI for the initiatives “Market-Oriented Value Chains for Jobs & Growth in the ECOWAS Region (MOVE/Comcashew)” and FAIR Forward - Artificial Intelligence for All. Both initiatives are implemented by the Deutsche Gesellschaft für Internationale Zusammenarbeit (GIZ) on behalf of the German Federal Ministry for Economic Cooperation and Development (BMZ).
CADI AI is based on the following resources:
- Drone-based dataset on cashews, available via Kaggle and HuggingFace, incl. an accompanying datasheet
- AI model to identify health conditions of cashew trees, available via HuggingFace
- The CADI AI demo-application available via the release section of this repository
- An idea collection on potential contributions to the data, model and software
The training data, AI model and CADI AI demo-application are available under the GNU Affero General Public License v3.0 that requires projects that work with the resources to apply the same licensing to their projects.
The threat of pests and diseases to the agricultural sector in Ghana is a constant concern, with climate change contributing to the potential for new and more damaging types of outbreaks (Yeboah et al., 2023). Based on multi-stakeholder engagements conducted by KaraAgro AI, also with women smallholder cashew farmers, stakeholders have identified pest and disease detection and yield estimation as critical concerns.
However, the existing methods of identifying agricultural pest and disease outbreaks, such as land surveys and on-site observations by individuals, are limited in their effectiveness and efficiency. Thus, there is a need for more innovative and efficient solutions to improve the monitoring and management of crop health. This highlights a gap in the existing tools and resources, which can be addressed through the use of technologies such as machine learning and image analysis.
-
Dataset images were captured with the P4 multispectral drone at image resolution of 1600 x 1300 pixels. The images consist of close up shots and distant shots of the cashew plant abnormalities. The total number of images collected were 4,736.
You can access the dataset via Kaggle and HuggingFace.
The data collection process was conducted in two separate trips at cashew farms in the Bono Region of Ghana to accommodate seasonal variations for the diversity of the data. The collection process spanned six days in total. While more continuous data collection across various regions during the cashew blooming cycle could have been beneficial, we still consider the dataset to be sufficiently diverse. This is due to the inclusion of different maturity stages, camera angles, time of capture, and various types of stress morphology in the data collected.
For more information on the dataset, its collection and annotation, please view the accompanying datasheet.
-
Pre-processing of the data involved removing crop images in which human figures or faces were accidentally captured. Also blurry images were deleted.
-
The collected dataset annotation consisted of drawing bounding boxes on the collected images using MakeSense dataset annotation tool. The three classes that were annotated in the process include:
- Disease
- Abiotic stress
- Pest infection
-
YOLO v5X architecture was employed to construct the model. To enhance the image quality and facilitate efficient processing, the resolution of the images was adjusted to 640 pixels, while maintaining a batch size of 56. The resulting model achieved an overall mAP of 0.648 and a size of 173.1 MB.
You can access the model and a more detailed description via HuggingFace.
-
CADI AIis a local flutter desktop application. It requires internet connection for the setup and intermittently to refresh cached data. Otherwise, it is mostly local.To keep it local, the application spins up a local python server using the
Flaskframework through which scans are then made by making localhttprequests.The python server code can be found in the
app.pyfile. The server accepts POST requests with a file path as parameter. Thefile_pathtells where selected images for scans are located on the user's device, and passes the same to the model for inferencing.It is our understanding that not every user of the application would have python installed on their device; especially for Windows users, the Operating System does not come bundled with python.
For this reason, the application features a Setup page where all required missing software is installed before the application starts.
The Setup stage can take some amount of time. We ask all users to be patient while that step is in progress.We are constantly looking into ways to improve this process in the application or to remove it entirely. Once we find a better solution that works, we will swap it out.
The folder structure for the project is as below:
├── assets ├── lib │ ├── adapters | ├── controllers | ├── entities | ├── generated | ├── layouts | ├── pages | ├── services | ├── themes | ├── utils | ├── widgets ├── macos ├── test ├── windows ├── app.py ├── pubspec.yaml-
The
assetdirectory contains images and icons that are used in the application. The application icon is also located in this directory. -
The
libdirectory contains most of the code written in thedartlanguage. -
The
lib/pagesdirectory contains dart files that define the widget look-and-feel of each of the pages in the application. -
The
lib/layoutsdirectory contains dart files that define the structure of the major widgets of the application. For example, theHomeLayoutState.dartfiles defines the various sections i.eSide Paneland anexpanded areafor content widgets. -
lib/servicesholds service files that define API for communicating with the trained model, for instance, and saving scan results and images toIsardatabase -
lib/utilscontains helper functions that are re-used across several other widgets. All extractable functions that can be separated so as to be re-used or simplified can be found in this directory -
lib/widgetsis where custom and re-usable widgets are defined. -
app.pyfile is the python script that spins up the local python flask server. -
macosandwindowsdirectories contain configuration files for MacOs and Windows respectively. Configurations like application icon and build targets when changed in Xcode are written directly to thePodfilein themacosdirectory.
Note: Due to the size of the trained cashew model as described in the
Model Trainingsection above, the total size of the project files exceeded the Github repository file size limit.As a result, the model was not included in the repository. The model can be accessed via HuggingFace..
It is required that the model file be downloaded and added to the project on your local device before tests can be run. If you run
flutter runwithout the model file available in the project directory, you will not be able to run scans.Note: CADI AI only runs scans on images that are having GPS coordinates in their Exif metadata (Exchangeable Image Format).
The Exif specifications define a pair of file types, mainly intended for recording technical details associated with digital photography exif-format
Exif is a metadata standard that defines formats for sharing metadata related to images, sound, and ancillary tags used by digital cameras, scanners and other systems that handle image recorded by digital cameras.
In this case, it is required that images selected for scan in CADI AI must have metadata following the Exif standard, and must have GPS coordinates in their metadata before they can be scanned.
This is because the application shows location pins on a satellite map that enables farmers to locate the region of the farm where a disease, abiotic stress or pest is found present. Without GPS coordinates this would not be possible.
-
-
CADI AI builds and releases are available on the repository.
The application is built into a Windows msi package and uploaded with a tag to the repository. Builds for MacOs are also available. There is currently no support for Linux Systems and no future plans to support them.
At the right side panel on the CADI AI repository, releases with tags can be found and can be downloaded and installed on users' devices.
Semantic versioning (Semver) is used to name each build. Latest builds are better and more robust and should be preferred over older builds.

Contributions are invited to fix issues and improve the application.
There are some rules, though, that we believe must be observed in contributing to the application. Find more information on these rules and related ones below.
-
CADI AI is a flutter-based local desktop application. The following technologies and tools are used in the development of the application. These technologies are also pre-requisite in order to contribute to the improvement of the application.
- Flutter<=3.3.0
- Dart
- Isar Database
- GetX Controller
- Python 3.0 and later
- Python Libraries( Flask=>2.3.2, Flask-cors=>3.0.10, ultralytics=>8.0.106, torchvision=>0.15.2, torch=>2.0.1, opencv-python=>4.7.0.72, pandas=>2.0.1, psutil=>5.9.5, pyyaml=>6.0, tqdm=>4.65.0, matplotlib=>3.7.1, seaborn=>0.12.2 )
- Visual Studio Code (Recommended IDE)
- Xcode (Required only for MacOs X)
-
Semantic branch names and semantic commit messages are the format to be used for branches and commits to this repository. Anything else deviated from these standards would be rejected.
The branching workflow also follows the rules below:
-
master/main: The master branch should always have stable code that can be picked for release at any time. Pull requests (PR) to the master branch only come from the QA branch.
-
QA/test/staging (Quality Assurance): The QA branch is where code that has gone through review from contributors can be tested. Then merged to main after testing.
-
Dev: The dev branch accepts pull requests (PR) for contributions. Code reviews are done against PR’s to the Dev branch
-
-
Before you submit an issue, please search the issue tab. An issue for your problem might already exist and reviewing the related discussions could provide valuable insights and solutions.
If you want to add improvements or suggest new features, you should first create an issue. This will let us discuss and agree on the proposed changes before you start working on them. After the proposal is accepted, the
acceptedlabel will be added to the issue and implementation can begin.If you just want to fix a bug or typo, you can directly create a pull request with a clear description of the bug or typo you are fixing.
-
To contribute to the project, follow the steps below:
-
Fork karaagro/cadi-ai. Uncheck the
Copy the main branch onlyoption to ensure you get thedevbranch. -
Create a new branch from the
devbranch in your forked repository.git checkout -b <branch-name> dev
-
Add your changes and commit them with a descriptive commit message.
-
Push your changes to github.
-
Create a pull request to the
devbranch of karaagro/cadi-ai and request a review from @atamino
-
-
The team at KaraAgro AI will keep supporting the software indefinitely. We will be fixing issues, making improvements and adding new features as and when they are needed.
Currently, CADI AI build process for Windows has been tried and tested. The process for MacOs also works but has some suspicious behaviour due to the use of python and the setup process not being designed for MacOs. KaraAgro investigates this behaviour.
Below are the steps to build for Windows and MacOs. Linux devices are not supported.
-
This is a general outline on how to package the app into a single msi package. We will be using Advanced installer to generate the msi build.
First, make sure the app has been built with flutter
flutter build windows
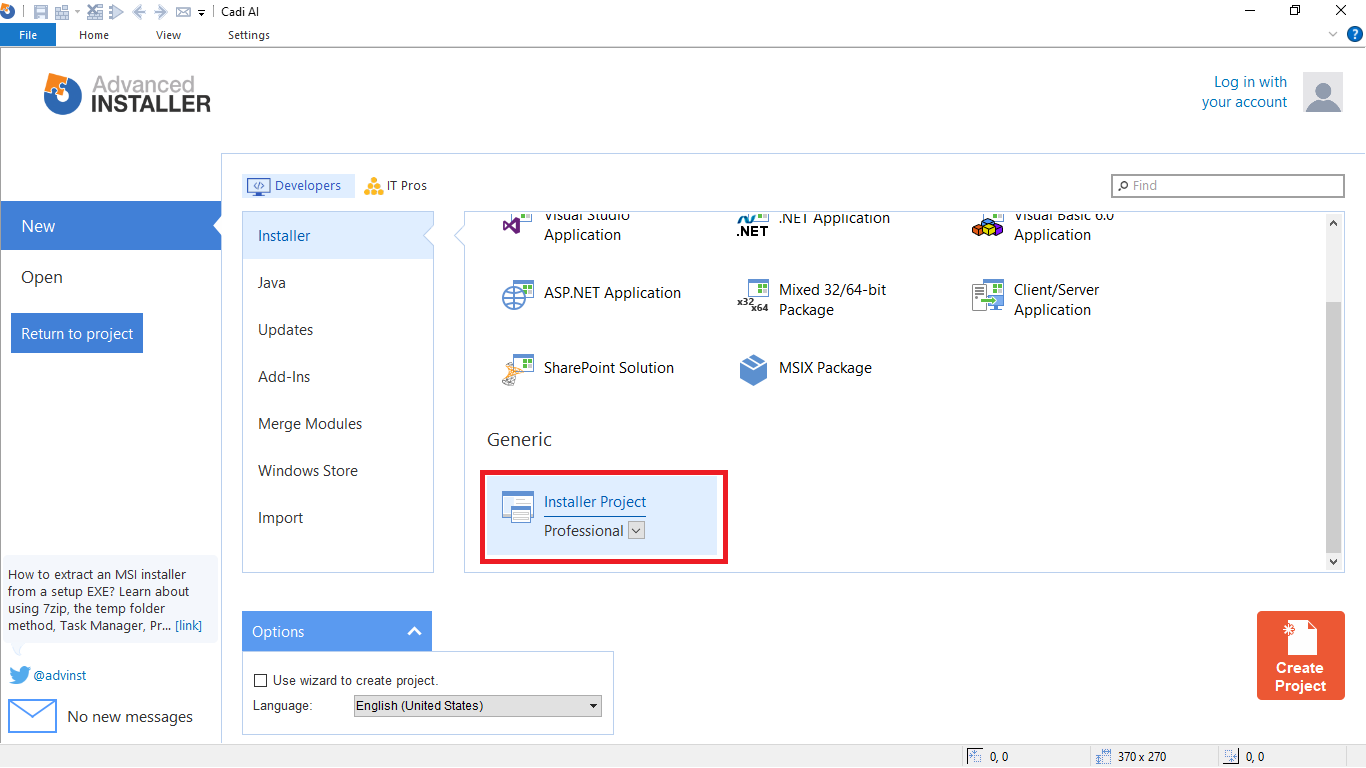
Select generic installer project in Advanced Installer and click on Create new project. You will need the professional version or above of the app to do this.
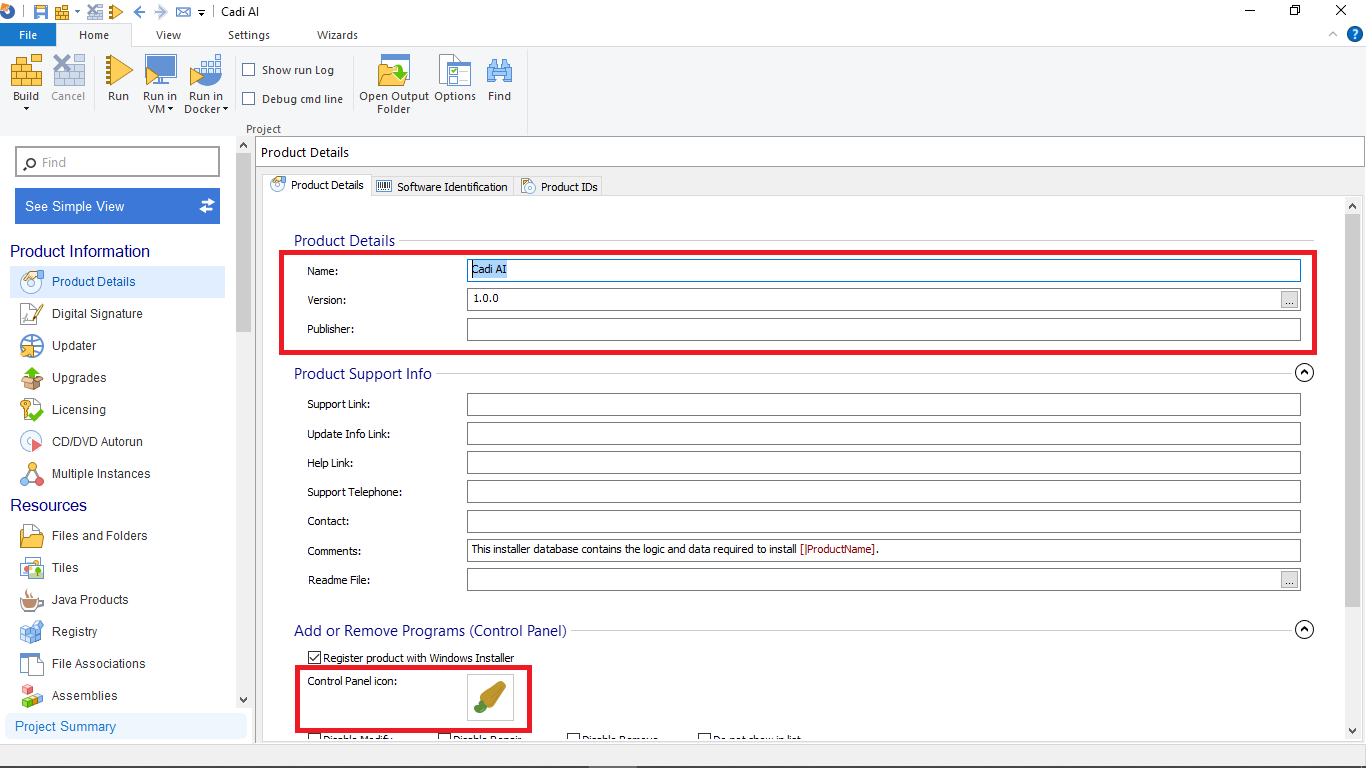
On the Product details tab, Enter the name, version and publisher of the application. Scroll down and select an icon to be shown on the control panel.
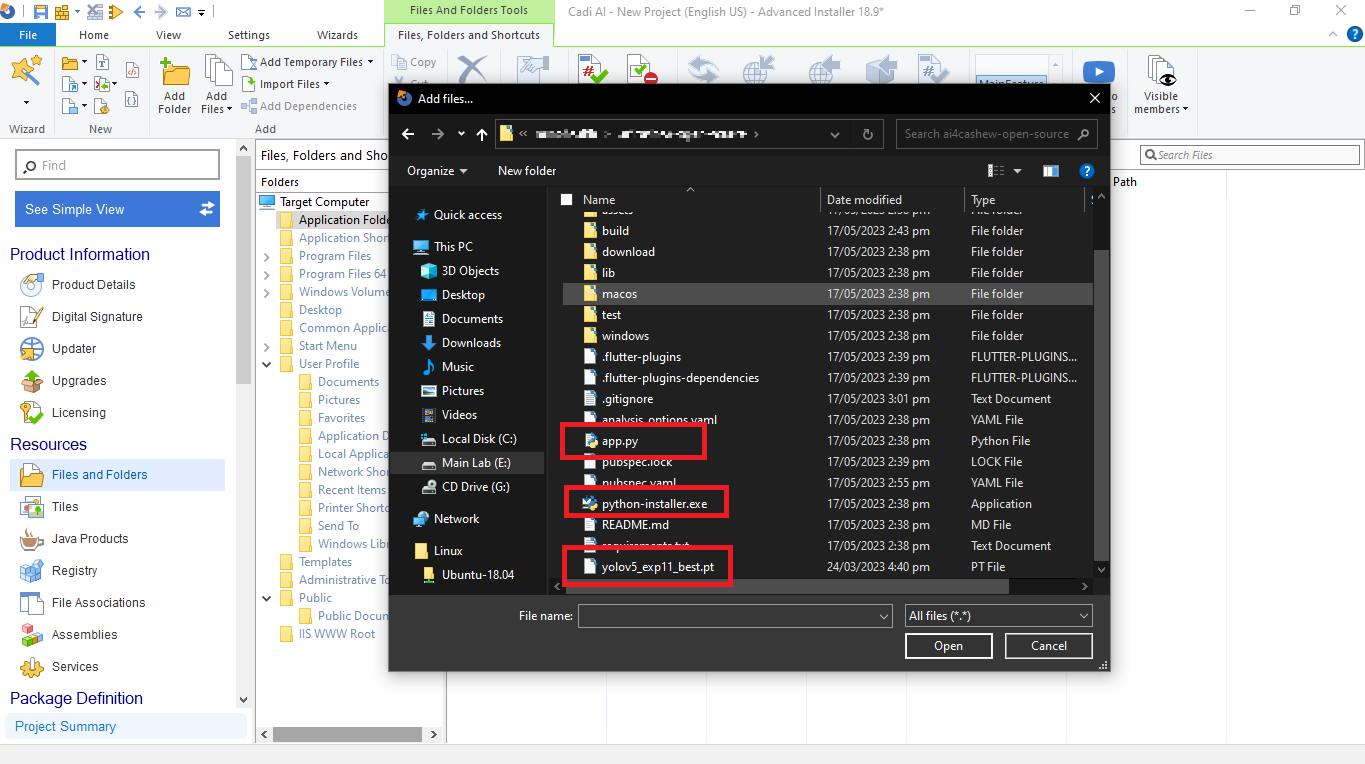
Click on the Files and Folders tab. Here we are going to provide the files that will actually be packaged. Click on Add Files and navigate to the directory with the flutter project. Here select
app.py,python-installer.exeandyolov5_exp11_best.ptClick on Add Files again and (Assuming you are in the project root directory) navigate to /build/windows/runner/Release. Select all the files.
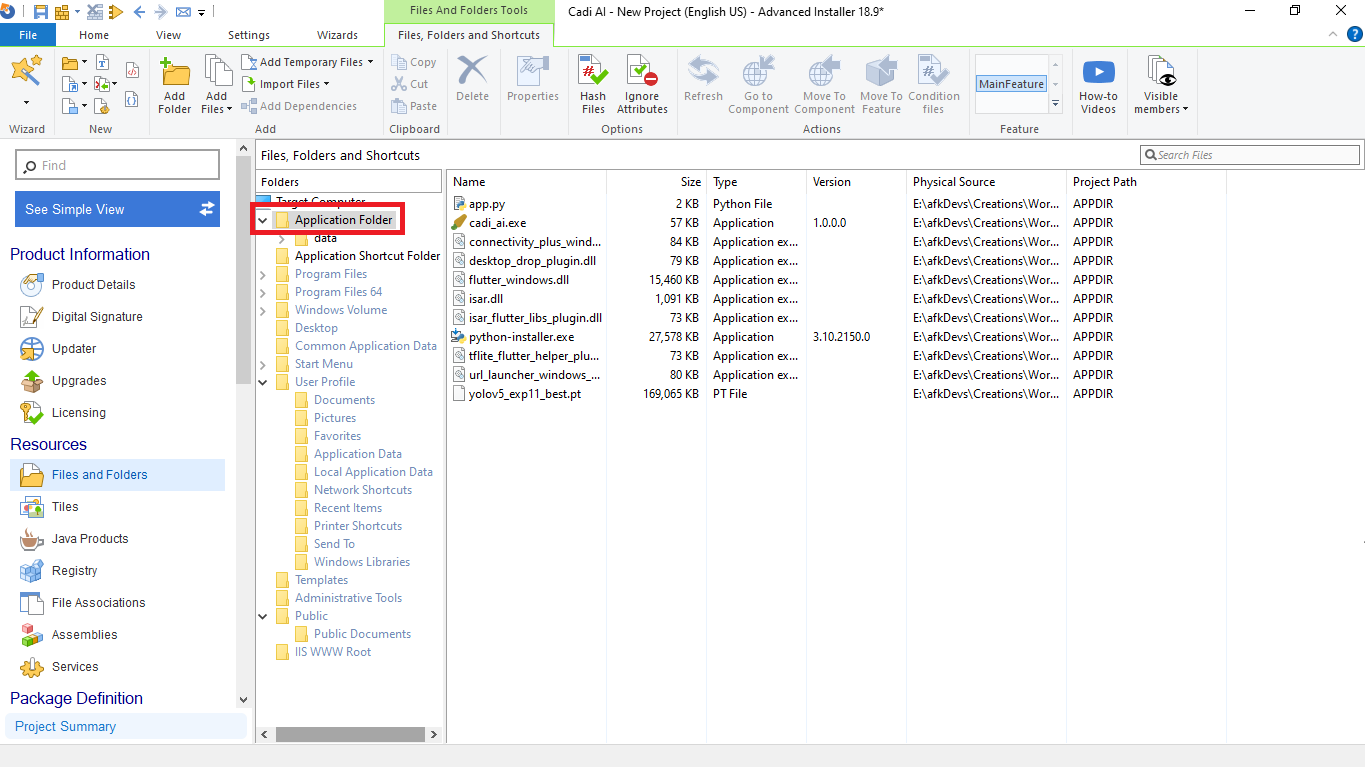
Now click on Add Folder and (Again assuming you are in the project root directory) navigate to /build/windows/runner/Release. Select the data folder.
Click on the application folder in the target machine to see all the added files.
Right click on the cadi executable and select New shortcut To - Installed file. Enter a custom name and for the shortcut folder, we will select Desktop. Select an icon for the shortcut and click OK.
You can create multiple shortcuts with the same process and just changing the shortcut folder.
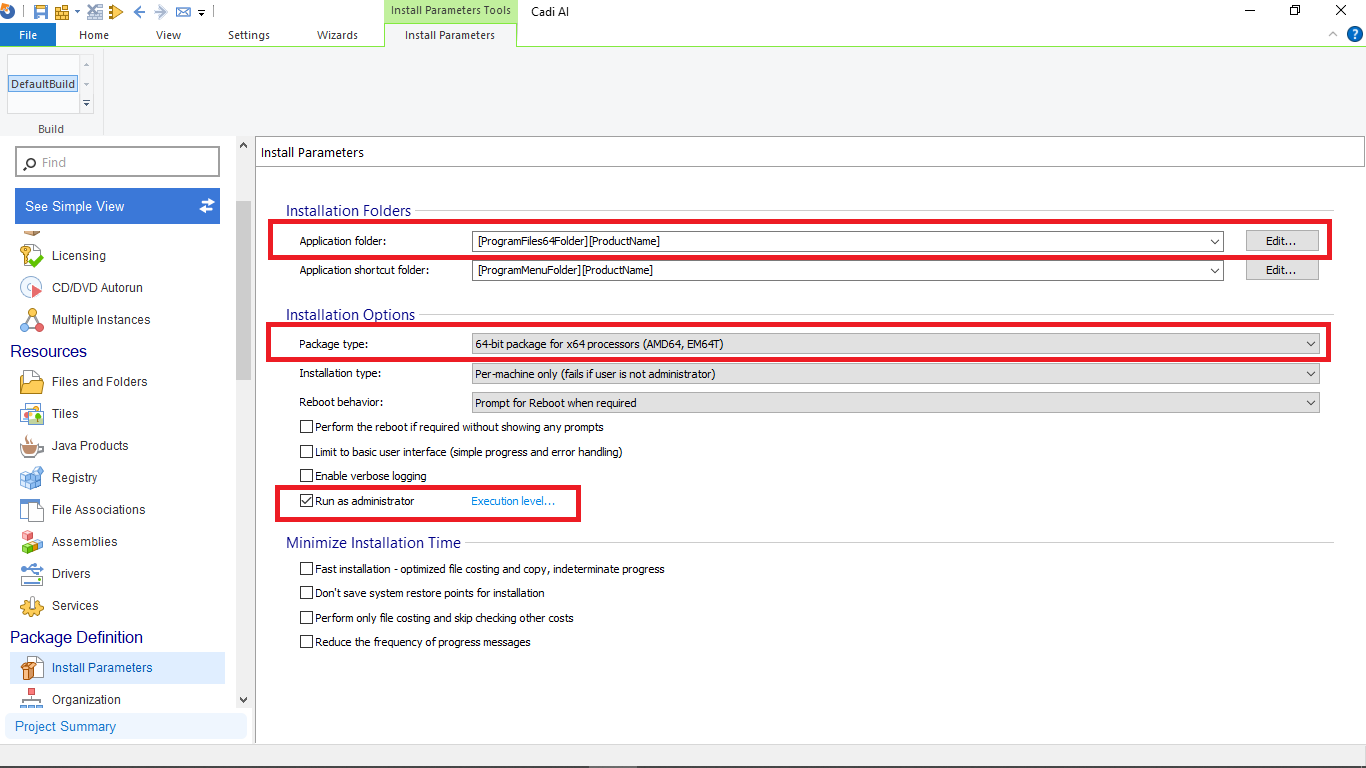
Click on the
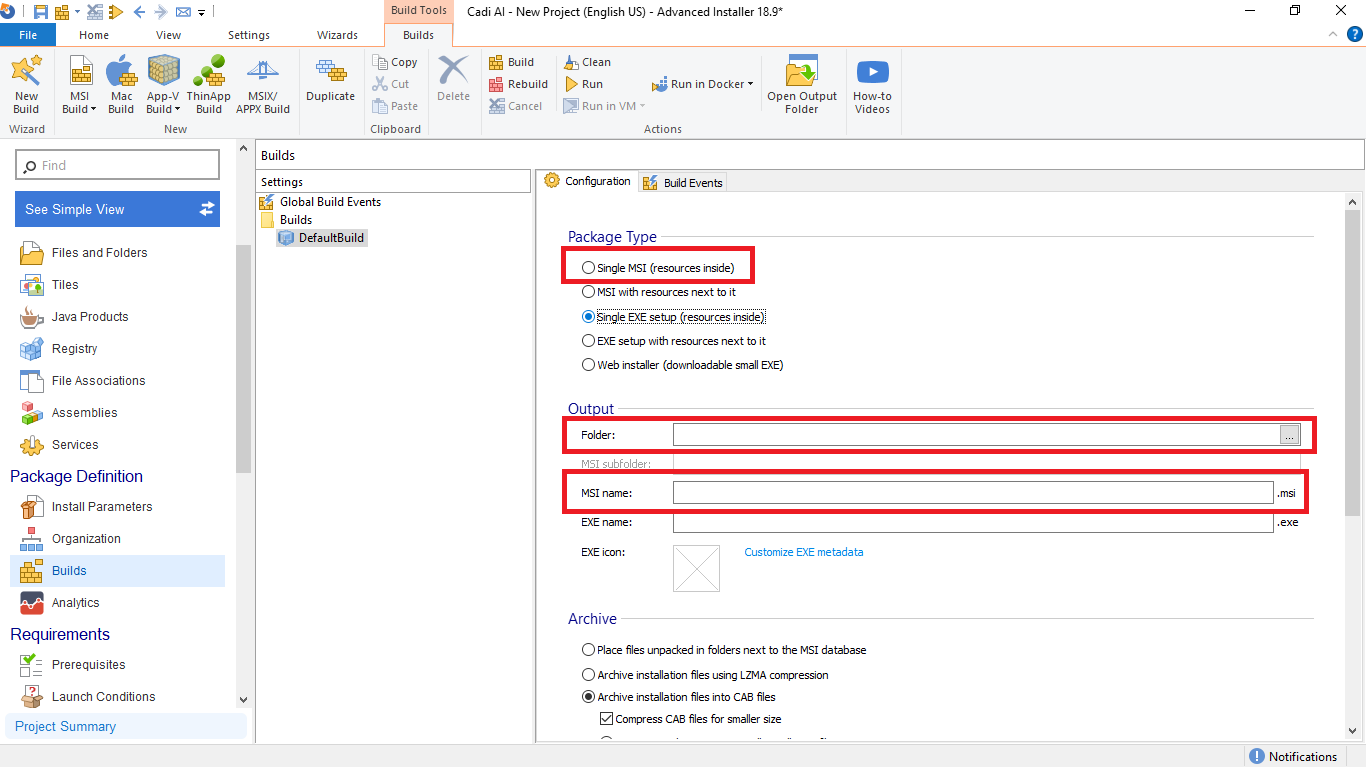
Install Parameterstab. Here we are going to set the application folder to[ProgramFilesFolder][ProductName]. Set the packet type to64-bit package for x64 processors (AMD64, EM64T). Also, checkRun as administratorClick on the
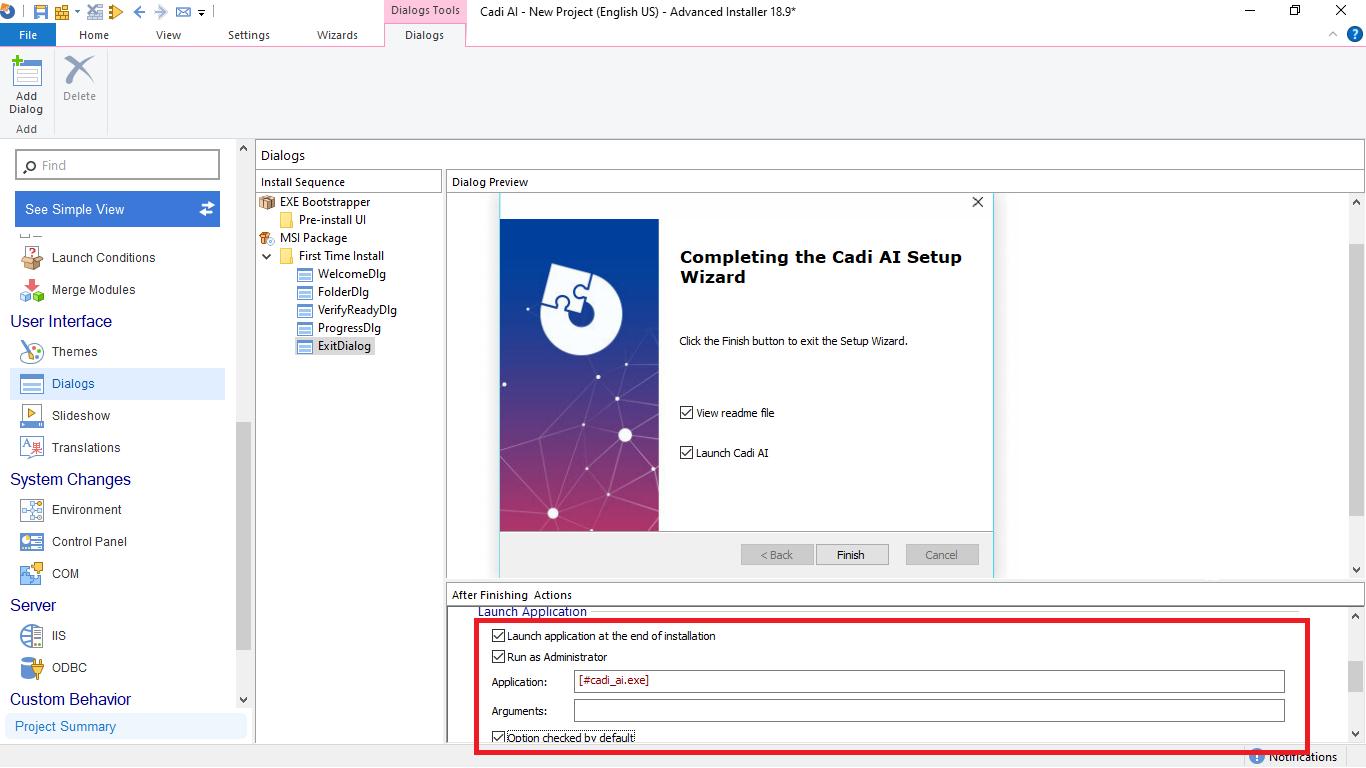
Buildstab. Here we will select theSingle MSI (resources inside)option. Select a folder where the package will be placed after build and enter a name for the msi.Finally go to the Dialogs tab. Here we will customise the installation dialogs. Click the Exit dialog and at the bottom, scroll till you find the Launch Application section. Check the
Launch application at the end of installationcheckbox and select the executable(Not the python executable). Also check theRun as administratorandOption checked by defaultoptions.On the title bar, click the build icon to build the msi package.
This is just a simple build without proper certificates and all that. For more information about building packages with Advanced installer, checkout their guide here
-
MaxOs X build process not perfected yet. Coming soon.


Overall, CADI AI offers a promising solution for cashew farmers to enhance disease and pest detection, by combining AI and drone imagery. With ongoing support and contributions, the application can continue to improve and contribute to the well-being and productivity of cashew farms.
While CADI AI provides valuable assistance, it should be noted that it does not provide specific disease or pest identification or treatment recommendations. Users are advised to exercise caution and verify the diagnoses by consulting trained agronomists or extension officers before taking any action based on the application's results.