The Annotation Process
In order to start annotating, you must have already created at least one set of item records (Item Part, Current Item and Historical Item), with at least one corresponding image, at least one hand associated with that image, and a suitable set of symbols. If you have not done this then please follow the appropriate steps in the relevant pages.
The tools provided by the Annotator are all placed in the toolbar on the left side of the page. They may vary when logged or not logged in as admin:
- Admins can create/delete/edit/share/store annotations
- Users can create and share annotations, but cannot store them
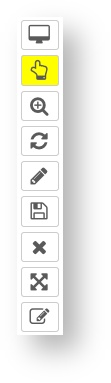
- Fullscreen: enlarges the image layer to the whole windows
- Select tool: allows users to select/deselect annotations and drag the image around
- Zoom: draggable selection rectangle to zoom in to a specific area
- Refresh: refreshes layer and annotations without refreshing the whole page
- Editorial Annotations: allows editors to create descriptive annotations not linked to any graph
- Save: saves the selected annotations
- Delete: deletes the selected annotations
- Modify tool: allows existing annotations to be resized
- Drawing tool: allows users to draw annotations
To create a new annotation the user needs to select the Drawing Tool from the toolbox (or press Shift+d). Once selected, the user can draw a box by clicking and then dragging the mouse over the intended area. To resize the annotation just adjust the corners.
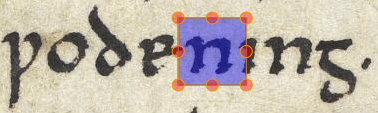
Once an annotation has been drawn, make sure it also is selected. Selected annotations will have a blue foreground. After this, you have three ways to save an annotation:
- Press Shift+s
- Click on the Save tool in the toolbar (floppy disk icon)
- Click on the Save button in the annotation dialog (if visible)
A notification will pop up informing whether the request has been successful or not.
To delete annotations there are two ways to proceed:
- Select the Delete tool from the toolbar, and click on the annotation you want to remove. Note that if you have multiple annotations selected, they will all be deleted, so make sure you only select those you want to delete
- Click on the Delete button in the annotation dialog (if visible). Again, all the selected annotations will be deleted
A notification will pop up informing whether the request has been successful or not.
- Blue: the annotation is selected (stored or not stored, described or not described)
- Yellow: the annotation does not contain any feature, that is, it is not described. If not saved, yellow annotations are pink
- Green: there is an annotation and it is stored
- Red: an error has come up while drawing it
- Pink: when an annotation has not been saved

- Allow multiple Boxes (default: unchecked): this option has the role of managing the number of boxes which are showed to the user when selecting annotations. If checked, a further box will get opened on the window. Otherwise, the current annotation box will be removed, and will be replaced by the box of the annotation selected
- Select multiple annotations (default: unchecked): this option allows the editor to select multiple annotations
This option serves to set the position of the toolbar. It may be:
- Vertical (default: checked)
- Horizontal
- Show Editorial Annotations: if checked, all editorial annotations are visible
- Open Boxes on click (default: checked if normal user, unchecked if admin): as a normal user the default behaviour of this option allows to open annotations boxes when clicking on an annotation. As admin they do not get open.
- Annotating (default: checked): if this option is checked, the content of the annotation boxes is the configurable list of features to describe annotations. If unchecked, will be showed the list of features already described as a normal user would see it.
This option serves to filter the list of allographs to annotate the image.
- Select: g
- Draw: r
- Save: s
- Delete: Backspace
- Fullscreen: f
- Zoom tool: z
- Move right: right arrow
- Move left: left arrow
- Move up: up arrow
- Move down: down arrow
- switch between Select and Draw: space bar
- constrain the aspect ratio of the rectangle when resizing: hold down shift
Archetype is maintained by the King's Digital Lab at King's College London. It has received funding from the European Union Seventh Framework Programme (FP7) under Grant Agreement no. 263751 (DigiPal), the Arts and Humanities Research Council (AHRC) under Grant Reference n° AH/L008041/1 (Models of Authority) and AH/L013975/1 (Exon Domesday), and the Faculty of Arts and Humanities at King's College London.


