Getting started
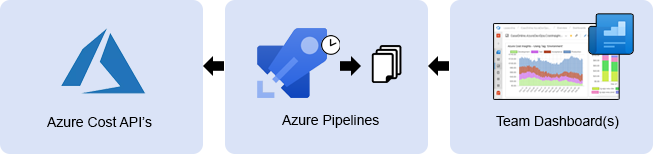
You need to create an Azure Pipeline for the widget to work. This pipeline is going to download and host your cost-data, used by the widget. Read the 4 good reasons for 'why the need of a pipeline' here.
-
Create the build pipeline
If you prefer to have your pipeline as (YAML) code, this is supported and documented over here.- Create a new empty build (not release) pipeline and select a (preferable empty) repository
- Name the pipeline something like 'Cost Insights'
- Add the 'Download Cost Data' task for each subscription, then end with the 'Publish Cost Data' task
- Depending on your Subscription Type (Pay as you Go, EA, CSP, etc.) you need to select the 'consumption' or the 'usage' API in the 'Download Cost Data' task. More info here.
- Your pipeline will look like this:
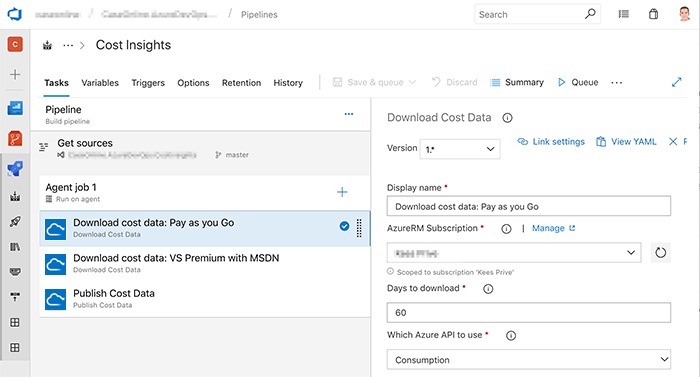
-
Queue the build and wait for it to finish before continuing with step 3
While waiting, you are encouraged you to read the following tips:- In the trigger's tab, disable the 'continuous' trigger and set a scheduled trigger, every night at 04:00 AM (these API's are unavailable ±00:00-03:00 UTC) and make sure 'Only schedule builds if the source or pipeline has changed' is unchecked
- The build pipeline has, by default, a maximum duration of 60 minutes (see the 'options' tab), this might be to short depending on the size of your cost data. It takes ~10 minutes to download the costs for 100.000$
- Observe the artifacts of the build, this is the data that will be used by the widget
- Create only 1 cost pipeline, teams (within a project) can share it. Add multiple 'download cost data' task for each subscription
-
Add the Widget to your Dashboard
- Go to your teams' dashboard and add the 'Azure Cost Insights' widget.

- Go to your teams' dashboard and add the 'Azure Cost Insights' widget.