Latex code for drawing neural networks for reports and presentation. Have a look into examples to see how they are made. Additionally, lets consolidate any improvements that you make and fix any bugs to help more people with this code.
Following are some network representations:
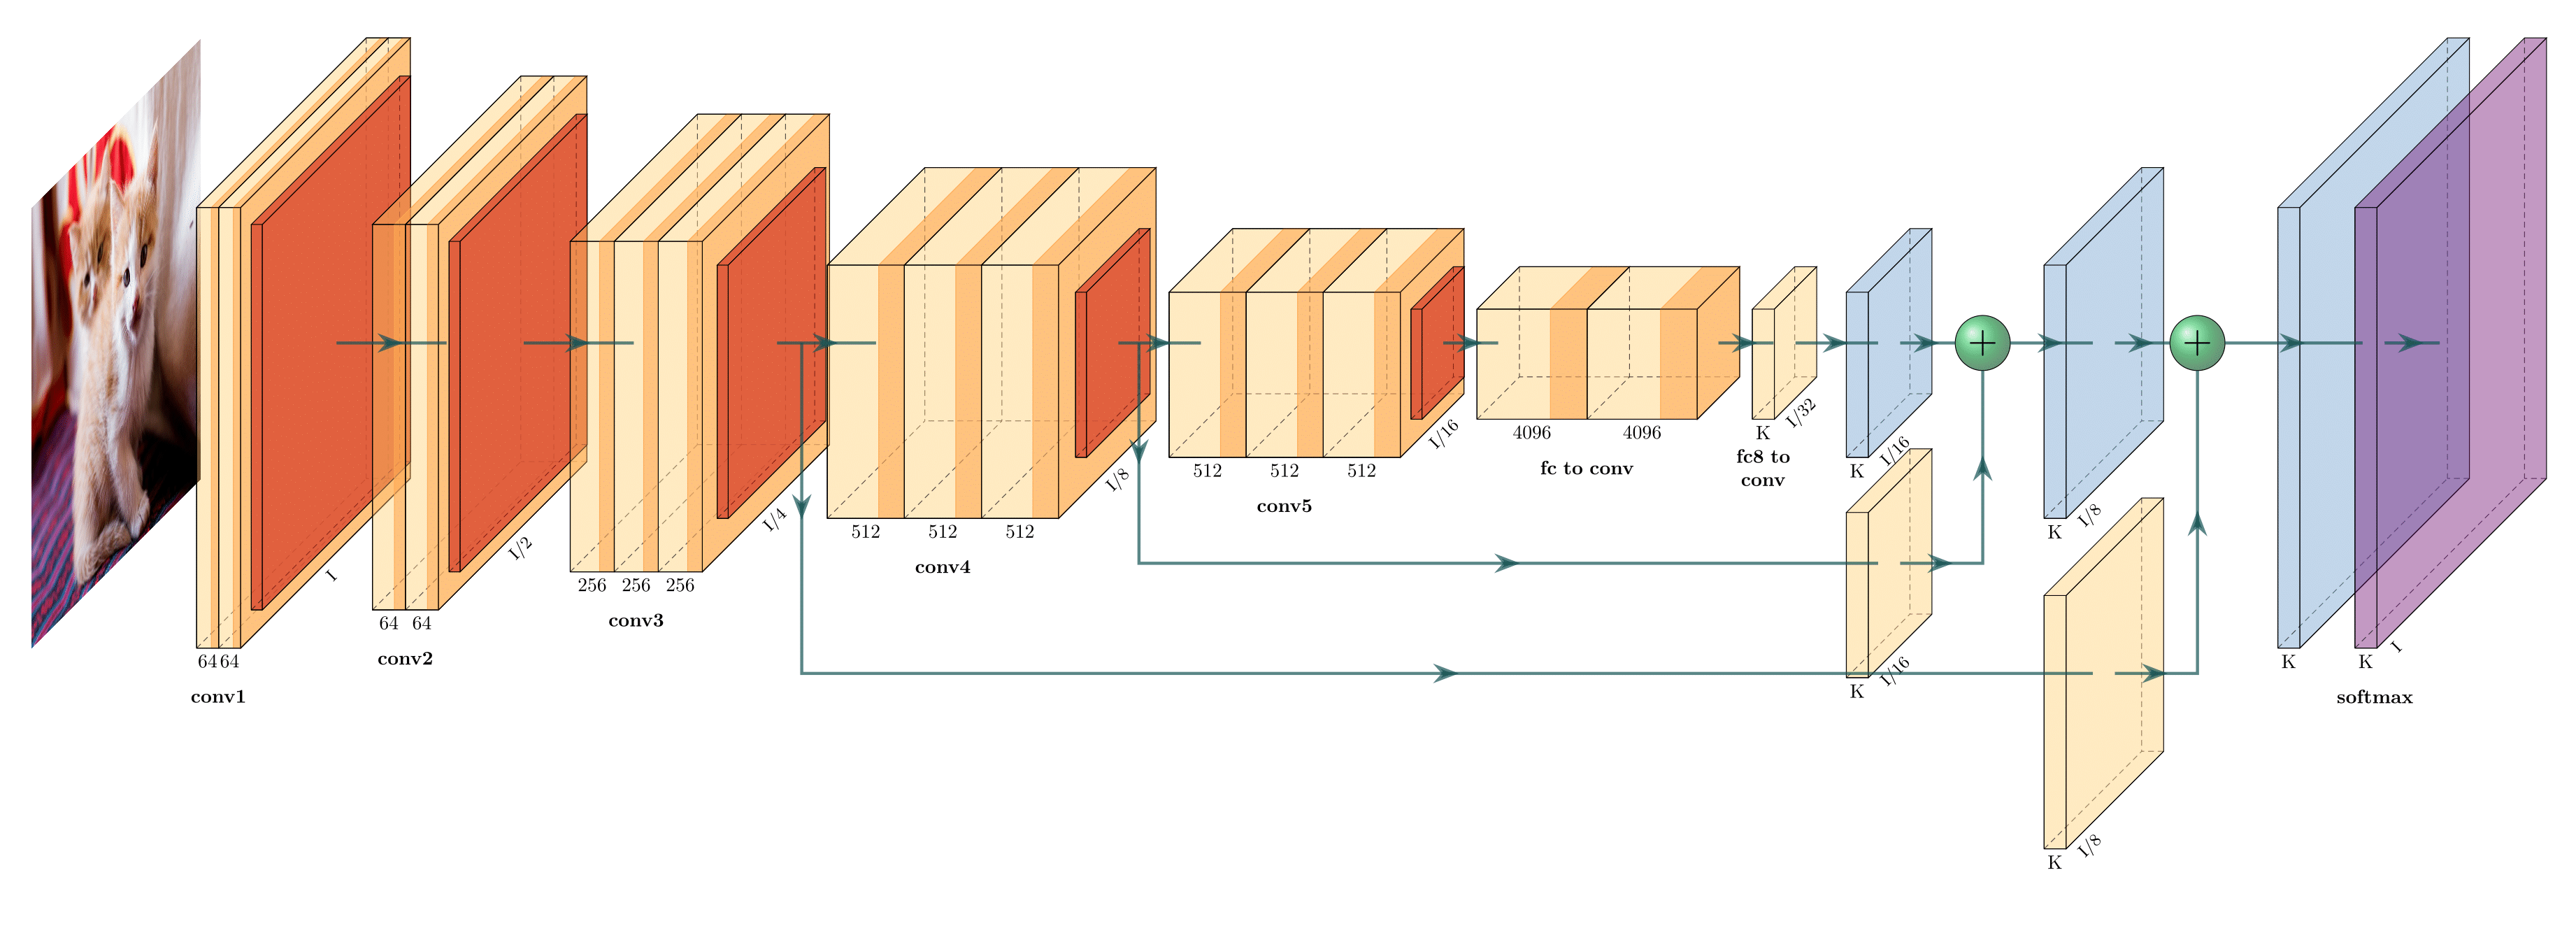
FCN-8 (view on Overleaf)
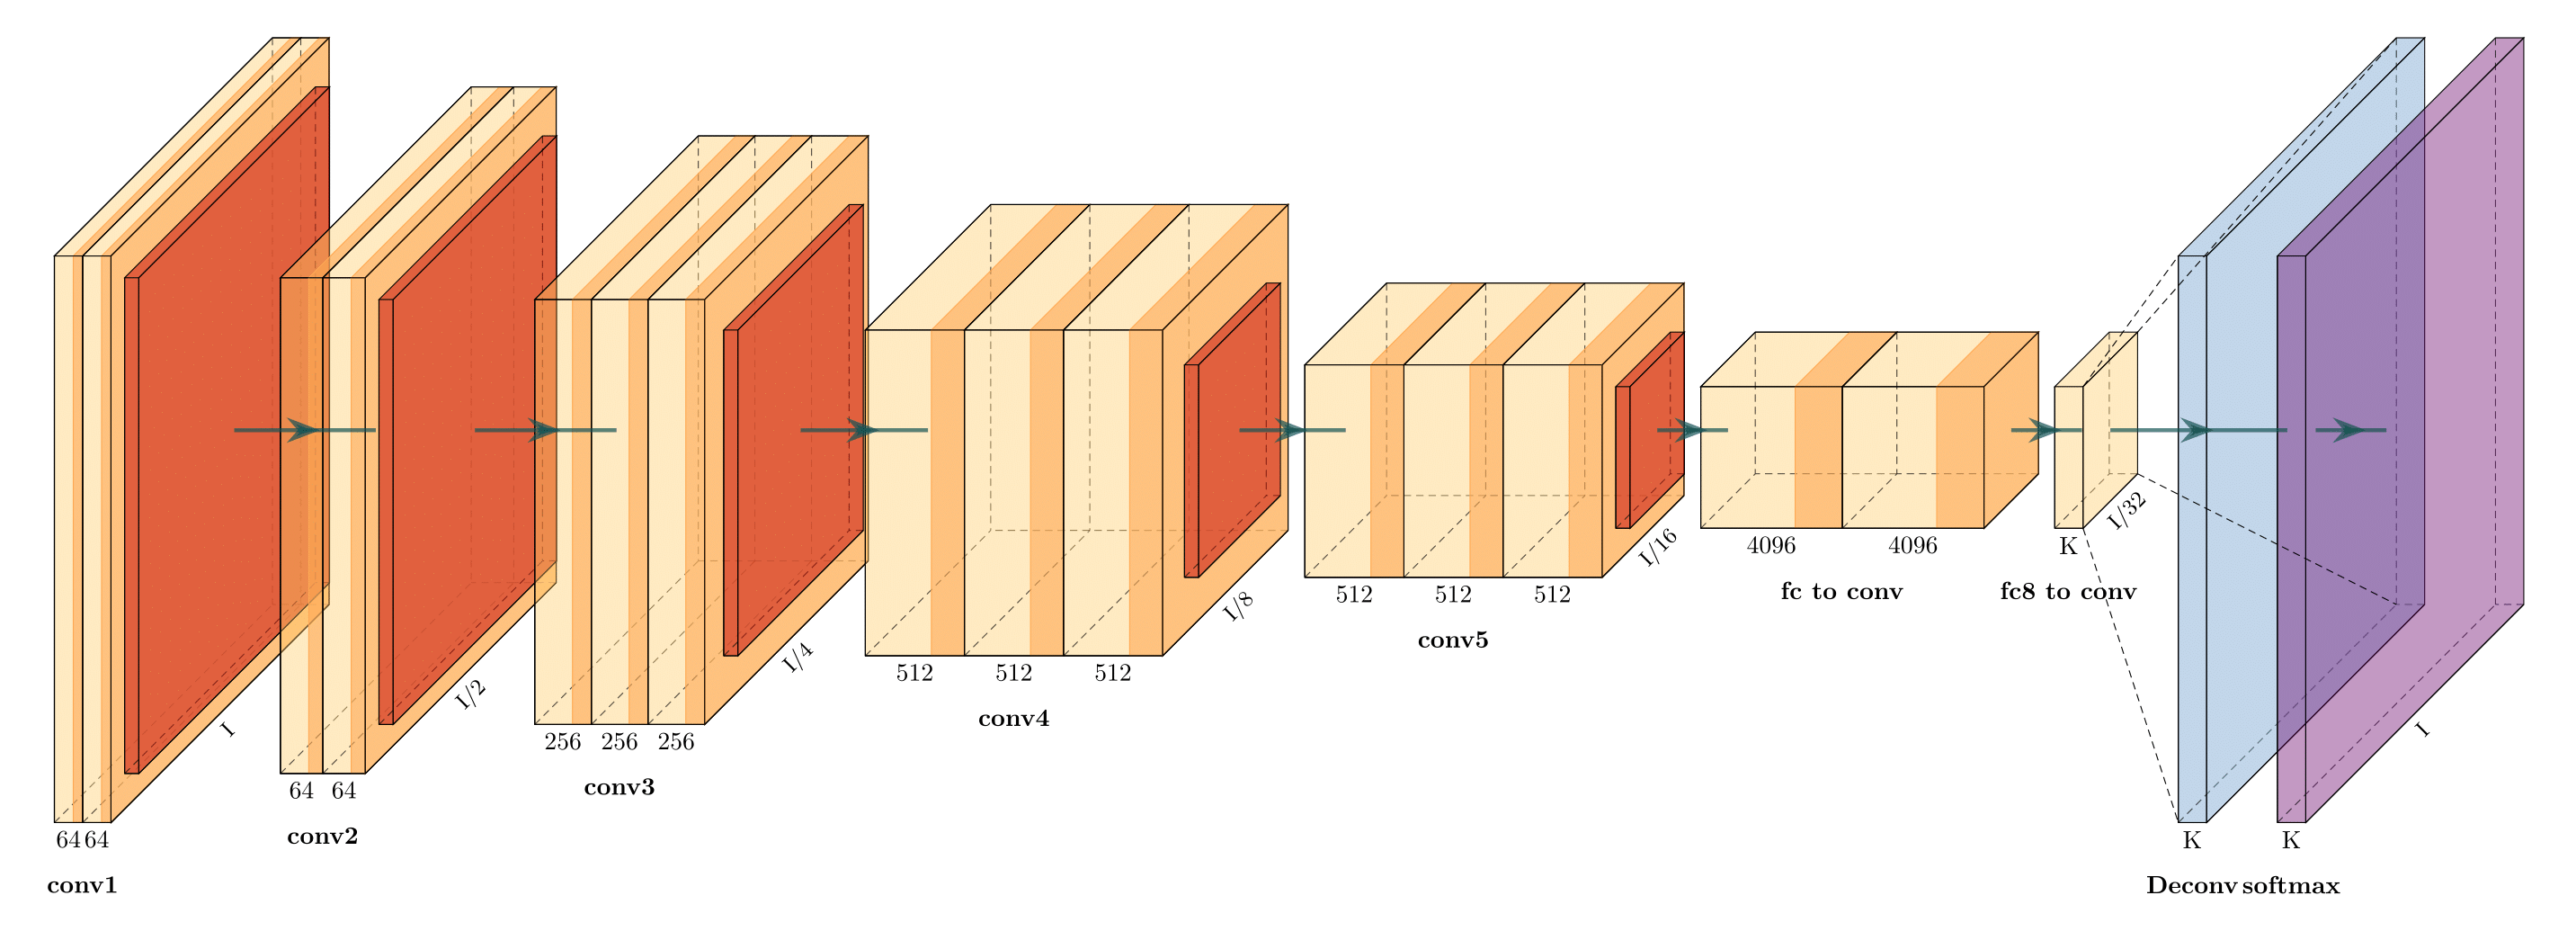
FCN-32 (view on Overleaf)

Holistically-Nested Edge Detection (view on Overleaf)
-
Install the following packages on Ubuntu.
-
Ubuntu 16.04
sudo apt-get install texlive-latex-extra -
Ubuntu 18.04.2 Base on this website, please install the following packages.
sudo apt-get install texlive-latex-base sudo apt-get install texlive-fonts-recommended sudo apt-get install texlive-fonts-extra sudo apt-get install texlive-latex-extra -
Windows
- Download and install MikTeX.
- Download and install bash runner on Windows, recommends Git bash or Cygwin(https://www.cygwin.com/)
-
-
Execute the example as followed.
cd pyexamples/
bash ../tikzmake.sh test_simple
- Python interface
- Add easy legend functionality
- Add more layer shapes like TruncatedPyramid, 2DSheet etc
- Add examples for RNN and likes.
See examples directory for usage.
First, create a new directory and a new Python file:
$ mkdir my_project
$ cd my_project
vim my_arch.py
Add the following code to your new file:
import sys
sys.path.append('../')
from pycore.tikzeng import *

# defined your arch
arch = [
    to_head( '..' ),
    to_cor(),
    to_begin(),
    to_Conv("conv1", 512, 64, offset="(0,0,0)", to="(0,0,0)", height=64, depth=64, width=2 ),
    to_Pool("pool1", offset="(0,0,0)", to="(conv1-east)"),
    to_Conv("conv2", 128, 64, offset="(1,0,0)", to="(pool1-east)", height=32, depth=32, width=2 ),
    to_connection( "pool1", "conv2"),
    to_Pool("pool2", offset="(0,0,0)", to="(conv2-east)", height=28, depth=28, width=1),
    to_SoftMax("soft1", 10 ,"(3,0,0)", "(pool1-east)", caption="SOFT"  ),
    to_connection("pool2", "soft1"),
    to_end()
    ]

def main():
    namefile = str(sys.argv[0]).split('.')[0]
    to_generate(arch, namefile + '.tex' )

if __name__ == '__main__':
    main()
Now, run the program as follows:
bash ../tikzmake.sh my_arch
在Windows环境下运行脚本时,会出现../tikzmake.sh: line 13: xdg-open: command not found这样的错误,因此对脚本进行如下修改。

源代码仅支持filter尺寸为正方形的网络显示,尽管通过 height=48, depth=48可以修改宽和高,但修改的也仅仅是显示效果,实际特征图尺寸仍为正方形,这样输出的网络图如下图所示,该网络图还存在如下问题:
- 特征图尺寸显示在边角,在我看来不够美观;
- 无法显示池化层特征图信息;

为了解决上述问题,对layers/Box.sty和pycore/tikzeng.py进行修改,对比图如下所示:
Box.sty

tikzeng.py

经过上述修改后,输出网络图如下所示,由于使用需要,我只修改了卷积层和池化层的代码
