- Understand how to complete assignments
- Apply what you've learned about Git version control
- Initialize a new Git repository
- Stage and commit new content
- Create a remote repository on GitHub
- Connect the newly created local repository with the remote on GitHub
So far lessons have only contained written content on specific topics. All you needed to do was read through each lesson and continue on. This lesson, however, is considered an assignment. Assignments are exercises that have some written content to guide you, but also ask you to complete some work of your own. Many assignments, like this one, include tests that must be passed in order to complete the lesson. Assignments with tests are often referred to as a labs in our course.
Now that you've learned about Git version control, in this lab, we're going to go through the entire process of creating a local Git repository, creating an initial commit and pushing that work to a remote repo stored on GitHub.
To start work on this lab, you will first need to fork this assignment and clone it to your local environment. Let's quickly review this process:
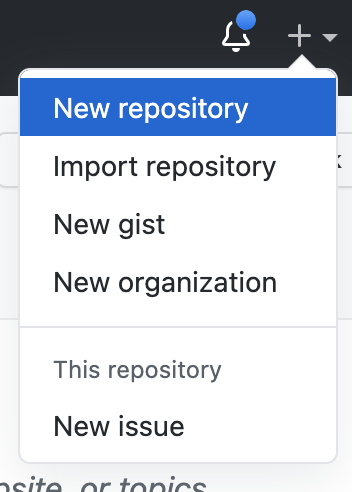
- Click the Fork button at the top of this page in Canvas.

Reminder: This buttton does the same thing as forking in GitHub (via the Octocat button). We recommend using the Fork button in Canvas.
-
Choose to fork to your personal account if prompted. Once the forking process is complete, you should be looking at your personal copy of the assignment on GitHub.
-
Click Code, choose SSH, then click the clipboard icon to copy the information we'll need about this repository.
-
In your terminal, type
git clone, and paste the info you copied from GitHub. The command should look something like this (but with your personal account name):
git clone git@github.com:<your-github-username>/git-basics-lab-phase-0.git
- A folder will be created wherever you run this command. The folder name will be the same as the repository, so in this case,
git-basics-lab-phase-0. Navigate into this folder withcd git-basics-lab-phase-0.
Once inside the folder, you are ready to work on the lab.
Once you're in your local clone of this lab, the first step is to run the lab's tests to get a sense of what you need to do. We do this with two terminal commands. First, we run the following:
npm installThis sets up the tools we'll use for testing. To run the tests, type the following once you regain control of the command line:
npm testThis will run all the tests included for this lab. You should see a lot of output, enough that you may need to scroll up in your terminal to see it all. Six failed tests should print out, starting with this:
this lab
  1) has a folder named my-repository
  2) has a valid git repository initialized for the my-repository folder
  3) has a README.md file in the my-repository folder

the local repository
  4) has README.md as a tracked file
  5) has at least one commit
  6) has been pushed up to the remote repository


0 passing (42ms)
6 failing

1) this lab
     has a folder named my-repository:
   AssertionError: no folder name "my-repository" was found: value: expected './my-repository' to exist
    at Function.<anonymous> (node_modules/chai-fs/lib/assertions/directory.js:21:53)
    at Function.ctx.(anonymous function) [as directory] (node_modules/chai/lib/chai/utils/addMethod.js:41:25)
    at Function.assert.isDirectory (node_modules/chai-fs/lib/assertions/directory.js:34:35)
    at Context.it (test/index-test.js:11:19)
    ...
Each failed test includes an explanation.
In the first test seen above, for instance, it says this lab has a folder named my-repository, followed by AssertionError: no folder name "my-repository" was found.
This first test is looking specifically for a folder, my-repository, to exist
inside this lab's main directory (or "folder"). You probably have a theory on
how to correct that test after seeing that error! We're going to use these
tests to let us know when we're all done.
IMPORTANT TIPS TO AVOID GETTING STUCK
- The work you will do to set up the Git repository will be done in the
my-repositorydirectory (after you create it ;)). If you're doinggitcommands in the same directory as THISREADMEthat you're reading right now, you're not going to get to working tests.- When you run the tests, you will need to be in the top-level directory of this lab, (
git-basics-lab-phase-0, the directory with theREADMEyou're reading right now in it).
Follow the steps provided below carefully to help ensure you are doing things in the right location.
As we saw above, there are six broken tests. Let's get them working.
-
Create a new directory locally named
my-repository. This directory should be side by side with thetestdirectory of this lab. Use the Unix command to create this directory. From the top-level of this lab, the parent directory ofmy-repository, runnpm testand verify there are only 5 broken tests left. -
Navigate into the new directory
my-repositoryusingcdon the command line. -
While inside
my-repository, using the command line, initialize a new git repository. You'll know you've done it if you see 'Initialized empty Git repository in <...your local directory>/my-repository/.git/'>. Change back-up to the parent directory and you should be back in the top-level directory. Runnpm testagain and you should be down to four tests left. If that's true, change back intomy-repository. -
Create a file (not a folder) called
README.mdinsidemy-repository. -
If you run
git statusat the command line, you should see thatREADME.mdis now listed as an untracked file. AddREADME.mdso that it is tracked by Git. -
Once the file is tracked, running
git statusagain will show thatREADME.mdis staged and ready to be committed. Go ahead and create a commit on the command line (don't forget to add-mwhen committing to include a message!).NOTE: If you forget to include
-mwhen committing, you may find you've opened vi, the built in terminal text editor. To escape out of this editor, press the 'esc' key once, then type:q!to close the editor and return to the normal terminal. -
Change back to the top-level directory, run
npm test, and you'll see that the test output is looking pretty successful:
  this lab
    ✓ has a folder named my-repository
    ✓ has a valid git repository initialized for the my-repository folder
    ✓ has a README.md file in the my-repository folder

  the local repository
    ✓ has README.md as a tracked file
    ✓ has at least one commit
    1) has been pushed up to the remote repository


  5 passing (18ms)
  1 failing

  1) the local repository
       has been pushed up to the remote repository:
     AssertionError: no record of pushing to a remote was found. Follow the instructions on GitHub to connect and push to a new remote repository: value: expected './my-repository/.git/logs/refs/remotes' to exist
Almost done! Change back into the my-repository directory.
-
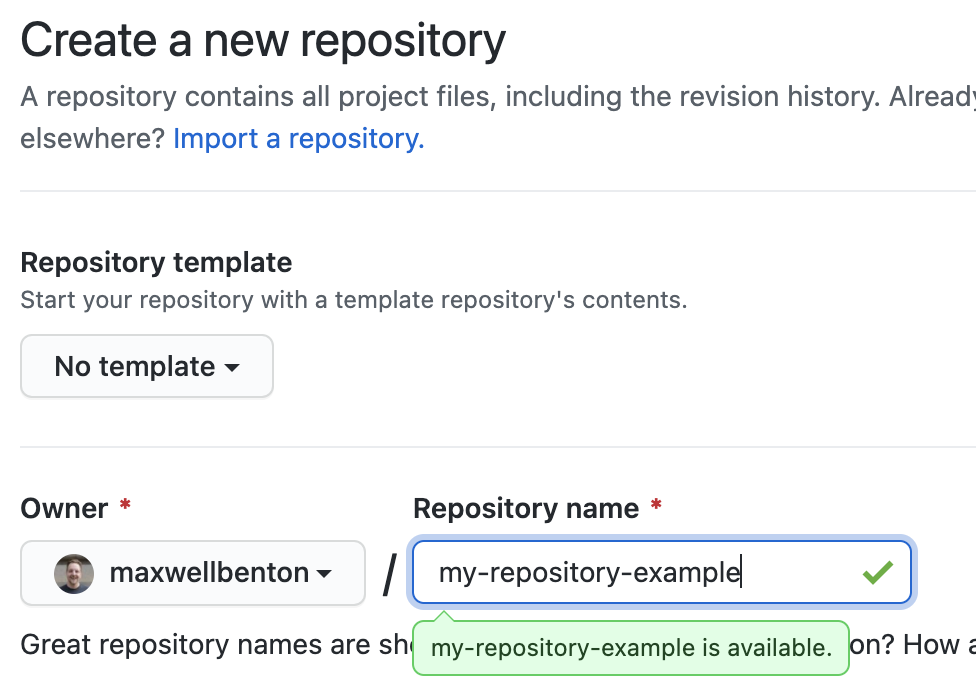
Create a remote repository on GitHub using your personal GitHub account and connect it to your newly created local repository.
When we create a blank repository, we are given multiple options for how to get started. Since we have a local folder with Git initialized already, we'll use the instructions for creating a new repository using the command line.
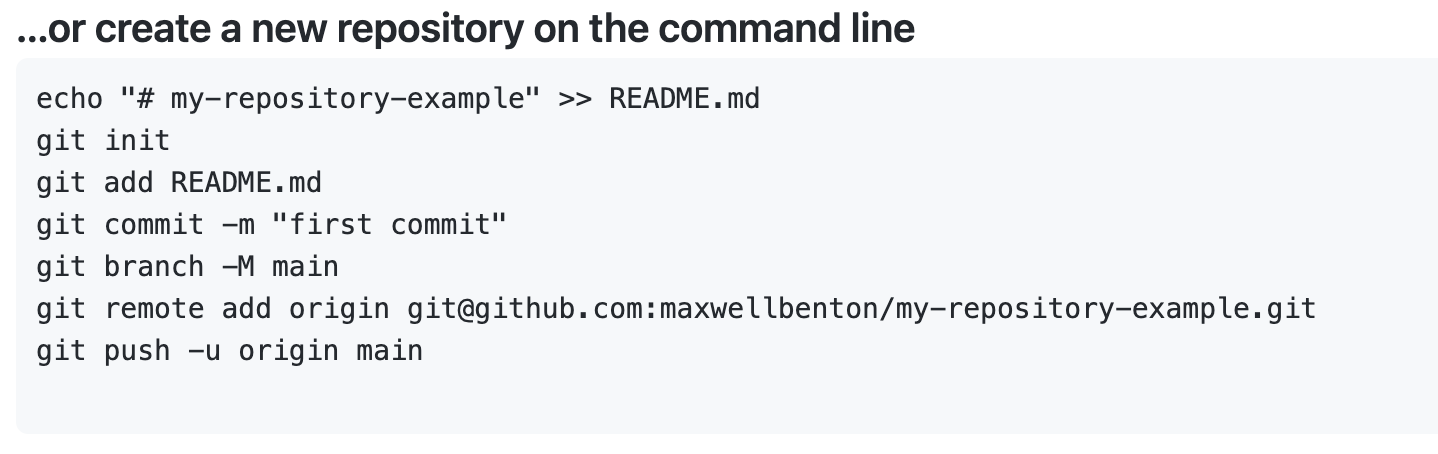
If you've been following along, you may notice that the first commands listed are things you've already done -
git initinitialized themy-repositorydirectory as a local Git repository;git add README.mdtracks theREADME.mdfile (you may have usedgit add ., which will work too);git commit -m "first commit"commits the newly createdREADME.mdfile with a message.The remaining commands still need to be run. First we run the following:
git branch -M main
If you recall from the version control basics lesson, going forward
mainwill be used as the default name of the... main... branch in a repository. Depending on your environment you may still have a version of Git that defaults tomaster. If this is the case, the above command will change thismasterbranch tomain.After setting the branch, we need to add the newly created GitHub repo as the remote for your local
my-repositoryrepo. This command will include info specific to your GitHub account and the name you gave your GitHub repo:git remote add origin git@github.com:<your-github-username>/<your-github-repository>.git
-
The last step listed pushes your local work up to the remote:
git push -u origin main
-
Change back up to the top-level directory and run
npm testonce more, your tests should all be passing.
Once you've passed all tests, if you visit the newly created remote repository on GitHub, you should
see that the README.md file you created is now present.
We recommend taking time to become familiar with Git commands since you'll be relying on them a lot. If
you'd like to practice further, change directory back into the my-repository folder and try the following:
- Create another file, then add, commit, and push to the remote
- Modify the contents of
README.md, then add, commit, and push to the remote - Rename
README.md, then add, commit, and push to the remote
If you would like to preserve the work you've done for this lab on GitHub, you'll need to push it up to your fork of this assignment. Change directory to the top-level once again, then run the following:
git add .
git commit -m "Done with assignment"
git push origin master
Note that this assignment was created with a master branch as the default, so the push command is different
than when you pushed my-repository.
As you become more comfortable with the terminal and Git, you'll find yourself using the workflow of initializing, adding, committing and pushing your work on a regular basis. These commands are at the core of Git version control. By knowing them, you now have the ability to create your own repositories and contribute to repositories that already exist.
In this lab you used tests to guide you in the basics of setting up a new local Git repository and binding it to a remote repository on GitHub. By pushing your work to a remote repository you've backed it up and made it available for the world to see via GitHub. Professional developers use this process to share code with each other, to document their code, and to earn interview slots by showing off what they're capable of. You did this guided by tests. It's common for developers to write tasks as tests that all fail and then slowly work to get them all passing. It's like a to-do list that verifies you've actually done the work!